To install an aftermarket stereo into a 2005 Dodge RAM truck, you must first remove the factory stereo and install a faceplate adapter into the stereo mounting dock. The faceplate adapter will serve as a universal platform to receive aftermarket stereos from various car audio makers. The stereo wiring from the Dodge will also need to be adapted to fit the new radio. Use a wire harness adapter to bridge any gap between the stereo wiring and your new head unit.
Lift the hood of the Dodge Ram pickup truck and disconnect the negative battery cable from the vehicle's battery using the 10mm wrench.
Pry open the lower dash panel, beneath the steering column, with the trim panel removal tool. Allow the panel to hang from the dashboard.
Remove the screw on the lower right corner of the center dash panel with a Phillips screwdriver. Pry the dash panel away from the dashboard with the trim panel tool. Start near the lower right corner and work the tool around the perimeter of the dash panel until it is released from the dashboard
Pull the dash panel away from the dashboard by grabbing the bottom edge of the panel. Allow the dash panel to hang from the dashboard. The panel will be connected by electrical wiring to the climate control knobs. There's no need to disconnect the wiring.
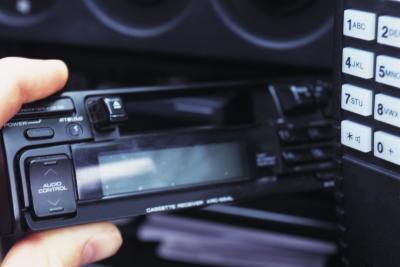
Remove the four screws at the corners of the stereo mounting bracket with the Phillips screwdriver. Slide the stereo forward until you can reach the wiring connected to the rear of the unit.
Disconnect the antenna cable from the right rear corner of the radio, by pulling the black cable collar on the connector upward. Disconnect the power supply cable and speaker wires from the left rear side of the factory stereo.
Insert a faceplate adapter into the stereo mounting dock of the Dodge truck. Feed the stereo wiring through the back of the faceplate adapter.
Connect the stereo wiring to the wiring harness adapter. Connect the wiring harness adapter leads to the appropriate outlets on the back of the aftermarket stereo. The wiring harness adapter will be adequately marked to show where the proper connections are to be made.
Slide the aftermarket stereo into the opening provided by the newly installed faceplate adapter.
Replace the center dash panel and press evenly on the perimeter to snap it back into place.
Replace the screw in the lower right corner of the center dash panel with a Phillips screwdriver.
Press the lower dash panel, below the steering column, against the dashboard until it snaps into place.
Place the negative battery cable clamp around the negative battery terminal lead post. Tighten the clamp onto the post with the 10mm wrench.