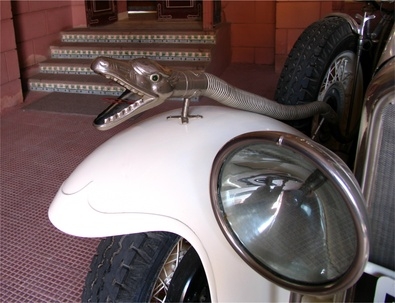
Car enthusiasts have long been making modifications to their vehicles, changing the body style, engine, transmission and even the height at which their vehicle sits. Some people take this tendency further by installing custom horns. Custom horns can vary wildly in both their capabilities and intended uses. Some can be used to make funny noises or tunes, while others can be unbelievably loud. A Hella horn will definitely let people know your car is nearby.
Jack up the front of the vehicle and set it up on jack stands using the proper jack points beneath the vehicle. Open the hood and remove the plastic lining on the inner parameter. Remove the negative cable from the battery using a socket wrench, and push the cable to the side to eliminate the possibility of accidental reconnection.
Remove the front two plastic under-covers from underneath the engine using a socket wrench and ¼ drive socket extension with a 10mm socket. The center of the front compartment contains a rubber grommet on both the top and bottom. Cut a slit in the grommets to allow the wire to travel through them.
Figure out the size and type of the terminal connection needed to fit on the positive side of the battery. Solder the terminal connection on one end of the 10-gauge wire, then connect and secure it to the positive terminal battery post. Fasten down the wire in several locations using electrical tape.
Slide under the front of the vehicle and fasten the wire in a direction leading to the rail under the front plastic cover below the radiator. The Hella-supplied relay can be fastened to bottom side of the rail, keeping the relay out of the weather and dry.
Note there is a diode that has been across the coil of the relay in the reverse direction to any applied voltage. The positive (+) side is the stock horn, thus the diode negative (silver banded side) or cathode connects to it. Connect the ground for the relay coil or negative (-) to the other side of the diode.
Position a a 5mf or 10mf non-polarized electrolytic cap across the contacts of the relay. Glue it in place using quick-dry glue. The cap will act as a shock absorber and prolong contact life.
Situate the fuse with a fuse holder so it is directly in line with the main power lead and the relay, on the rail under the radiator. Run two pieces of wire out to the horns.
Run the 10-gauge horn wires from the relay to where the horn mounts. There is space located just to the side of the horn mounting. Other routes can be made or used, however this is the best route because it is the most direct.
Solder a female blade terminal to one end of the wire and connect it to the (+) side of the horn. The other end will also have a female blade terminal soldered onto it and must be connected to the relay. The relay has several sets of pins on it which are listed on the installation guide that comes with the horn. Connect the terminal to pin 87 and solder the connection in place.
Run the ground wires for the horns. Cut a small length of wire and solder a female blade terminal and connect it to the (-) side of the horn. Secure the opposite end to the frame of the vehicle with a screw.
Attach the horns in place on the vehicle either under the hood or on the grill of the vehicle for maximum efficiency. However, the easiest place would be where the old horn was located. Once connected, test by pressing the button for the horn in the car.