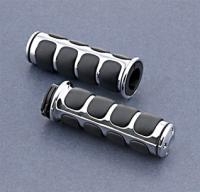
You undoubtedly have a very good reason for wanting to install new grips on your motorcycle. Your old grips have become slick and worn. You are customizing your scooter and new grips will let you add color and texture to the overall look. You have been feeling a lot of road vibration, and new grips will help you control it. You’re going on a long haul, and you just want new grips. It doesn’t matter why you want them—you got them and now you need to install your new motorcycle grips. The project is a bit more complicated than installing new grips on a bicycle, though. Read on to learn how to install new motorcycle grips.
Remove the old grip from your left bar. Take the bar end off, then work on the old grip to get it loose. You may need to use something like WD-40 to loosen the adhesive. Slide the grip off the bar. If you’re working on a rubber grip, you may find it easiest to cut it off with a knife. Use rubbing alcohol, mineral spirits or another cleaning solution to clean the bar and remove all the old adhesive.
Install the left grip first. You may need to lubricate the bar and the grip to make the grip slip on. Use grip glue or an adhesive like 3M to keep the grip firmly in place. Depending on the brand and style of your new grip, you may need to tighten it down with set screws. Refer to the manufacturer’s instructions.
Understand that the right grip works the throttle and is installed on a rotating sleeve. Remove the screws from the switch housing; it may open in two halves. Pay attention to the way each throttle cable is connected with the existing grip and make certain you put the cables in your new grip exactly the same as they were installed in your old grip. Work your new grip over the bar and put the halves of the housing together and screw the switch housing back in place.