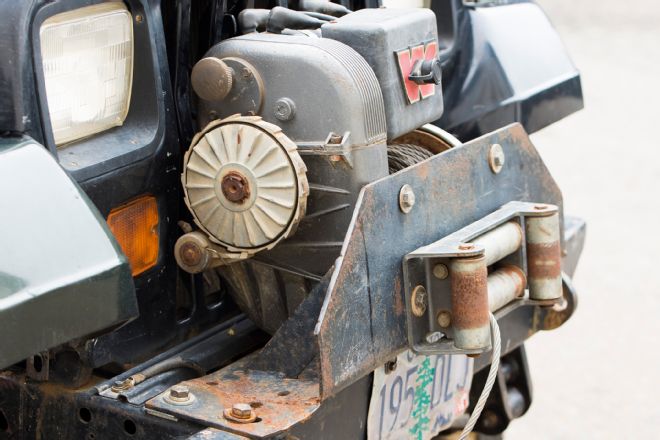
Legendary status is bestowed upon someone or something when actions or performance far surpass the norm, so when the name is mentioned there’s instant recognition because of those actions or abilities. In the world of Jeeps, there’s one product that truly fits the legend status: Warn M8274 winch. This winch has come to our rescue time and time again over the years, just as it’s done for its owners around the world.
Dozens of electric winches have come and gone over the decades, touting strength and durability, speed and performance. While others have failed and faded away, the M8274 has stood strong and is still being produced—gracing the bumpers of Jeeps and being passed down from generation to generation, vehicle to vehicle because of its reliability and strength. That respect is what makes it legendary.
This tall, beefy electric winch looks much the same today as it was 41 years ago with only a few electrical upgrades and minor cosmetic touches being made over the years. The case and inner workings of a 2016 M8274 are the same as the first one made in 1974. In an age where things are outdated the day after they are bought, that’s an incredible testament to Warn’s original design and the quality of the materials used to make it. This winch was built to last lifetimes.
Worthy Rebuild
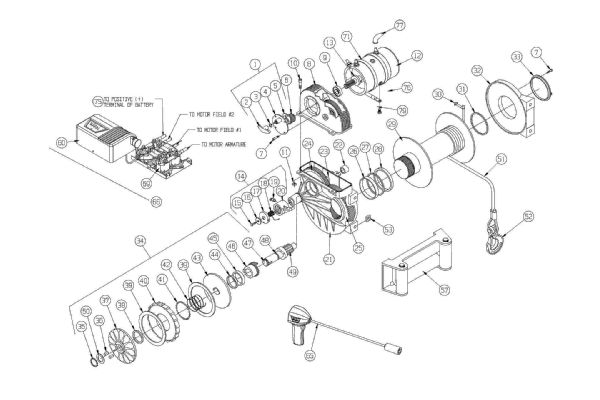
The Warn M8274 consists of an upper and lower case sections, and refurbishing is easiest done on a work bench where it can be bolted upright. An old winch mount works fine, or you can fabricate a bracket like Warn’s Mike Warrilow uses on our winch here.
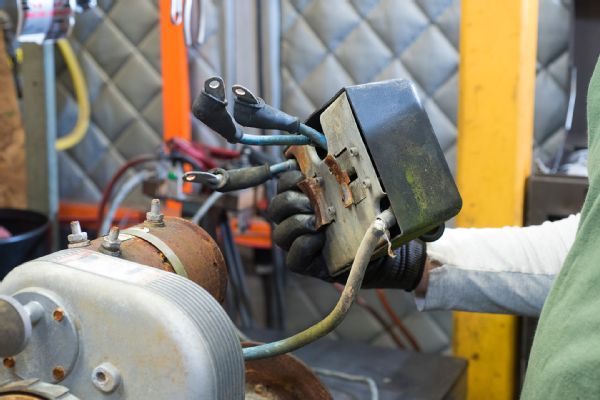
Refurbishing requires stripping the winch down, beginning with the electrics. The motor and control box on our old winch had seen far better days. So Warrilow tossed them in the junk pile under his work bench.
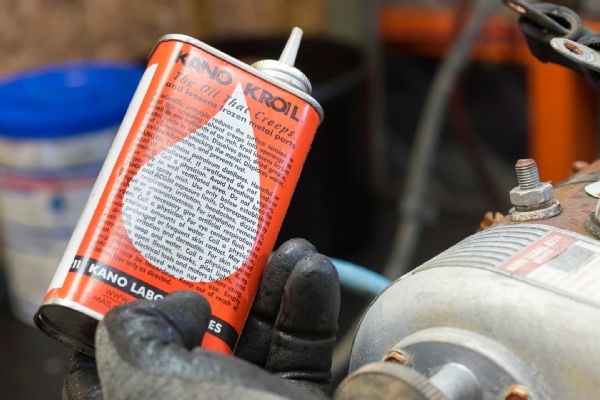
One of the oft-used products in the winch refurbish is a good penetrating oil. Rust and corrosion are the biggest hurdles to overcome with disassembly. We used Kano Kroil, which, like our M8274, has withstood the test of time for its performance.
Another contributing factor to the high cost of a new M8274 is that while the other winches in Warn’s extensive line share a lot of common parts, those for the M8274 are made exclusively for it and the supply of those parts is limited. So if you have an older M8274, now is a good time to do a “frame-off” rebuild. Warn has numerous service centers across the United States and Canada that handle winch repair/rebuilds. There’s also a good supply of internet sources for parts.
It typically costs between $500-$700 to have a M8274 refurbished by Warn techs, including updating the motor and control box. The cost can be more if parts are broken or missing and can be less if the motor and solenoid pack is of the newer six-pin control cable era. What’s cool is a DIYer with a little patience can shave off a couple hundred dollars on the labor side by doing the rebuild.
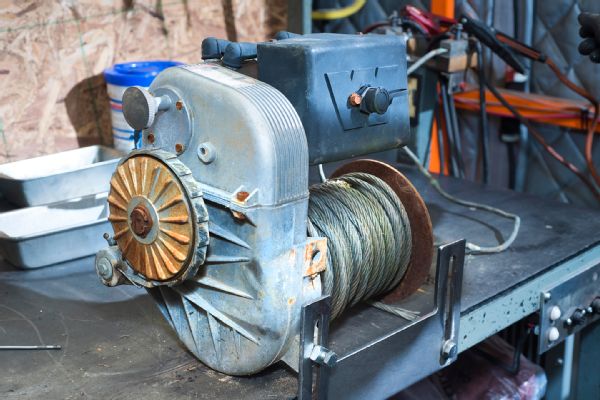
We took the opportunity to take a “seasoned” M8274 to Warn’s corporate service center in Milwaukie, Oregon, to have it rebuilt under the skilled hands of Mike Warrilow, a veteran winch technician and avid member of Portland’s Jolly Jeepers. Warrilow looked at our legend’s serial number and quickly discerned it was 35 years old, being built on October 1, 1981 (the coding system Warn used up until the early ’90s indicated day and year the winch was built).
That would fit with the history we were told about our classic legend. It had been passed down from father to son, gracing multiple vehicle bumpers in the family along the way, finally coming to rest on the front of a rockcrawler in-progress Jeep.
The old winch had seen its share of pulls and has sat out in the elements most of its life. Our winch needed the electrics upgraded, the free-spool release fixed, the brake rebuilt, and a new control box and wire rope, but all in all, it was in good shape for a three-decade-old winch.
Primary Areas of Concern
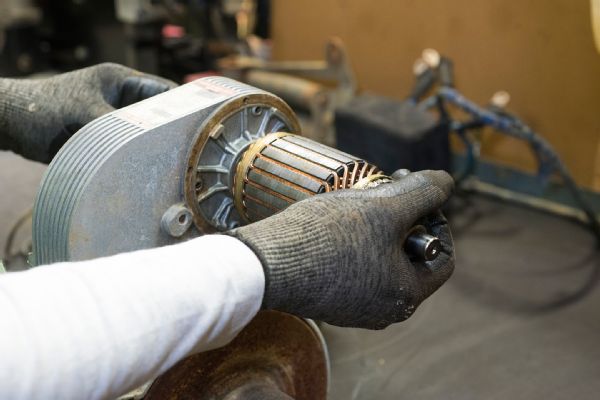
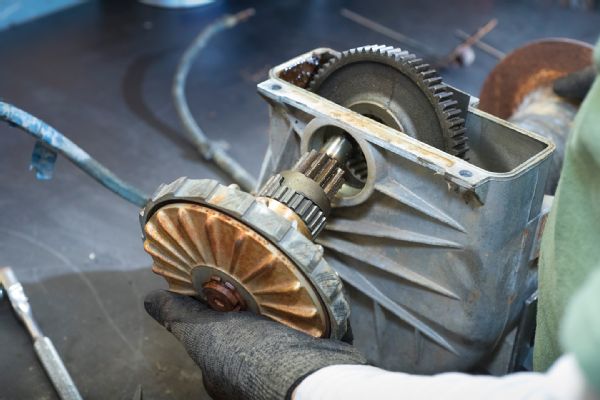
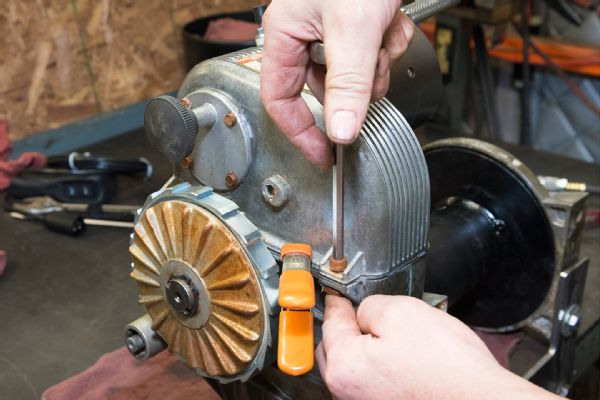
The clutch (free-spool) assembly has to be removed, as does the motor. We removed the motor case and jiggled the armature to help in removing the clutch assembly located on the other side of the upper housing.
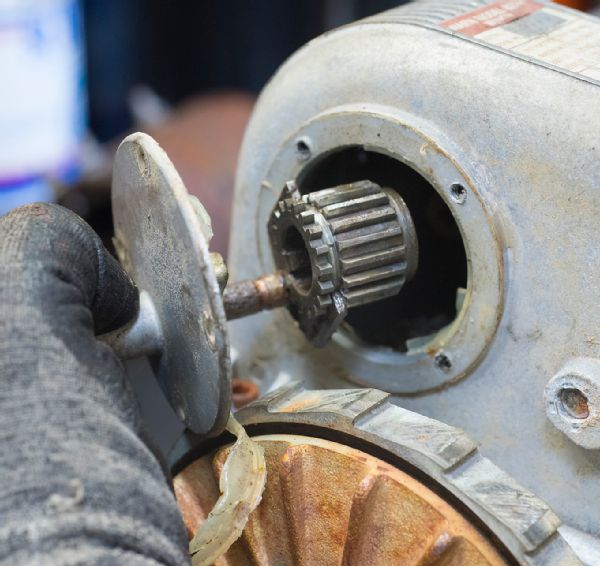
When the clutch assembly is removed, carefully slide the cover out about a 1/2-inch, then rotate the release knob counterclockwise so the gear fork is under the pinion. This keeps the pinion (and the key that holds it on the motor shaft) from dropping down into the lower case. The shaft in our assembly was frozen in the “power in” position.

Decades-old silicone sealant acts like cement, so after removing the three 1/4-inch socket-head bolts that hold the two halves together, we coaxed the upper case half off with a gentle use of a small pry bar.
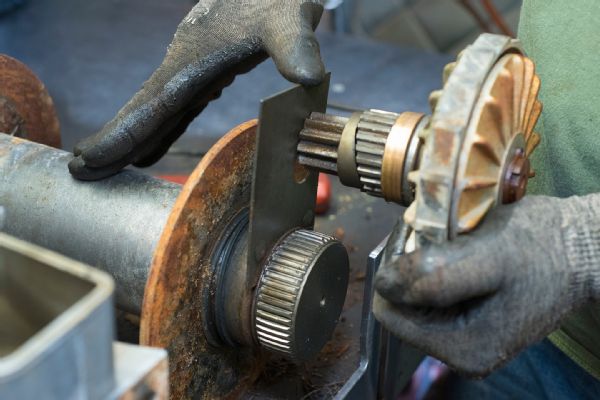
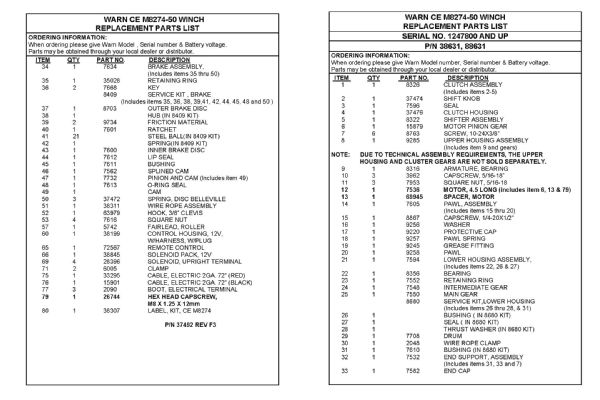
The winch is basically made in two sections—upper and lower—with three items that typically need attention: the brake assembly, the clutch assembly, and the electrical system (i.e. motor and control box). Warn offers the M8274 parts for two of those three areas, but if the clutch assembly, which engages/disengages the motor from the intermediate gear so the drum can free-spool, is broken or frozen from rust, a new assembly has to be purchased. (We found a Winch Service Parts diagram to be quite helpful when ordering parts.)
However, Warrilow showed us the secret to taking the clutch assembly apart and rebuilding it, saving about $100. Warrilow also provided Jp with a few other time- and money-saving tips along the way.
Refurbishing the M8274 is a worthwhile investment and easy to do. Even more gratifying is knowing it will pull strong for another 30 years after being rebuilt.
Warrilow showed us how raising the keyhole locking plate about an inch and letting it rest on top of the brake drum shaft allows the removal of the brake assembly. We then used a screwdriver and hard plastic mallet to tap the brake assembly so it’d slide out of the housing.
The M8274 brake assembly is what holds the load. Disassembly, cleaning, and replacing the frictions that press against both sides of the ratchet face is a critical part of the rebuild. Warn offers a complete brake service kit (PN 8409) with parts and instructions for this step. The frictions in ours were worn and the faces rusty, as is normal for winches of this age.
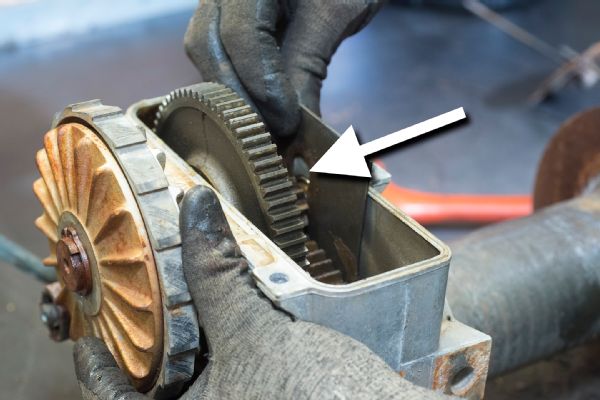
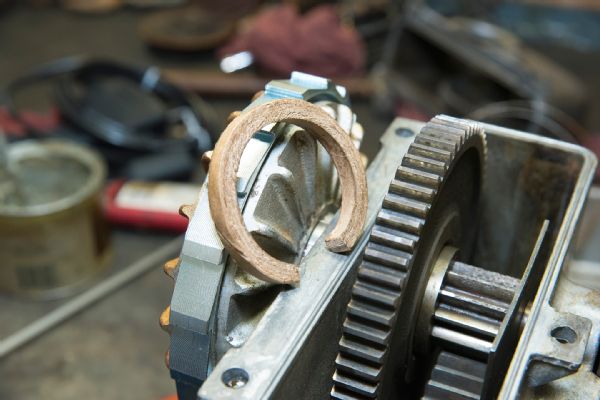
Here’s how the keyhole plate locks both the brake shaft assembly and winch drum together inside the M8274. Lifting the plate removes it from the notch on the drum shaft while simultaneously opening up the larger part of the hole for the brake shaft to pass.
Tip: Once the upper case is empty, check out the brake assembly’s shaft roller-bearing ( (PN 8356). These bearings are prone to rust. Ours was showing signs of that, so Warrilow replaced it using a block of wood to keep the aluminum housing from damage when the old bearing was pressed out. Lube the new bearing before reassembly.
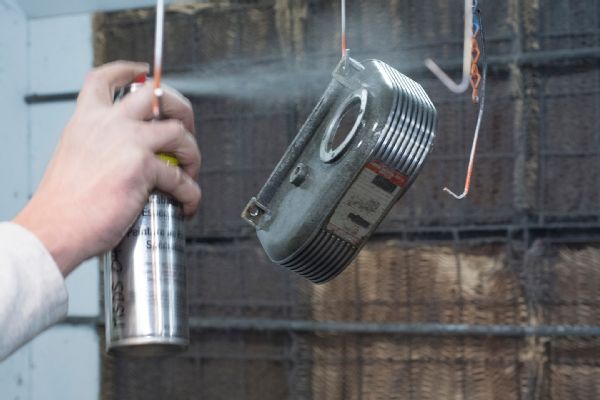
We cleaned the upper and lower cases, then hit them with an automotive clearcoat to preserve the patina. Warrilow says a lot of owners go as far as media-blasting and powder-coating their rebuilt M8274s.
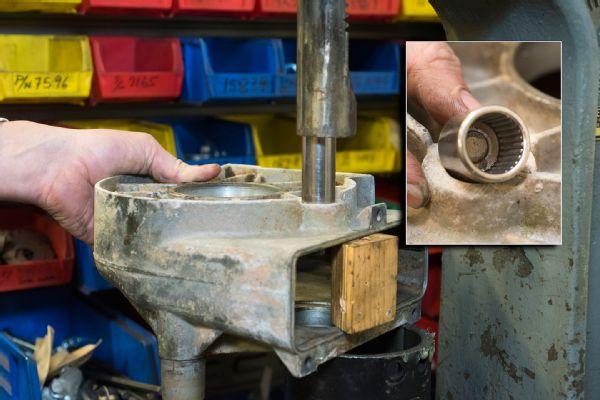
Tip: Before removing the nylon bushing in the case that supports the drum, use a small screwdriver blade to scribe a line around the top. This is a trick Warrilow suggests so the new bushing that comes in the Lower Housing Service Kit (PN 8680) is at the proper depth for the shaft seal to seat properly.
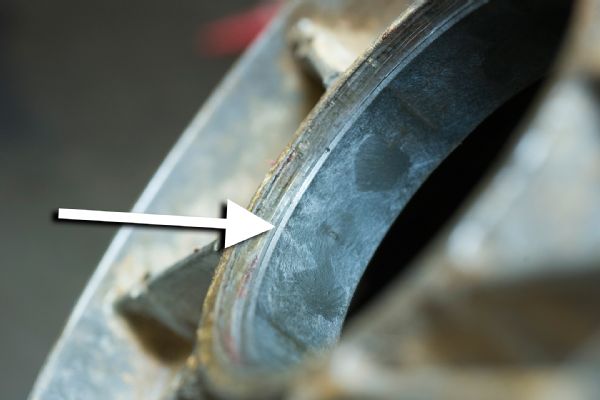
When the new drum bushing is put back in the lower housing, it should be right at the line (arrow) scribed before the old one was removed. Warrilow says if the bushing is not at the correct depth (0.190 in/4.8 mm), the drum shaft seal will leak oil. Smear a few drops of Loctite 272 around the hole surface to keep bushing in place.

Warrilow cleaned the rust and grim from our winch’s drum shaft before installing the new thrust washer, seal, and bushing that comes with the PN 8680 service kit. Use a very light dab of mil-spec Shell Darian SD 1 (or equivalent) grease on the shaft to help ease the seal into place.
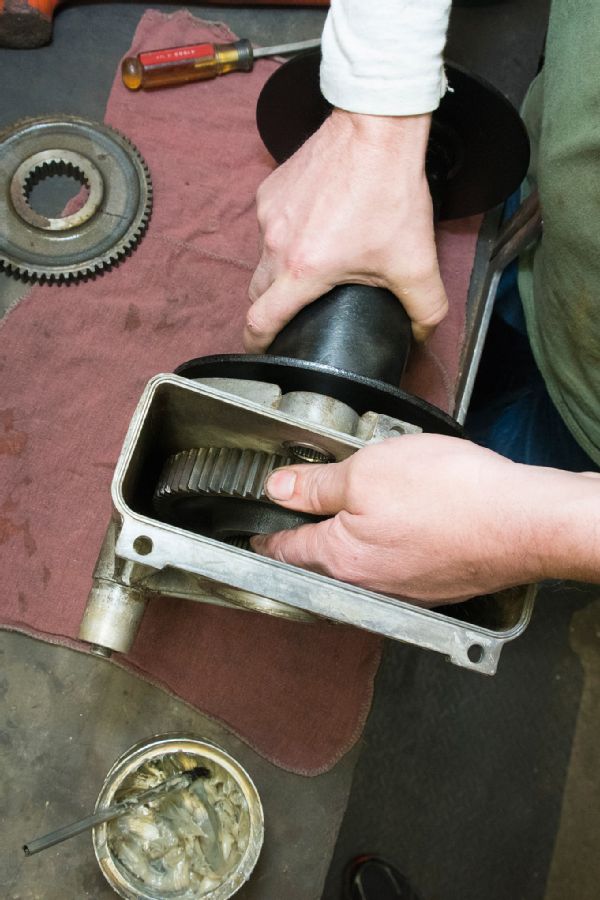
After we’d put the new seals and bushings in place, we re-install the cleaned and painted winch drum sliding it into the main gear (we also inspected it closely.)
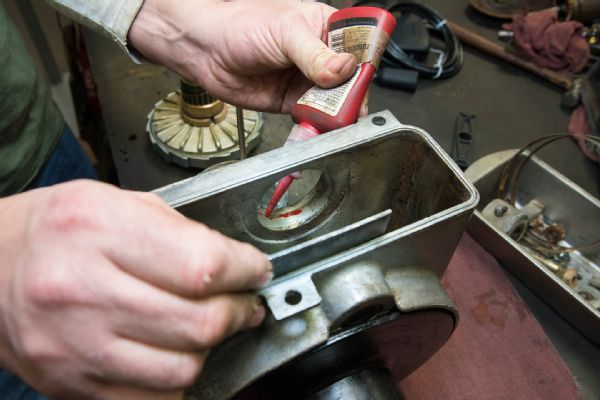
Warrilow put a drop of Loctite on the upper housing before sliding the rebuild clutch assembly into place. This keeps the lip seal in place, helping keep water out and oil in. Our winch was bone dry of oil and had signs it’s seen water at some point in time. No doubt bad seals were part of the blame.
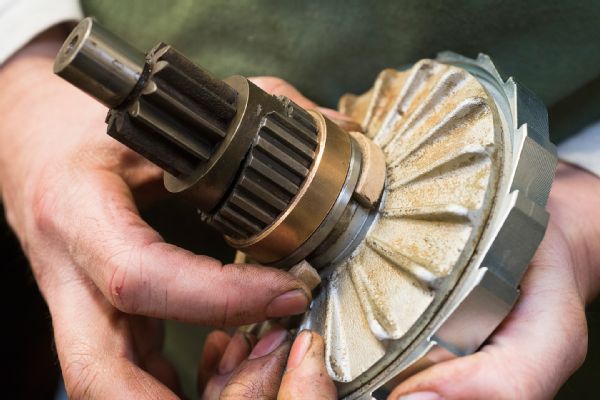
Warrilow says he gets a lot of calls about the purpose of the cardboard spacer that’s in the brake service kit. The spacer slides on the brake shaft between the seal and the inner finned disc. Once the brake assembly is tapped in place, that spacer is removed and tossed. The cardboard spacer ensures the seal is pushed flush into the housing.
After we installed the brake assembly, the keyhole locking plate is slid down so it locks both the brake assembly shaft and the drum shaft into position. We also removed the cardboard split spacer and saved it for another day.
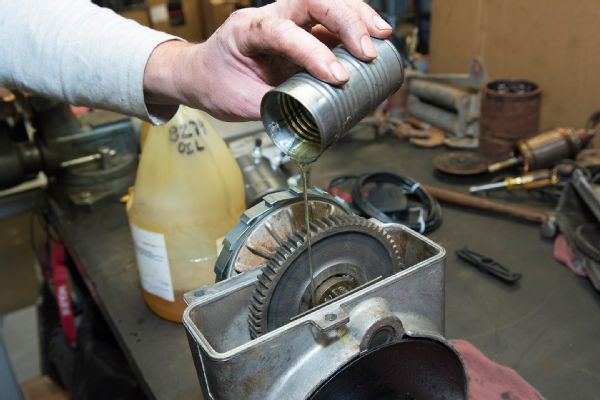
The M8274 uses good old non-detergent 30W motor oil for lubrication. Warrilow says six (6) ounces is all that’s required. More and it’ll leak. Our winch was bone dry when we opened it up, showing at some point in time the drum seal leaked. Now it’s ready to roll!
We then re-installed our rebuilt clutch assembly. With Warrilow’s help, we’d pulled the old rusted unit apart and cleaned, sanded and lubed the shaft, as well as cleaned/lubed the detent ball/spring. Now it works like new, saving us about $100. We also installed a new 4.6hp motor to replace the old 2.5hp version.
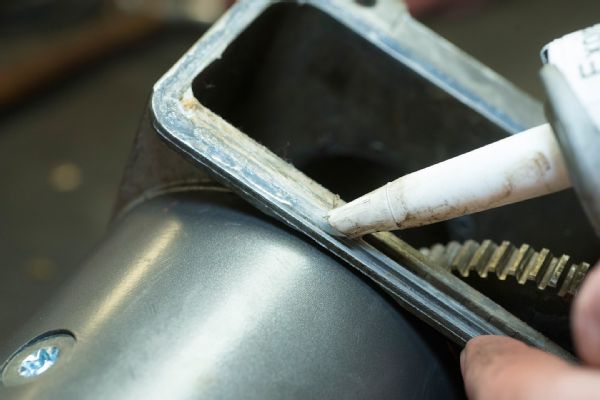
We cleaned off all the old sealant and ran a small bead of silicone around the groove in the upper case.
We then re-installed the top half of the case (with our new 4.6hp motor), and Warrilow used a strong spring clamp to hold the side-heavy upper case to the lower case. A very handy trick if you are trying to do the rebuild by yourself. Torque the 1/4-inch socket-head bolts to 11 ft-lbs.
Mud daubers and mice had made a home in our 34-year-old control box (right). The old solenoids and 2.5hp motor and wiring were on their last leg anyway, so for safety and greater efficiency, we upgraded to a new 4.6hp motor and control box/remote control.
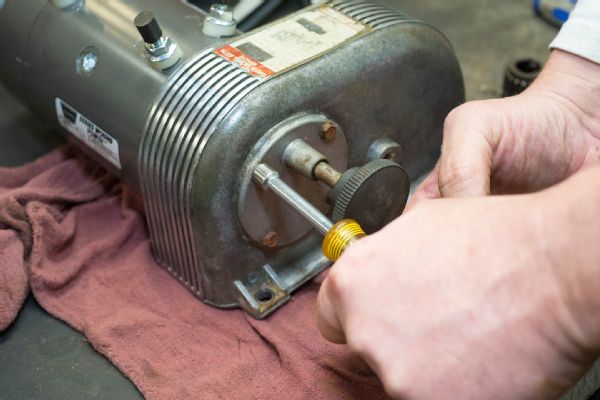
Refurbish done. We bench-tested our rebuilt M8274 in the best way possible—by spooling on a 100 feet of new wire rope. It’s amazing how smoothly, quietly, and quickly the old legend works now that it’s been refurbished. We can’t wait to show it off on the trail!