Hydraulic Bumpstops - 4Wheel & Off-Road Magazine

Hydraulic Bumpstops Jerrod Jones Former Editor, Off Road

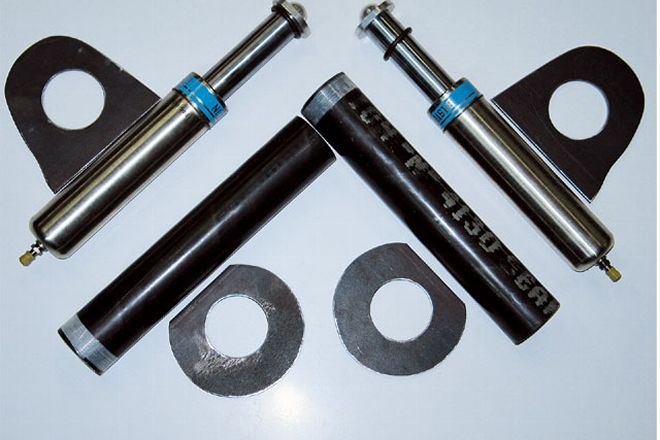
Like any other act of evolution, your suspension can only stay the same for so long before you start tinkering. Whether it be a bolt-on kit or a custom job, you'll probably look and (if not immediately) eventually find little ways your spring stuff can be improved. One of the biggest little improvements we've experienced a before-and-after with are hydraulic bumpstops. Hydraulic bumpstops like these Bilstein units (or air bumps as they are inappropriately nicknamed) have large shafts that can travel 4 inches up into their own bodies before stopping. They are pressurized with nitrogen (via a Schraeder valve on top) to your desired rate and get progressively stiffer as they compress and the cavity above the bumpstop's piston gets smaller (creating greater pressure to deflect the compression as it compresses). And, no, we really can't make a comparison with urethane bumpstops: they're not even in the same league.

Hydraulic bumpstops were derived for the race scene, but in the last five or so years have made an exaggerated leap in placement on off-road toys and street-legal trucks that are greatly benefiting from the extra mod. T and J Performance has seen this trend and responded with reasonably priced hydraulic-bumpstop installation kits for the popular XJ Cherokees (and Comanches) that everyone seems to be buying up nowadays. We went to check out a front kit being installed. Though the kit is very simple and straightforward, it'll require some welding skills to place.

PhotosView Slideshow T and J Performance's kit comes with the raw metal, but you will have to supply your own hydraulic bumpstops. For our fancy, we chose a nice pair of Bilstein 2-inch bodies to complement our Bilstein shocks. Except for a couple of oversized 2.5 versions out there, most hydraulic bumpstops have a universal 2-inch size that will fit into the bumpstop can. The bumpstop kit welds into place right above the coil spring and in the place of the original rubber bumpstop and its supporting structure. To get to all this, you must first support the vehicle and remove the coil springs. You might as well take out the factory air intake box and move the coolant overflow bottle (depending on what year) as well, since they sit over the points in the body that you'll be cutting and welding on later. Also realize that you might have to modify the placement of these items depending on your installation job. Once we had these parts removed, head fabber Big Steve Wilson took special care to grab a Sawzall and hack off the original bumpstops. The upper plates are the first to be welded in. Grind off the paint on and around where you will be welding. Once the upper plate is welded in place, use a 2 5/16-inch hole saw to cut through the body. You will be placing the bumpstop cans through these holes and welding them in place at the desired height location. To find out what height you want to place the bumpstop can, you'll need to compress the suspension until only 3/4 inch of the shock's shaft remains. This will be the point of maximum compression for the hydraulic bumpstop, and you'll want to set and weld the bumpstop can to hold the bumpstop accordingly. Why leave 3/4 inch of travel in the shock? The shock is in a different location in the arc of the suspension travel and that extra little bit will be utilized during axle articulation. Once you find the desired position of your bumpstop can, cut off the unnecessary upper portion (which you will have unless you have 12 inches of lift on your XJ). Once the bumpstop can was measured, cut, and welded in place, some extra gussets were cut and added to spread the load during compression. This gusseting is suggested whether it be into the factory unibody like shown or into a full race cage with support coming directly from the rollcage. This is also the time to weld on the lower support plate that the coil rests against. It should be completely welded to the bumpstop can and to the unibody (again, remembering to take care-this ain't frame metal). The finished kit looks like so. Because of the slightly angled bumpstop design on Cherokees (to best suit the arc of the suspension-something retained by T and J's kit), there is a good chance that the end of the hydraulic bumpstop will rub slightly against the coil spring during full-droop situations. This is nothing to worry about at all, and you will never even think of it again once you feel the amazing improvement a bumpstop with a controlled 4 inches of movement will make on your suspension ride.