Easy Early Jeep Bolt-On Drum Brake Upgrade - Jp Magazine

John Cappa Former Editor, Four Wheeler

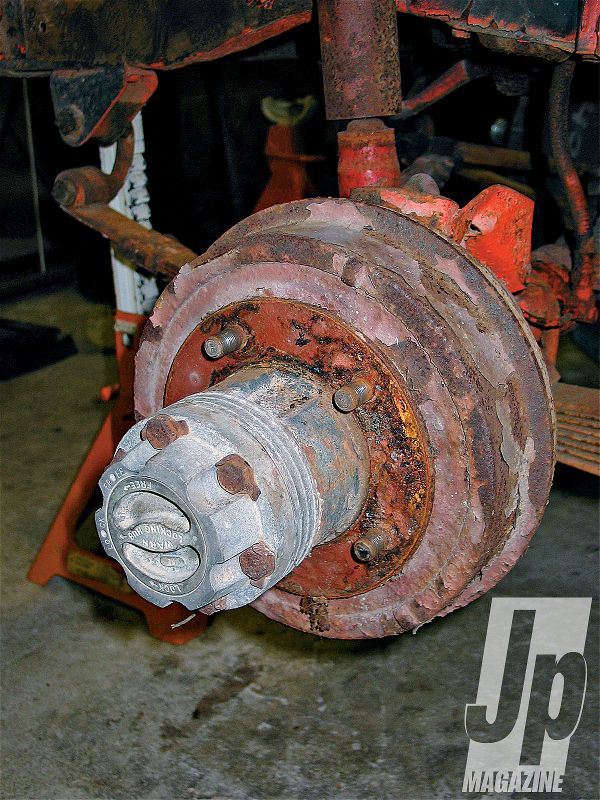
If you've spent any time behind the wheel of an early Jeep with the stock 9-inch drum brakes at all four corners, you know that applying them can sometimes feel more like a request to stop rather than a command. And if you've tried to keep the eccentric bolts on the 9-inch Jeep drums properly adjusted, then you probably know that rust usually makes this task impossible. Fortunately, it's easy to upgrade to a larger more modern drum brake assembly up front where 60 to 90 percent of your stopping power comes from. It's a bolt-on-and-go conversion for the wrecking-yard-savvy swapper. Your first task is to locate some complete 11-inch Jeep drum brakes and rubber brake lines. They can be found on the front of many '73 and earlier Wagoneers, Cherokees, and J-trucks. We found ours on a '73 J2000. There are some 10-inch drum assemblies out there that can be used as well, as long as they came from a closed-knuckle Jeep Dana 25, 27, or 44. Here's how to make the swap.

154 1105 Easy Early Jeep Bolt On Drum Brake Upgrade old 9 Inch Drum Brake Photo 32304469 PhotosView Slideshow The drums are mounted to the inside of the wheel hubs on some 9-inch brake assemblies. You'll have to remove the locking hub and wheel bearings to get to the spindle bolts. Other 9-inch drums are mated to the outside of the hub like most modern drum brake assemblies. You simply unbolt the 9-inch backing plates and bolt on the 11-inch backing plates using the existing bolts. You don't even need to remove the spindles. It doesn't get any easier than this for a brake upgrade. If your stock drums are mounted to the inside of the wheel hub you'll have to pound out the studs to remove the drums. It's a good time to replace them anyway, especially if your Jeep still has the left-hand threaded studs on the driver side. Use Dorman part number 610-032 for a box of 10 right-hand studs. The 11-inch drums provide significantly more stopping power and are much easier to adjust and maintain. They also mount to the outside of the wheel hub like a modern brake system making inspection a much simpler task. Do yourself a favor and get the proper hub socket (Omix-Ada PN 16711.01) to adjust the wheel bearings. Everything goes on just like stock since all of the factory parts are retained. Even the original locking hubs are reused. All that's left is to hook up the rubber FSJ brake lines to the original hard lines on the axle and bleed the brakes. Fashion a sort of loop in the lines to keep them from rubbing the tires when turning. The original brake line shields attached to the top of the knuckles could snag the longer rubber lines when turning, so it's a good idea to remove them. Ours were mostly rusted, so we simply tore them the rest of the way off.