 John Cappa
Former Editor, Four Wheeler
John Cappa
Former Editor, Four Wheeler
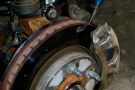
If you've busted a front axle, then you know the frustration and mess of pulling the scrap metal from the end of the knuckle. Current commonly-accepted Jeep axleshaft technology is over 50 years old and the only thing that's really changed is the materials, machining process, hardening, and the size. In the end it's still the same old U-jointed axleshaft with all of its flaws. That's why we were pretty excited when RCV showed us these bolt-in axleshafts that are about double the strength of stock and eliminate many of the problems associated with U-jointed shafts.
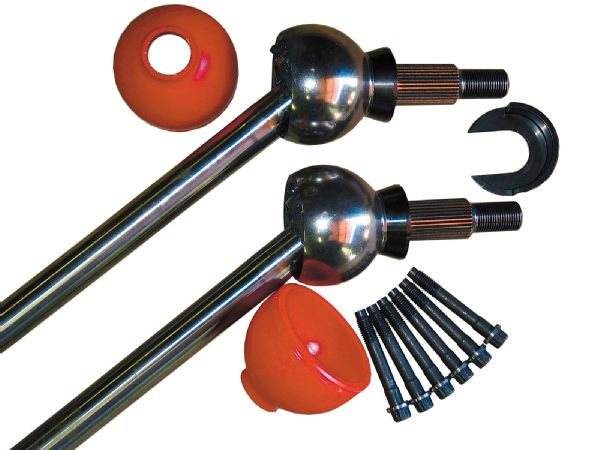 The RCV axle kit for the JK includes the shafts, orange urethane boots, the boot tool, and all the necessary hardware.
For example, when the steering is turned, the U-joint in an axle causes the wheel to speed up and slow down several times with each rotation of the shaft. This can cause vibration and in worst cases a loss of traction, binding, and possibly shaft or joint failure. The RCV shafts feature CV joints that allow the shafts to spin at a constant velocity no matter what angle they are turned to. There is potential for more traction and less potential for failure than with U-jointed shafts. The other bonus is that the RCV joints are virtually the same strength when the steering is straight or turned. Conversely, a factory-style U-jointed shaft is significantly weaker when the steering is turned.
 Just How Strong?
So how strong are these RCV axles and joints? On an axle-snapping jig with the joints turned to 40 degrees, the stock JK U-jointed shaft spit out the U-joint and broke an ear at 3,872 lb-ft. By comparison, the RCV joint never failed, but a shaft finally snapped at 7,604 lb-ft. That's chompin' at the heels of 35-spline Dana 60 territory! For updated applications, info, and animated drawings of how the joints work, go to the RCV website.
Just How Strong?
So how strong are these RCV axles and joints? On an axle-snapping jig with the joints turned to 40 degrees, the stock JK U-jointed shaft spit out the U-joint and broke an ear at 3,872 lb-ft. By comparison, the RCV joint never failed, but a shaft finally snapped at 7,604 lb-ft. That's chompin' at the heels of 35-spline Dana 60 territory! For updated applications, info, and animated drawings of how the joints work, go to the RCV website.
These aren't the same stock Birfields your Toyota buddy breaks just by sneezing on the throttle pedal. The RCV shafts and CV joints are made from high-quality aircraft steel and do not hinder the turning radius of your Jeep. Overall, the RCV JK axles are about the same strength as a stock 35-spline Dana 60 axle shaft. That's a pretty big upgrade for a simple bolt in that only takes about an hour using common hand tools. And if that wasn't enough, RCV offers a "You break it, we replace it warranty," all for about the cost of quality chromoly shafts and wiz-bang U-joints. Along with the '07-up JK Wrangler kit, RCV offers axles for the Dana 30 and 44 in TJs, the Dana 30 in YJs, XJs, ZJs, as well as a Dana 60 version. A traditional Dana 44 version should be available by the time you read this.
PhotosView Slideshow
 PhotosView Slideshow


 PhotosView Slideshow