According to my own calculations, I've spent close to 40 years pounding and painting old cars. With retirement unrealistic, even semi-retirement seems illusive, but believe it or not, the finish line is now within sight and I'm excited by the prospect of graduating to "garage hobbyist." Granted, that won't pay, but now that I'm raking in the dough as a freelance technical writer, I'll be happily helping friends with their projects on the side—or in this particular instance, on the B side.
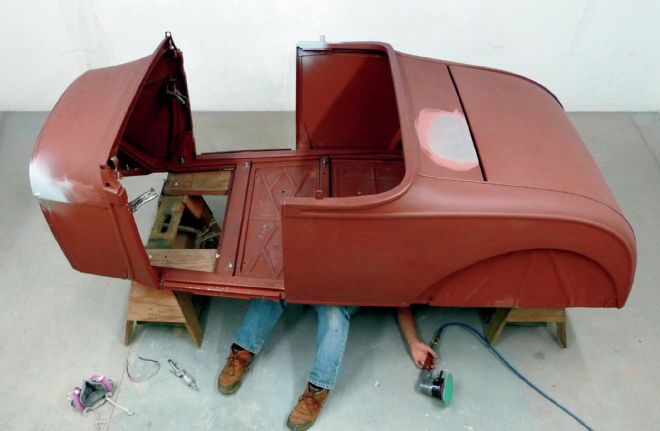
The John Martin Special is a tribute car of sorts. This Brookville-bodied '29 roadster is a clone of the car that our friend "Guardrail" Willie Martin's father and grandfather raced together in the '40s. The project has provided subjects for tech in the past and at the time of this writing the body is being prepared for color, beginning with the area that most folks won't see—the floor's underside.
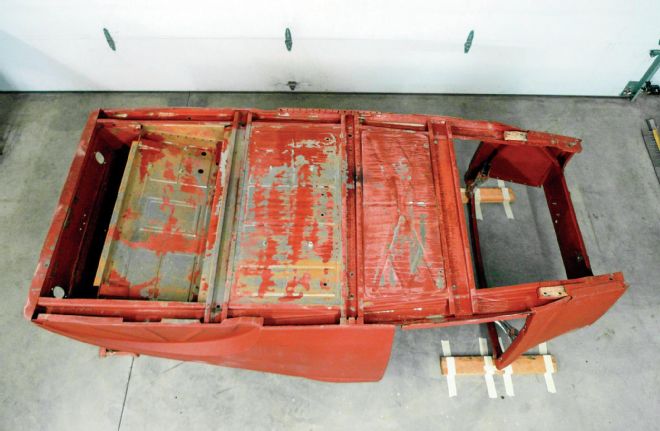
1. Today, Brookville bodies come in bare steel only. Willie's, however, is an older body, delivered years ago with a thin preservative coating of questionable red-oxide primer. We don't know exactly what it is, or what's underneath, therefore the primer will not be trusted as a stable substrate for paint.
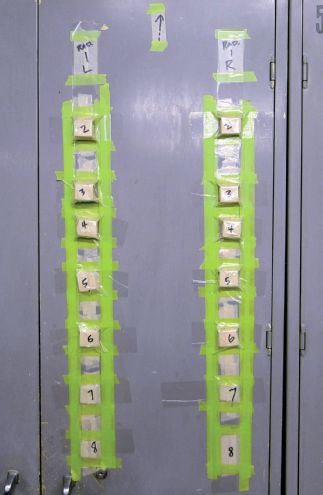
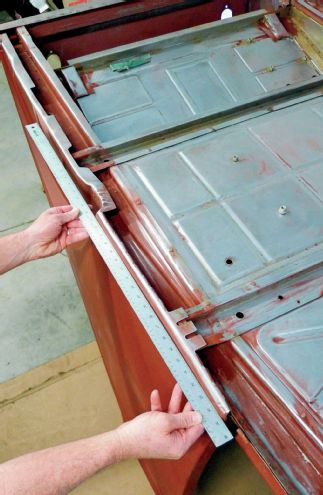
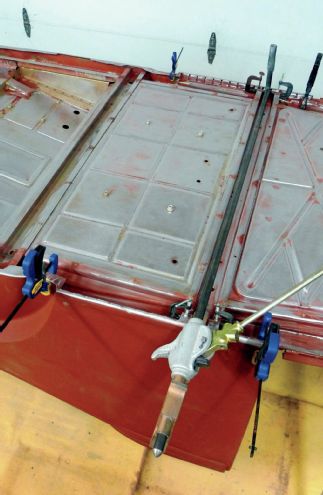
2. At this stage of construction the body has already been fitted to the frame, shimmed, and trimmed as necessary for better-than-new gaps and panel alignment. In an effort to retain reference, the body-to-frame shims are indexed and stored in proper order to speed final fitment of the body—when it's time.
3. Like its predecessor, this clone is banger powered and it had been street driven—at least until the first banger went bang. During that short period the body's underside accumulated grimy goo that must be dealt with before any paint-related procedures can begin. Right about now, my little sister's swing set makes a handy tool, indeed.
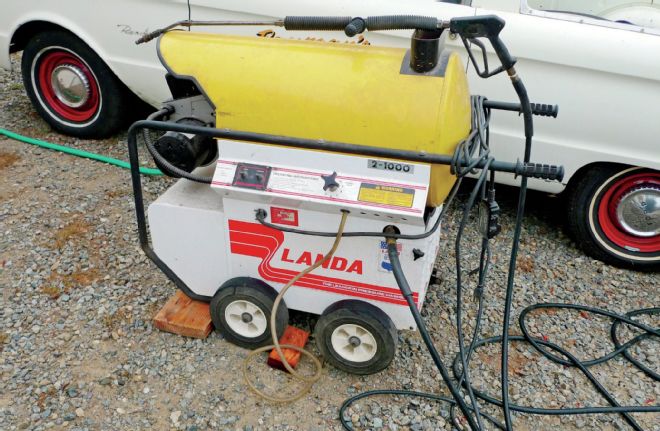
4. The following step will involve the use of hot water under pressure. During warm-up, ordinary household cleaning products are applied to the body's underside where necessary in order to soften the grimy goo. From here it's full steam ahead. Knowing this'll require two hands, it's time to ditch the camera and start steaming.
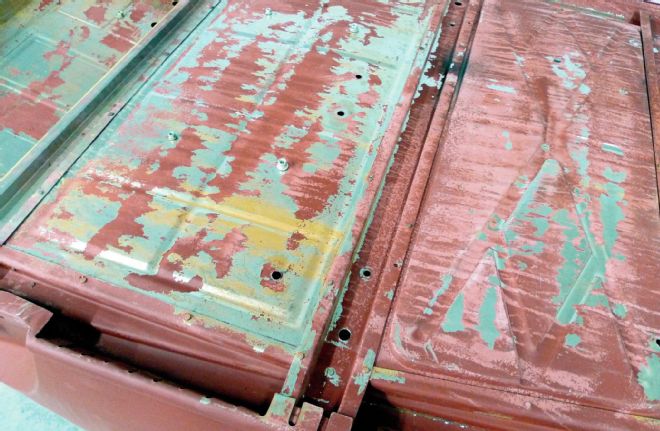
5-6. The remaining red-oxide primer is now very clean. However, we're in deep with a serious adhesion problem. Whatever won't feather will be stripped away, which is pretty much standard procedure anyway. Following instinct here, we'll avoid chemical strippers as excess could become trapped in the gaps, triggering failure later.

7. For the larger, easily accessible expanses, 80-grit on a 6-inch DA (dual-action) sander does the job. This particular DA is a Hutchins, purchased in 1980. If tools could talk, this one would say, "oil, oil, oil," but since we do a little painting here from time to time, we don't "oil" pneumatic tools.
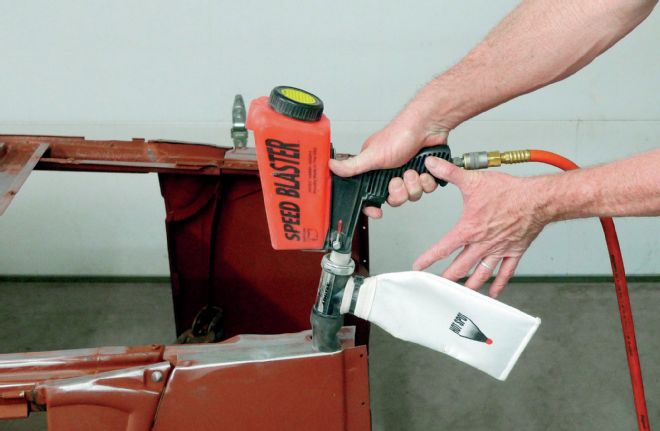
8. The Speed Blaster is an Eastwood item, or at least that's where I got mine years ago. The Hot Spot attachment came later, and the combo works bitchin' for stripping around rivets without spewing abrasive all over the shop. Today's abrasive comes straight from the beach, and of these three rivets, the center one is done.
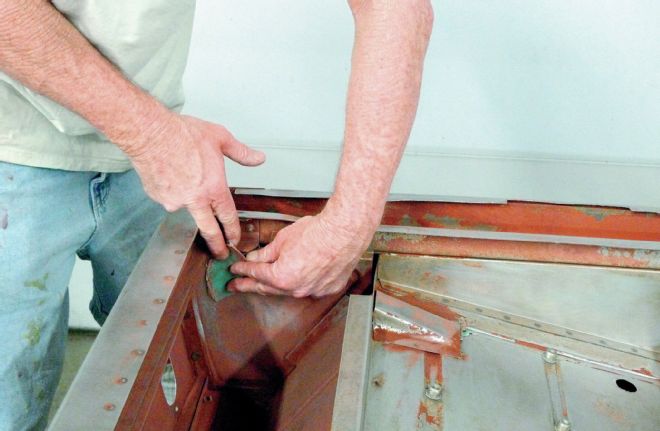
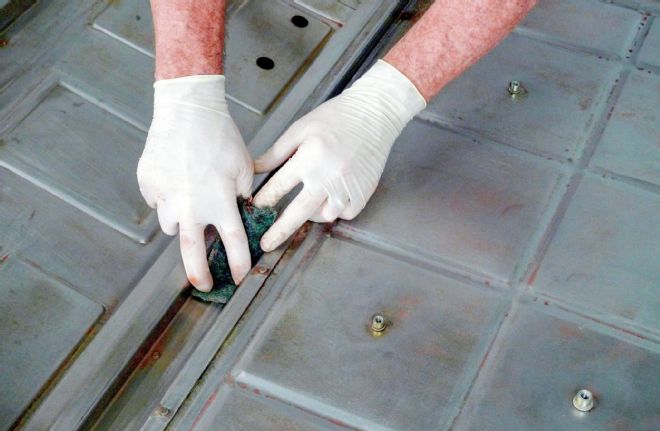
9-10. Inevitably it comes to this. We have many areas that cannot be accessed with DAs, die grinders, and such. So far, the red-oxide primer surrenders quickly to folded pieces of spent 80-grit DA paper and Scotch-Brite–type scouring pads. These dark green pads are the household variety and they're courser than what we generally use.
This is our first experience with a Brookville body. So far the new steel is a pleasure to work with and if time was money, this could be cost-effective compared to working with bulletholes and rust. Even so, this may be the only Brookville body we'll ever afford. For that reason, we're going the extra mile to ensure that this one will last.
So right about now, some might be thinking that bulletproofing and beautifying the underside of a brand-new body might be too much about too little for tech. If that's you, bear with us. Here in our home-based hobby shop we can make a big deal out of just about anything, as you'll see.
11. We're not sure what happened here, but somewhere between Brookville and our own concrete floor, the lower quarter reveal area where quarter meets rocker has become misshapen. In fact, it's slightly concave, which won't look right—no matter what color this soon-to-be black body becomes.
12. From Brookville the lower quarter skins come crimped over, but not welded to the rocker panels, which is ordinarily fine. Because of our damage, however, welding will be required to hold position. A 3M Clean 'n' Strip disc on a Central Pneumatic die grinder reaches what it can, before folded bits of 80-grit again come into play.
13. Proper G-clamps secure the corners as the previously concave midsection is gently ushered outward with an autobody friction jack—aka "monkey on a stick" amongst those in the trade.
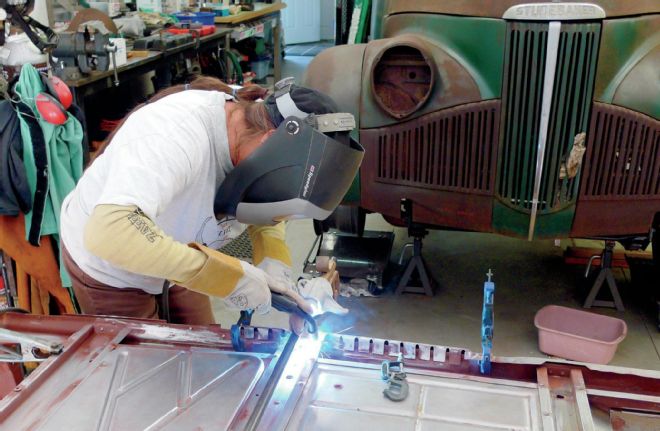
14. These days I'd rather watch than weld, so whenever my welder-wielding wife is available to do such jobs, I'll take a break. With just a few zaps from Mrs. Rotten's MIG, this quarter skin becomes securely set, right where we want it to stay.

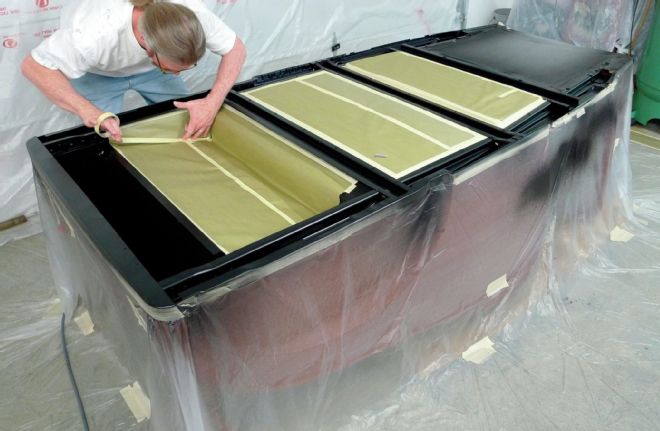
15. After a little grinding and a lot more sanding, masking can begin—and with the right materials, it's easier than it used to be. There are numerous brands of static cling–type masking materials on the market today. Here we're using the Carborundum brand to protect against overspray and looming splatter.
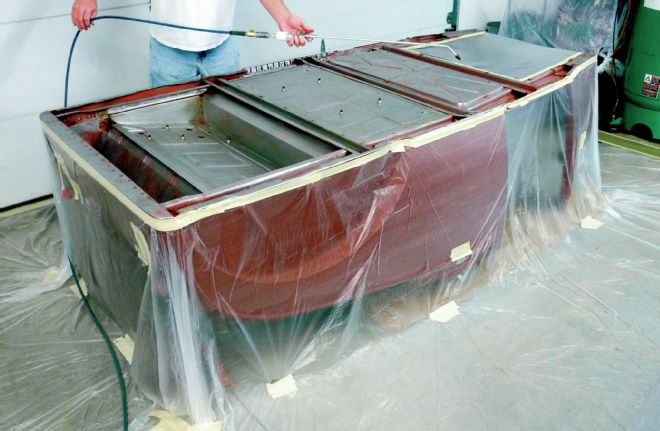
16. At this stage our masking is finalized—for now. It will be modified as we go, as you'll see. From here once we've chased away remaining dust particles we'll be ready for epoxy primer, and don't worry, we're not flash-rusting this bare metal. Even at the home-based hobby shop, our compressed air is very clean and dry.
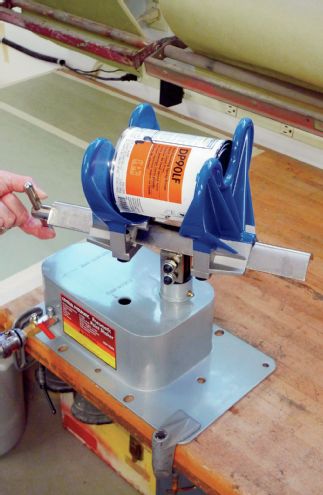
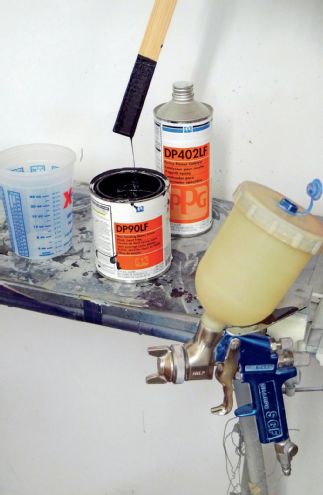
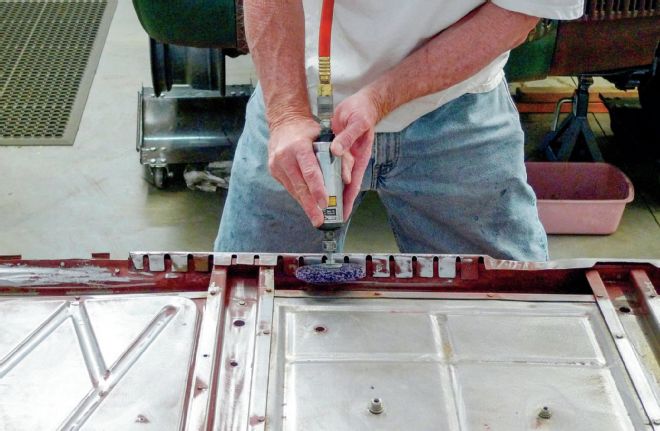
17-18. In our area, the earlier DP epoxy primers are no longer used by shops, but only because it's the law. As garage hobbyists, we can legally use what we've bought and paid for. This can has been shelved for years, but a short ride on a Central Pneumatic shaker from Harbor Freight makes the old primer good as new and good to go.
19. Although this spray gun is seasoned, it is a California-compliant HVLP. In fact, it's my very first HVLP—a 1995 Sharpe SGF, which in all honesty, I only purchased to stay out of trouble as a California shop owner at the time. Since then, higher-tech HVLPs have assumed their positions in the gun safe, but Old Blue here is still my little buddy.
20. Two coats of black DP90LF epoxy primer later, we're satisfied that we've reached into the underside's crooks 'n' nannies. Somehow the brand-new beat-up floor doesn't look so beat-up now, but we worked for that too. The older DP primers are very forgiving with a two-week chemical-bond window for recoating with no abrading required.
During the demonstration to follow, the pros may notice an older non-California-compliant product that's no longer available to shops in our area. As hobbyists we're able to donate surplus materials from jobs-gone-by, and toward the end of my run in the autobody trade, I'm just tickled that it's going where it's needed. With those things said, it's time to put our experience to work—just for friends, just for fun, and you're all invited to follow along as we bulletproof and beautify what few will ever see.
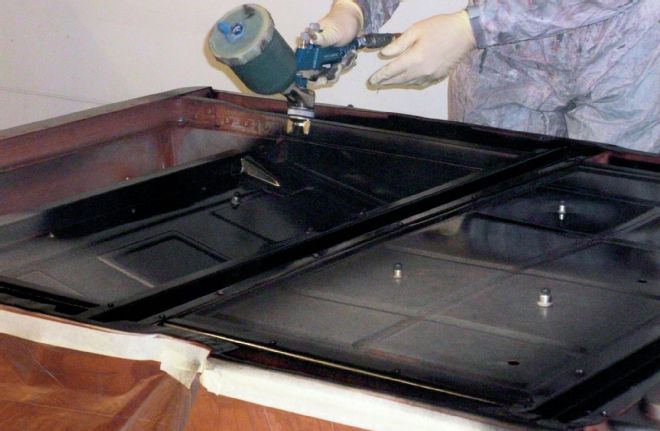
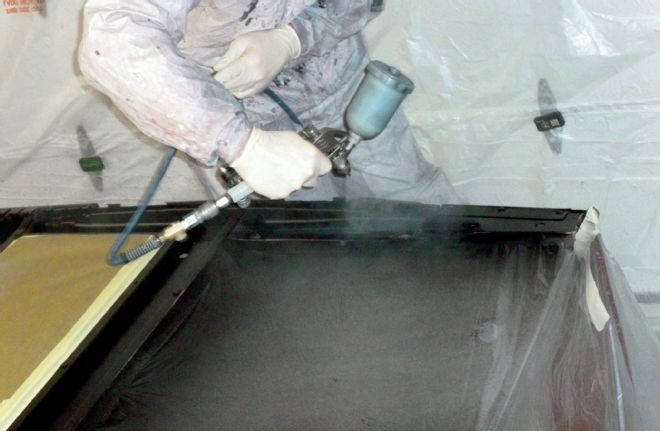
21. But since we're coloring outside the lines with mismatch donation materials, we're abrading for a solid mechanical-bond to ensure adhesion for the upcoming textured coating. Here the areas where additional build is not welcome are masked. Remember the shims? We don't want to change their relationships now.
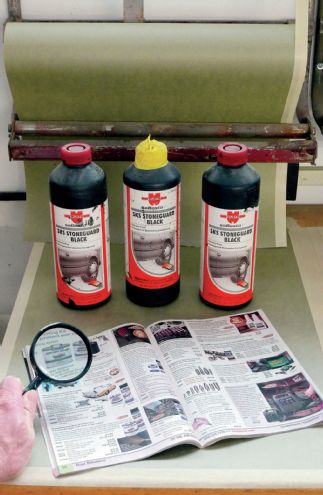
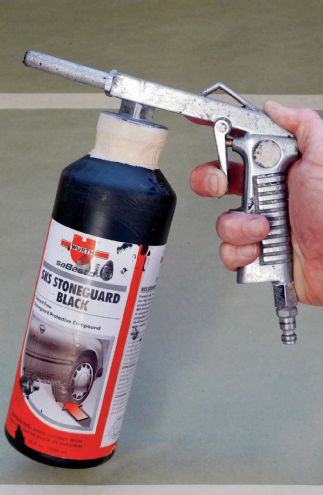
22-23. Now ordinarily I'm quick with the catalogs, but this time we have a gift opportunity that must at least be considered. Our friend, Jimmy Benitez of Coastal Auto Restoration & Performance has offered surplus SKS Stoneguard. At his own shop, Benitez uses a fancy, high-end shutz gun. This isn't it, but for the small job at hand it'll work just fine.
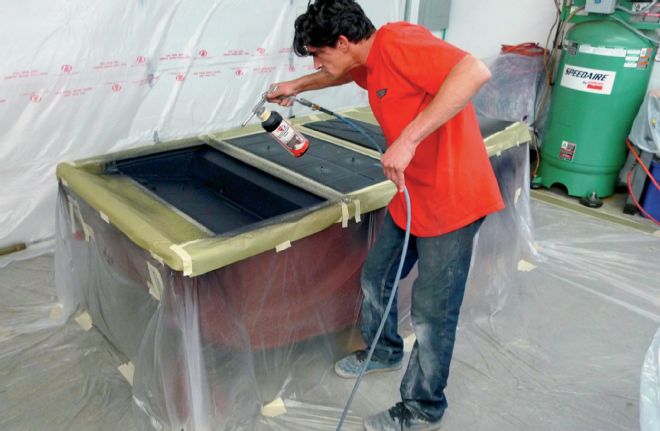
24. So right about now, some might wonder why Benitez would spray sans respirator. We don't recommend it, but for the record, SKS Stoneguard is a waterborne product, which smells as mild as latex house paint to my own sensitized olfactory. Does that mean it's OK to inhale? Not according to label instructions. Don't try this at home.
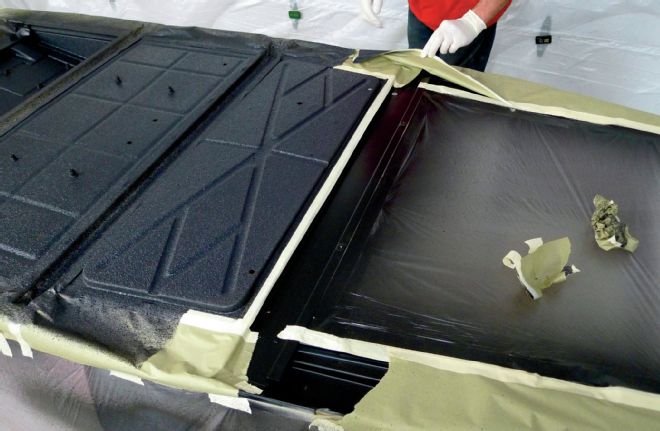
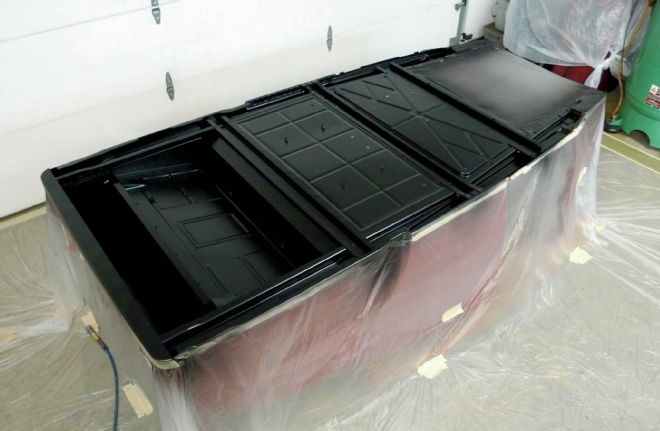
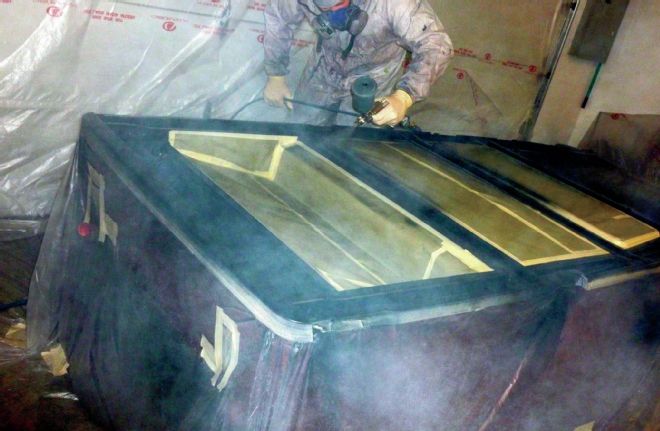
25. Benitez knows from previous experience that masking should be removed as soon as possible while the SKS Stoneguard is still soft. Being a waterborne product, SKS Stoneguard requires time before taping or optional topcoats. Moving air helps to speed the process, as does summer heat. We'll allow a couple days before the next step.
26. SKS Stoneguard can be painted if desired, but it's bulletproof enough as is. The color darkens as it dries and we're satisfied with the look, so we'll mask the textured areas and topcoat the remaining DP90LF. With only three days between these applications, we're well within our chemical-bond window.

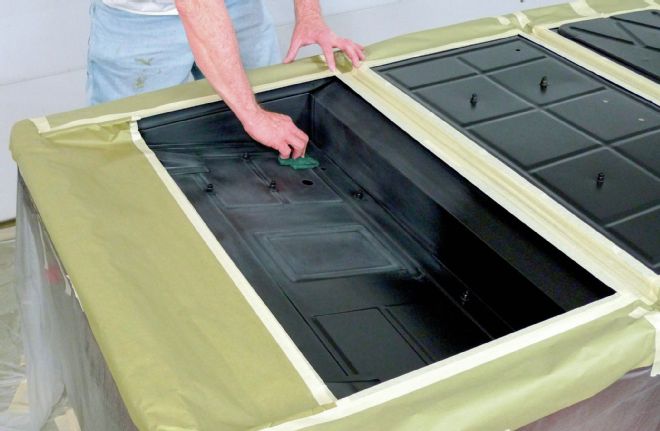
27. Let's use up some more leftovers! For the underside of this Model A, we'll save some dough with Advantage-brand, single-stage urethane. This affordable-yet-durable coating comes from our local paint supplier. It's not in every paint store, but suitable substitutes are available through the usual sources.
28-29. From here we'll apply our gloss-black topcoats, with this cute little Walcom-brand, HVLP detail gun. This one is also California-compliant. It's a good fit for tight spots and it too has been my little buddy for years. Application steps are fairly straightforward: two medium-wet coats with a 15-minute flash-time between coats.
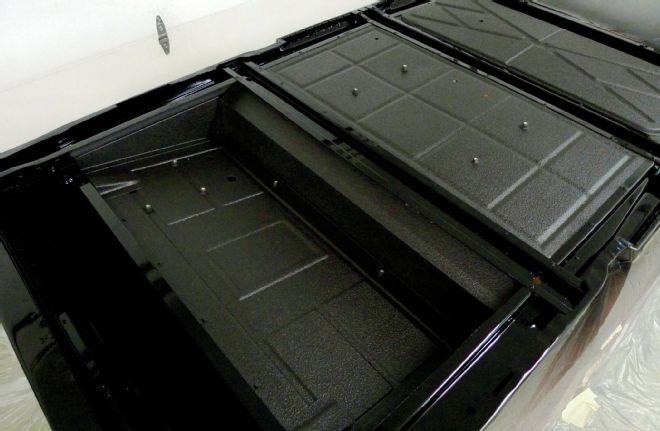
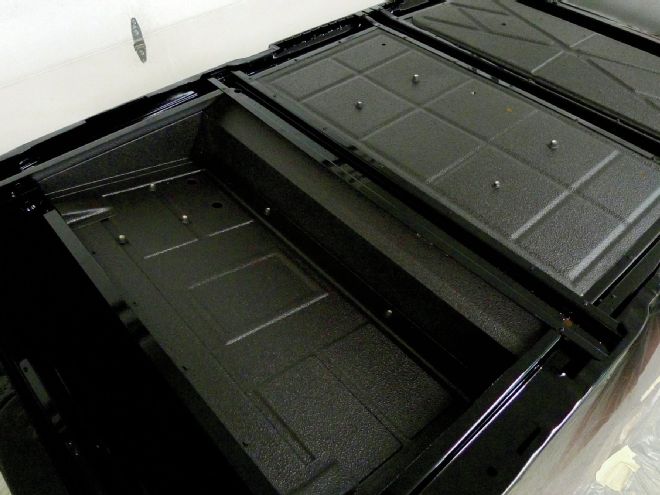
30. Here's the finished underside; seam-sealed, sound deadened and well protected from the elements. With masking removed, this may be the last clear view we'll get, but we'll always know we went the extra mile. Now that we've bulletproofed and beautified what few will ever see, let's turn our attention to parts that'll show.