Our Corvette lead a typical life, bought as a state-of-the-art sports car in 1960. By the late ’60s it was fair game for hot rodders and drag racers alike. This particular car spent some time being driven a quarter-mile at a time with a big-block stuffed under the hood, and stuffed is as good a word as any. Some frame damage incurred and after repairing that (“The X-Factor,” Apr. ’15) we turned our sights on improving the front suspension.
Since the original suspension unbolts we thought a bolt-in front suspension made a lot of sense. There are several good bolt-in suspension systems to choose from and we ultimately settled on the front suspension kit from Martz Chassis in Bedford, Pennsylvania. We liked the construction of the crossmember and the fact that the control arms have urethane bushing rod ends. Frontend alignment is made easy because of the eccentric adjuster built into the crossmember. We also liked the fact that the kit included QA1 shocks and Wilwood brakes, these components combine to give us a quality ride and great braking power.
Before we removed anything from the frame, a piece of 1-inch box tubing was fabricated to bolt to the stock sway bar mounts on the top of the frame. This brace would help to keep the framerails in proper alignment after the front suspension was removed.
First, we removed the steering box and disconnected our heavily modified pitman arm from the front suspension. Next, we set the frame on jackstands to prepare for the removal of the front crossmember and suspension. Working on a bare frame made this all very simple, but it can also be done with the body and engine in place. Unbolting the stock suspension really involved snapping off 10 out of the 16 bolts that hold the front crossmember in place. Fifty-five years of weather will do that to bolts. After rolling the front suspension out from under the frame we couldn’t help but notice a white powdery material stuck partly to the frame and partly to the crossmember. This turned out to be the remains of an aluminum spacer the factory used between the crossmember and the framerails. Years of electrolysis between the steel and aluminum had turned it to dust. While we chose to replace the front suspension, if you are restoring a C1 be sure to remove the crossmember and check this spacer, chances are it needs replacing.
We spent some time with a wire wheel cleaning the rust off the frame and in the process discovered a small, 3/4-inch long stress crack in the frame. We welded the crack up and gave the entire area a coat of primer. We’ll put several coats of Eastwood Chassis Black on the area before final assembly.
In keeping with the out with the old and in with the new approach, we mounted the frame to a pair of engine stands to act as a rotisserie. Having the chassis upside down makes it easy to test-fit the new Martz Chassis crossmember. With the Martz crossmember in position on the bottom of the framerails we checked for bolt-hole alignment. If you are doing this swap in a complete car, a simple floor jack can be used to raise the crossmember into position.
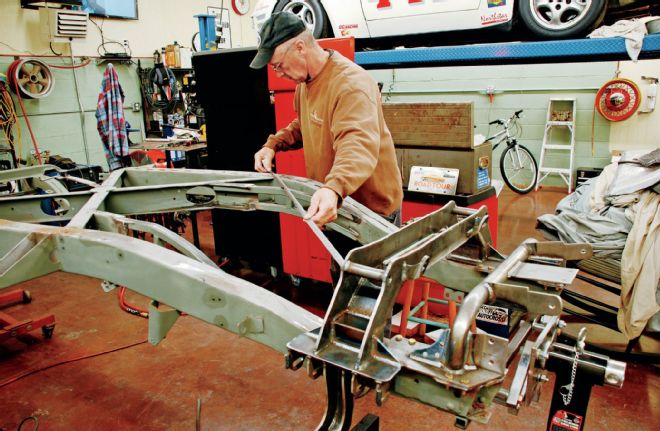
Our initial test-fit of the crossmember showed some bolts were aligned while others were a half-hole off. Now, at first glance you might think the crossmember doesn’t fit but that is not the case. Rather, it is a simple matter of slowly aligning the framerails to the crossmember. We found that by using several tapered drift pins and one large C-clamp we were able to bring every single hole into perfect alignment. First, we dropped bolts in the holes that initially lined up, then we drove the drift pin into a misaligned hole and dropped a bolt in the adjacent hole. In the end, every hole aligned perfectly, no need for drills or files, just some prying and patience before the old framerail came into perfect alignment.
With all the bolts in the holes we snugged them down and took measurements to ensure the crossmember was square in the framerails. We measured diagonally and front to rear and our crossmember was within 1/16-inch of perfectly square in all directions. This is probably a closer tolerance than the factory used, particularly when you consider there could be some small error in measuring caused by things like tape measure sag, etc. Satisfied the crossmember was a perfect fit we removed the unit and painted the bottom of the framerails to prevent rust from occurring when the crossmember was finally installed. We took the Martz Chassis front crossmember outside and after wiping it down with Eastwood PRE, a pre-paint degreaser, and applied two coats of self-etching primer and two coats of Eastwood 2K Aero-Spray Chassis Black, this gave us a very nice satin black finish that will be durable and easy to keep clean.
After the paint cured we placed the Martz Chassis crossmember under the framerails for the final time and bolted the crossmember in place with 3/8-16 Grade 8 bolts, washers, lock washers, and a drop of Loctite blue for good measure. We’ll have to leave it here for now, but in the next issue of Vette we will install the Martz Chassis sway bar and tubular control arms, the Flaming River rack-and-pinion, the QA1 coilover shocks, and the Wilwood disc brakes. In the end we’ll have a great handling and braking package.
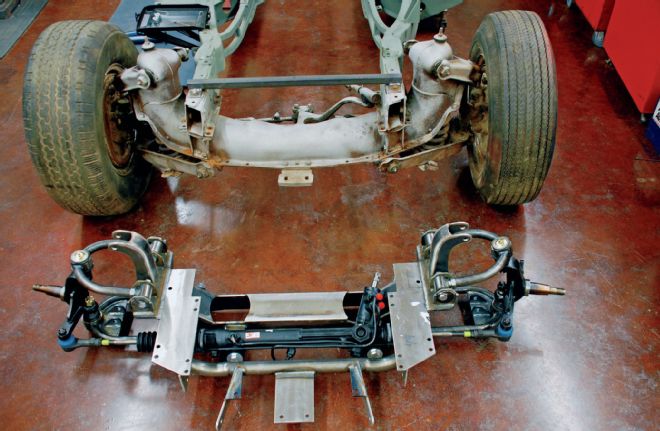 01 The original C1 front suspension design dates back to 1949, complete with kingpins, drum brakes, and a lot of weight. The new Martz Chassis front suspension replaces all that with tubular control arms, rack-and-pinion steering, etc. Not shown in the photo are the QA1 shocks and Wilwood brakes that complete the front suspension package. Better handling and less weight, now that’s a winning combination.
01. The original C1 front suspension design dates back to 1949, complete with kingpins, drum brakes, and a lot of weight. The new Martz Chassis front suspension replaces all that with tubular control arms, rack-and-pinion steering, etc. Not shown in the photo are the QA1 shocks and Wilwood brakes that complete the front suspension package. Better handling and less weight, now that’s a winning combination.
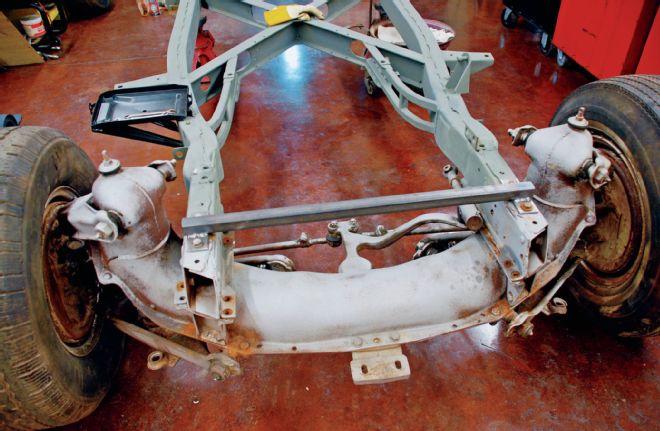
02. We had the entire chassis mediablasted. Before we set about removing the 16 bolts holding the front crossmember in place, we fabricated this 1-inch box tubing brace and bolted it to the sway bar mounts. This will prevent the framerails from moving when we remove the crossmember.
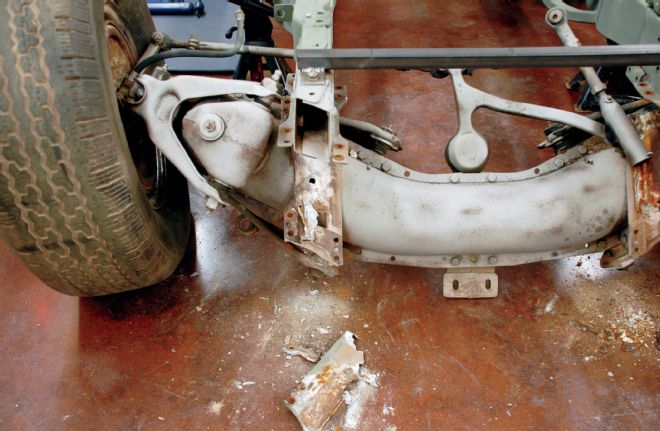
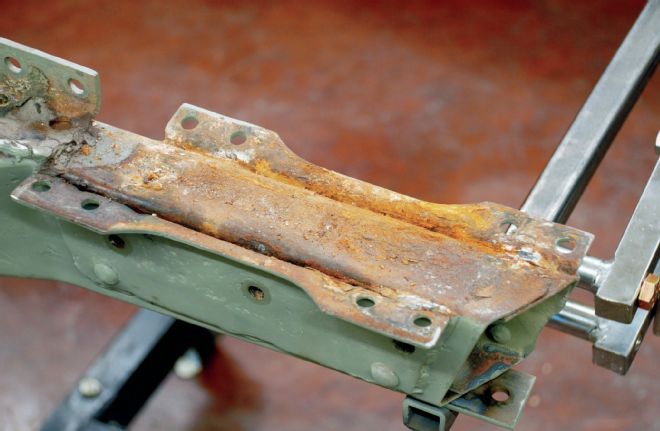
03. After we disconnected the steering linkage and removed the steering box we removed the 16 bolts and the old crossmember was free from the frame. That white powder and chunks of “stuff” is actually the remains of the aluminum spacer that Chevrolet used between the crossmember and the frame. Electrolysis and oxidation of the dissimilar metals turned it to dust over the last 55 years.
04. To ease installation we mounted the frame in a homebuilt rotisserie and turned the frame upside down. Happily, the bottom of the framerails showed only surface rust and not serious structural rust.
05. The only interference point we found during the initial trial fit was the lower engine mount on the passenger side. The mount tab appeared to be bent inward and we could have simply hammered it out for clearance.
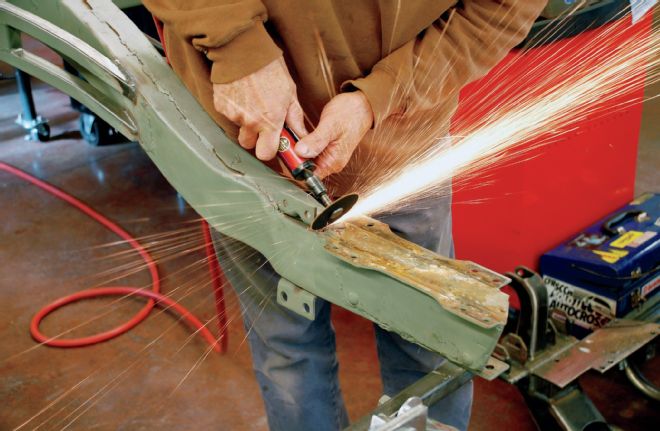
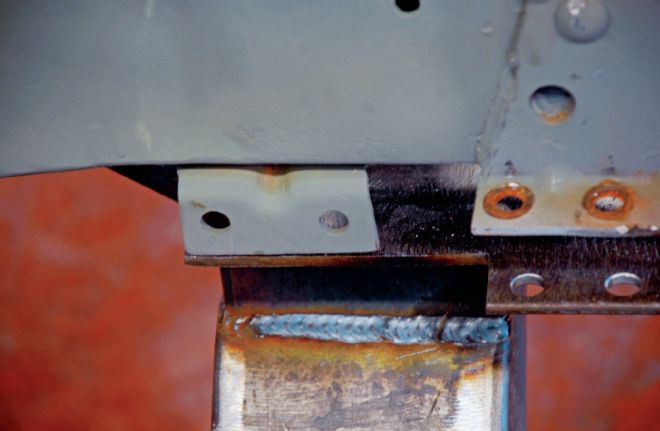
06. Since we are not going to use the factory engine mounts we simply removed all four of the engine mount tabs. We cut the bottom tabs off by slicing almost completely through the welds, but not so deep as to score the framerail. A cutoff wheel is the best tool for this job.

07. Once the welds were cut, a hammer and chisel made short work of removing the tabs. We followed this by grinding the remaining welds off the framerail for a nice, clean look.
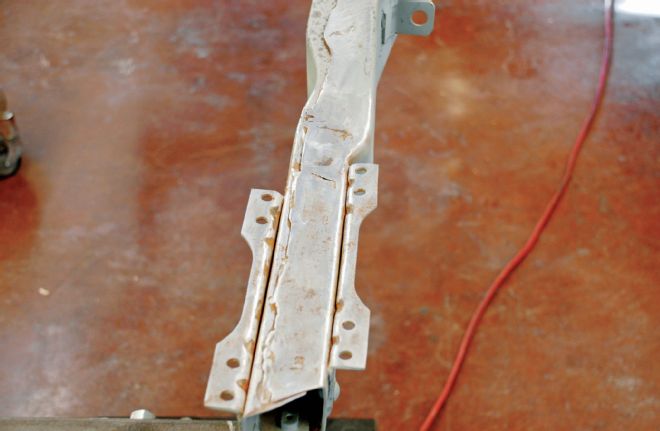
08. After a few minutes with the grinder all traces of the original engine mount tabs have been erased. We’ll test-fit the Martz Chassis front crossmember first and then follow up with some self-etching primer and Eastwood Chassis Black satin paint.
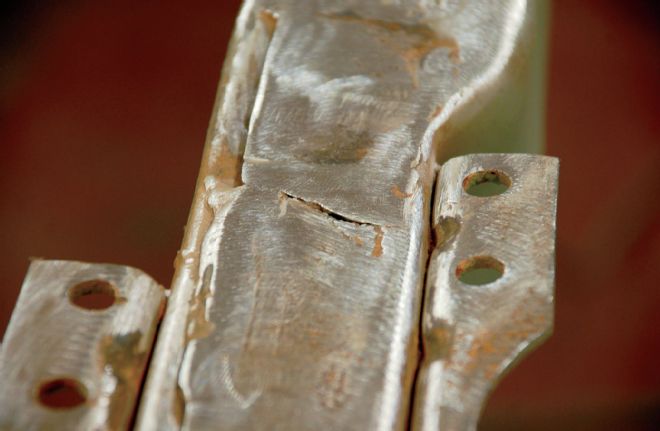
09. During the cleaning process we discovered this small stress crack that had been hidden by the original front crossmember. A quick pass with the TIG welder took care of the problem.
10. All of the chassis mounting flange holes did not line up perfectly with the new Martz Chassis front crossmember. However, by using a tapered drift pin (seen in one of the forward holes) we were able to align every hole for the proper 3/8-16 bolt. All it takes is a little patience and prying.
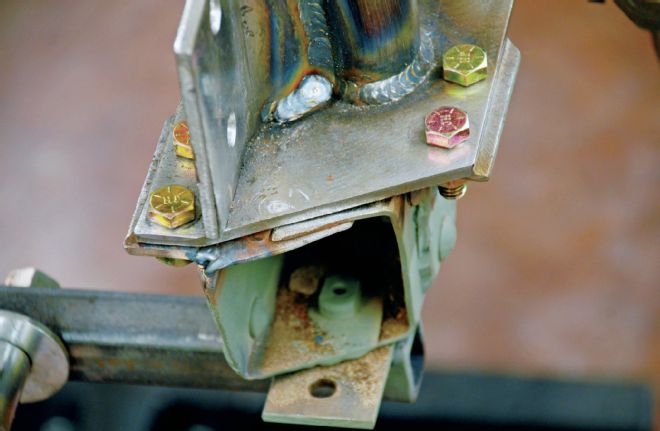
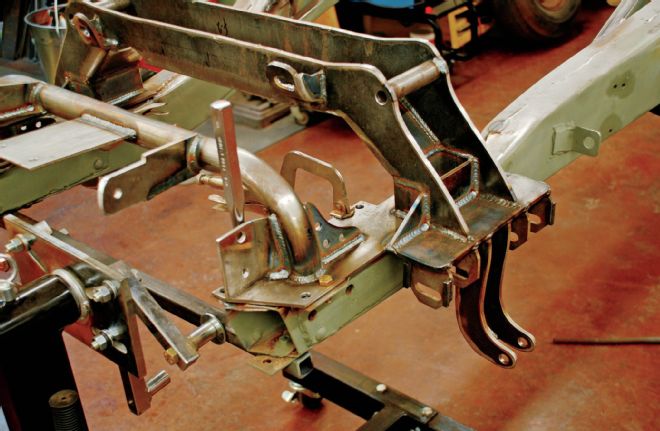
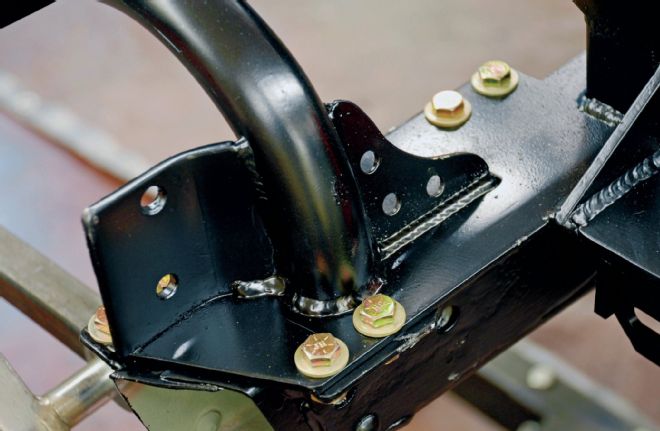
11. Here we can see the forward flange on the passenger side with all the bolts installed. We used Grade 8 bolts throughout as it seems like a good idea to use strong bolts in any structural part of the car.
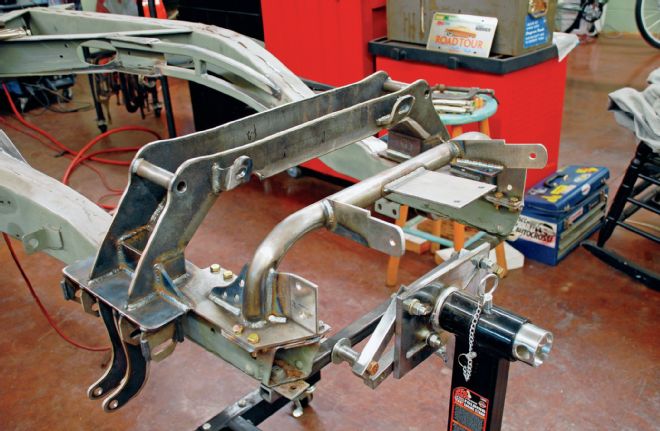
12. Here is the crossmember completely bolted in place. Installing the crossmember with the frame upside down made things very easy to work on, but this same process can be completed working under a complete car.
13. After we had all the bolts tight we checked measurements to ensure the crossmember was square with the framerails. We used a rivet in the chassis for a measuring point and our tape showed we were within 1/16-inch of perfection.
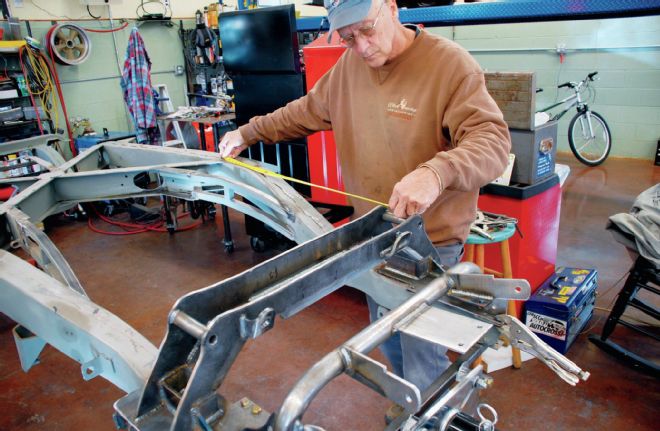
14. Our front-to-rear measurements were spot-on, exact from side to side, indicating the framerails were straight and the crossmember was a perfect fit. Satisfied with the trial fit, it was time to remove the crossmember to paint it and the framerails.
15. After giving the bare metal a good wipe down with Eastwood PRE, a pre-paint degreaser, we applied a couple of coats of self-etching primer.
16. After the primer cured we laid down a couple of coats of Eastwood 2K Aero-Spray Chassis Black. Our new Martz front crossmember was looking good and ready for final installation.
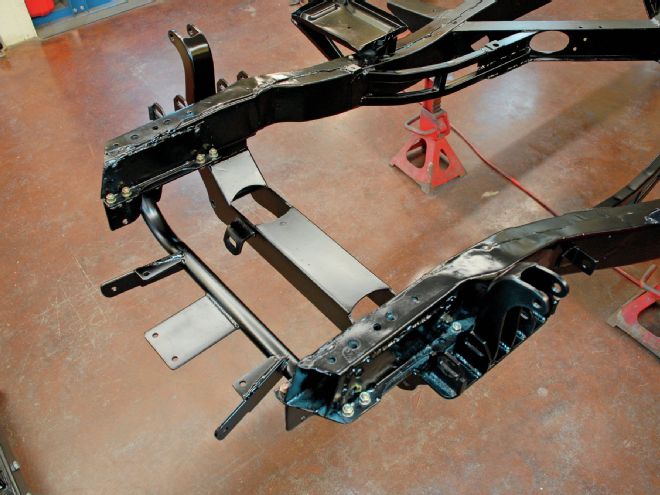
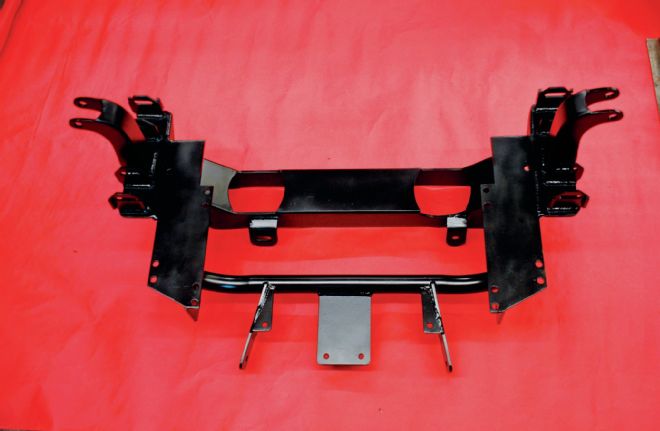
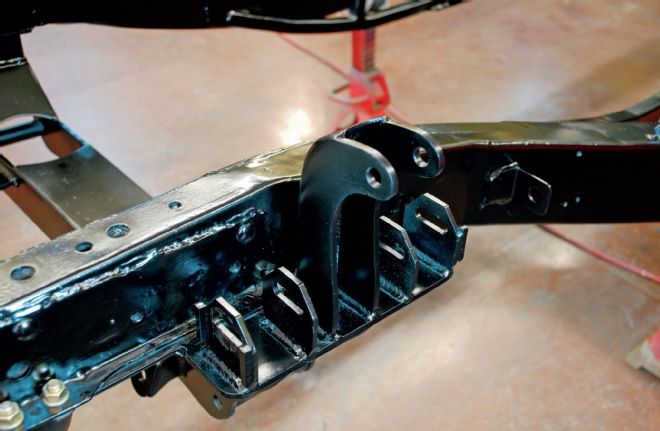
17. Once again, looking at the bottom of the framerail you can see the bolts in place. The contrast of the fasteners and the satin black paint give the installation a clean, strictly business look. We were impressed with the amount of gusseting on the Martz crossmember.
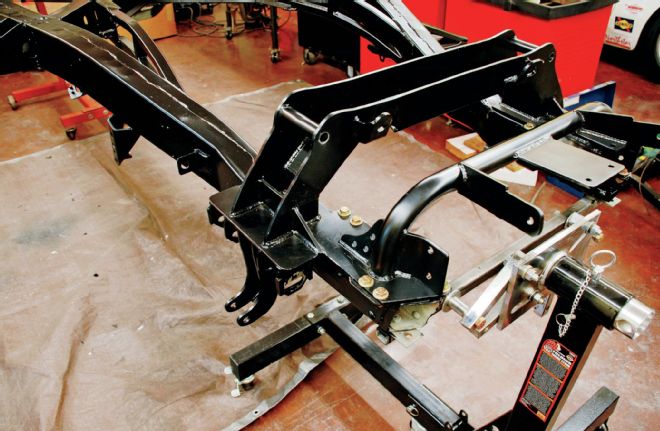
18. The new crossmember sure looks more modern than the bulky original front suspension. We didn’t have a method to weigh the old front suspension but we’re certain there is considerable weight savings. Now it is time to rotate the chassis over for suspension installation.
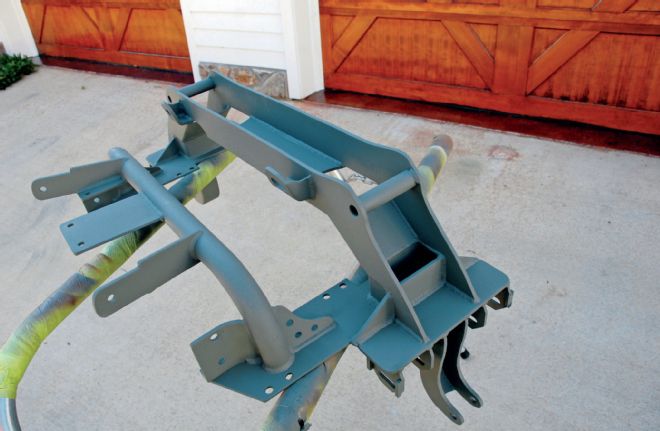
19. Looking at the top of the chassis we can clearly see the shock tower that will hold the QA1 adjustable coilover shocks. Eccentric bolts on the upper control arms will make wheel alignment easy.
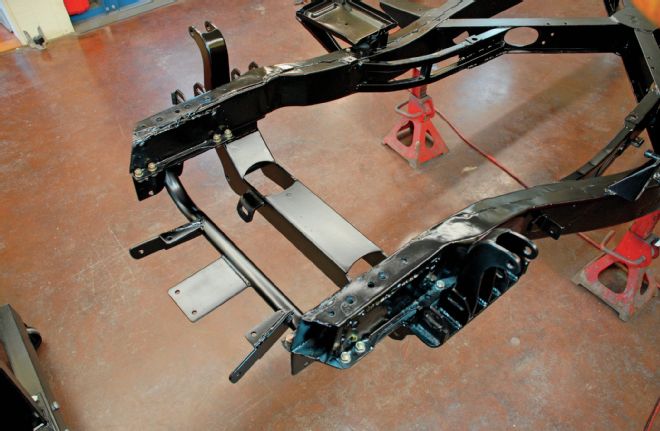
20. With the painted frame resting on jackstands it is easy to see the Martz front suspension is going to be a huge improvement. We now have a structurally sound, rust-free chassis. Next month we’ll install the complete Martz suspension and sway bar, Flaming River rack-and-pinion, along with QA1 shocks and Wilwood brakes, so stay tuned.