Within two weeks after buying this neglected, yet miraculously unmolested 1966 Chevelle Malibu from its second owner, the first thing we did was install polyurethane body mounts from Energy Suspension. Naturally, as with any vehicle that’s remained un-driven for 13-plus years, there’s a long list of mechanical issues we’ll need to address, but we decided to work on getting the door gaps and body lines right first.
Whether one is dropping a body fresh from the rotisserie down onto a new chassis or dealing with an old car with worn-out body mounts, the first thing to do before even thinking about repainting is to adjust the gaps. Aligning the gaps after a car has been repainted is a mistake; one that can cause damage, necessitating repainting scratched body panels. For those unfamiliar with the term “establishing the gaps” it means to make sure a car’s body lines align and the openings between the doors, fenders, hood, and trunk aren’t too tight or too wide. Perhaps the best known, easiest way to picture what we’re trying to say is that an ice cream stick should be able to pass snugly in between the doors, hood, and trunk.
As a car ages its rubber body mounts compress and crack allowing the body to sag. The affects of sagging can range from squeaks to door gaps closing up. Installing new body mounts reestablishes where the body sits and lays the foundation for all the body panels to follow.
Before we move on to captioned images with step-by-step installation tips, it should be mentioned that we deviated slightly from the installation procedure Energy Suspension describes in its instructions. Instead of loosening all of the body mount bolts and doing one side at time, we determined—because we have a two-post lift in our tech center and four tall jack stands—the fastest and easiest method would be to remove all of the body mount bolts and lift the body straight up. Please follow along and we’ll show how we did it.
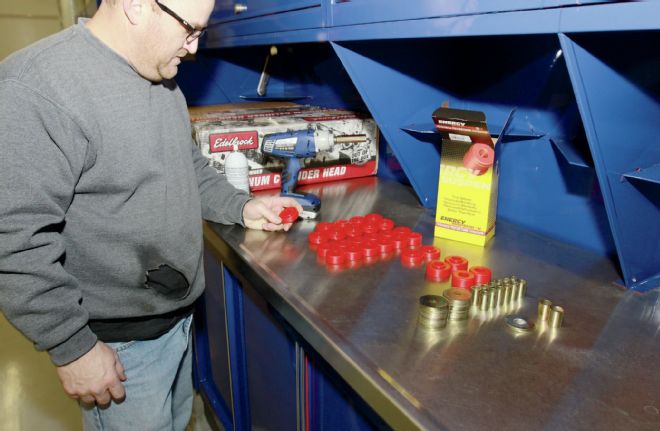
01. The Energy Suspension Body Mount set for ’65-’67 Chevelle hardtops (PN 3.4111) includes all the hardware necessary to upgrade to polyurethane body mounts. It’s a good practice to lay out all the parts to keep track of what’s there and has been installed.
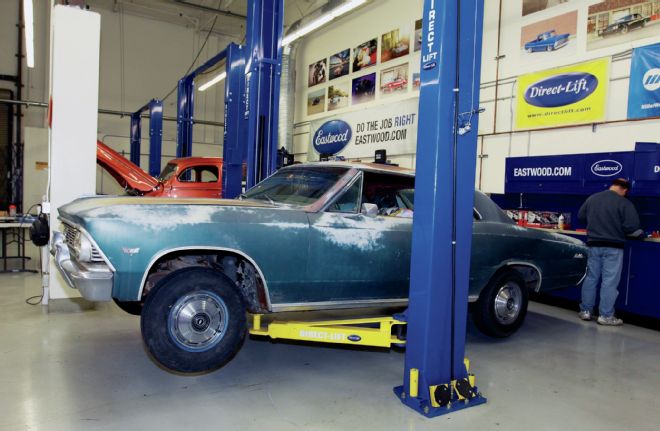
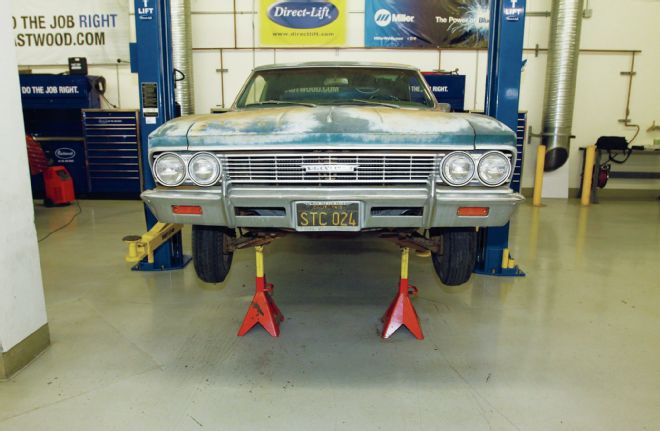
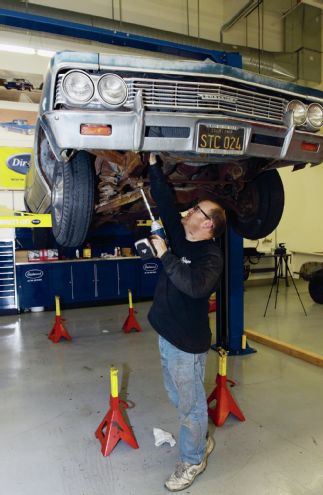
02. Our first step was to position the ’66 absolutely level on the two-post lift. Notice the risers added to the front of the lift.
03. Next, we raised the ’66 into the air and then placed four jack stands beneath it to suspend the chassis above the shop floor.
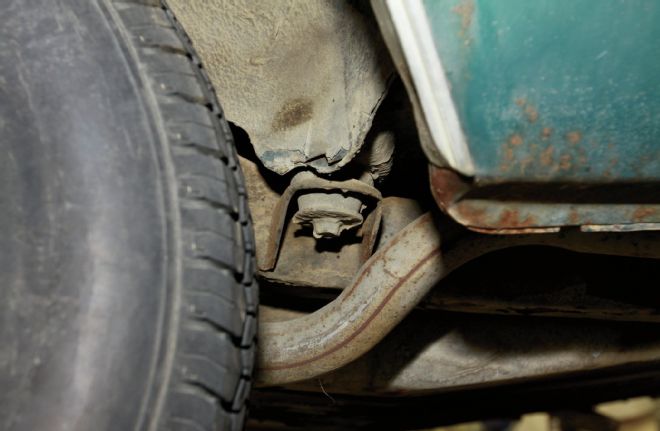
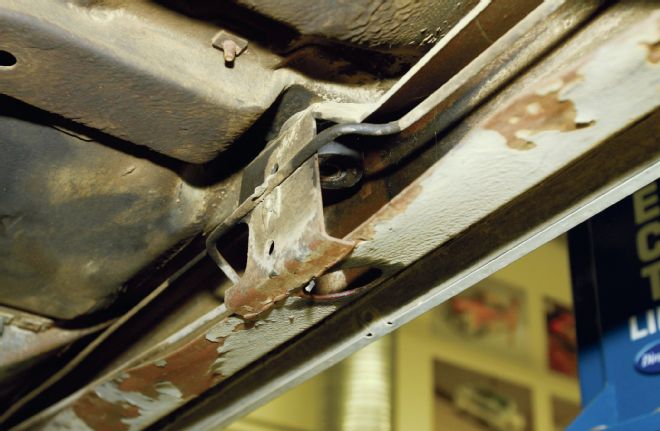
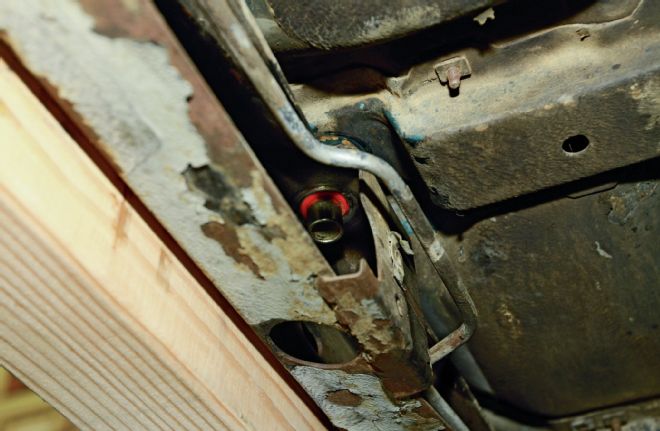
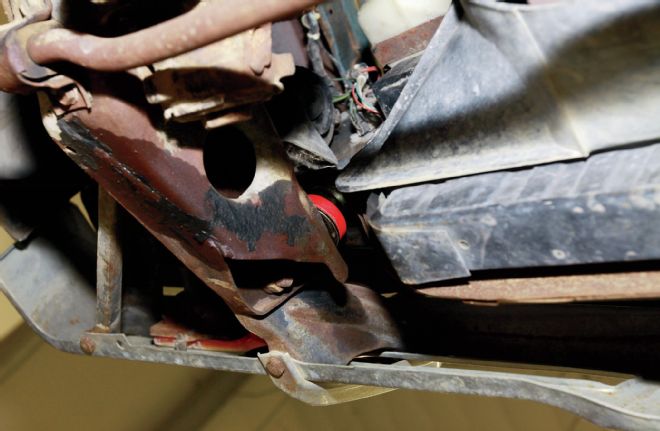
04. There are 12 body mounts on a Chevelle 2-door hardtop. Ten body mounts are easily located and two are hidden near the top of the rear shock absorbers.
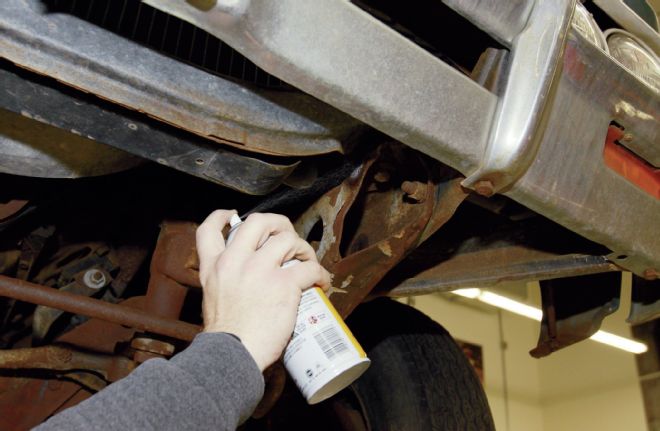
05. Before removing the body mount bolts we suggest soaking them with a good penetrating oil spray. This is a rust free California car, however, cars from the Rust Belt might require cutting the bolt heads off, with plenty more ugliness to ensue.
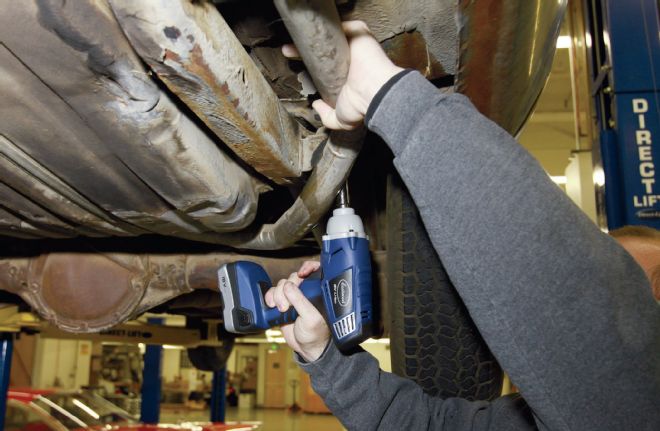
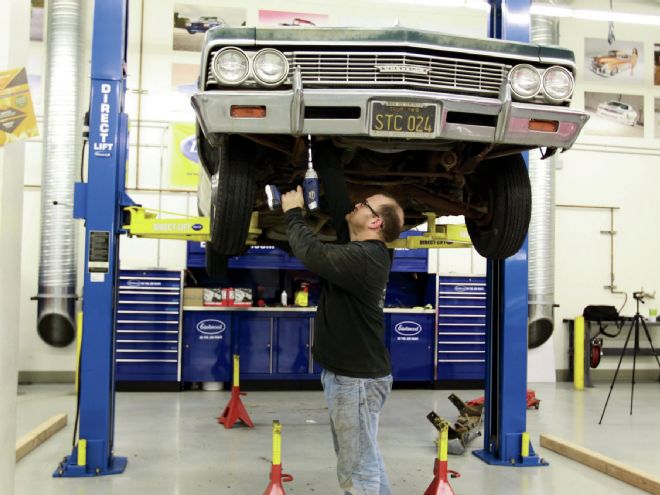
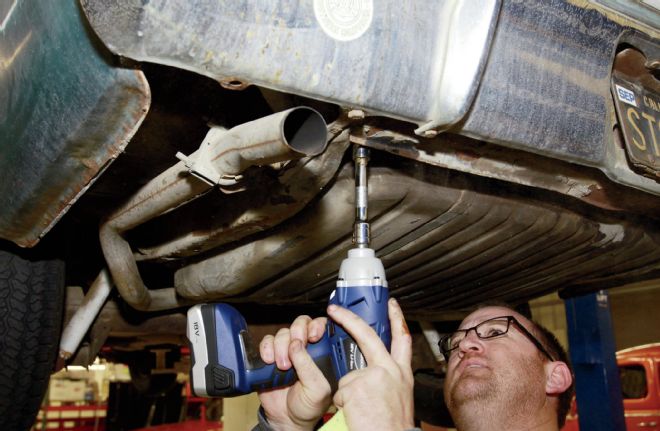
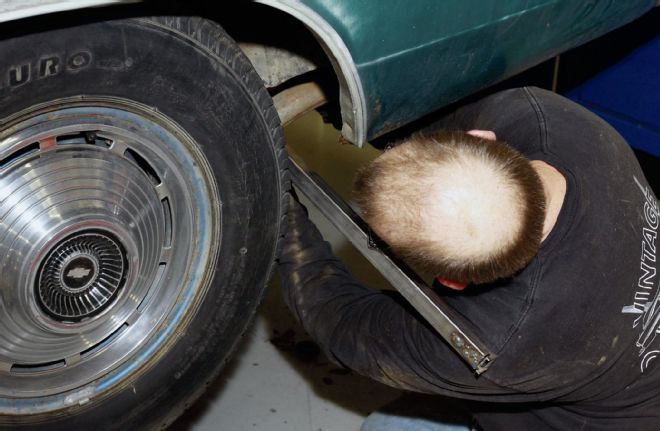
06. Use a good impact wrench to remove the bolts. Here, our good friend Brian Shaw moves the tailpipe to one side to gain access to a bolt.
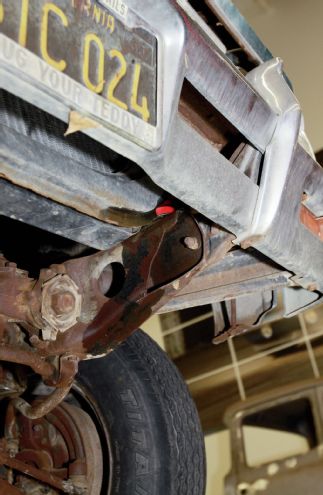
07. Up front, the two radiator core support mounts (replacement mounts included) must be disconnected to raise the body. The bolts are nutted and must be backed up with a wrench to remove.
08. The big round holes in the lower framerails are for access to remove and install the body mount bolts.
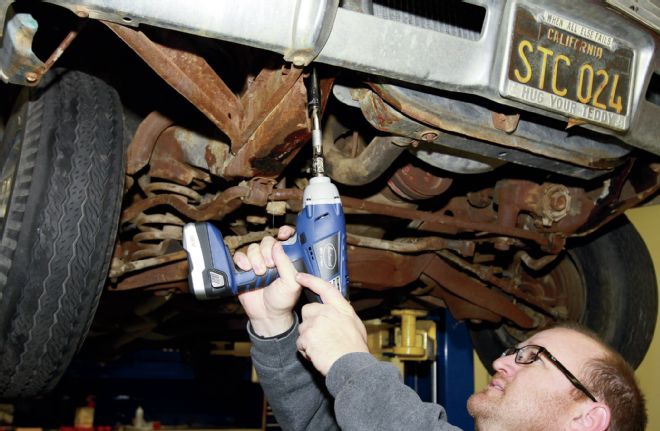
09. Starting from front to rear, the last two body mounts are located adjacent the rear bumper at each rear frame corner. Now all of the body mount bolts have been removed.
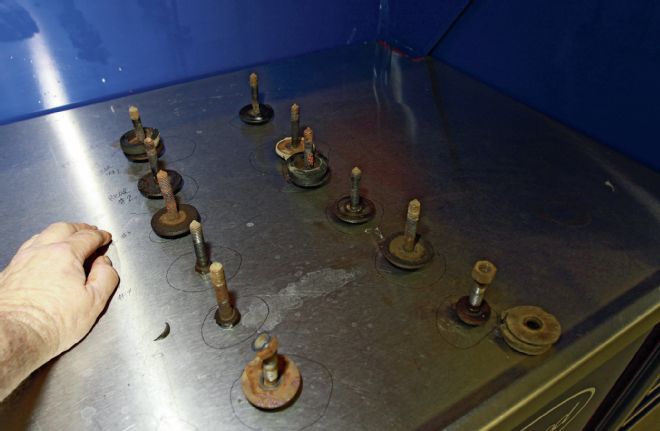
10. Just in case the body mount bolts varied in length we kept them in order as they were removed. FYI, the bolts are all the same length.
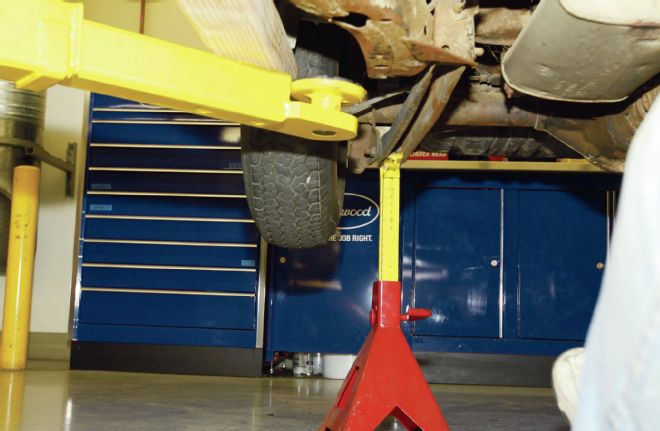
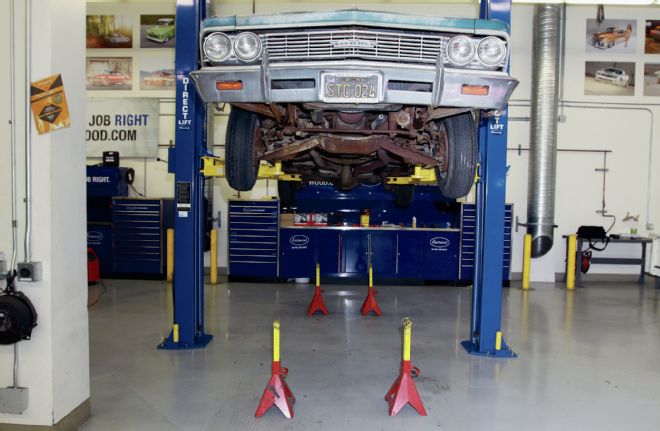
11. To suspend the chassis in the air, the rear jack stands were placed under the rear of the trailing arms (beneath trailing arm-to-differential mounting bolts).
12. At the front, the jack stands were placed under the spring pockets on the control arms. After setting a vehicle down on jack stands, always while standing clear, shake the car to ensure it’s on solid ground.
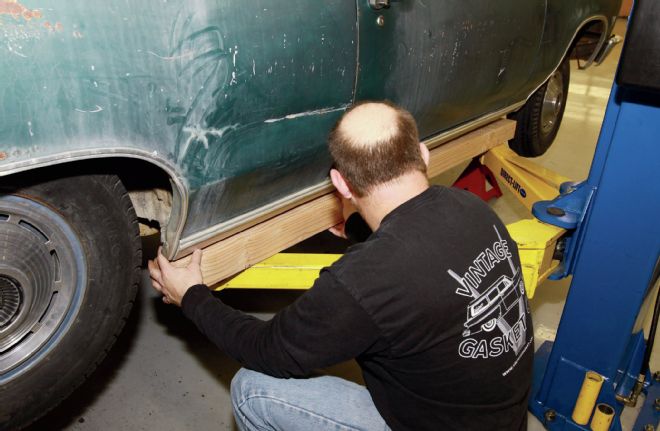
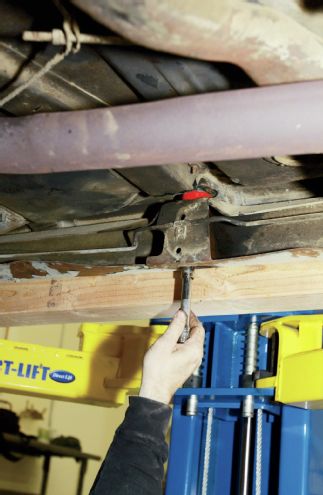
13. With the ’66 chassis resting firmly on jack stands and all of the body mount bolts removed, we placed a 4x4 on each side of the lift under the rocker seams to lift the body up.
14. Only a few inches of lift with the hoist is necessary to gain enough clearance to remove the old body mounts. An Eastwood pry bar worked great to gain the little extra lift needed at this mount.
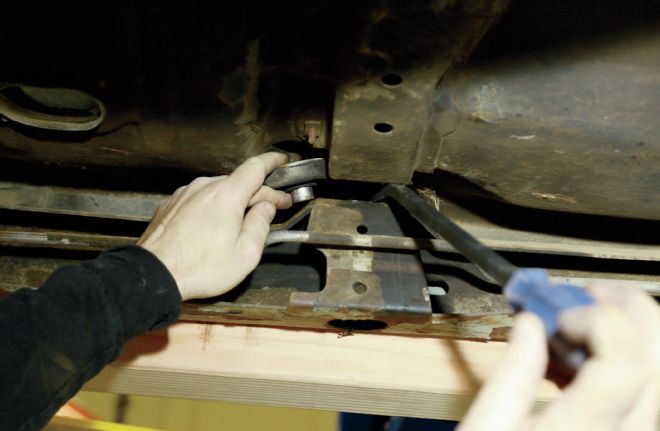
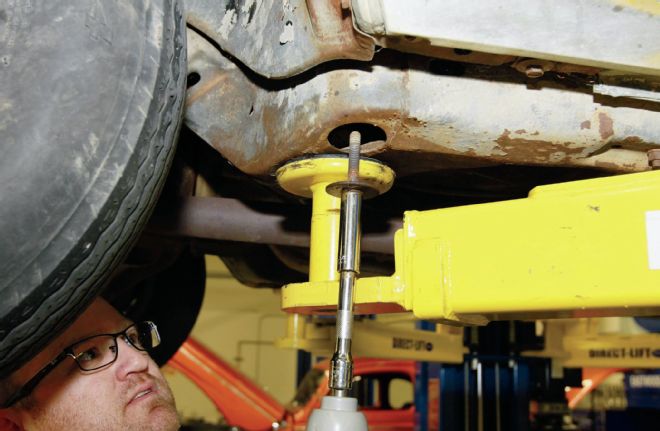
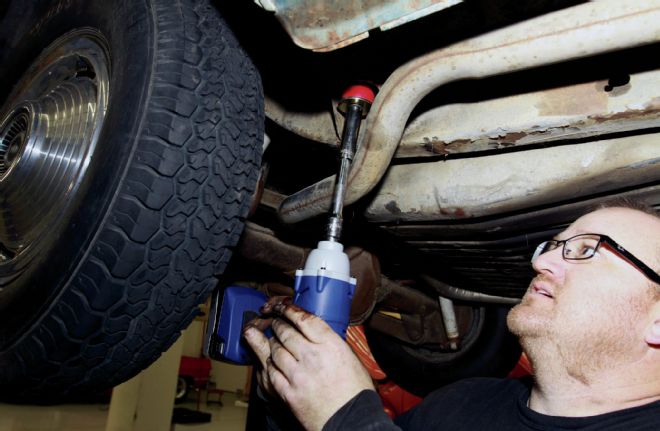
15. Installing the new Energy urethane mounts began by installing the top donut (mount) first.
16. Then inserting (pushing) the gold bushing upward into it.
17. After visually establishing the mounting bolt hole was in proper alignment (a straight shot), the mounting bolt was started by hand.
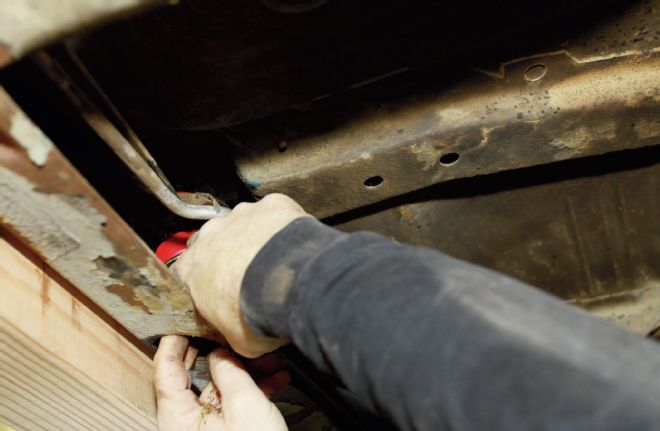
18. Using the impact wrench to start the mounting bolts is a good way to cross (buggar) the threads.
19. Which mounts to install first was determined simply by seeing which ones would be the easiest to get to. Once each mount was completely assembled, the mounting bolt was screwed in by only a few threads.
20. The nuts on the two core support mounting bolts were screwed in by only a few threads as well.
21. A large pry bar was necessary to lift the body up away from the frame to install the body mounts in front of the rear wheels.
22. With all 12 of the Energy body mounts installed, Brian snugged the body mount bolts down in a star-pattern sequence to ensure the body mounts were brought down evenly.
23. The final step was to tighten the Energy urethane mounts down until a slight bulge in the donut was noticed. A final check for tightness was done by hand.