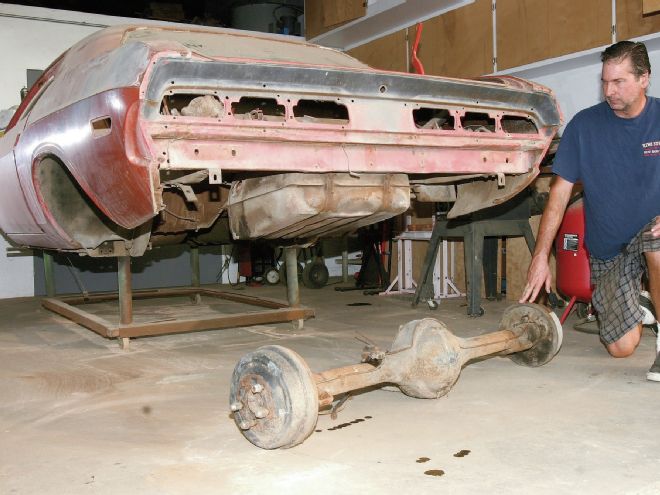
Life in Mopardom used to be a lot simpler. When building a basic street machine, some components generally required little attention. Items like the 8.75-inch rear were built to go the distance, and more often than not were serviceable with little more than a coat of paint. Restoring a Mopar these days means you really can't take anything for granted, after all it has been over four decades since the factory put these machines together. Our Dodge Challenger's 8.75-inch rear was complete, and that meant it was more or less-closed off to the elements. Overall, external appearances showed nothing that would suggest things were amiss, but for peace of mind we decided to dig in for a full teardown and inspection. What we found was less than perfect, and in the end it required a complete teardown, assessment, and what will become a full mechanical rebuild.
A fresh coat of paint alone isn't going to cut it on this one, and there really is no way to know for sure what you may be in for before pulling the wrenches. Here we will detail what's involved in a full teardown, what to look for, and how to proceed with a game plan. Our unit can be brought back to life with basic rebuild parts. If the situation had shown the need for even more extensive repairs, the cost of rebuilding has to be weighed against the cost of purchasing an all new rear. A major cost savings here is being able to do the work yourself, and we will show how you can do it in a well-equipped garage.
Overall, external appearances showed nothing that would suggest things were amiss...
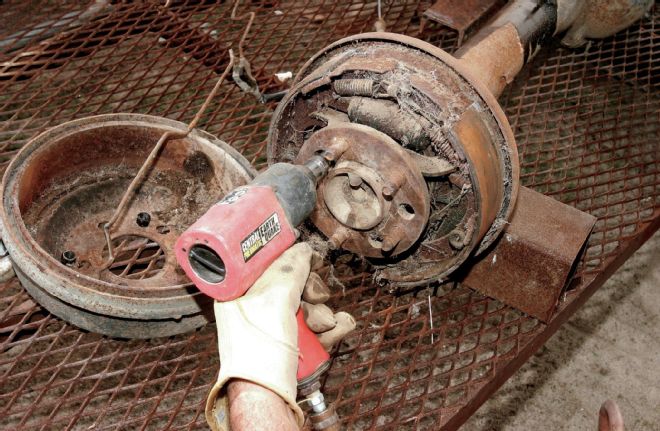
Disassembly of our 8.75-inch rear begins with the axleshafts, which requires removing the brakes. Our drums weren't too stubborn, but sometimes backing off the brake shoe adjuster is required. The axleshaft flange has an access hole to get to the five retainer bolts with a socket.
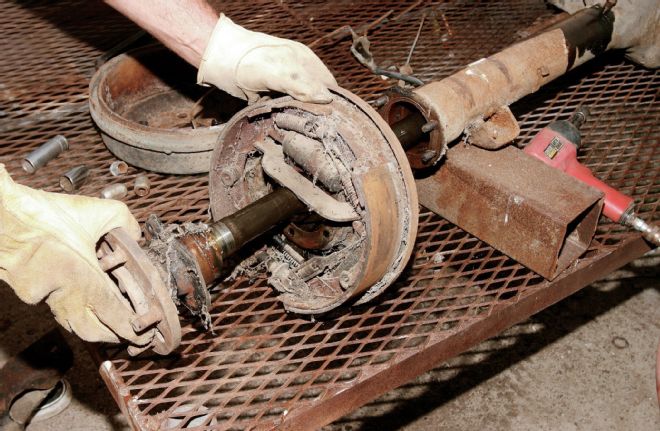
The axleshaft and the backing plate can be pulled with the brake components still assembled. There is an axleshaft seal a couple of inches into the axletube, which should be removed for replacement.
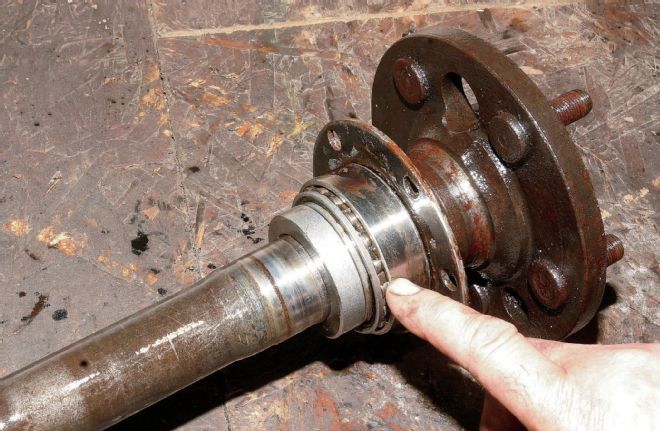
Our axleshafts were still fitted with what looked like the factory tapered roller bearings. These should be replaced as part of a major rebuild. Inspect the seal area for galling or wear—ours looked good. The stock-style tapered roller bearings are arguably better than the popular ball bearing–style "green" replacement bearings. Tapered roller bearings need adjustment for endplay, while the "green" bearings do not. Aftermarket disc brake conversions generally required the "green" bearings to eliminate the axleshaft endplay. We will likely retain drum brakes, however installing "green" bearings now will have us set up if we ever swap to rear discs.
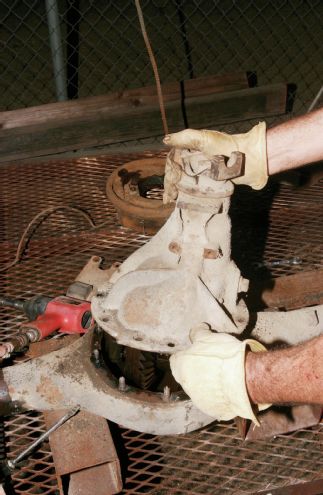
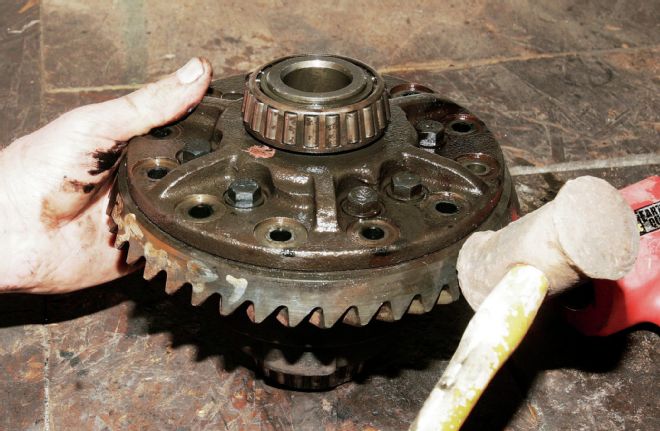
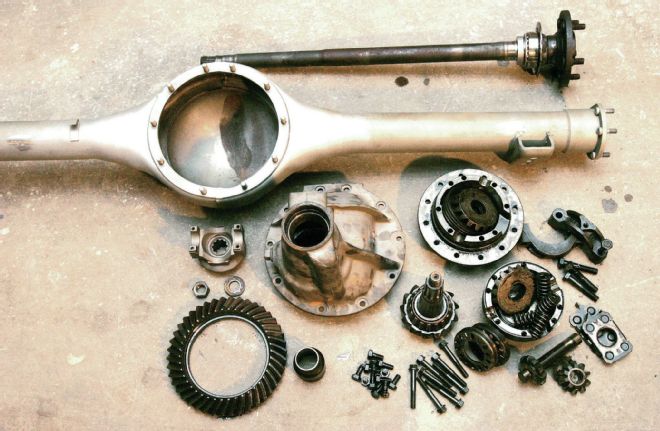
The center gear chunk is the business end of an 8.75-inch rear, and it drops out with 10 bolts once the axleshafts are clear. Placing the rear in an upright position will prevent spilling a mess of hypoid lube once the chunk is broken loose.
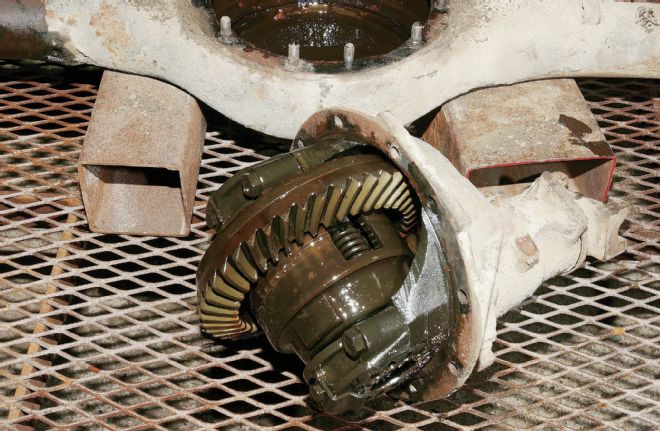
Inside our gear chunk looked good, preserved by a healthy coating of gear lube. The bonus was finding a factory Auburn Sure Grip limited-slip differential. While we seemed to be in luck with the limited slip, these cone-clutch Sure Grip units do eventually wear out.
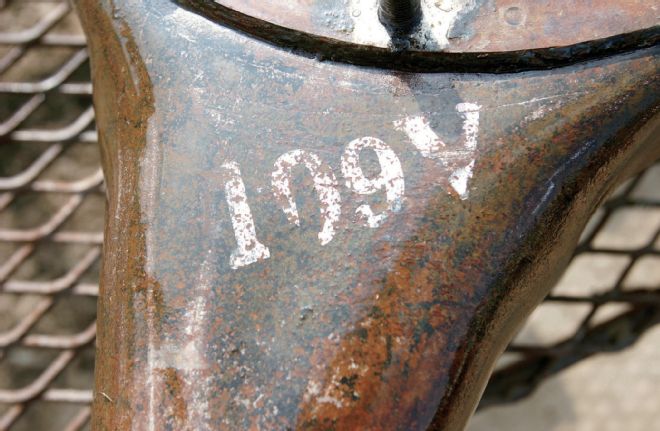
We thoroughly cleaned the rear with a strong detergent solution and noted several factory markings and paint dabs. These were all documented with photographs, although we are not committed to the idea of recreating them at this time.
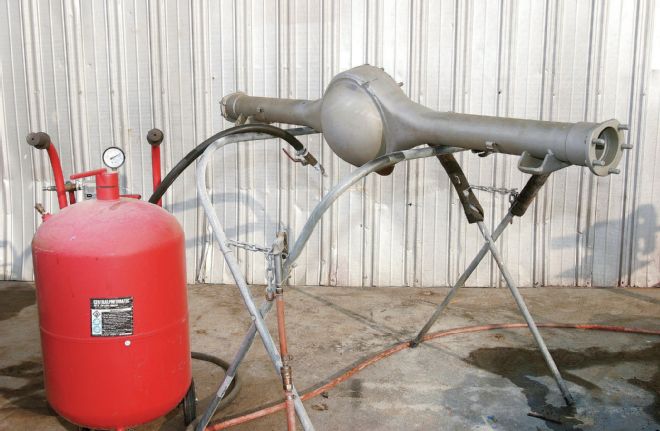
Our rear housing was sandblasted to white metal using a Harbor Freight pressure pot sand blaster and #30 mesh silica sand. The insides were then cleaned with solvent followed by serious scrubbing with detergent and brushes, and then blown dry. This part is now ready for paint.
What we found was less than perfect, and in the end it required a complete teardown, assessment, and what will become a full mechanical rebuild.
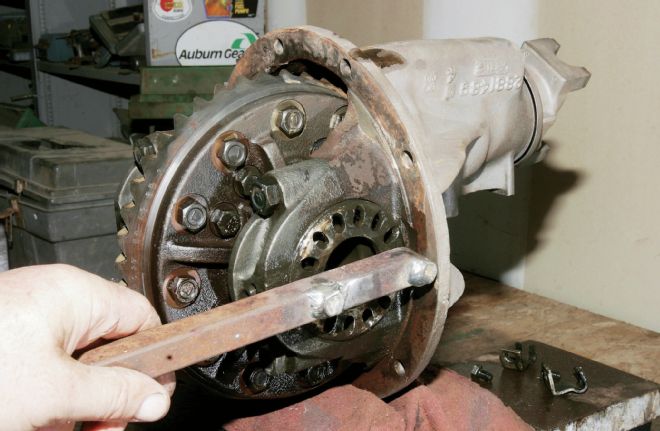
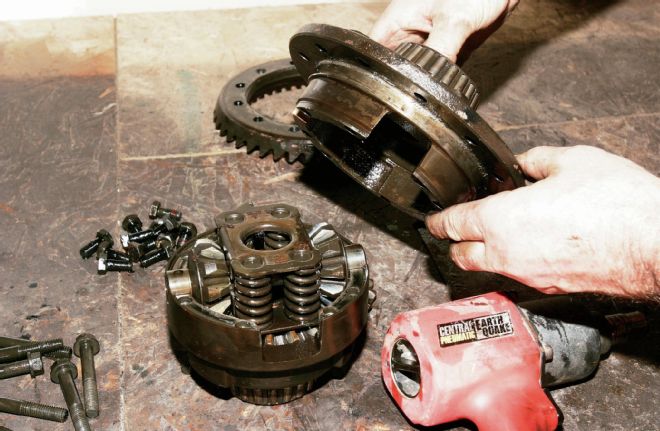
The third member was moved to the vice bench for full teardown and inspection. Step one is removing the carrier. We backed off one main cap fastener to reduce the tension on the spanner adjusters, and then backed the adjusters off to relieve the carrier bearing preload using a homemade spanner tool.
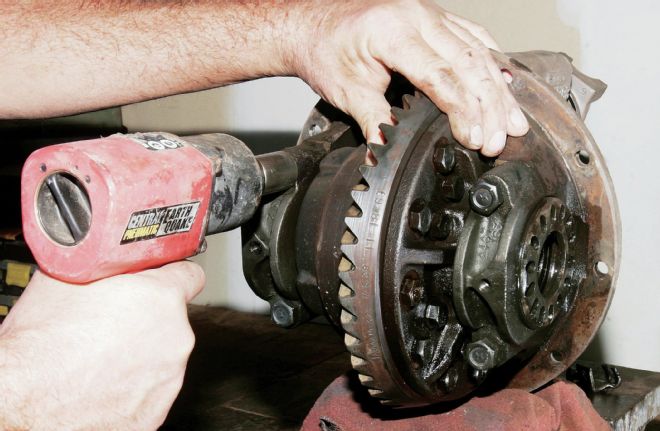
Make sure to mark the main caps so that they can be reinstalled in the same position, and then remove the cap fasteners to pull the carrier and ring gear. Our Harbor Freight Earthquake air impact wrench can handle tough bolts with ease.
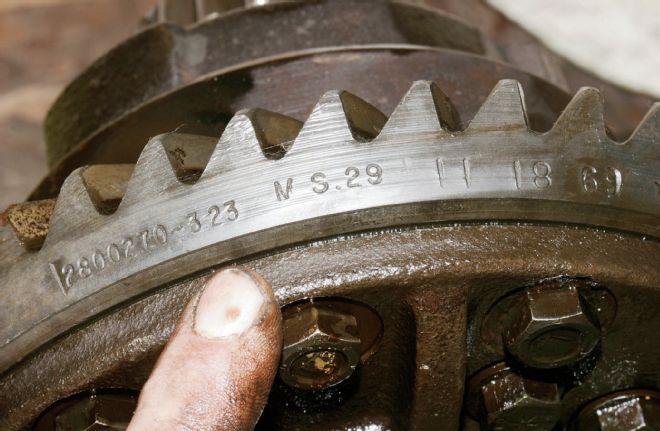
OEM gears and most aftermarket sets are marked at the ring gear with the gear ratio. Our 8.75 featured 3.23:1 gears, which is the most common ratio found in muscle car–era Mopars.
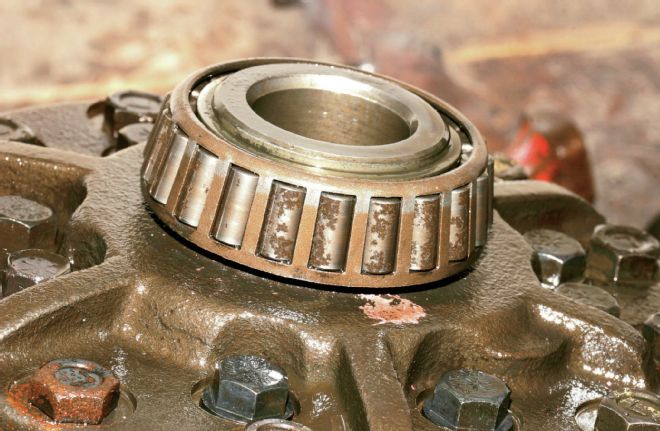
While assembled, the gear chunk looked great, but once inside the carrier bearings told a different tale. These bearings are clearly dead, as evidenced by readily apparent rust and pitting. A more common sign of wear is fine radial grooving along the rollers, also evident on our bearings.
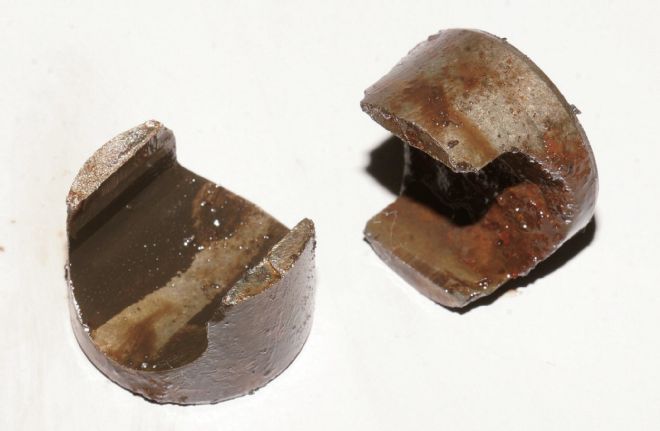
Our differential coughed up a broken thrust block (spacer) when removed. The thrust block normally surrounds the differential pinion shaft, and requires disassembling the Sure Grip unit to replace. Its purpose is to work with the axleshaft adjuster to set the endplay with tapered roller bearings, but it is not necessary with replacement "green" style bearings.
Since we had the entire rear disassembled, now was the time to consider a gear change. The factory 3.23 gears were considered compromise "highway" gears back in the day, but the final drive is very low compared to modern cars at almost 3,000 rpm for 70 mph. Since a non-stock overdrive is not in the cards for our Challenger, we decided to make a switch to 2.76 freeway flier gears, which would drop the rpm to 2,500. As good Mopar guys, we have several sets of "drag gear" chunks on the shelf should the need arise.
We opened our Sure Grip for inspection by removing the eight housing bolts. The Auburn design uses cone clutches behind the side gears, which engage the differential housing. This design is very effective and durable, but can eventually wear out.
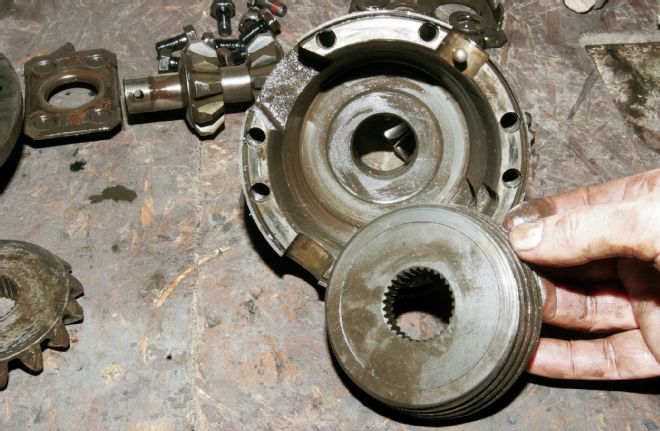
As the cone clutch wears, it goes deeper in the housing, and eventually bottoms, no longer providing any grip. Our clutches were just starting to bottom, as we could see by the clear contact pattern on the cone face. This Sure Grip differential is essentially done, though it could be revived by machining the cones for added clearance and adding spacer shims behind the side gear. We will likely replace the unit.
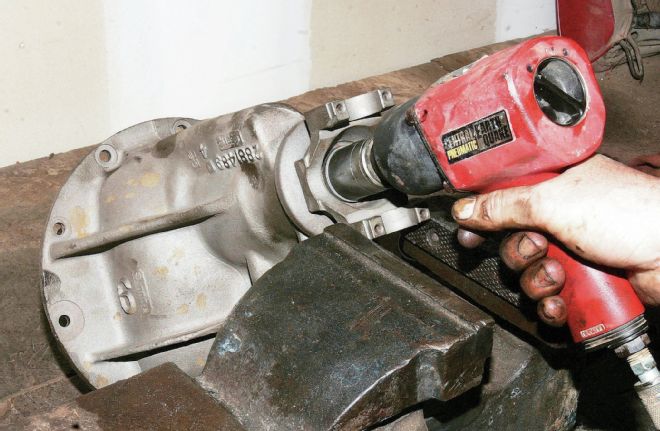
Back at the gear chunk, the pinion nut and yoke are removed to release the pinion. Since this is a #489 case housing, the pinion uses a crush sleeve to set the pinion bearing preload. Removing the yoke means the crush sleeve will need to be replaced upon reassembly.
A fresh coat of paint alone isn't going to cut it on this one...
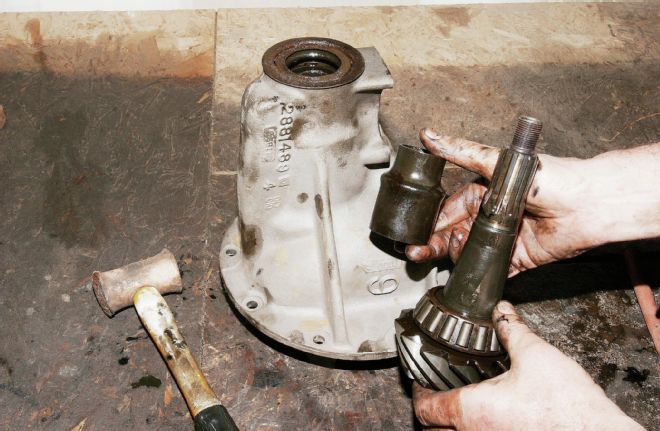
Usually a few blows with a soft-faced mallet at the end of the pinion is all that is required to free it from the front pinion bearing and allow the pinion to drop out of the case. The crush sleeve arrangement is not an optimal setup for performance use, but it can be replaced with a solid spacer and shims when a major service is being performed.
Stay tuned as we show how to assemble this mess into a fresh unit with the help of rebuild parts from Randy's Worldwide Automotive, and do-it-yourself wrench turning.