One of the key items that defines the character of a vehicle is its suspension. Here the build style will dictate the direction to take, be it a full aftermarket redo in the Pro Touring motif, a detailed stock OEM original restoration, or something in between. For our project 1971 Dodge Challenger R/T, we were looking toward the latter, choosing to retain a "stock-resembling" appearance while adding subtle upgrades to improve the performance potential. This meant retaining the OEM torsion bar suspension the way Mopar built it, but making selected modifications that complement the increased grip possible with today's vastly improved tire technology. That increased grip will increase the potential suspension loading in cornering, so making the most of a classic Mopar suspension calls for increased roll rates and stiffness.
Another aspect of our suspension build centers upon appearance. Although looking at restored show Mopars would have you believe the factory suspension was a bright and colorful assembly of beautifully finished and detailed components, the real OEM look was multiple hues of rust accented by roughly applied gloss black paint on selected items. Today's standard in restoration is somewhat of an idealized interpretation of that reality. With several non-original suspension components going into our build plan, our refinishing strategy follows the current over-restored and idealized theme, but takes some liberties to achieve a look that is eye popping rather than factory sloppy.
...our refinishing strategy follows the current over-restored and idealized theme, but takes some liberties to achieve a look that is eye popping...
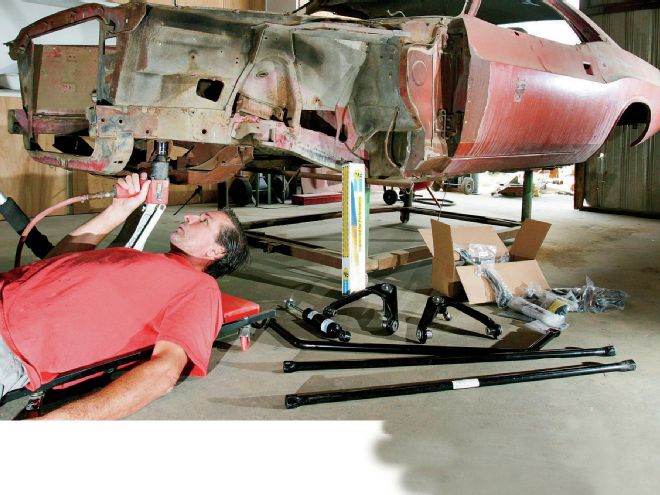
At this stage of our build we are far from bolting restored components onto our Challenger as it is being prepared for paint, but the majority of the suspension components can be restored and built off the car. When it all comes together, our engine, trans, and suspension will be mounted to the K-member and the whole assembly will be installed from underneath. Our car was partially disassembled decades ago, and the entire suspension and steering system was already stripped from the vehicle, with only the K-member remaining in place. Fortunately, all of the components removed were still with the vehicle, so we were spared scrounging for missing parts.
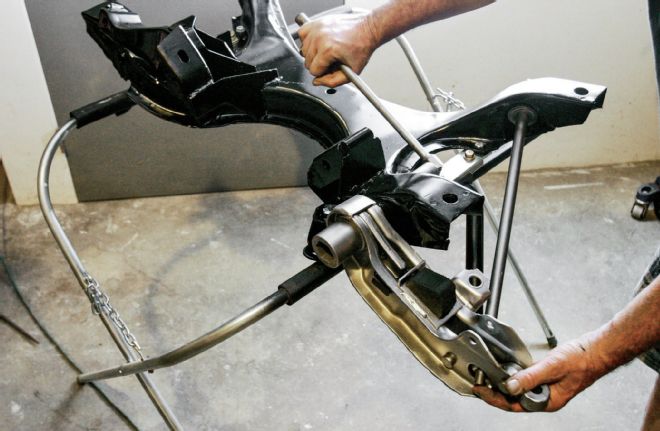
Though it was already done for us, removing the suspension is very simple. Nevertheless, here is our basic procedure to pull the complete suspension subassemblies for further disassembly on the bench. Start by unbolting the shock at the upper mount, disconnecting the sway bar endlinks if so equipped, and breaking the tie rod loose from the steering arm. Unwind the torsion bar adjuster screw at the lower control arm. Remove the torsion bar retention clip at the rear torsion bar socket. Remove the nuts at the front of the strut and at the lower control arm pivot shaft. Unbolt the upper control arm at the cam bolts. Now, using a large prybar between the K-member and lower control arm, prying in close to the inner pivot shaft, the whole lower control arm can be forced back taking the torsion bar back and out of its rear anchor. You'll now have both control arms and everything in between out and on the ground.
The Plan
All of our required suspension parts were readily available from the extensive selection of stock and improved components from PST. Increasing the front roll rate would be via a two-step approach, starting with a pair of PST 0.960-inch torsion bars to replace the stock 0.880-inch bars original to our factory 383 R/T. This increases the spring rate from the factory 101 lb/in to 135, which may not seem like much, but is actually more than 30 percent stiffer. PST has even bigger and higher-rate bars, but the 0.960-inch bars are a good balance of rate and ride quality for a street machine. Our second step-up in rate was upping the factory 7/8-inch front sway bar to a PST 1 1/8-inch unit. These two items will add up to a much stiffer front roll rate. For street use you can definitely go overboard with torsion bar rate, and bars as stiff as granite will usually result in everything in the car flexing before the torsion bars budge.
Other variances from stock were aimed at reducing compliance. To achieve this we went with PST Polygraphite bushings in the upper control arms and at the sway bar mounts and links, and by adding PST weld-in lower control arm bracing. We found that PST actually offers complete stock-style replacement upper control arms with bushings and ball joints installed, and we decided to go new here. Next, we would improve control with a set of premium Bilstein shocks, also from PST. Of course, a full rebuild of the wear parts of the suspension would get everything up to like-new tightness, with a complete PST suspension rebuild kit including ball joints, steering linkage, and factory-style lower control arm bushings. A final component change would be to the taller F-M-J-R and late B-Body spindles. Although we had the OEM spindles, these later tall spindles reduce the front roll couple and provide a wider range of brake choices, whether going OEM or aftermarket.
For street use you can definitely go overboard with torsion bar rate, and bars as stiff as granite will usually result in everything in the car flexing...
Wrenching & Refinishing
Suspensions take a beating, with rust, grime, grit, grease, and corrosion. Cleaning and refinishing it is the toughest part of the rebuild, but the results are worth it. Everything in the suspension hangs on the K-member, so that's where we started. Factory K's can be pretty beat up and rusty, and are usually caked inside and out with grease and grime. Cleaning the outside is easy, but getting to the blind areas inside is another matter. The best first step here is to have the K commercially tanked. The caustic tank had our K stripped and grease-free inside and out. Fortunately, our K was solid and free of major bashes. We prepped for paint by blasting using a Harbor Freight pressure pot blaster and #30 mesh sand, then it was cleaned, phosphated, and finished in PPG Delfleet gloss black single-stage urethane. (Factory K-members were finished in gloss black.)
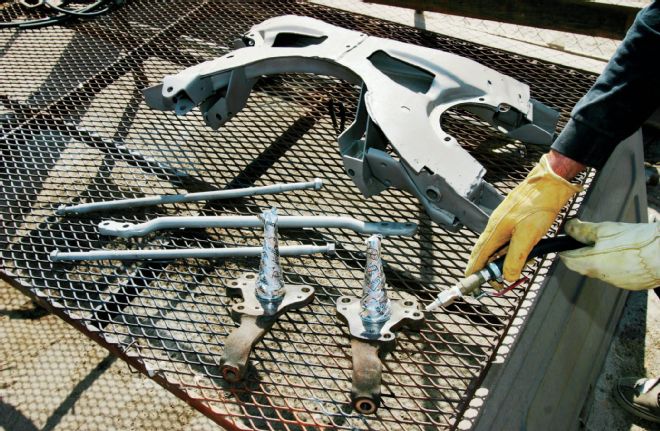
Other parts that received a similar blasting and painting treatment included the lower control arms, spindles, strut rods, steering centerlink, and miscellaneous bolts, nuts, and small parts. We finished these items with various custom mixed bare metal shades of the same PPG urethane, as well as ultra-flat black as a much more durable simulated phosphate (after actually phosphating these pieces).
Besides the usual wear items, the replacement parts from PST included the aforementioned upper control arms, the torsion bar adjusting bolts and swivels, upper control arm hardware, the sway bar and hardware, and torsion bars. All of these items were new and nicely finished or plated, so they were left as delivered. For added durability on the plated or phosphated new parts, we sprayed a light coat of Eastwood Diamond Clear as a protective coat. Although phosphate and zinc plate will last indefinitely on a garaged and trailered show car, in real street use it is a matter of time until rust takes hold, ruining the suspension detail. The Eastwood coating is a welcome added layer of protection.
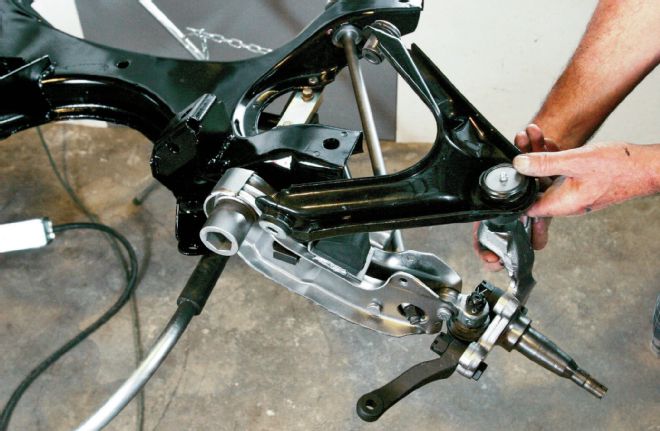
With everything refinished and ready to go, the suspension assembly is a straightforward process. We set the K-frame on a stand and loaded the components, starting with the sway bar, and then adding the lower control arms and struts, the lower ball joints and spindles, the upper control arm, and finally the steering linkage. Final assembly will wait until the suspension and drivetrain are loaded into the car, at which point we will install the steering box, shocks, and torsion bars. When it all comes together the results are certainly satisfying. The neatly detailed suspension definitely has the looks to impress.
...a full rebuild of the wear parts of the suspension would get everything up to like-new tightness, with a complete PST suspension rebuild kit...
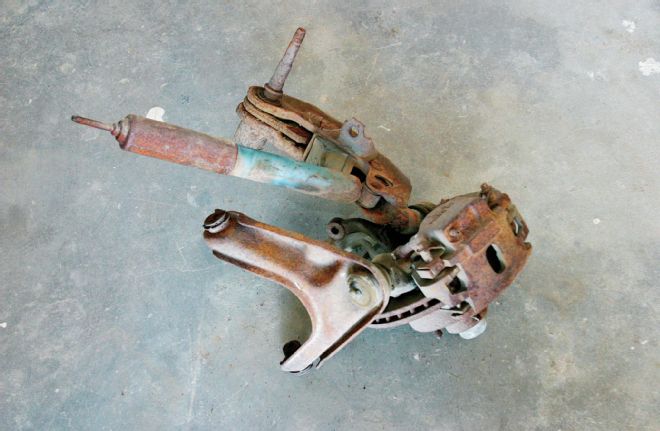
Our Challenger was already stripped of its suspension decades ago. Fortunately the parts were dropped out as assemblies and still with the car. The job here was to break it all down and start cleaning and rebuilding.
After cleaning and degreasing, a good blasting removed the rust and prepared the parts for paint. We will be using various painted finishes for improved durability in street use compared to true bare metal.
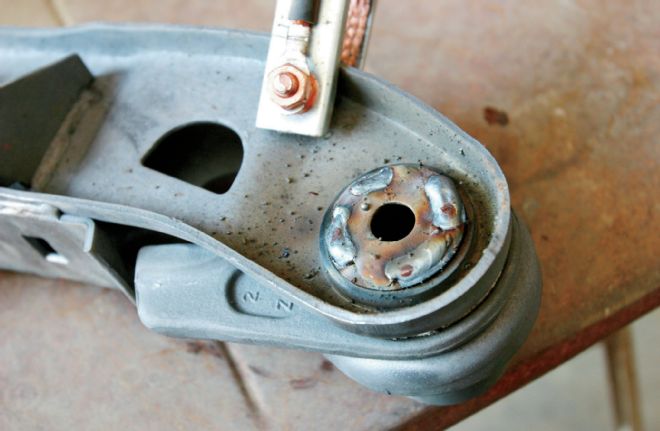
The lower control arms represent the toughest part of the job, and replacing the lower control arm bushings is usually the hardest part. Begin by pressing the pivot pin out from the torsion bar socket side, then pry the rubber bushing from the outer shell. The factory calls for hammers and chisels to remove the outer shell, but a better technique is to weld a common 1/2-inch washer to the shell flange ...
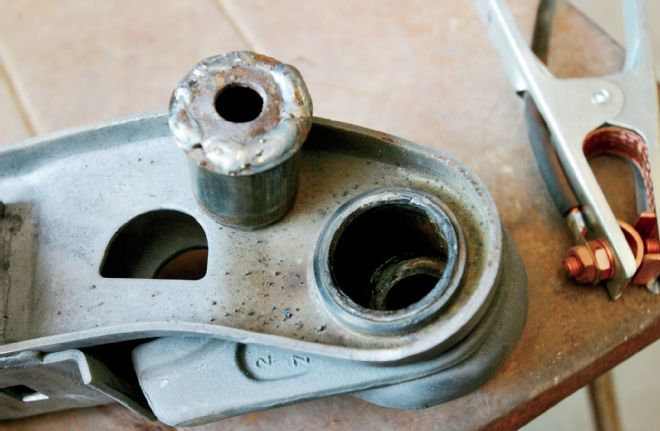
The washer provides a surface to bear upon, allowing the shell to be easily extracted on a hydraulic press without beating up the arm.
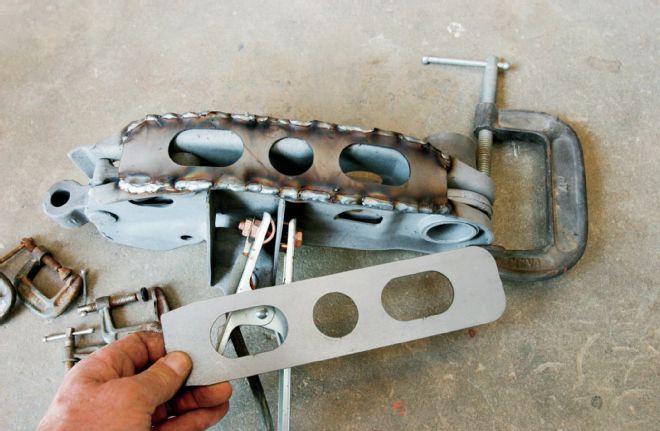
We welded PST's pre-formed stiffening plates to the bottoms of our lower control arm. Not only do the plates box the control arms for more strength, but by clamping the end adjacent to the torsion bar socket, excess play at the socket can be permanently eliminated. Weld in short sections at a time to avoid overheating and distortion.
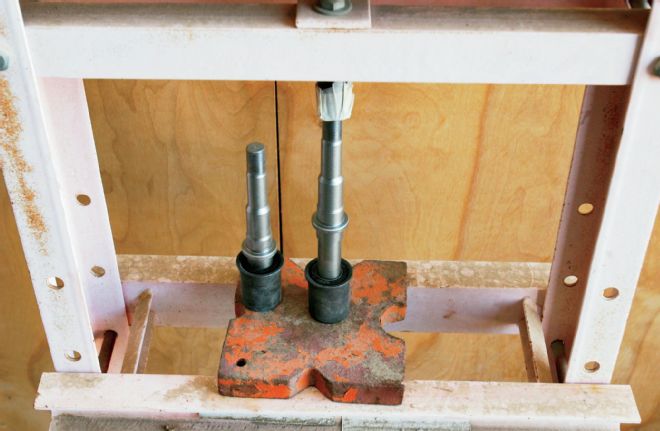
The lower control arm pivot shafts should be pressed into their bushings first, and then the assemblies installed into the lower control arms. Loading the bushing into the control arm first can damage the bushing when installing the pivot shafts.
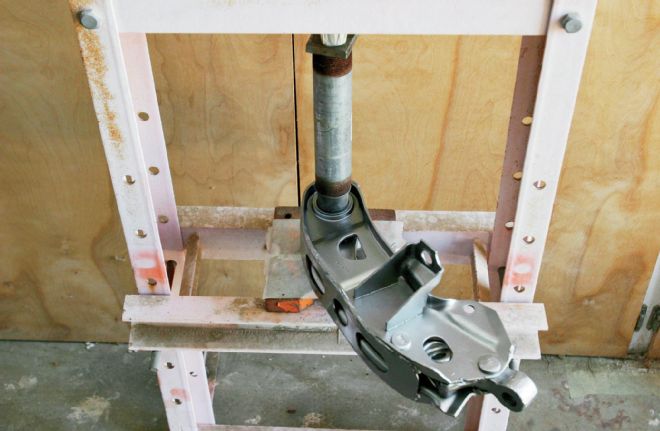
A tube or pipe is used to clear the pivot shaft as the assembly is pressed into the lower control arm. Make sure the socket in the control arm is clean and free of burrs, and make sure the tool is acting on the full face of the outer flange only—not the rubber or shaft.
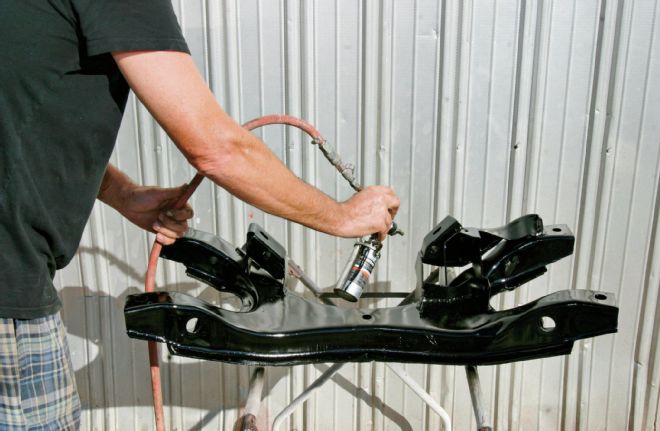
After cleaning, blasting, and phosphating, the K-member was given several coats of PPG gloss black single-stage urethane. The trick is to get paint inside and into the shrouded or recessed areas for full coverage. The urethane is far more durable than the factory gloss black air-dry enamel, which quickly deteriorates and fades.
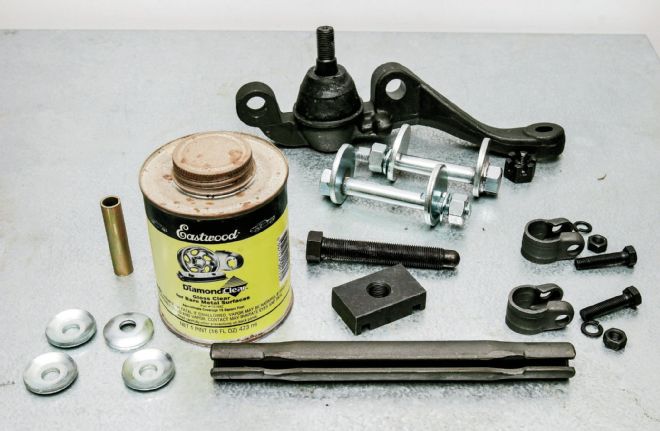
The bare metal or plated new parts were given a light coat of Eastwood Diamond clear to protect the fresh appearance. Left to the elements in a street application, these parts would quickly deteriorate.
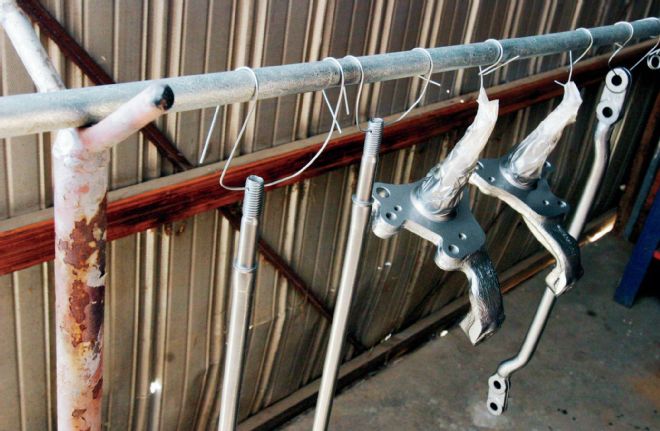
Using a PPG Delfleet tinting base in coarse and fine aluminum, black, and blue, virtually any shade of bare metal effect can be custom mixed. We used such finishes to simulate new bare metal, but in a durable painted finish.
Assembly starts with the sway bar. The large 1 1/8-inch bar from PST comes with poly bushings. The bar comes with mounts adjustable fore and aft via a slotted bracket, and up and down via shims. Shim to center the bar in the K-member opening, and adjust fore and aft to align the endlinks with the control arm brackets. The bar comes with control arm tabs to fit cars not originally equipped with a front sway bar.
The lower control arm and strut rod go in together. Load the rear half of the strut bushing to the end of the strut, and guide the pivot shaft pin and strut rod into place. The pivot shaft nut is not torqued until the full weight of the vehicle is on the ground at ride height. This keeps the bushing in the neutral and unstressed position when at static height. The same for the front strut nut. Tighten these nuts until just seated.
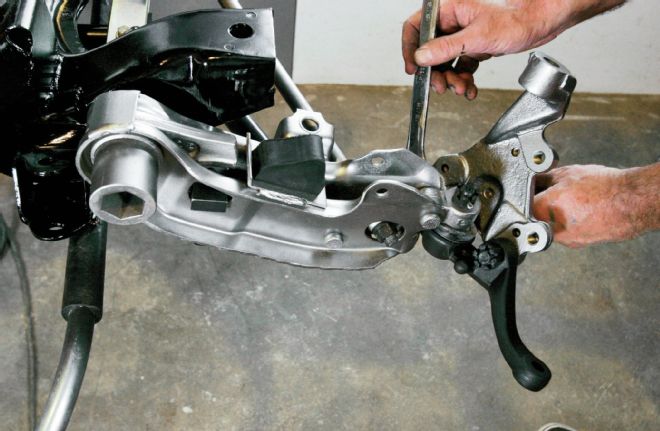
The lower ball joints are specific to left and right, and the steering arms go toward the rear. The lower-ball-joint-to-spindle fasteners are special, with reduced heads to allow full steering articulation. Don't use hardware store bolts here.
We went with new PST upper control arms, which come with ball joints and bushings already installed, and with a nice gloss-black powdercoat finish. These new uppers saved plenty of rebuilding and refinishing time, besides adding the security of fresh metal.
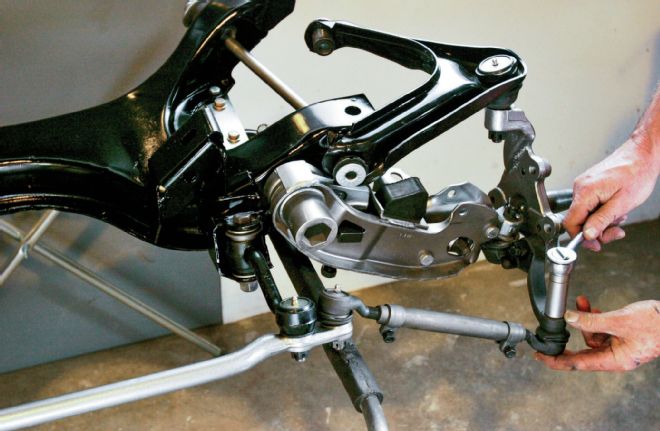
The final step for our suspension bench build was the steering linkage. Start by installing the idler (and pitman arm if the steering box is in place), and then mount the centerlink. The link goes in with the offset to the rear of the car. The new tie-rod ends and sleeves from PST finish it off.
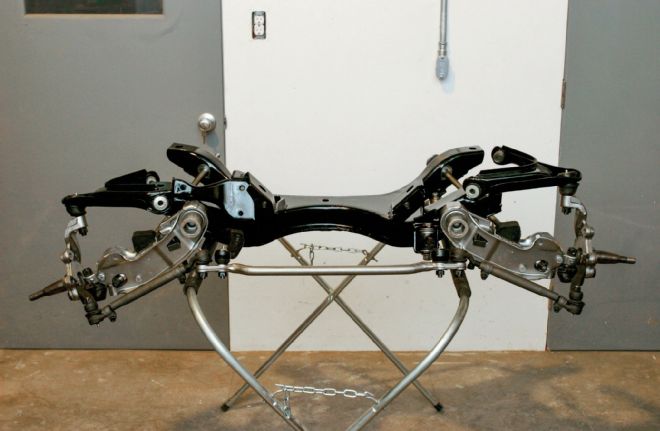
Once nicely restored, the stock Mopar suspension takes on an almost exotic, high-tech look. For Mopar faithful like us, the torsion bar suspension is one of the unique and defining characteristics of these classic muscle cars!
E-Body Front Suspension Torque Specifications Upper ball joint into control arm 125 ft-lb, minimum Upper ball joint to spindle 100 ft-lb Lower ball joint to LCA 85 ft-lb lca pivot shaft to K-member 145 ft-lb Idler arm to K-member 65 ft-lb Lower ball joint to spindle 120 ft-lb Strut front nut 52 ft-lb Strut rear nut 105 ft-lb Tie rod nuts 40 ft-lb Torque Notes: To align cotter pinholes, castle nuts are torqued and then additionally tightened to align to the slot as required. LCA pivot shaft, upper control arm adjusters, and front strut nuts are left lightly seated and torqued once the vehicle is on the ground and at ride height.