What does a winning NASCAR Sprint Cup Series driver do when he is no longer racing in that division? If you’re David Reutimann, you go back to what you and your family have done since you were a kid and build race cars. A few years back Reutimann started Beak Built Chassis to build and sell a better quality dirt Modified race car. This is not something new to him.
Many might think, “what is a Cup driver doing building race cars, let alone dirt Modifieds,” a very specialized car with plenty of builders out there already? Good question, but you’ve got to realize that David and his father, Buzzie, have never drifted very far from this kind of racing. In fact, Buzzie still drives and won the feature Modified race at Volusia Speedway Park in Barberville, Florida, on July 19 of this year. He continues to be a top finishing driver wherever he goes. David grew up around dirt racing and watched and helped his dad build and set up those cars. So, it’s not a stretch of the imagination for him to want to return to that genre of circle track racing.
When we got wind of what David was up to, we wanted to be a part of this particular build, it had been quite a few years since we tackled a dirt car project build so the timing was perfect. Needless to say we were very excited when he agreed to partner with us and make it a Circle Track project car. And I personally got even more excited because there are some very innovative things that David is doing with his car and most of our readers will not only be interested in those new things but they will learn something as well.
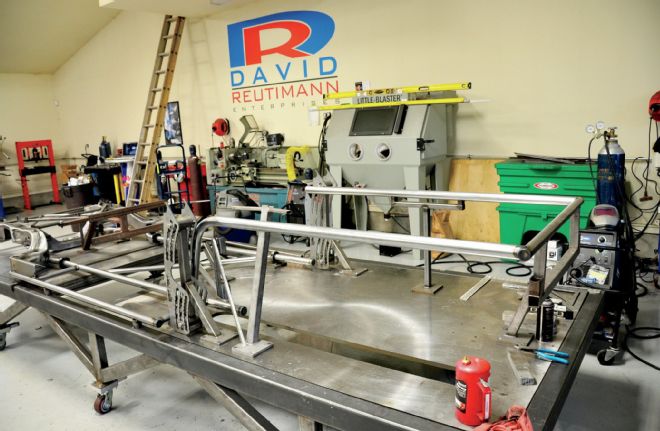
This story will be short on body text and long on photos. Pictures tell a thousand words, so we’ll let the art do the talking. I visited with David at his shop several times, both before construction started and at what is the end of this phase. I completely understand his philosophy of chassis building and where he wants to go with this build.
We also discussed experimentation with different things on the car that might, or might not end up on his production cars. The point is we are there to test and make better, a common goal for every racer out there. The nice thing about this project is that we will be testing the car and trying out the different configurations and reporting the results back to you.
The chassis that comes out of Beak are constructed from scratch. The “stock” front clip is one you can buy that comes in several pieces that have to be welded together. It ends up looking just like the original stock front clip off a production car.
In the process of putting those pieces together, David and his lead fabricator, Kyle Strickler, finesse the shape and construction so that it is both stronger and more useful for what they see as important to making up a good race car.
Every tube in the rollcage, every mounting point, and all of the control arms are purpose and hand built by Beak. And David has thought out what he needs for making the car adjustable for just about any racer’s desires as far as rear suspension adjustments, wheelbase, front-end geometry, and load re-distribution.
In this initial phase of construction, the crew starts with the front clip parts and works with making it a true Beak piece. How they construct the front spring well, the upper control arm mounting surface will be detailed as well as the way they ensure quality control of pickup point placement.
Then, the other framerails are added as well as the connecting bars, rollbars, rear hoop, front hoop, rear suspension mount brackets, and so on. What is controlled in this process is the exact placement, in relation to each other, of the lower control arm mounts, upper control arm mounts, and rearend mounting plates where the links will attach.
If all of those points are strictly controlled as to location, then each and every car will come off the assembly line the same. Those are the critical points to have consistently positioned.
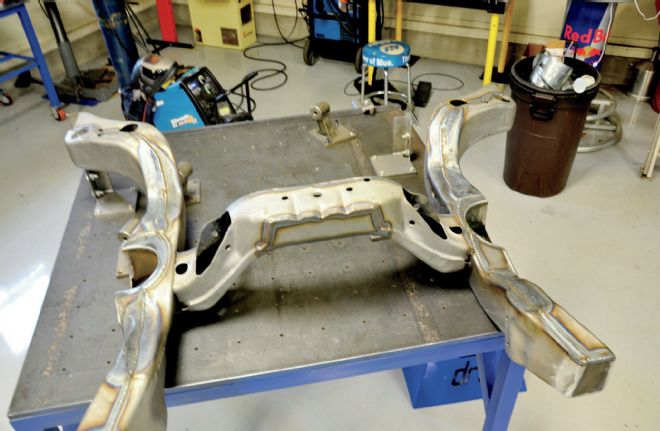 The “stock” front clip was purchased in sections and had to be welded together. If you built a car, this is what you would have to do if you did not have an original front clip. David puts a lot of extra effort and attention to his frontend.
 The front clip is mounted on the jig table and the lower control arm mounting points are bolted into jig points that remain the same for each and every car.
 Here we can see in a close-up of the front clip halves how you need to put these together and weld the two together. The actual placement of the two parts can be creatively positioned to facilitate other mounting needs, if you get our drift.
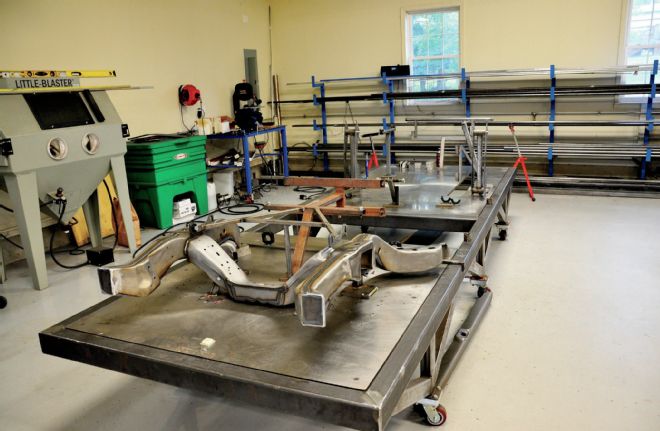
 This is a look at one of the braces that hold the front framerails in place while everything else is welded on to make sure every car is consistent.
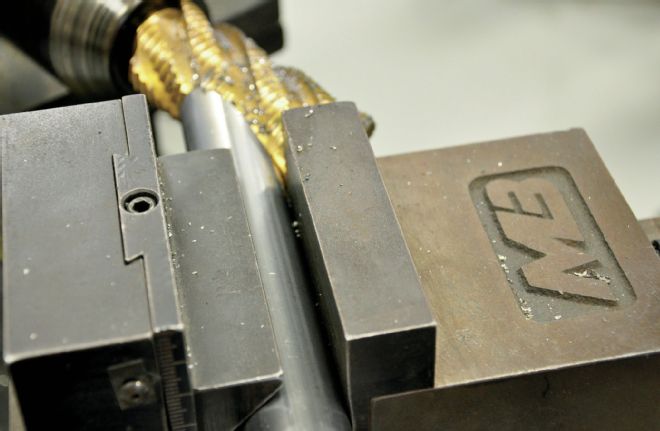
 For the lower spring adjuster bolt, David uses a large bolt and machines the outer diameter into a round shape that will be welded into a hole in the top of the spring perch. This probably saves money over ordering custom-made bungs for this purpose.
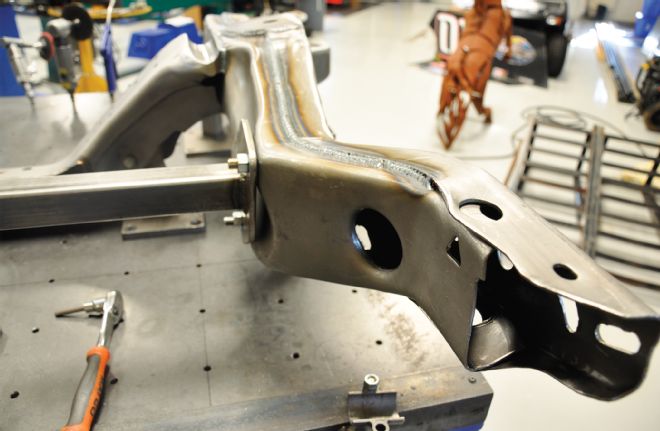
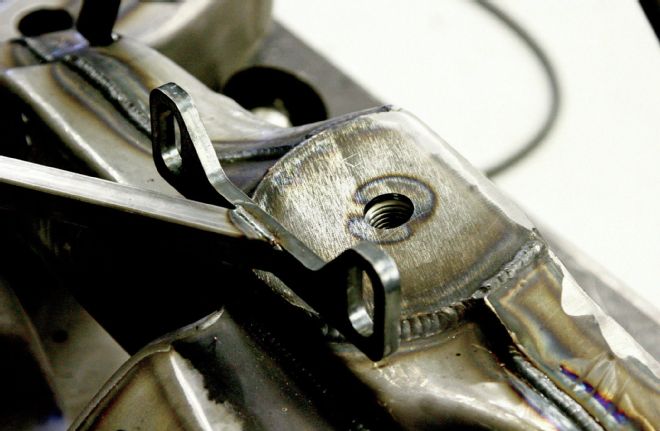
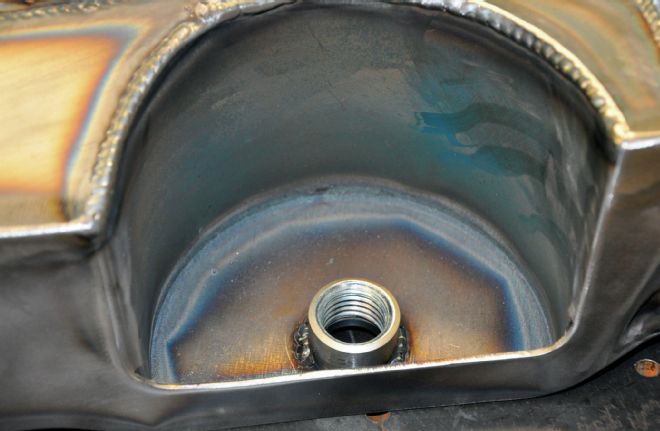 This is the finished mount for the adjuster bolt that is atop the stock size spring. The plate that the bung is welded to is a flat plate that will be an ideal mounting platform for the upper control arm mounting plate. That plate has slugs so the team can change the height of the inner mounts to enact Moment Center changes as needed.
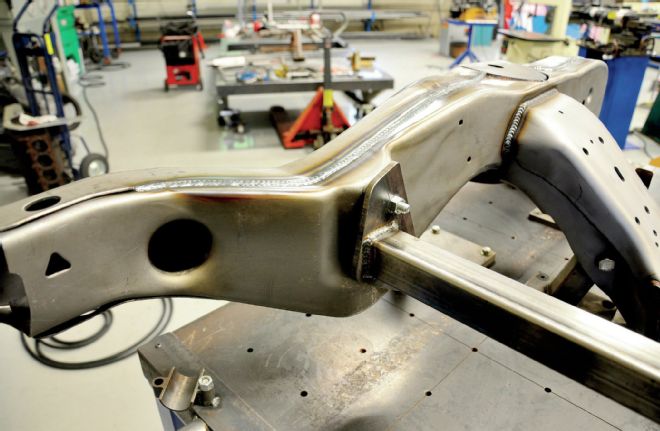
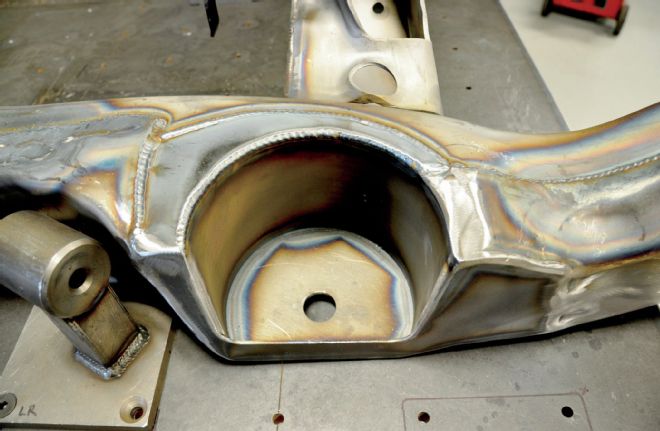 Note how much detail goes into the spring pocket and how David encloses the frame around the spring. Some chassis don’t have this kind of support and end up being weak in this area.
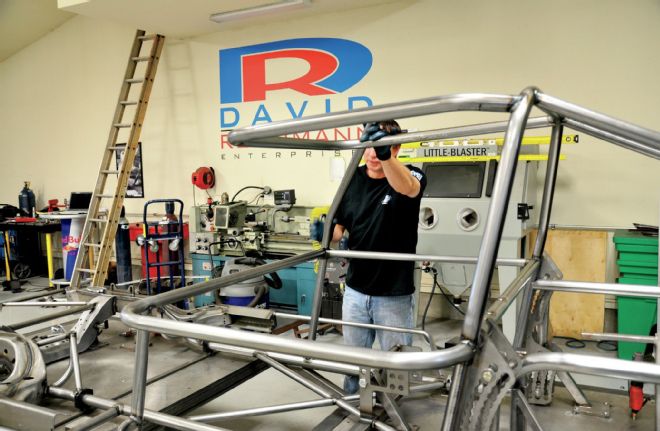
 David cuts a notch in tubing that will become part of the rollcage. We’re using Docol steel from AED Motorsport Products. Every piece of tubing is carefully fitted to tight tolerances to ensure a good weld and a strong joint. Right now, he doesn’t need a lot of help to do much of the work, he jumps in with his lead fabricator Kyle Strickler to do most of the work.
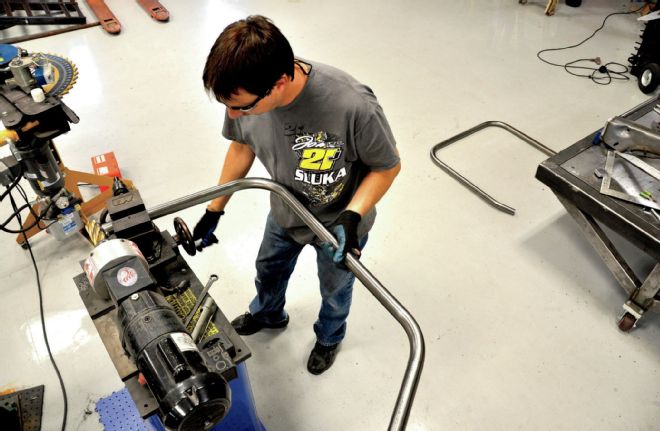
 Using the Mittler Brothers tubing cutter makes joining the cage pieces more accurate due to being able to cut precise predetermined angles at just the right length. These angles can be documented and repeated for each component on the car.
 This upper arm mount jig bracket holds the mounting plate in exactly the same position in relation to the lower arm mounts for each chassis. Even if the top of the pieced-together front clip is off a bit, the mounting points in the upper control arm will be in the same location. The bottom of the mounting plate is then shaped to fit the top of the frame. This keeps the Moment Center locations consistent and the handling predictable.
 As with the front clip, the rear mounting points for the radius bars is jigged into place and built off of. This again ensures a car that comes off the assembly line exactly the same as every other car. Note how many different points are available for rear steer tuning. There are enough for a wide range of adjustments.
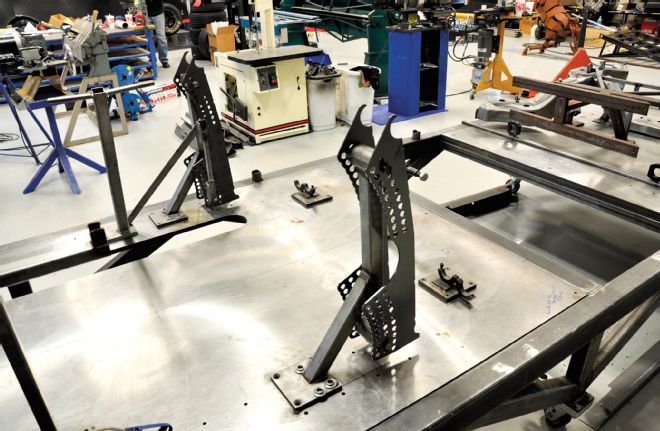
 As the work moves to the rear of the car, the main framerails and rear chassis mounting supports go in. This is the most time-consuming part of the build and there are a lot of welds to do.
 David fits and installs the rollcage, as we note the highly adjustable rear linkage mounts in the lower right corner of the photo. Not only is the length of the links adjustable, but many different positions for link angles are available on the Beak Built chassis. There are even provisions for adding Z-link mounts if anyone wanted them. We have some ideas for using that type of mount to enable quick and easy spring rate changes. We’ll report more on that later as that will be part of our test program.
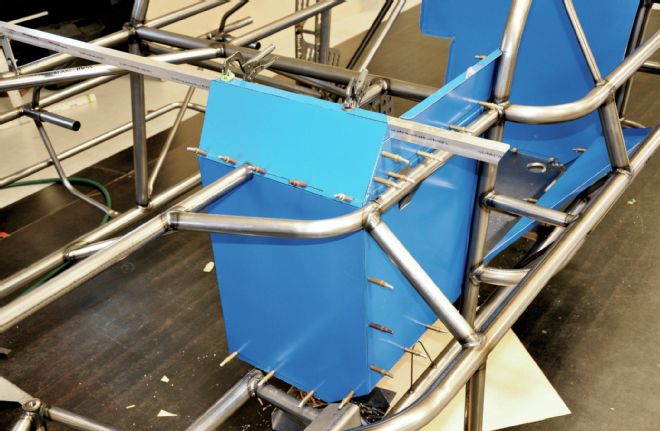 The cockpit sheetmetal is fitted before the chassis goes to the powdercoating shop. Once everything is installed and made to fit nicely, they will be removed and it’s off to get some color.
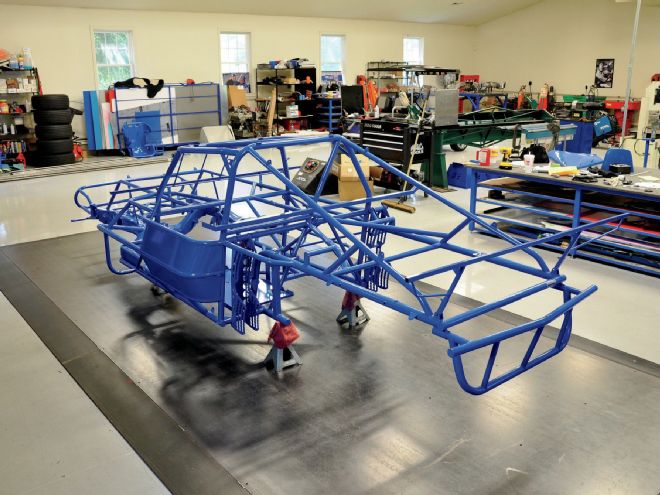
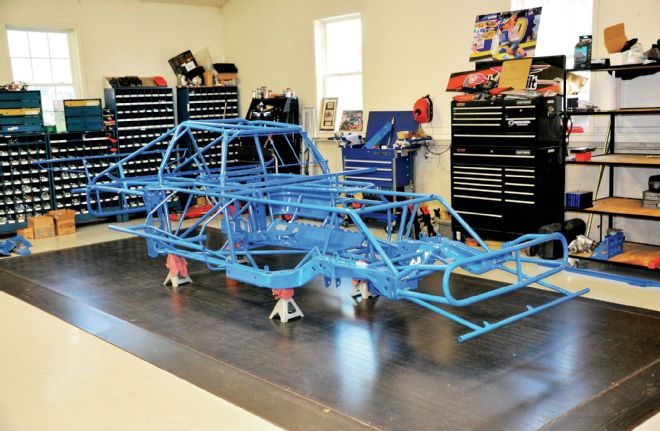 Here is the CT chassis back from the powdercoat process looking great. It’s time to reinstall the sheetmetal and bolt on the suspension parts, fuel enclosure, install a fuel cell, and fit the seat, gauges, and body.
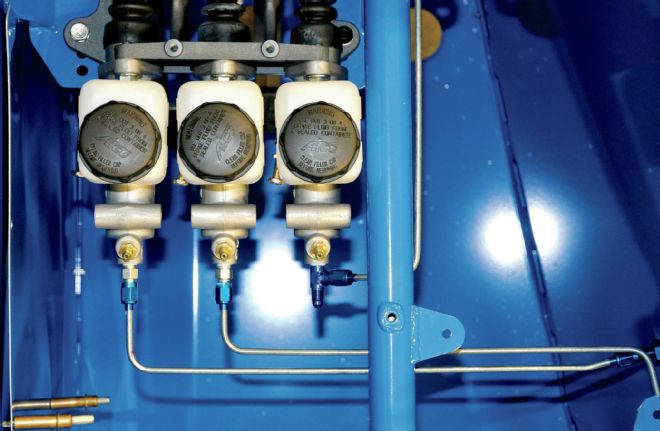 Notice how nicely each brake line is bent and arranged. Someone here has been around the Cup shops before. Everything about this car is classy. We cannot wait to take if for a test day and see what we can do with the setup. We’ll even dirty it up a bit.
Now that we have documented the chassis construction up to the point of having the entire car powdercoated, we can move onto mounting the body, attaching and setting up the suspension for the front and rear, and checking bumpsteer and Moment Center placement.
I had made a suggestion to David that we document the Moment Center location for each point of adjustment on the frontend as well as the rear steer for different adjustments at the rearend. These represent information that the racer can use to decide on the setup and what few other builders provide.
As you can tell this build is just getting started, future issues of Circle Track will document every step of the process right up to our first test of the car. So stay tuned.