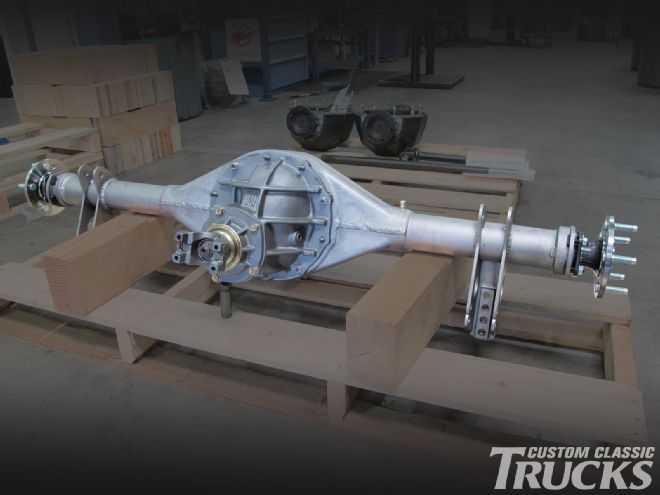
 1. A brand-new 9-inch from Currie Enterprises made with all new parts is ready to go under Jason Scudellari’s Chevy pickup. Manager of our Source Interlink Media Tech Center, “Installation Jason” lends a hand with many of our project vehicles.
Without a doubt, Ford’s 9-inch axle assembly has been the No. 1 choice for a performance rearend for a long time. The reasons were obvious enough—they were strong, plentiful, and affordable. A wide range of gear ratios was available, and the Hotchkiss-style dropout center section made gear changes relatively easy, especially when compared to axles that used integral carriers, like the Dana and 12-bolt Chevy.
Most of those who have tinkered with trucks for a while can remember making a trip to the wrecking yard and having a variety of 9-inch rears to pick from. Of course the most desirable were found under ’57-59 Ford station wagons and Rancheros as they were the narrowest and had big wheel bearings. They’d fit most applications, and fat wheels and tires could often be used without the rubber hanging out of the fenders.
While its hard to believe, Ford stopped producing the 9-inch in 1986—that’s 27 years ago guys. Editor Ryan Manson was still putting playing cards in the spokes of his bicycle when Ford pulled the plug on the 9-inch, but they’re just as popular, if not more so, than ever. Over the years, one of the premier purveyors of all things 9-inch has been Currie Enterprises and at one time they had a mountain of used rear axles at their Anaheim, California, facility. But it was becoming increasingly clear that demand was exceeding supply as the mountain became a mole hill and used rearends became increasingly expensive.
As a result of these developments today at their new Corona location, virtually every part you see is brand new. With the dwindling supply of original Ford parts, the Currie clan bit the bullet and made the investment necessary to produce an all-new 9-inch. A variety of new axle housings are available, including the Hot Rod smooth-back ’57-64 style, the 9-Plus Heavy Duty housing, the Extra Heavy 9-inch as well as a selection of fabricated housings. New gear cases are available in Currie’s exclusive 9-Plus series along with the big-bearing nodular iron and aluminum versions (and there are some used original iron cases still available).
To broaden the shopping options, Currie offers two pinion supports, the stock style and the big-bearing “Daytona” version. Open and limited slip differential assemblies are available, along with a wide range of gear ratios, yokes can be had to accommodate 1310, 1330, and 1350 series U-joints, and of course axles are available for any application.
Obviously there are lots of decisions to be made when tailoring a new Currie rearend to your specific application. To make the process easier, here are some suggestions from Currie’s Brian Shephard:
Measurements: With the wheels and tires that will be used fully inflated, position them in the rear fenders ensuring there is adequate clearance—then measure from the back of one the mounting flanges to the other to determine the rearend width required. Another measurement is pinion offset side to side. You’ll have to choose between having the pinion centered (which offsets the center section) or housing centered so that four-link brackets can mount evenly on both sides of the housing center, but moves the pinion off-center.
Bracketry: You can have all the mounting brackets welded in place or install them yourself. If the brackets are coming from a company and you have a copy of the instruction sheet, just send them in and we’ll take care of it! The only things we cannot mount are triangulated upper mounts, because the angle has to be set in the car.
We encourage customers to provide us dimensions, let us build a tacked together housing, ship them the housing for fitment in the car, they can tack all their brackets on, drill any holes for brake line tabs that they need, etc., and then ship the housing back to us for welding and assembly of the rear. We then ship them back the complete unit ready to install in the vehicle.
Gears: For us to give a recommendation we need the height of the back tire from the ground to the top of the tire, we need to know the final drive ratio in the trans—overdrive percentage taken into consideration, and we need to have some idea of the car’s use. Is it a cruiser that purrs down the freeway or is it a muscle truck that shoves you back in the seat?
Housings: For the most part our Hot Rod housing is perfect for classic trucks. It’s compact, providing as much under-car room as possible for exhaust routing. It’s the housing you want to use in most all triangulated suspension applications.
We also have the polished aluminum housings that are strong and will add that extra sparkle under your truck. The only drawback is triangulated four-links cannot be used because the upper mounts can’t be welded to the aluminum.
Another housing option is the fabricated sheetmetal type that, on the street, are more for looks than anything. They are way stronger than would ever be required in non-competition applications, but they look cool and can be back braced, etc.
Brakes: Drums are always a safe bet and more than adequate on a street truck. We have the 11-inch Explorer brakes and standard Wilwood kits. If a more exotic brake system is desired it’s best to order it from the manufacturer. That way you get a matched set per the manufacturer’s recommendations and also you get parts out of the same anodizing batch so all the parts match front to back.
2. Currie’s new housings are made from better and thicker material than the originals. This is a smooth-back similar to the early-style Ford housings.
3. Assembly begins by installing a center section that is actually part of a fixture to locate the axle tubes and ends.
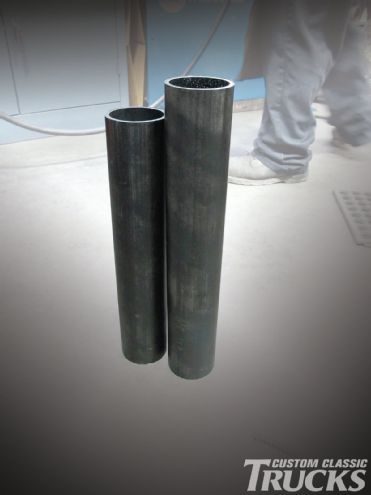
4. Axle tubes are made from DOM (drawn over mandrel) tubing 3 inches in diameter with .188-inch wall thickness. In this case, the tubes are different lengths to center the pinion, not the housing.
5. This solid steel bar establishes the centerline of the differential side bearings; it will in turn locate the ends of the axle tubes and wheel bearings.
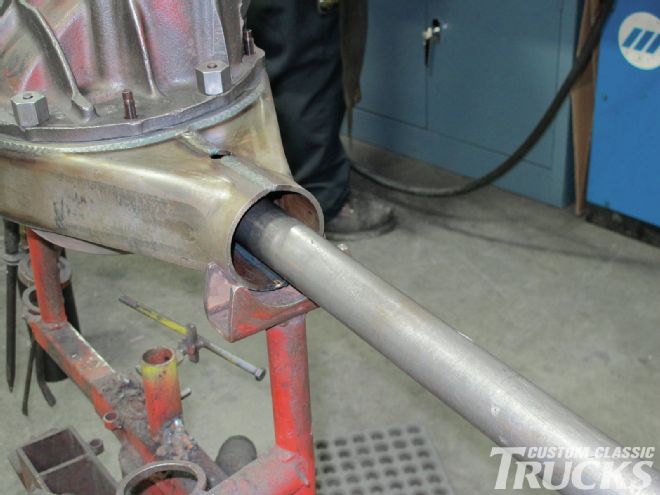
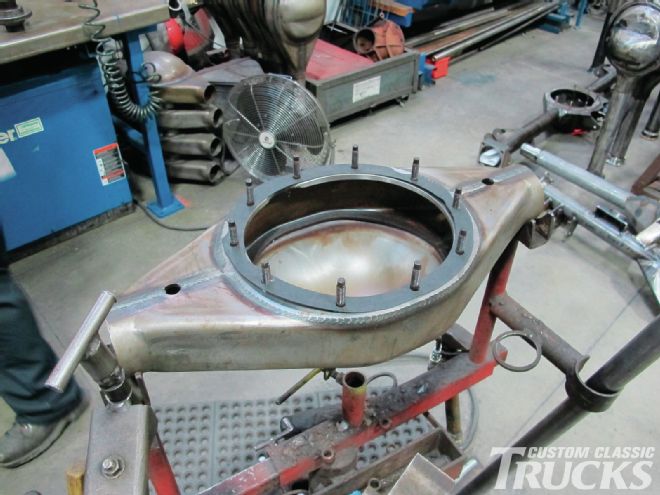
6. The new axle tubes are slipped into the housing and clamped in place. Note the hole in the housing for a rosette weld.
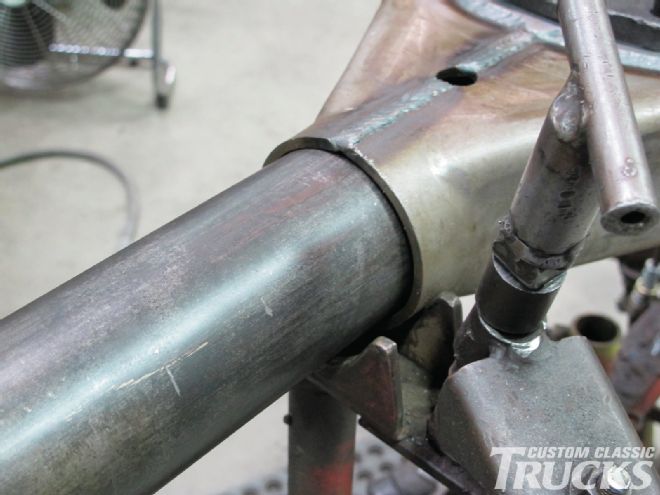
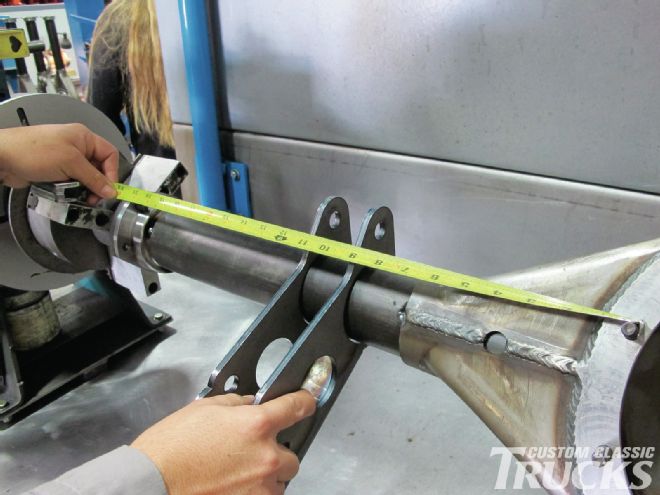
7. With the axle tubes in place, the housing ends are positioned on the alignment bar and clamped in place.
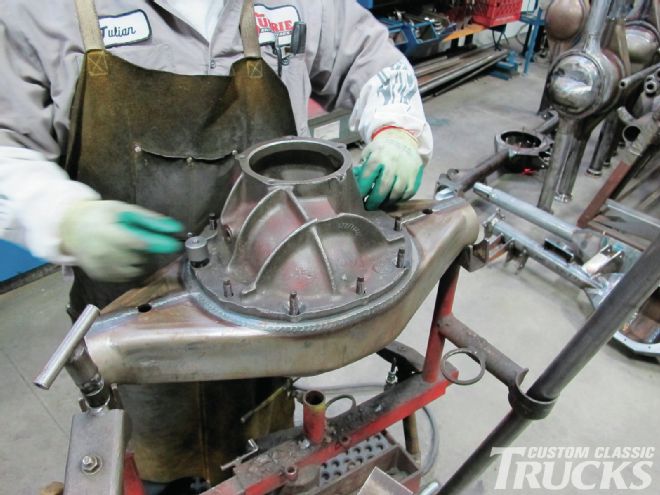
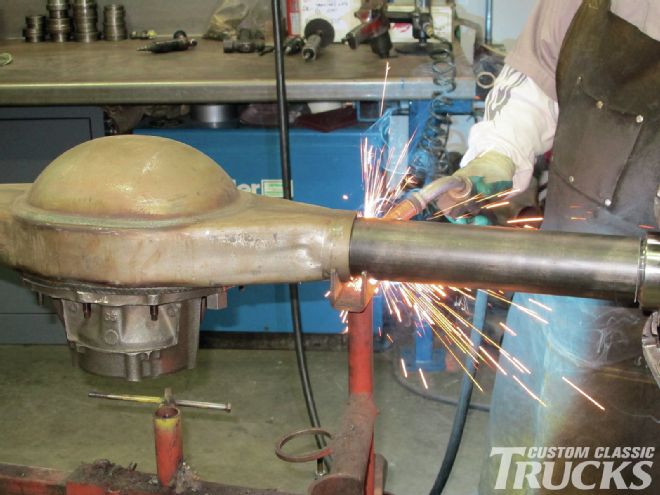
8. Once all the parts of the housing are clamped in place the tubes are tack welded to the center section.
9. If at all possible, it’s best to have Currie weld on any mounting brackets.
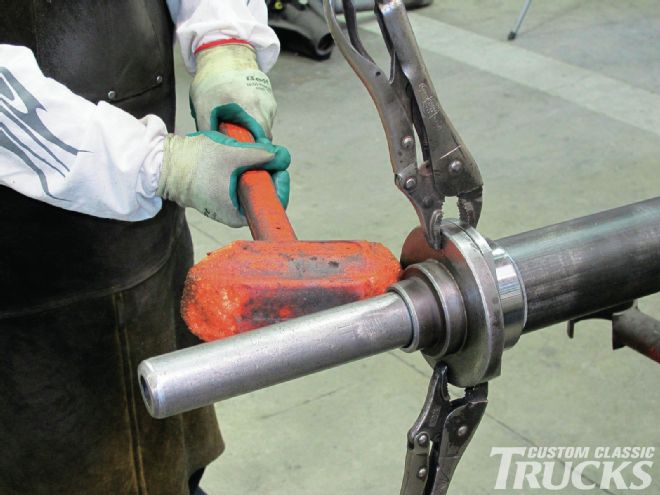
10. With all the brackets welded and their location verified, the ends can be installed. This procedure guarantees the housing is perfectly aligned.
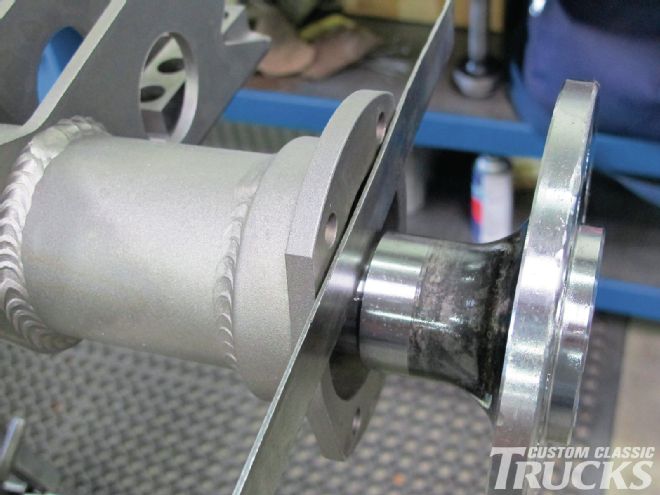
11. Assembly of the third member begins with the installation of the pinion shaft, bearings, and pinion support. Setting up a ring and pinion is a procedure best left to the pros at Currie.
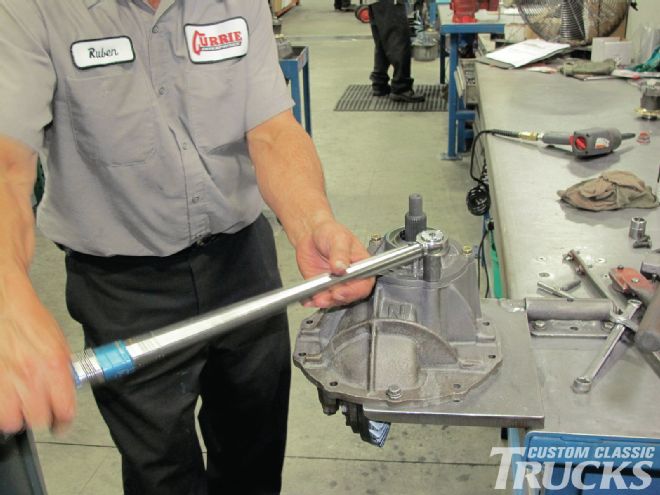
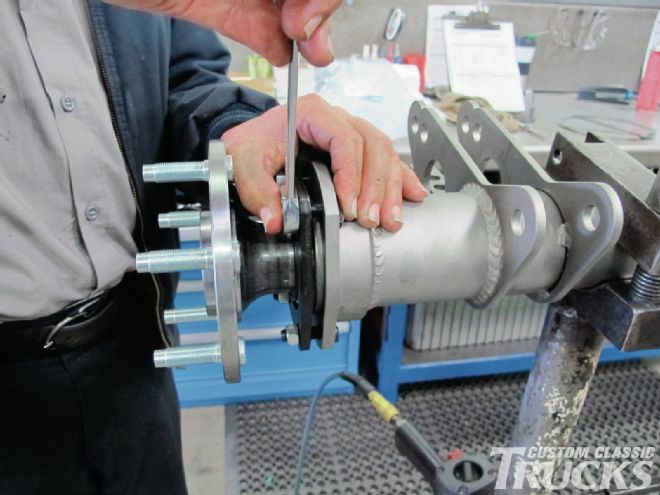
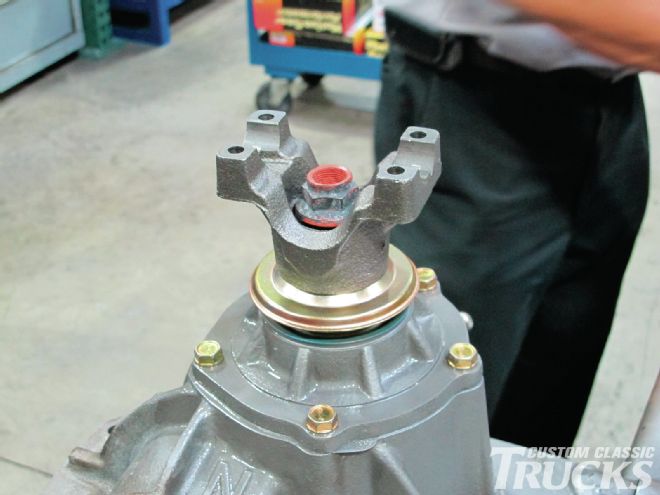
12. Yokes are determined by the size, or series, of the universal joint to be used. The retainer nut is tightened to provide the proper bearing pre-load.
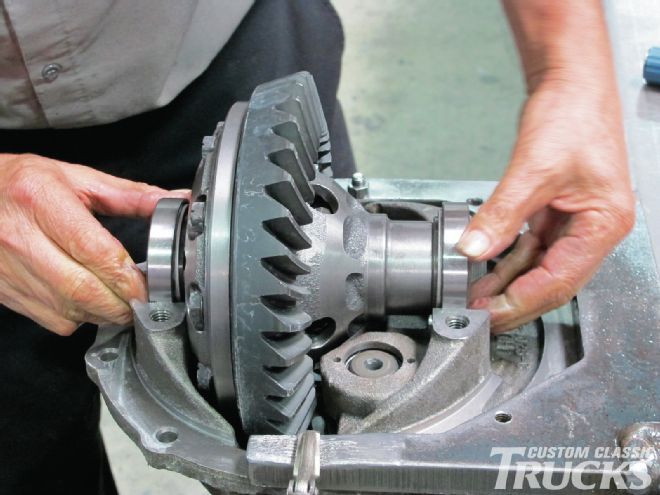
13. Here, the differential and side bearings are set in the housing. Note the end of the pinion shaft is visible; it rides in a bearing that adds support to that gear.
14. The bearing caps are installed as well as the threaded adjusters that go against the side bearings.
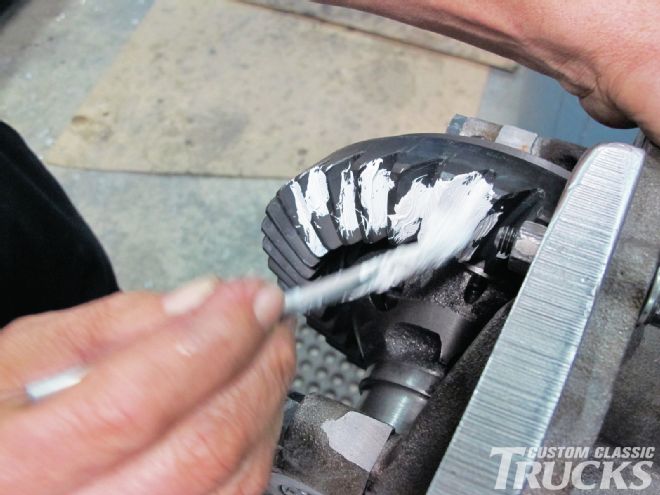
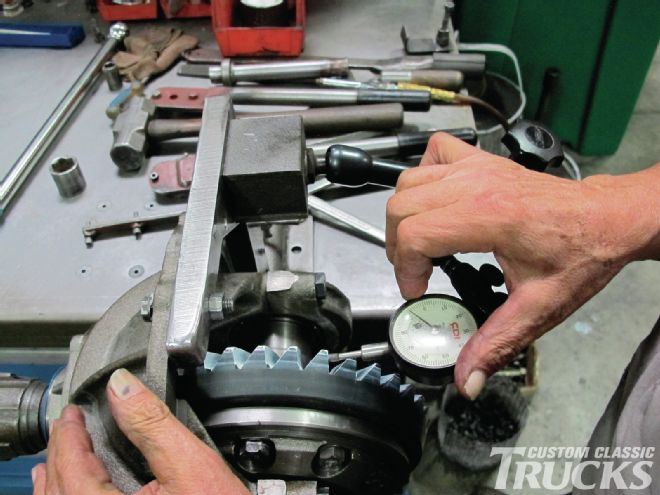
15. After a generous coating of matching compound, the gears are rotated to establish the contact pattern of the teeth. To achieve the proper pattern, the pinion is moved in or out by adding or subtracting shims between the gear and the support bearing.
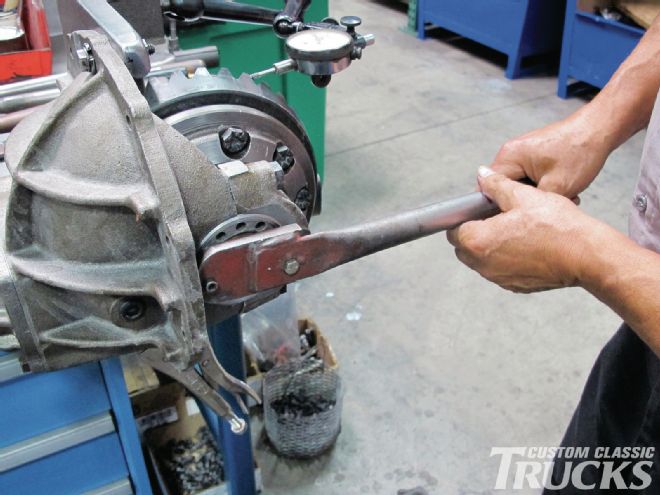
16. Another critical adjustment is backlash, or play between the gears—it is established with the threaded adjusters that move the ring gear closer to, or further away from the pinion.
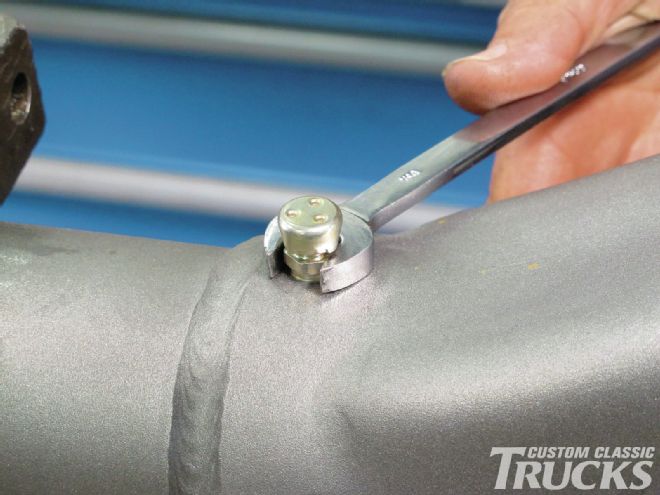
17. This small but important part is a vent, it keeps pressure from building up, which can cause gear oil to leak out of the seals.
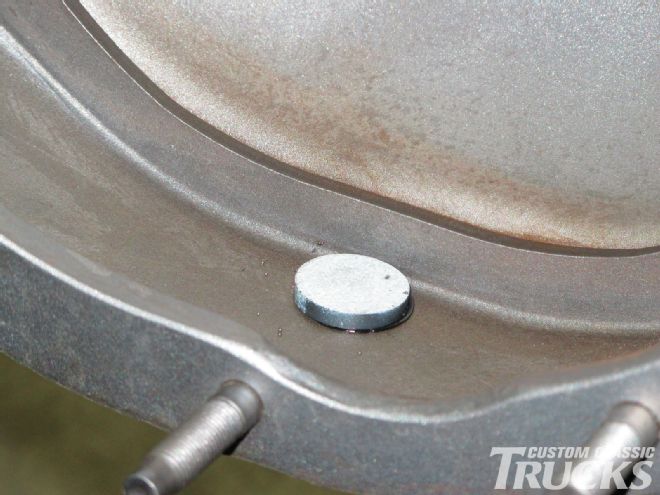
18. Here’s a good idea—epoxy a magnet in the bottom of the housing; it will trap the little bits of metallic trash that comes with normal wear keeping it out of the bearings and off the gear faces.
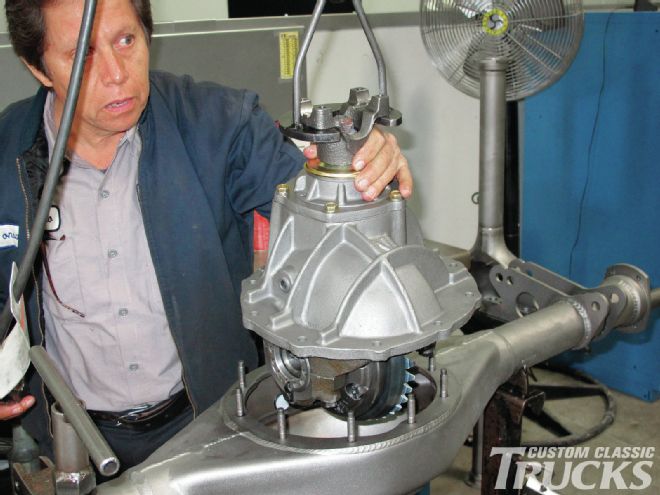
19. With the gear set properly adjusted the assembled third member is dropped in place. A small bead of silicone along with the gasket will prevent gear oil from seeping out of the housing. Copper washers are used on the studs for the same reason.
20. Axles are often drilled with more than one bolt pattern. In this case it will be the 5 on 4¾ Chevy pattern. Here, the retainer is installed (closest to the wheel flange) followed by the outer seal, bearing, and lock ring put in place. A press is used to push the bearing and lock collar in place.
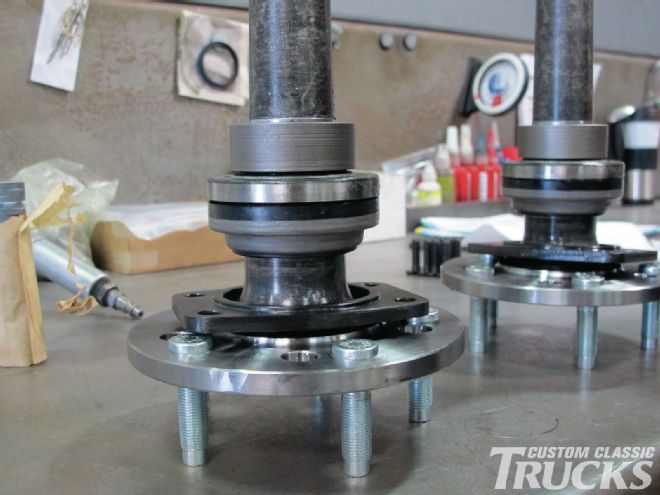
21. The retainers hold the axle assemblies in the housing. If drum brakes were used the backing plate would have been put in place before the axles were installed. Most caliper brackets can be added with the axles in place.