 Rebuilding your brake calipers is simple and can help you catch small problems in their infancy before they become big ones.
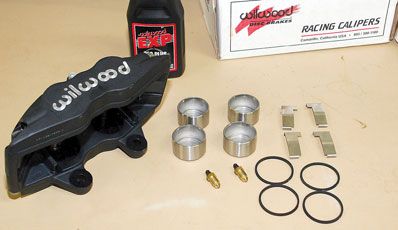
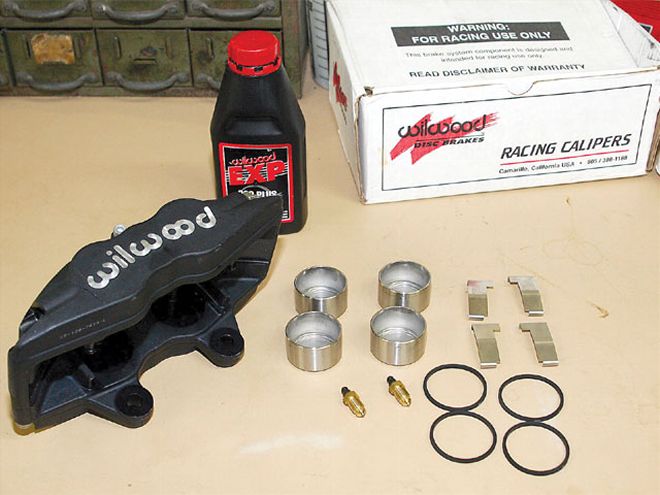
It's funny how we spend so much time working on race cars, yet some parts are almost universally undermaintained. Brake calipers definitely fall into that category. Maybe you have a good set of racing calipers that is so dependable that a failure not caused by a wreck is a rarity. But that doesn't mean there is nothing you can do to ensure top-level performance from your braking system throughout the season.
Karl Bush of Wilwood recommends a caliper rebuild every time you have done enough racing to wear through a set of brake pads. This may seem extreme, but it is actually a very good idea, because it should help you catch potential problems before they become expensive ones. If you have never rebuilt your brake calipers, it's quite simple and only requires common shop tools and a steady hand. For this article, Bush walked us through the rebuild process for Wilwood's Forged Superlite calipers, which are extremely popular among Dirt Late Model and Asphalt Modified racers as well as competitors in many other classes. No matter which brand you run, this information will apply to you. You should, however, check with your manufacturer to see if any additional steps (or special tricks) are required.
The first step is to remove all four calipers from the car. Although we will only cover calipers in this article, consider making caliper rebuilds part of a routine, comprehensive brake system checkup. Since the calipers have to be removed from the brake lines, plan on flushing and bleeding the brake fluid in the lines. With the calipers off, it's also an excellent time to perform a visual inspection of the rotors for any signs of cracking, warping from excessive heat, or other forms of damage.
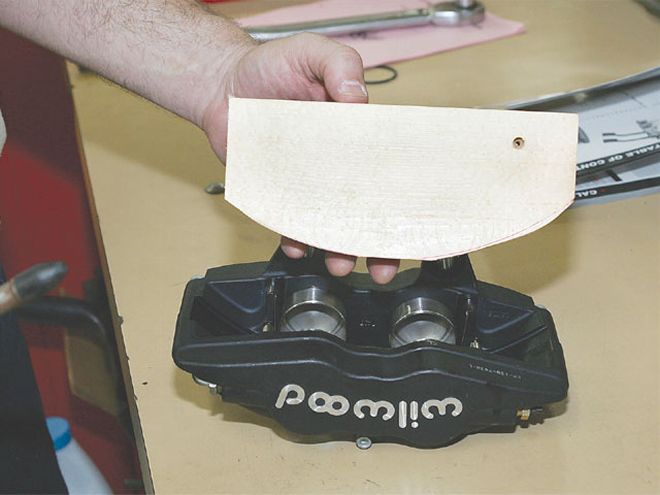 Create a piston stop like this out of wood. The soft wood will protect the pistons from damage when you extend them. The block should fit inside the caliper where the rotor normally goes, and it should be approximately the width of the rotor and two pad backing plates.
When pulling the calipers, it's important to cap or plug the ends of the brake lines to prevent fluid from dripping onto the shop floor. The bleed screws on the calipers must be closed. Once the calipers are free from the car so that you can get them to your workbench, pull the pads and set them aside. While you have your pads out, check them for even wear. If you plan to run them again, make sure they aren't glazed over. Next, drain the calipers and give the body of the caliper a preliminary cleaning to avoid contaminating anything once the interior components are exposed.
Before pulling the calipers apart, you need to manufacture a tool for yourself. Break out your high school shop skills and prepare to shift from metal to wood. You need to cut a piece of wood that can fit inside the caliper where the rotor normally goes so that it acts as a piston stop. It needs to be approximately the width of the rotor and two pad backing plates and have enough length to cover all the caliper pistons. The piston stop should be wood and not metal to protect the pistons from being damaged when they are removed.
Once you have fabricated your wood block, you can begin removing the caliper pistons. Insert the block into the caliper. Using an air chuck with a rubber tip, place the top against the fluid inlet and apply low air pressure (Bush recommends setting your compressor at 40 psi). This should extend the pistons until they hit the block of wood. Be careful to keep your fingers out of the way; at even 40 psi inlet pressure, the pistons can clamp down with over 240 pounds of force. Once the pistons are extended, remove the wooden piston stop and finish removing the pistons by hand. This may be difficult to do if there is extreme wear, but resist the urge to use a set of pliers or anything else that can scratch the metal.
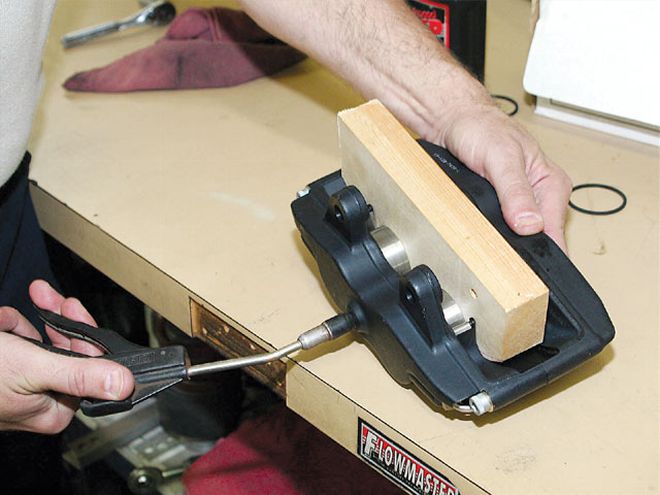 Using the piston stop to protect the caliper pistons (and your fingers), extend the pistons using an air chuck with approximately 40 pounds of pressure.
Once the pistons are out, use a small flat-blade screwdriver to remove the rubber piston seals in each of the piston bores. Again, be very careful not to scratch the interior of the piston bore. At this stage, you can also pull the bleed screws.
Now that the pistons are removed, they need to be cleaned so that they can be properly inspected. It's best to use a parts washer, but you can also use brake cleaner in a pinch. Bush recommends using a Scotch Brite pad to gently clean the outside bore of the piston. Normal use causes some buildup around the piston, but it should come off fairly easily. He also says that a visual wear line is acceptable as long as the outside bore of the piston is smooth to the touch. Pitting or scratches that can't be buffed out warrant replacing the pistons; otherwise, leaks will occur.
Next, turn your attention to the calipers. It may be tempting to clean the calipers in your parts washer, but doing so leaves cleaning fluid inside the caliper that will contaminate the brake fluid. You pay enough as it is for the good stuff, and you don't want anything in there that will impede performance or lower the fluid's boiling temp. Instead, clean the caliper in hot, soapy water, rinse it thoroughly with hot water, and use an air hose to blow it dry. You should also use the same method to clean the bleed screws.
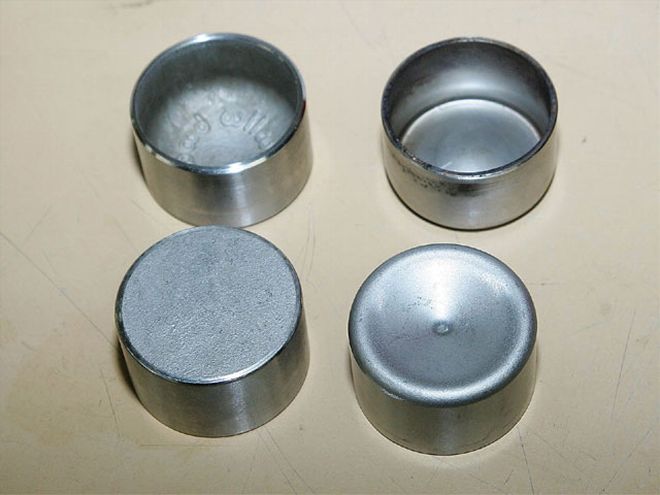 If you need to replace your pistons, you may want to consider an upgrade. All Wilwood calipers now come standard with these heavy wall pistons (left), which exhibit less flex under load than standard stamped pistons (right). This can contribute to a firmer pedal and more feel for the driver.
Once the calipers are clean, take a moment to check the caliper bores. They should be smooth, especially on the thrust side (the side of the bore opposite the direction the rotor is turning) Bush says that some anodizing wear is OK. Any small scratches or buildup from boiled fluid can be buffed out with a Scotch Brite pad.
Bush also says that you shouldn't have to remove the caliper's crossover tube, especially since it can be difficult to fit a wrench in that area to remove it. If you decide to remove it, make sure there's a new bead of silicone for the tube to sit in once it's reinstalled. The silicone not only helps hold the tube in place, it also damps vibrations that can eventually cause the tube to crack.
Rebuild kits are available from your manufacturer and usually include new seals and metal clips for the pads. Bush recommends always replacing the piston seals on every rebuild, no matter how good the old seals look. Repeated heat cycles cause the rubber seals to harden and become brittle. This not only makes the seals more prone to cracking, it also reduces their ability to pull the pistons back and away from the rotor and can lead to brake drag.
Once everything is clean, trial-fit the pistons into the caliper bores without the seals in place. They should slide in and out smoothly and spin without catching. If they don't, you may have to spend some more time with the Scotch Brite pad. If the piston movement is smooth, place the seals inside the groove in the caliper bores. Leave the seals dry for installation; they should go in place with only finger pressure.
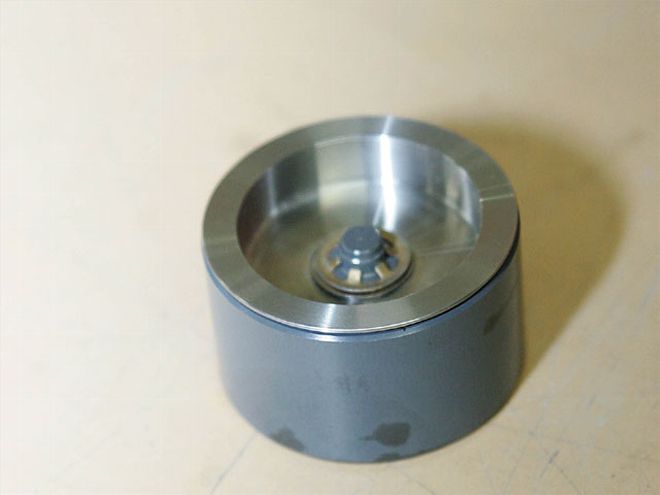 If you are having trouble boiling your fluid, one possible solution is Wilwood's new Thermlock(r) piston. Bush says it is being used by NASCAR Nextel Cup and Craftsman Truck teams at Martinsville. It does such a good job of insulating the brake fluid from the radiant heat created at the pads that teams running them have been able to do away with brake recirculators.
Next, insert the pistons back into the caliper bores. The fit is tight, so it may require a little work to align them properly. You should never have to force them or use anything other than your fingers. Also, make sure that the pistons are bottomed out inside the bores (the top of the pistons will be nearly flush with the inside face of the caliper). If you are installing new pads, the pistons have to be completely retracted so that the pads fit over the rotor. Then, insert your piston stop again and test the pistons using the air chuck. They should extend at approximately the same time. It's better to discover a stuck piston now than on the racetrack.
Finally, reinstall the bleed screws. Bush says that Wilwood bleed screws are tapered and self-sealing at the proper torque. If you use pipe-thread style bleeders, however, you will likely need to use thread sealer. If this is the case, be cautious so that you avoid getting sealer inside the caliper body. Thread sealer can contaminate the fluid. Bleed screws should be torqued in place according to the manufacturer's specs. While you're at it, recheck the torque on the bridge bolts as well.
The last step before reinstalling the calipers on your race car is to insert a fresh set of brake pads. Now that you've come this far, don't just slap in the pads and assume that everything is OK. Make sure the pads slide back and forth inside the caliper without sticking or catching. If one does, use a file or grinder to bevel the edges of the backing plate. Reinstall the calipers and begin flushing the fluid throughout the system. If you've also changed the rotors, don't forget that you may need to take a little extra time at the racetrack to bed in the brakes. And with that, you are ready to go racing!