There are a number of arguments as to why it’s a good idea to move a stock, cab-located fuel tank to an alternate location. Safety, comfort, and space probably being the top three. But there are a few other things to consider as well that just might convince you why it’s not just a good idea, but a great idea.
For starters, if your truck is still using a stock tank, chances are there’s crud in it. Every time the fuel level runs low, there’s a chance for condensation to build up on the top of the inside of the tank. And if the tank isn’t filled up to capacity regularly, there’s an even greater chance that the condensation is left unabated. That can lead to surface rust inside the tank and ultimately clog your fuel system. Naturally, that’s worst-case scenario, but given that many of our trucks have been sitting for years, it’s not such a stretch of the imagination.
Another factor to consider when it comes to replacing a stock gas tank is that if you plan to upgrade to an EFI system, you’re going to want to get a tank that’s fully baffled to prevent fuel slosh leading to pump starvation. Fuel starvation is bad news for EFI systems, and with a fully baffled system that problem is solved. Speaking of EFI, it’s common knowledge that a fuel pump submerged in the tank runs quieter, cooler, and is more efficient than one that is mounted elsewhere; on the framerail for instance. Most tank manufacturers can provide both of these options as standard items.
And so, it was with these few things in mind that I set out looking for an alternate to my ’68’s in-cab fuel tank. There are a few options for the ’67-72 C10s, such as the commonly used Blazer tank of similar vintage or a completely custom tank, but every option I looked at required a custom filler to be mounted somewhere above the height of the framerail.
That left only a few end roads; either the filler was in the bed floor, mounted in a door on the side of the bed, or hidden behind the turn signal or taillight. I didn’t like the idea of having to lift the tonneau cover I’m planning on using to get gas, nor was I excited about the likelihood of spilling fuel on the brand-new bed wood that’s gonna sit under said tonneau cover. The other option required a filler neck that would have to snake through the bedside and then somehow over the framerail before arriving at the fuel tank.
Physically, I couldn’t see how this would work, plus the additional fab work of adding a fuel door on the bedside (which I didn’t like for aesthetic reasons alone) or creating a hidden door on the marker or taillight sounded like more work than it was worth.
As I weighed my options, I happened across a press release from Aeromotive pitching their new Camaro F-body Stealth Fuel Tank line. Usually, I don’t spend much time looking over non-truck-related news items, but this one caught my attention as I’d been considering using an early Camaro tank as an alternative to the Blazer tank.
The dimensions seemed like they’d work and the tank had all the attributes necessary for the induction system requirements of the forthcoming LS engine; an in-tank fuel pump capable of handling over 400 horsepower and a fully baffled tank. Add to that the fact that the tank used the traditional Camaro fuel filler location behind the license plate and it looked like we were in business.
Once the tank showed up, it was pretty clear that it would work under the ’68, but it would require a bit of handiwork. And though it wasn’t a bolt-in alternative for the early trucks, it was a pretty simple install that a capable person with a handful of tools and a little ingenuity could handle in a weekend. Most importantly, it solved all my conditions that I had set aside to accomplish, which is a pretty great feeling at the end of the day.
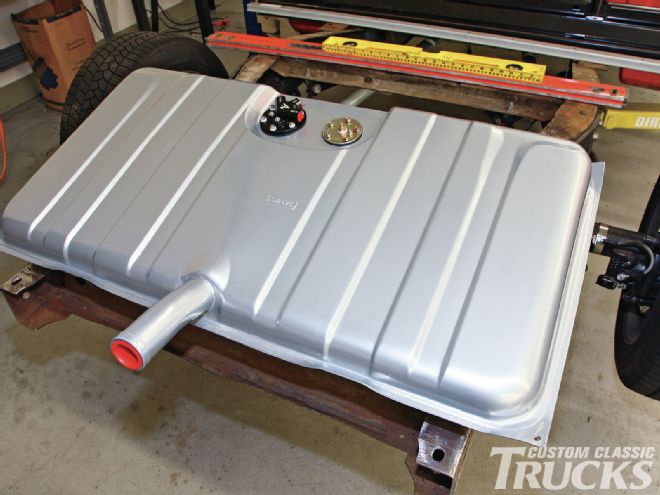
1. Instead of the more common Blazer-style gas tank, I opted to go with Aeromotive’s Stealth tank for the F-Body, ’67-69 Camaro (part number 18658). Featuring a pre-installed 340 Stealth fuel pump and complete, in-tank baffling, this tank is perfect for the upcoming supercharged EFI setup that’s going on the LS engine. The stamped steel tank comes in a silver powdercoat finish and is equipped with a 0-90-ohm fuel level sending unit, black anodized pump hanger assembly, and three ORB-06 ports (outlet, return, and vent).
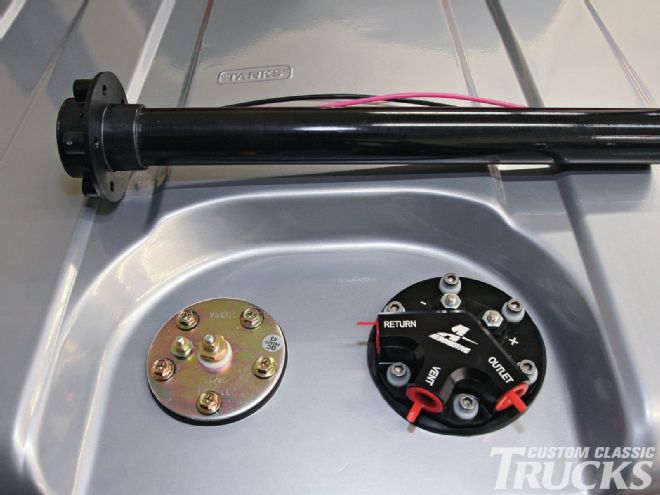
2. Since I’m going to be running a Classic Instruments gauge panel, I had the foresight to install their floatless fuel level sender before installing the fuel tank. That’s the floatless sender at top and the standard 0-90-ohm sender installed below.
3-4. Installing the floatless sender is pretty simple. Simply determine the depth of the tank and cut ½-inch less than the total depth from the sender tube.
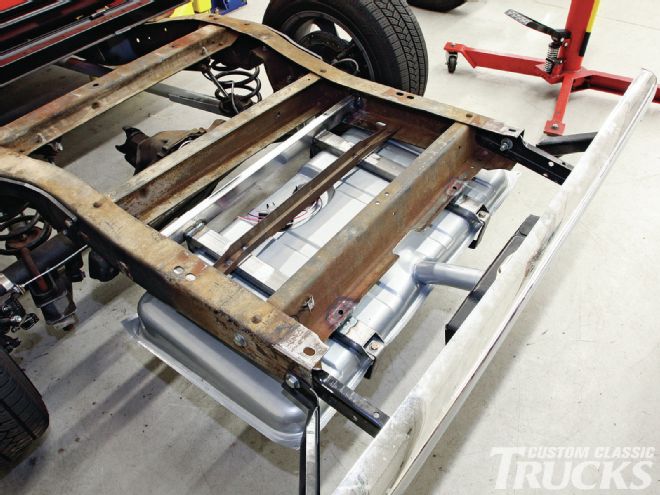
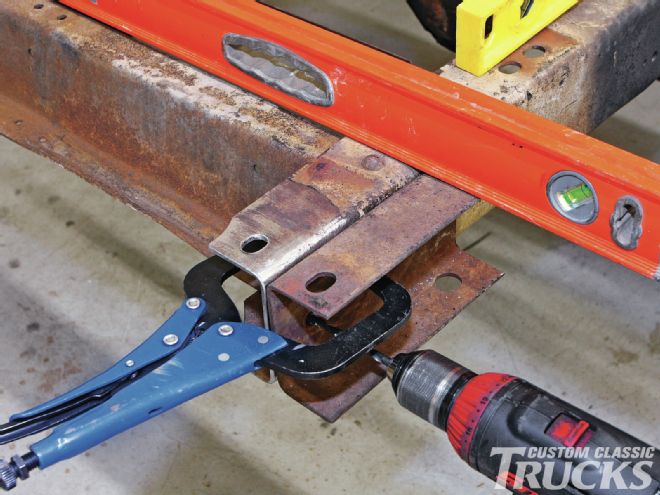
5. Before I can think about placing the gas tank, I need to first mount the rear bumper. Since cutting the frame last month, I hadn’t gotten around to redrilling the attachment points for the bumper brackets. Luckily, I kept the two frame sections I removed to use as templates. First, I made the top hole elongated just like the factory one, then I swapped the sections side to side and clamped them in place to mark the bracket holes.
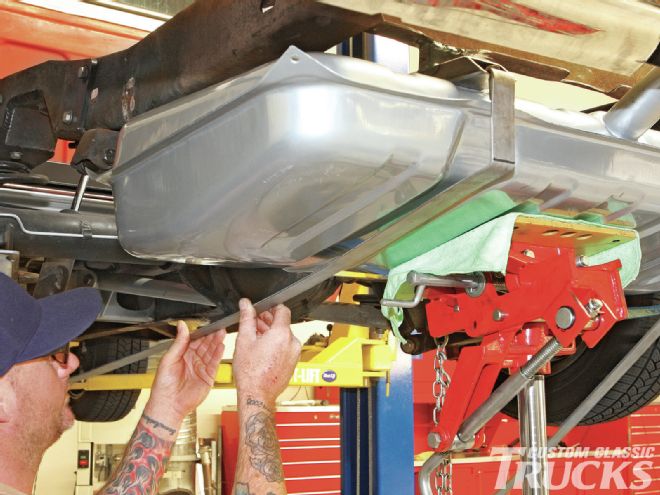
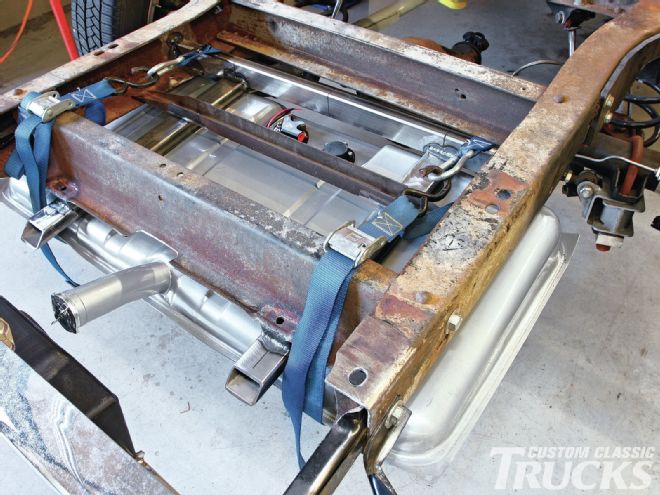
6-7. With the bumper in place, I could then slide the tank up under the chassis using a handful of jackstands as support and various scrap steel as spacers between the tank and the chassis.
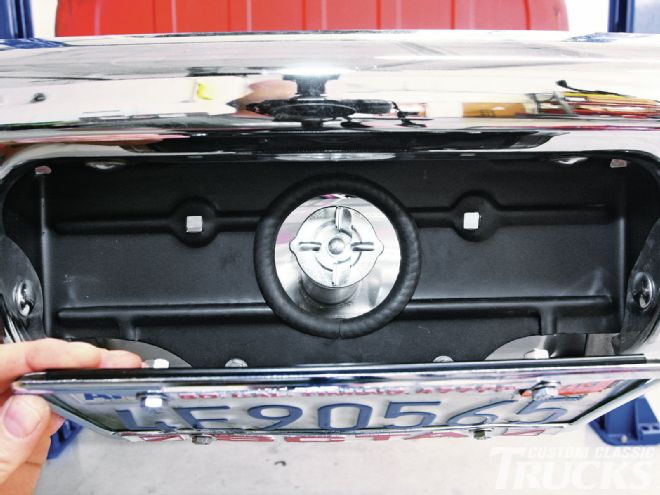
8. At this point I marked the license plate bracket and cut a 3½-inch hole where the filler will exit. I also trimmed a bit off both bottom corners so that the flip-down ’69 Camaro license plate bracket from Classic Industries would fit. A piece of 3⁄8-inch fuel hose, cut in half lengthwise, makes a good grommet.
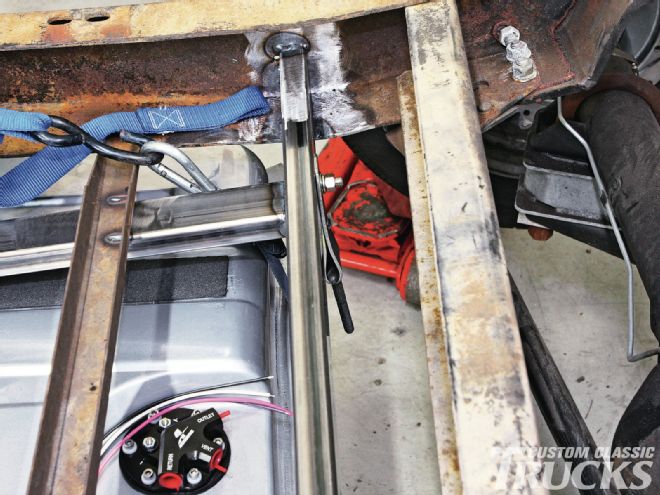
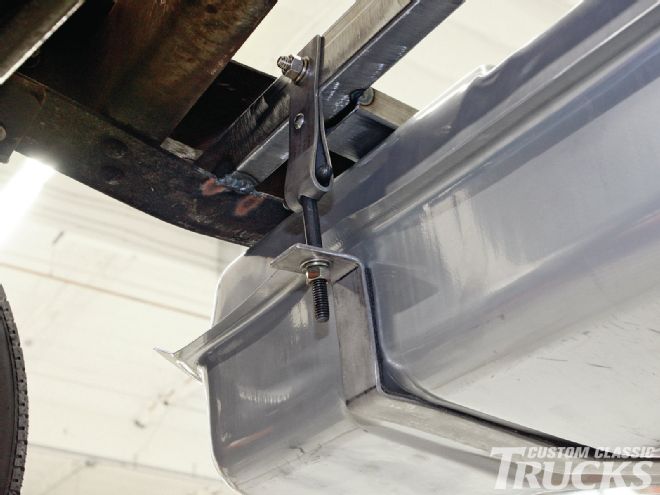
9-10. With the placement of the tank finalized, I can start fabricating the framework that will serve to support the tank. I start at the front, using a 2x3-inch piece of square tubing to create a crossmember in which the framework will attach to as well as the tank straps. First the crossmember is tack welded to each framerail before each side is marked, drilled, and tapped for the tank strap bolts. I cut the heads off a pair of 3⁄8 fasteners to make a pair of studs, then threaded them into the crossmember until the shoulder side was flush. A quick TIG weld around their circumference and a few passes with a DA and the result is a pair of studs supported at one end via a weld and the other via the threaded end in the crossmember.
11. You can see here where the weld was ground down on the backside of the crossmember at the intersection of the parallel support tubes. These tubes act as the backing for the tank to tighten up against and locate the tank via the stamped, flat section on the tank’s surface.
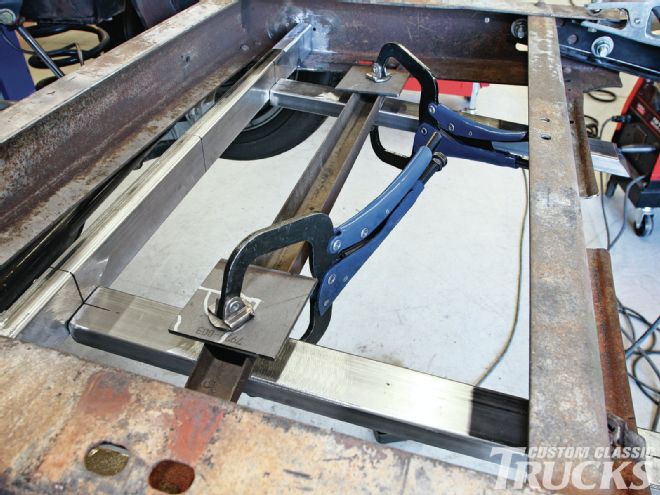
12. To achieve the proper angle of the tank, the parallel support bars are mounted flush against the small, middle crossmember and spaced away from the rear crossmember using a 1-inch section of 2x3 tubing that I welded in place beforehand. Clamps hold everything together while the framework is tacked in place.
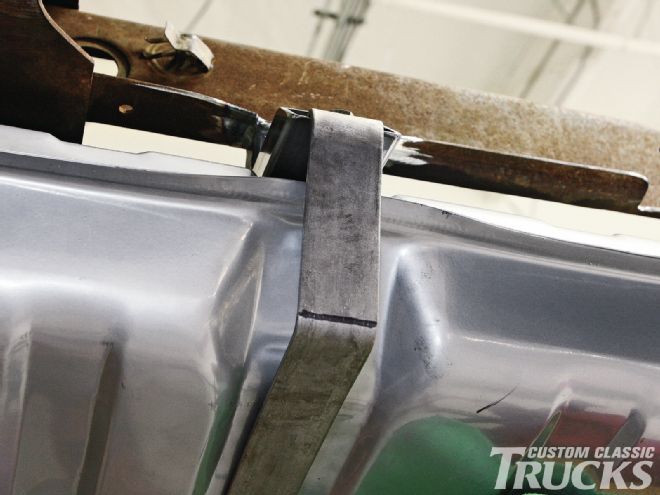
13. With the framework complete, a pair of tie-downs holds the tank in place while I fabricate a pair of stainless steel straps to support the tank.
14. The first step in creating the tank straps is to fabricate the T-bolt ends that will attach to those studs on the front crossmember. First, a 3⁄8-inch hole is drilled into a piece of 2-inch stainless steel strap before a T-bolt is inserted. Then the short section of strap is clamped in a vice while the strap is bent around the T-bolt.
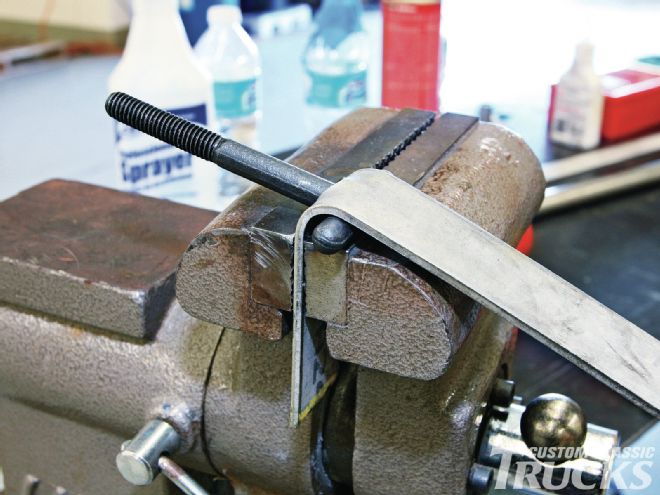
15. A little work between the vise jaws and a rubber mallet completes the bend. A ¼-inch hole is then drilled through both sections of strap and a corresponding-sized fastener “pins” the assembly together.
16. The T-bolt strap assembly is then cut just long enough to clear the crossmember and attached to the stud.
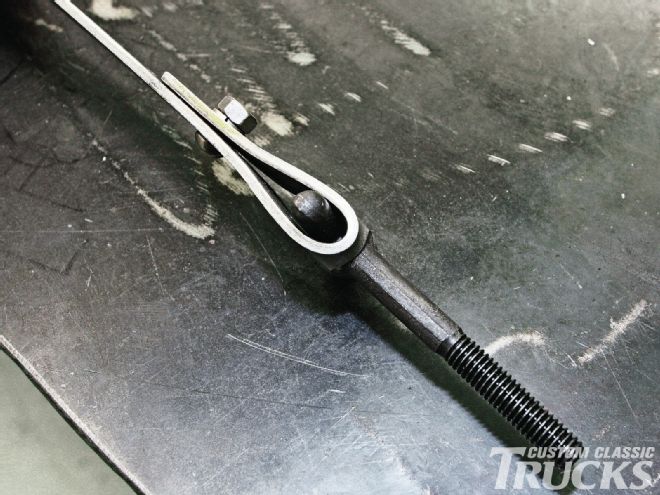
17. The gas tank straps are built in a similar fashion. First, a 3⁄8-inch mounting hole is drilled in one end before a hard 90-degree bend is created in the vise.
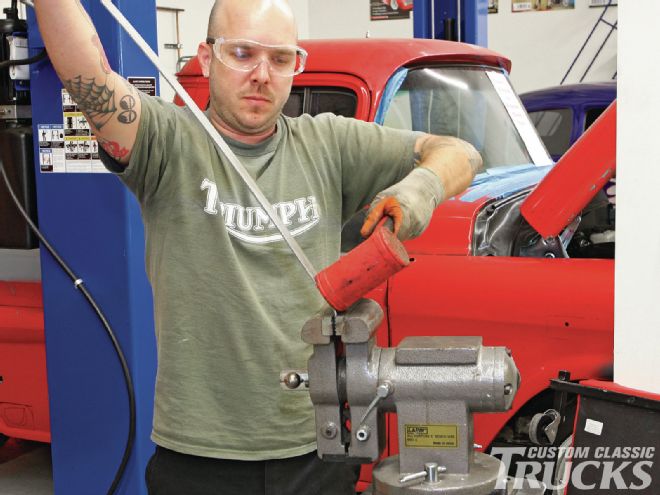
18. From there, it’s a simple matter of marking and bending each strap to follow the contours of the fuel tank…
19. …until we reach the front, where it attaches to the T-bolt and each strap is cinched up tight.
20-21. It’s hard to see from the photos, but I lined the stainless straps with thin strips of Dynaliner to prevent any metal-to-metal contact between the straps and the fuel tank.
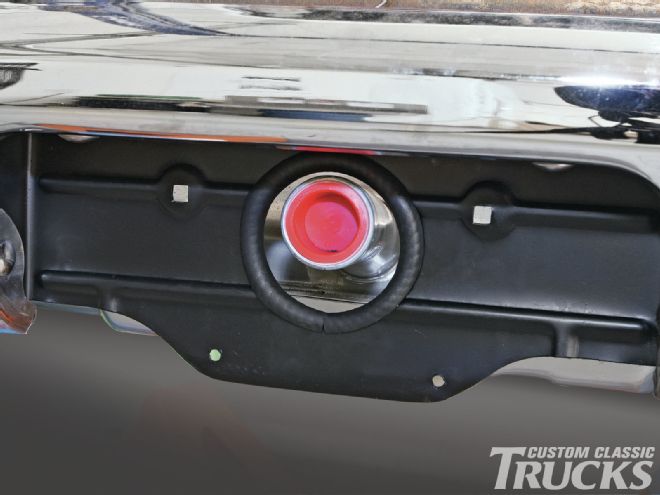
22. Here’s a peek at the fuel tank filler, neatly tucked away behind the license plate.
23. And a final view of the tank installed before the bed goes back together.