
When it comes to installing an exhaust system on a project vehicle, there are a number of options open to you; though it's a safe bet to assume no production system is going to fit. It's also safe to assume there'll be a lot of custom fabrication. You could take your car to a muffler shop that will be able to bend up a system to suit, though the end result may not be as attractive as you'd like, as exhaust bending equipment distorts the tube when it's bent and reduces the diameter as it does so. However, if a car is not detailed underneath, and will be driven a lot, this is a viable option. You could also adapt an existing system if your car is not too far modified from stock.
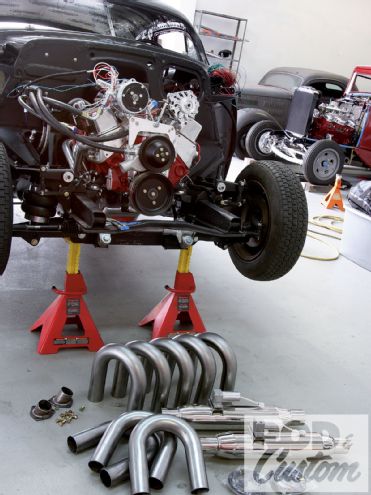
This is certainly not the case with the Purple Pig project '49 Chevy, meaning I had to fabricate a system from scratch-a system that would have to take a tortuous route in order to clear various components, and would consist mainly of sections of U-bend welded together with straight lengths comprising the rear sections and part of the passenger side system. My preferred method, having done this a number of times in the past, is to buy a number of mandrel-bent U-bends and a length of straight tube. I elected to run 2 1/2-inch-diameter tubing front to rear, and purchased 10 U-bends and 10 feet of straight tube. As it turned out I needed one extra U-bend of a smaller radius, but was left with only one 3-inch section of U-bend at the end.
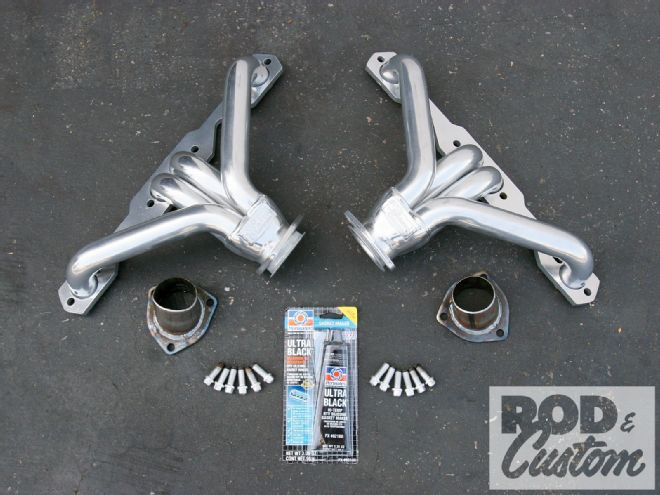 The starting point for any exhaust system is a good pair of headers. Mine came from Sanderson and are block huggers, with an aluminized ceramic coating and supplied with collector flanges, hardware, and a high-temperature RTV silicone gasket. Sanderson claims they are the tightest fitting header available. Various primary tube diameters, from 1 1/2 to 1 7/8 inches, are available depending on the horsepower of the engine.
The headers I used are block huggers from Sanderson Headers, which are very compact, and are advertised as offering clearance for any motor mounts, tie rods, or steering rods. Also, any starter and transmission combination will clear this header except cast-iron Powerglides, as will any rack-and-pinion. Perfect for my application! The headers were supplied with a polished, aluminized ceramic coating, which reduces engine bay heat and improves cylinder scavenging.
Muffler choice can either make or break the driving experience, being either too loud or too quiet, as well as droning on the highway. With this in mind I opted for Patriot Exhaust Products' new VaraFlow muffler, which features an electric motor and valve, allowing the driver to adjust the volume and tone, whilst on the move. Constructed from polished stainless steel, the VaraFlow measures 23 1/2 inches overall, with the muffler body 18 inches long, and has a 2 1/2-inch inlet and outlet. The compact size was advantageous as there's not a lot of room under the '49 for large mufflers, or anything else come to think of it!
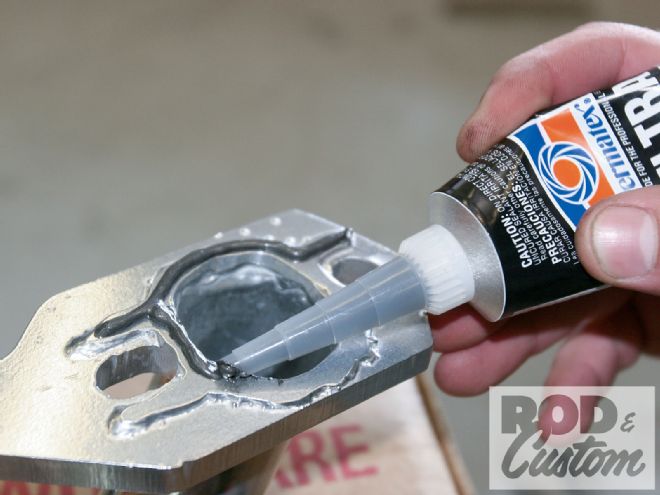 Sanderson headers are designed to be installed without conventional gaskets; a bead of RTV silicone is all that's required.
When fabricating a system using U-bends, care should be taken to ensure every cut is absolutely perpendicular to the tube for close-fitting joints, especially important when TIG welding. The tube should also be cleaned on the inside at every joint, and any swarf blown out of the tubing using an airline before welding. Also take into consideration that the exhaust generates heat, so plan the route carefully to avoid close proximity to gas and brake lines, and components such as the starter motor, gas tank, and brake master cylinder. Pay attention to suspension travel limits, especially around the rearend, and ensure you don't mount the system too low. I managed to keep this system tucked up close to the floor and above the lower edge of the chassis rails.
Now the system is tack welded together, I have the laborious task ahead of me of removing the rearend, taking the whole system off the car, finish welding it (though this is done on the front section), having it coated, and refitting it and the axle. Then, finally, I can fire the motor, bleed the brakes ,and drive this puppy. 'Bout time, too!