
For those of us old enough to remember '80s Reaganomics and learning about new math in school (what was the point of base 8 numbering anyhow?), our idea of tricking out a car used to be adding a set of Cherry Bombs and a Holley 750 double-pumper to the requisite '79 Camaro and promptly destroying a set of T/A Radials. A day or two has passed, and the LT1 F-bodies littering the Auto Trader have become the '79 Camaros of today. They're cheap, you can sort of work on them, and they still do great burnouts.
Granted, it was a lot easier back in the day to just yank off the smog stuff and the Quadrabog and pick up some good power. But for those wanting to push that small-block a little faster than the next guy, a cam swap was the next step. The same philosophy holds true today; do all the bolt-ons, watch as your friends blow by you, then jump into the engine.
Though the architecture of the LT1 is based on the Gen I small-block and shares the same basic layout with a goodly portion of the parts interchanging between the Gen I and LT1, or Gen II small-blocks, there were several big changes. The design changes between these are beyond the scope of this article, but the big stuff includes a totally revised reverse-flow cooling design, the distributor moved to the front of the engine, and the camshaft and timing gears changed to allow them to drive the distributor and the water pump. That last little bit put a big hiccup in the hot rodding community as it totally ruled out using any of the myriad cams out there designed for the typical early small-block Chevy.
When they came out, the LT1 engines (LT1, LT4, and L99) had few choices for aftermarket cams, and if a custom cam was built, then who could figure out how to tune the thing? Fortunately in the last several years, the aftermarket has expanded its cam offerings and the availability of tuning software has made it cheap and easy to bump the power of these engines just like we would've back in the day. So what's the problem? Well, everyone talks about this cam or that, but nobody has really buckled down to see what's what on a dyno. We wanted to change that.
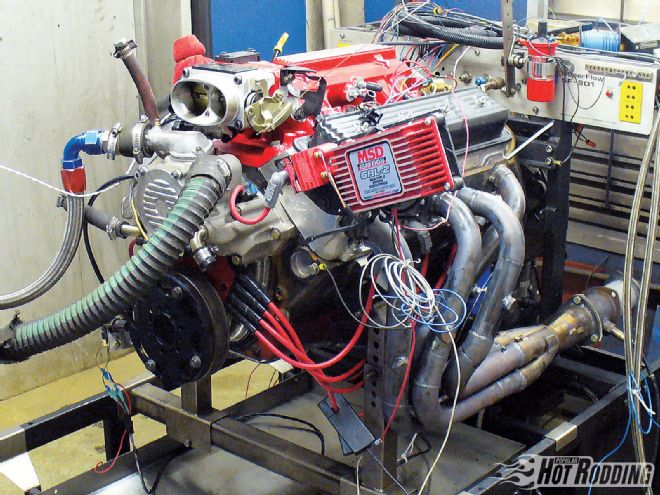 The calm before the storm. After setting up the 377ci LT1 test mule engine on the dyno, we gave it a good night's rest before spending two solid days burning our hands on hot oil and headers, cursing our mistakes, and finally cheering with glee.
The Test Subject
Most '93-97 LT-powered cars now have well over 100,000 miles on the clock and as they are being freshened up, a good number of them have bumped the stroke to be reborn as 383s or 396s. A 383 was also the configuration we chose here, as it seemed to represent a growing portion of the crowd.
We started with a core from a typical 150,000-mile car, and thanks to low-tension rings and the glory of fuel injection, it had basically zero wear on the cylinder walls, so we torque-plate honed it at Revolutionary Performance and Machine in Mt. Juliet, Tennessee, and kept it at standard bore (actually making our engine 377 ci). We internally balanced an Eagle cast-steel crankshaft and matching SIR 5.850-inch connecting rods, as they are great for street/strip use and come at a reasonable price. Wiseco forged pistons with thermal barrier coatings were used as insurance against any poor tuning decisions. Mahle/Clevite bearings and ARP main studs were a given for the engine as we didn't want any surprises in the bottom end. Naturally, we would use pump gas for the final tests. I will admit we were a little nervous, as the compression was on the high end of the spectrum at 11.5:1. Early cast-iron-headed small-blocks couldn't handle that but the reverse-flow cooling and advanced combustion chamber design of the Edelbrock Xtreme LT4 heads we chose led us to believe we could pull it off without any problems.
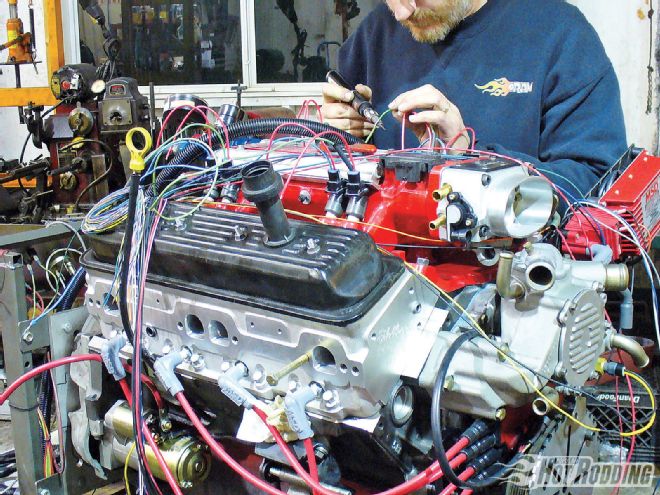
 Teardown between rounds of camshaft testing started with removing the front parts of the LT1 engine. We removed the MSD distributor cap to verify that the rotor was located correctly on the camshaft dowel pin upon reassembly, though most reasonably competent workers can line it up without removing the cap. We got it wrong twice so we took no chances.
When GM discontinued the LT4 intake manifold a couple years ago, Edelbrock stepped up to the plate and started making their version. Dubbed the Air-Gap LT4 intake, it features typical LT4-style raised runners and a redesigned plenum. We swiped one of those pretty red pieces and featured it on our engine along with the Edelbrock dual 58mm throttle body. Between that intake and our short-block sat those Edelbrock's LT4 cylinder heads. Sporting beehive springs, 8mm valve stems, and 195cc runners that flow like the dickens, the heads complete a great bolt-on top end.
Our goal with this stroker is to test four different cams ranging from pretty mild, to lopey and wild. We'll start with the Edelbrock LT1 cam as our model since it completes the whole Edelbrock LT package. Moving forward we'll swap in three different COMP Cams sticks, all of them operating COMP Cams Magnum hydraulic roller lifters, pushrods, and roller rocker arms.
Engine management would be controlled through an EMS-Pro ECU available from EFI-Source. An integrated narrow-band as well as an Innovate wide-band O2 sensor would verify tuning decisions. The ECU would also tell the MSD 6AL2 ignition box when to fire the matching MSD billet Optispark distributor.
Dyno Testing
We wanted a good baseline to begin with. We know through past testing that typical 150,000 LT cars make about 225 rear-wheel horsepower through a six-speed, and that corresponds pretty well with their 285 advertised horses at the crank. Assuming the extra cubes we were running would add about 30 horses to the stable, that would set a baseline goal of 315 hp in otherwise stock trim. With a bushel full of cams and a team ready to burn our hands in the name of horsepower, we set out to Shackett Automotive in Nashville to strap our engine to their Superflow 901 dyno.
We started up our little stroker with the complete Edelbrock LT4 system, including the 218/218-at-.050-inch camshaft. The cam is relatively mild mannered and the engine fired up right off the bat with just a lovely hint of lope. A glance at the computer screen revealed the manifold vacuum at idle was a near-stock 28 kPa. After bringing the oil and water temps up, we dropped the hammer on the dyno and were stunned with the results: 430 hp and 461 lb-ft of torque. We were not expecting those kind of numbers. Granted, the Edelbrock heads flowed pretty well, but with the docile cam just bumping along, we didn't expect the combo to pick up over 100 hp from stock! We couldn't wait to bring on the bigger cams.
We popped off the valve covers and the COMP Cams rocker arms and got busy installing cam number two. COMP's 503 cam is one step bigger in duration than the Edelbrock cam. With 224/230 degrees at .050 inch, it would have a slightly more noticeable idle but still work with the stock 24-pound injectors (though pressure was raised to 52 psi from 43) and satisfy those wanting the sleeper effect.
We set the preload on the COMP Cams hydraulic roller lifters to zero, and brought the engine back to life. Again, wow! It pegged over 450 hp without breaking a sweat. This was moving steadily into big-block territory with just a basic bolt-together small-block.
Back into the steaming engine we went and installed cam number three. This was COMP's 467 cam with 230/236 degrees at .050 inch and a solid, lumpy idle. Based off some simple math, we knew we were at the end of what our tired stock 24-pound injectors could handle, so we went on a last-minute scavenger hunt looking for 36-pound injectors. We called a local shop and they said, "Sure, we got those," but when we arrived it turns out they never checked the shelf, so we were SOL. Or so we thought. The counter guy rooted around out back and came back with a set of DEKI 60-pound injectors that were way overkill for the engine, but we had to get it going, as dyno time wasn't free. We fouled a set of plugs before backing off the tune enough to run smoothly, but we were soon back in business.
At this point we shouldn't have been surprised to see the Edelbrock heads and intake support a solid 470 hp and 489 lb-ft of clutch-punishing torque with the third cam. I don't care who worked on dad's old double-hump heads, very few modified old-school small-blocks made this kind of power on a real dyno. And most were not fun to drive.
With cam number four, we jumped straight to the bottom of the page. No use trying to sneak this car past the neighbors late at night. This dude lopes. And let's face it, at this stage you want it good and loud. The COMP 468 cam runs 242/248 at .050 inch and idles at a tooth-rattling 48 kPa.
At this point we had already run through 10 gallons of gas, and we had to make a last-minute run down to the local Kwik-Stop to get another five gallons of junky 10 percent ethanol-infested 93-octane juice. If this 11.5:1 bolt-together engine could survive 50 dyno pulls on this swill, it could live on anything.
Back at the dyno, we fiddled with the fuel curve. She liked to be lean at around 13.5-14:1 AFR. She also liked a little timing. We set the curve to peak at 35 degrees total, and pulled the handle. Six guys huddled in a control room big enough for two, and we jockeyed for the best view of the dyno screen. When the pull peaked and the screen flashed up the numbers we actually cheered: 500.4 hp.
Conclusion
We learned quite a bit from this exercise. First, cam swaps with an LT1 are no more difficult than with an old-school small-block. In fact, they are a little easier as there is no break-in process. Second, with a little extra stroke, Edelbrock's LT4 top-end kit blows away their modest power claims. Third, even with a mondo camshaft, it is entirely possible to use the EMS-Pro to create a totally driveable power-monger. This little stroker took a beating and came back again and again for more. Say what you will about the short-lived Gen II engines, but don't ever say they won't make power.
Bonus Test!
We had this hideous homebuilt intake manifold sitting on the shelf for about three years and figured there would be no better opportunity to test it. The story here is that a while back, we figured a higher-revving LT1 engine would enjoy the benefits of a larger intake plenum. So we headed down to the metal store and picked up a bunch of aluminum and started hacking away at a stock LT1 intake. We removed the entire top of the intake and welded a 2-inch tall extension to the length of the plenum. This precluded the use of the factory fuel crossover so some minor modifications were made to that as well. Some port matching was also in order to meet the runners of the Edelbrock heads.

As soon as we were done wringing the most we could out of the Edelbrock intake, we left the big cam in there and installed what we lovingly call the "bread box" intake. We honestly had no idea how it would fare compared to the beautiful red intake that had performed so well. Not surprisingly, the gurus from the big E knew their stuff as their LT4 intake bested the bread box through almost the entire rpm range ... until 5,900 rpm that is. From there on up, the bread box did as it was designed to do and was able to feed just a little more air to the mill and pick up just a couple of horses. Was it worth it? Maybe, if you plan on using only a high stall converter and revving the wee out of the engine. Otherwise, save a bunch of time and effort and stick with what papa Vic puts out.
Edelbrock Top-End Kit
Under a mass of wires that resembles the lower intestines of someone who overdosed on Skittles lies a wolf in wolf's clothing. The heads, intake, and throttle body of the Edelbrock LT4 kit are beautifully crafted pieces that scream power and deliver at a competitive price. We wanted to do this test with a combination that was in fact reasonably priced and readily accessible to the average rodder. There are a number of custom head porters out there who could no doubt out-perform the LT4 Xtreme heads, but at what cost? The Edelbrock heads showed up to our door in ready-to-run condition. The decks were perfectly level with no need for extra surfacing as some aftermarket heads require. Screw-in studs and guideplates precluded the need for expensive narrow body self-aligning rocker arms. In fact, we were able to use standard issue COMP rocker arms under the OEM valve covers by merely cutting out the tin tie-bar in the valve cover and installing a piece of tubing to make up the difference.
The heads use lightweight 8mm valve stems with 2.02/1.57-inch stainless steel valves and beehive springs that according to our spring tester were easily good for more than .600 lift. They have fully CNC-ported combustion chambers as well as CNC-blended intake and exhaust runners. The only issue we had was that the large 195cc runners had a port entry that was larger than either the LT1 or LT4 intake gaskets. This was easily remedied by using a set of Felpro 1206 gaskets, and punching out a new set of boltholes in them. With flow numbers better than the factory LT4 heads and much less scarce, it makes the Edelbrock heads an easy choice.
The Edelbrock LT4 intake manifold is every bit as nice as the heads. It uses an Air-Gap design to cool the runners and plenum and accepts all the factory sensors and bolt-ons as well as a 58mm throttle body without any extra grinding. A super nice red powdercoat mimics the finish of the GM LT4 intake. No port matching was required to mate the Edelbrock intake to their heads. Though they suggest some matching may be required if using this intake on factory heads. Together, the pieces of the Edelbrock top-end kit form a perfectly matched combo clearly capable of massive power.
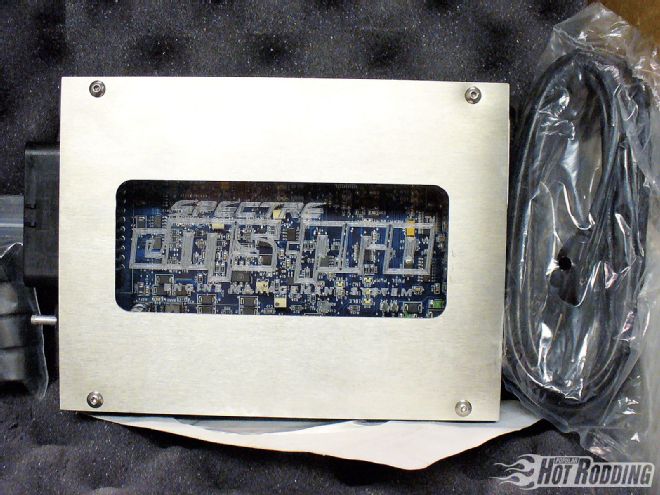
EMS-Pro
Controlling a fuel-injected engine can be very complex, or very simple. The options for an LT engine vary from using the stock computer and reflashing it with one of the available programmers, to running a complete stand-alone fuel management system. We've been down the road of reprogramming the stock ECU, and though it does work well, we wanted something that was easy to deal with outside the chassis of the car and didn't take forever to download each change. That left us trying to decide what fuel management system to use. There are tons of them out there, and honestly, they are all pretty darned good. We didn't want something that, in reality, could cost more than the car we yanked the engine from. Having used the home-brewed Megasquirt before on a few projects, we decided on the EMS-Pro from EFI-Source that uses the latest Megasquirt technology and Megatune software. With a flying-lead harness, a set of injector clips, an air intake sensor, coolant temp sensor, and narrow-band O2 sensor (all just plain-Jane GM stuff) our whole system cost less than half of some of the more popular systems. We just added a throttle position sensor, fuel rails, and injectors from a stock LT1 and we were in business.
There are a number of options for triggering the ECU. After lengthy searching, we found a way to run it based off the Optispark pickup, but we wanted something a little simpler. Following the do-it-yourselfer attitude of the Megasquirt world, we rounded up an old Holley hall-effect crank trigger wheel, scavenged a crank sensor from an LS1 engine, and cobbled up a sensor mount. Correctly assuming there would be a learning curve, we got everything together on our run-in stand instead of wasting precious dyno time. The initial setup was fairly straightforward, and the engine fired up without much effort. The problem came whenever we tried to rev it above 3,000 rpm and it would stutter and stumble. After lengthy calls to EFI-Source tech dude Scott Clark-aka "Dieselgeek" on the boards-we went through a couple of different crank triggers and sensors, but it turns out we were just getting noise in the crank trigger wires from having them routed too close to the injectors. A quick rerouting and the engine ran like a dream. Tuning changes were quick and easy, and most didn't require turning off the engine, though I wouldn't suggest that technique in a moving car. For just over a grand, we had a fully optioned ECU with 12x12 resolution tuning tables that worked as good as anything on the market.
MSD For LT1
In their quest for ignition perfection, MSD is constantly innovating and updating. Case in point: the billet LT1 Optispark distributor. They've taken the OEM design to the next level with this masterpiece. A billet aluminum base featuring large ball bearings for stability and an extra hold down bolt to reduce leakage are standard fare. What really sets it apart is the adjustable dial that allows the tuner to advance or retard the spark timing +/- 5 degrees at the twist of a screw. They've also included an upgraded optical pickup that is significantly improved over stock. Add those tricks to their top-shelf cap and rotor and it should be the last Opti you'll ever have to buy.
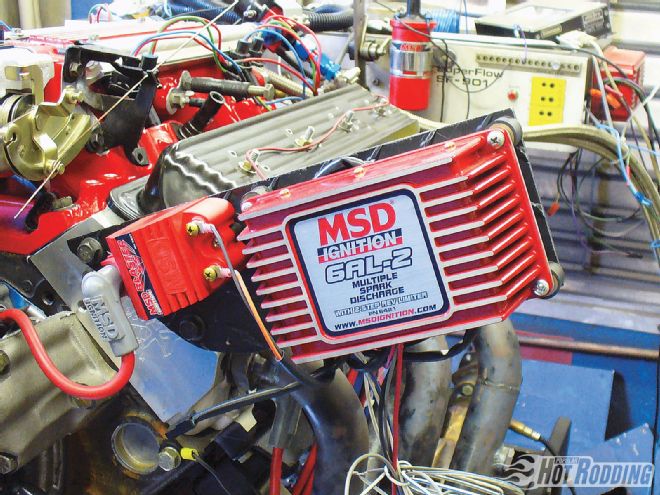
The distributor isn't the only place where MSD is moving forward. Recently, they unveiled their 6AL-2 ignition box. Destined to take the place of the venerable 6AL that has been a staple in racing and hot rods for years, the 6AL-2 uses digital technology instead of an analog design. This allowed MSD to put additional features like a built-in two-step and optional hall-effect trigger pickup into a smaller case. More features, less space, what's not to like? As always, they even went through the effort of printing their wiring diagram on the back of the box for those of us who immediately destroy all instructions upon receipt.
WHERE THE MONEY WENT Item: Part No: Price: Used LT1 complete engine core NA $150 Eagle cast steel 3.75-inch stroke crank 10352375057I $259.95 Eagle SIR 5.850 rods SIR5850BBLW $264.95 Wiseco flat-top pistons K166AS $653.99 Total Seal gapless second piston rings NA $259.39 Mahle/Clevite rod bearings CB663P $22 Mahle/Clevite main bearings MS909P $25.95 Mahle/Clevite cam bearings SH290S $17.95 Felpro conversion gasket set QCS9966 $69.95 Felpro head gaskets 1074 $75.90 Felpro intake gaskets 1206 $16.95 Felpro valve cover gaskets QVS50088R $16.25 COMP Cams Type R Magnum lifters 875-16 $207.88 COMP Cams Magnum pushrods 7608-16 $99.95 COMP Cams Gold 1.5 roller rockers 1004-16 $299.95 Cloyes LT1 timing set C3039 $87.95 Melling std. volume oil pump M55 $19.95 Enginetech oil screen S55S1 $7.95 Edelbrock LT4 Extreme heads 61939 $2,059 Edelbrock LT4 Air-Gap intake manifold 7109 $509.95 Edelbrock 58mm throttle body 3810 $315.95 Edelbrock LT1 camshaft 2108 $285.95 PARTS SUBTOTAL: $5,727.71
LABOR Bake and shot-blast block $40 Torque plate hone block $122 Deck block $110 Clean, install cam bearings and freeze plugs $75 Balance rotating assembly $225 File fit rings $50 Assemble engine $375 LABOR SUBTOTAL: $997
EFI PARTS EFI-Source EMS-Pro ECU $795 EFI-Source flying-lead wiring harness $95 EFI-Source fuel injector pigtails (8) $96 EFI-Source narrow band O2 Sensor kit $20 EFI-Source coolant and air temp sensor kit $35 Crank trigger wheel – used $20 Hall-effect pickup from LS1 – used $5 EFI SUBTOTAL: $1,066
IGNITION PARTS Item: Part No.: Price: MSD Billet Optispark distributor 83811 $499.95 MSD spark plug wires 32149 $109.95 MSD 6AL2 6421 $251.95 MSD Blaster SS coil 8207 $40.95 NGK spark plugs TR55 $21.52 Ignition subtotal: $924.32 BASIC ENGINE TOTAL: $8,715.03
CAMSHAFT TESTING Item: Part No.: Price: remove Edelbrock cam 2108 -$285.95 COMP Cams LT1 cam option 07-503-8 $249.95 COMP Cams LT1 cam option 07-467-8 $249.95 COMP Cams LT1 cam option 07-468-8 $249.95 Deki 60 lb/hr injectors NA $450 TOTAL COST: $9,129.03
On The Dyno • LT Cam Test Results RPM TEST 1 TEST 2 TEST 3 TEST 4 TEST 5 TQ HP TQ HP TQ HP TQ HP TQ HP 3,600 447 306 436 299 443 304 393 269 383 263 3,700 448 316 444 313 446 314 397 27 394 279 3,800 454 328 459 332 453 328 399 289 410 296 3,900 459 341 462 343 459 341 404 300 415 308 4,000 461 351 463 353 466 355 426 324 419 319 4,100 459 359 464 362 474 370 441 344 436 341 4,200 464 371 468 375 474 379 445 356 442 353 4,300 463 379 468 383 480 393 453 371 447 366 4,400 460 386 467 391 483 405 456 382 450 377 4,500 459 393 463 397 479 410 453 388 449 385 4,600 453 397 459 402 477 418 448 393 456 399 4,700 450 403 453 405 473 423 450 403 450 403 4,800 449 410 446 407 470 430 450 411 450 411 4,900 448 418 454 423 469 437 451 421 448 418 5,000 439 418 448 427 465 443 451 430 446 424 5,100 433 421 447 434 462 449 453 440 456 443 5,200 428 424 438 434 457 452 459 454 447 443 5,300 419 422 434 438 453 457 454 458 452 456 5,400 416 428 429 441 447 459 453 466 450 463 5,500 413 432 421 440 443 464 452 474 443 464 5,600 399 425 416 444 433 461 444 473 442 472 5,700 395 429 411 446 429 466 448 486 442 480 5,800 388 428 403 445 423 468 440 486 439 485 5,900 383 430 402 451 419 471 436 490 440 494 6,000 375 428 394 450 410 468 429 491 433 495 6,100 365 424 385 447 400 465 427 496 427 496 6,200 354 418 375 443 394 465 420 496 422 498 6,300 416 499 418 502 6,400 411 500 411 501 6,500 402 498 406 502 6,600 393 494 402 505
TEST 1: Edelbrock top-end kit w/Edelbrock 2108 cam 218/218 @ .050 .525/.525 lift 112 LSA TEST 2: Edelbrock top end w/COMP 07-503-8 cam 224/230 @ .050 .503/.510 lift 112 LSA TEST 3: Edelbrock top end w/COMP 07-467-8 cam 230/236 @ .050 .542/.537 lift 113 LSA TEST 4: Edelbrock top end w/COMP 07-468-8 cam 242/248 @ .050 .549/.545 lift 113 LSA TEST 5: "Bread box" intake w/COMP 07-468-8 cam 242/248 @ .050 .549/.545 lift 113 LSA