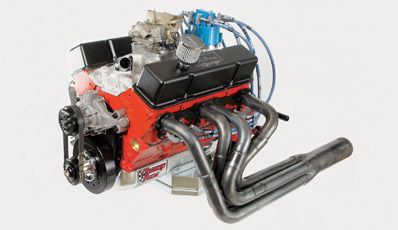
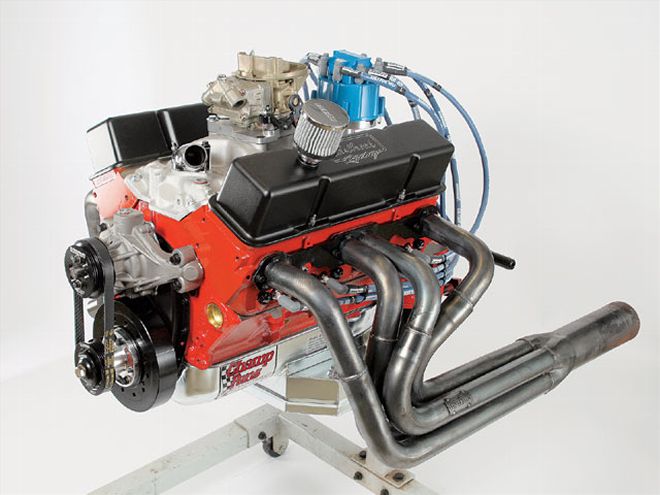
 This Chevy should make good power and have plenty of durability without any exotic components or magic tricks-just good engine-building practices. Power and torque numbers? Well, you'll just have to wait for the end of the series for that!
Times are tough. The economy is moving slower than out-of-town traffic on a Friday afternoon, money is tight, and race teams everywhere are being forced to tighten their belts a little bit. We've seen too many racers have to mothball their cars until they're able to scrape up enough extra cash to pay the bills. It's understandable. For many of us, racing is done with the money that's left over after we take care of feeding the family, paying the mortgage, and giving Uncle Sam his cut.
With that in mind, Circle Track has embarked on a multipart engine-build series designed specifically for the racer on a budget. This series will be geared toward the first-time engine builder. Granted, this is somewhat of a departure from CT's normally advanced tech focus, but it's always a good idea to revisit the basics every so often.
Throughout our engine-build series, we'll walk you through a buildup of a Chevy 350 built for what's generally known as the Limited Late Model class. It may be called something different at your racetrack, but the idea is to build an engine that's right in the sweet spot of what you see all across the country. It may not be exactly like what you race, but it should at least be close, and you can take many of the ideas from this build and transfer them to just about any race class with any make of engine. The money you save by doing many of the steps yourself may be enough to keep you in racing for another season, or you can use it to upgrade the components in your engine or chassis. It's your choice.
The key is to know what you can do yourself and what you'll need to farm out. That will vary a bit for everyone. For example, almost all of us will need to send out the block and cylinder heads for machine work. Those steps require specialized equipment that's too expensive for anyone other than a professional engine builder. But if you're comfortable making measurements with a dial indicator and a set of calipers, you can do much of the prefitting and assembly yourself. It's all about finding your comfort zone, and we're here to help you push that comfort zone out a little further than ever before.
So follow along as we begin the build of this Chevrolet with an eye toward getting the best bang for our buck. This is no typical magazine pie-in-the-sky engine build where cost is no object. We'll do one of those later. Instead, we've switched things up by keeping an eye on selecting the components most likely to be used in the real world, so that we can evaluate exactly how they'll perform. And finally, it's important to note that this series of articles will be aimed toward showing you as much as possible about the art of building a race engine, there's no way we'll be able to cover absolutely every eventuality. Entire books have been written on the subject, and while we simply don't have that much space here, we can certainly get you pointed in the right direction.
As mentioned earlier, most of these build tips will work with any engine, but some things-such as torque numbers or measurements-are specific to the Chevy small block. Hopefully, next time around we can build a Ford to fit the same class rule set and see how they compare, both in terms of power production and the dent they make in your wallet. Let's get started.
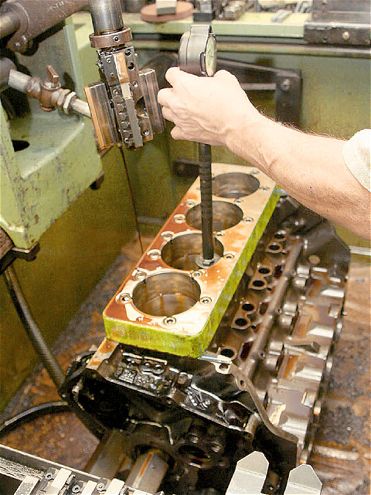
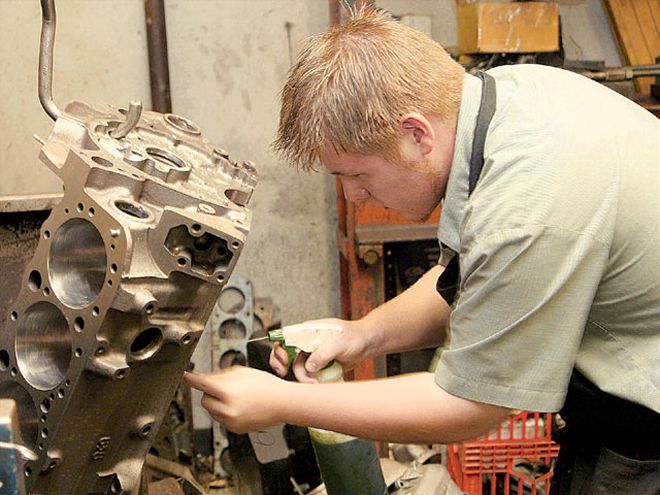
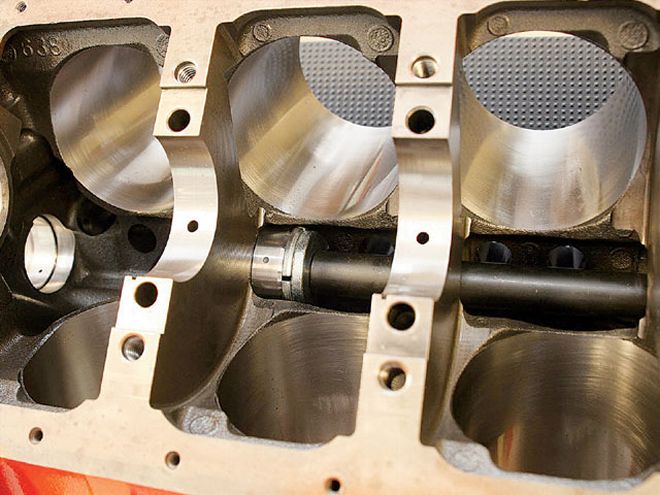
Our block is a standard Chevrolet 350 that we picked up for $450 and had KT Engine Development check out for us. Machining your block and heads is one area you should definitely leave to the professionals. Have your engine machinist check the block for cracks, align-hone the cam bores and mains if necessary, deck the block and heads, and bore and hone the cylinders. Here, the cylinders are being measured just before final honing to 4.030 inches with a deck plate in place. This plate simulates the stresses placed on a block when the heads are bolted in place.
We went with JR Motorsports because it can provide the entire rotating assembly (crank, connecting rods, pistons, bearings, and rings) in one complete package. The benefit of doing this is that JR Motorsports can ship everything already balanced so you don't have to send the crank out to be balanced later. The crank, by the way, is a Scat unit with stock stroke and journal dimensions that should work nicely.
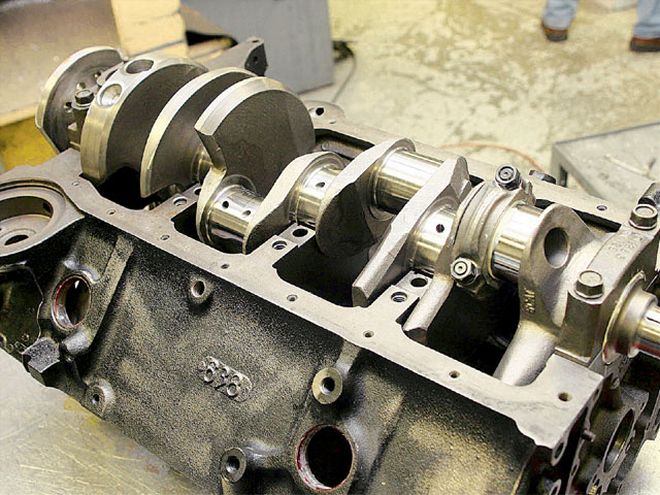
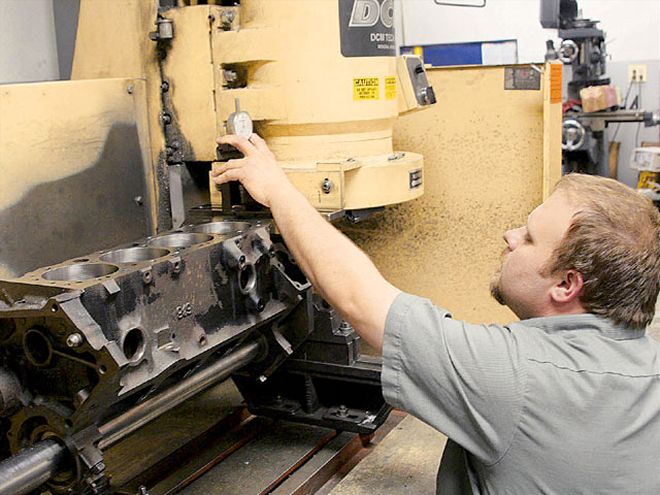
KT Engine's Kevin Troutman decks the block. Standard deck height on a Chevrolet small block is 9.025 inches, and with the flat-top pistons required by most racing classes, one of the only ways to increase compression ratio is to cut the deck of the block down so that the piston top is closer to the combustion chamber at top dead center. Troutman cuts the block so that the piston is still 0.005 inch below the top of the deck at TDC. In order for your machinist to deck the block correctly, he must know your crank's stroke, rod length, and piston compression height (the distance from the center of the pin hole to the top of the piston). Being able to take the compressed head gasket thickness doesn't hurt, either (this information is available from your gasket manufacturer).
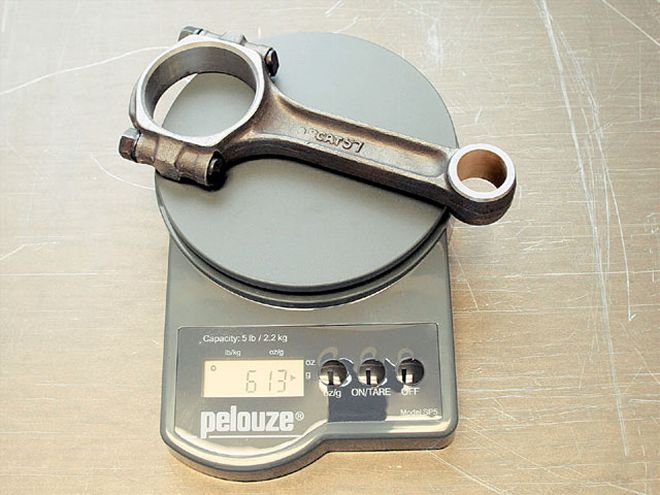
The connecting rods are also from Scat. They are the stock 5.7-inch length and a stock replacement design that is very economical. This is one area where, if money is available, you might want to step up to one of the lighter-weight Scat rods that JR Motorsports offers, which will make the engine accelerate more quickly.
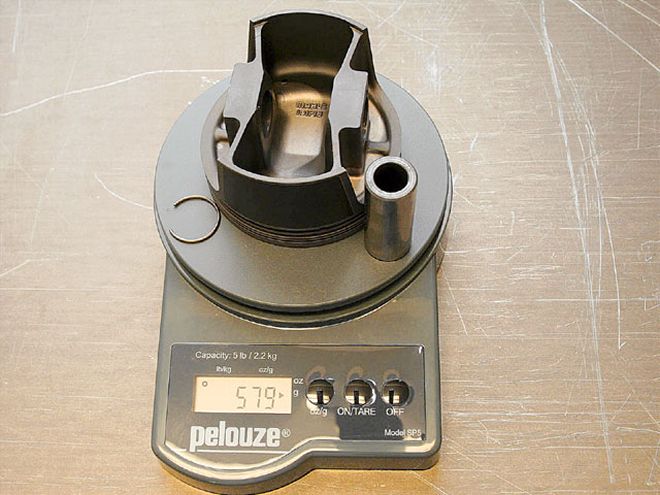
The pistons JR Motorsports provided are Mahle units that are perfect for this level of racing. They are relatively lightweight at 579 grams (including pin and locks, but not rings), and use Mahle's great skirt coatings for reduced friction and scuffing. Notice the narrowed pin towers which reduce weight by shortening the length of the wristpins while still maintaining good rigidity.
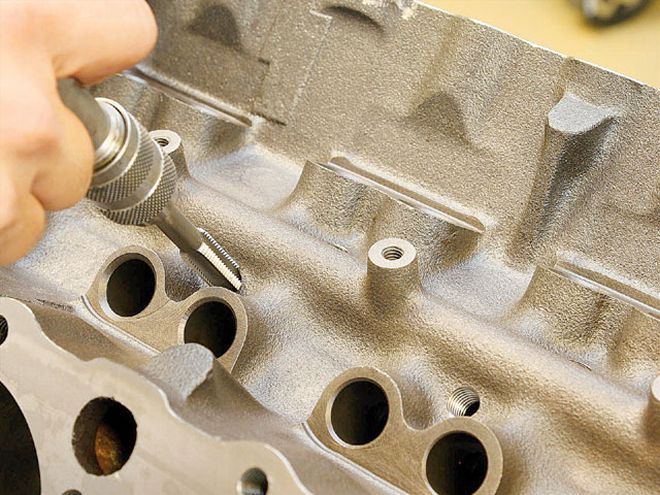
One easy process that can save you some horsepower is to block the oil drain holes in the lifter valley directly over the camshaft. These holes are designed to provide additional lubrication to the camshaft, but they aren't necessary in a race application and only cause a loss of horsepower through windage. Tap and plug these holes, but make sure the plugs can't extend so far that they can contact a spinning camshaft. The best time to do this is before the block receives its final cleaning. If you plan on having your engine machinist do the cleaning, tap these holes-but do not plug them-before sending out the block.
KT Engine's Nathan Allmond handles final cleaning on our finished block. This is a labor-intensive process and one that definitely should never be short-changed. Dirt or grit left anywhere inside a block can be very harmful to bearings or other components. Make sure to scrub out all the oil galleries thoroughly and then blow them out completely. This requires a specialized set of brushes you can pick up from places like Powerhouse Products. Don't try to get by with stuff you have laying around the kitchen. Begin by washing the block with water to cut the soaps in the cleaners used in engine shops. Then follow up immediately with lacquer thinner and a coat of automatic transmission fluid. The ATF is not only a good cleaner, but it will also stop rust from pitting the freshly machined areas such are cylinder bores.
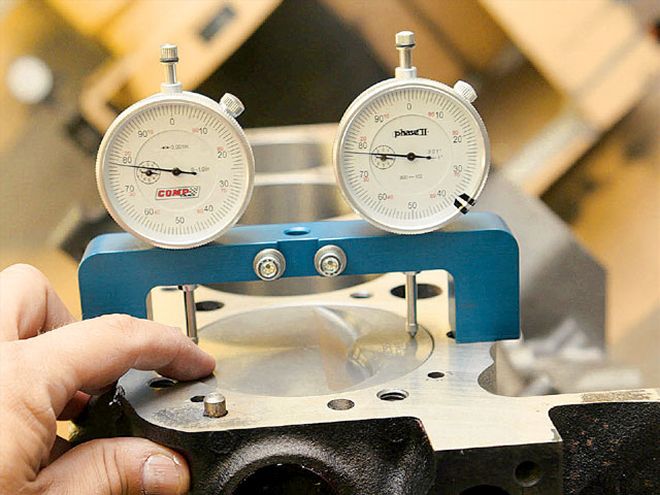
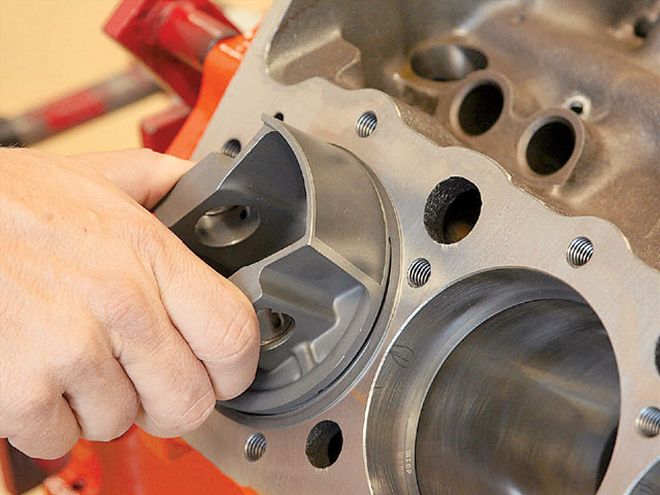
This is a deck bridge tool, and it has a number of uses. This one came from Powerhouse Products, and it can be fitted with either a single dial indicator in the center or two on the edges. We're using two here to check the piston height to the deck at TDC. You want to do this after the block comes back from the machinist to make sure the deck is machined correctly. Using one set of bearings, one rod, one piston, and the crank, mock up the assembly in each of the four corner cylinders. Spin the crank until the piston is at TDC (the closest to the top of the bore). Use the two dial indicators to make sure the piston is level (both readings should be the same), and measure the distance from the deck of the block to the piston top. You should have already zeroed out the gauges on a flat surface, and make sure the dial indicators are on a flat part of the piston, not the pocket. The distance from the deck of the block to the top of the piston should be the same at all four corners. If not, the deck of the block may have mistakenly been milled at an angle.
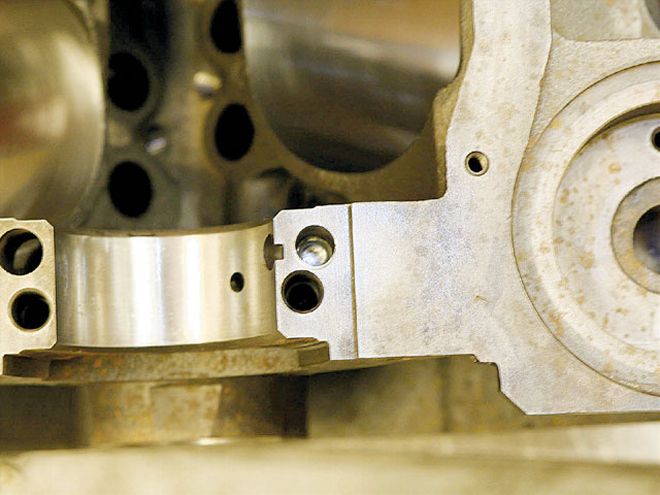
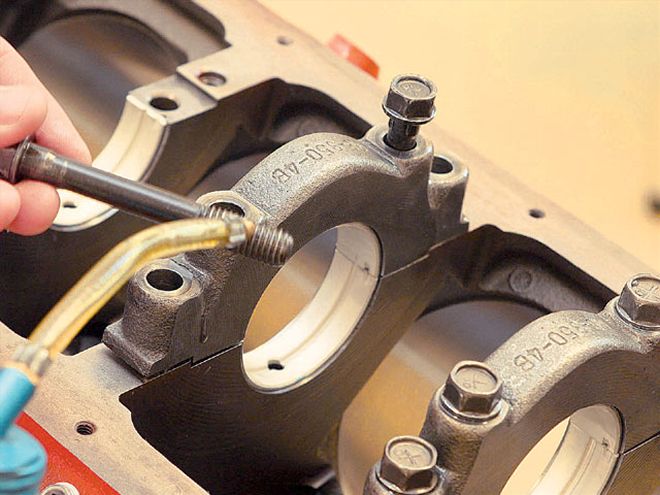
This is the rear housing bore for the main bearing. Before installing the bearings, make sure this oil gallery plug is reinstalled. You can see it in the upper hole on the right side of the housing bore.
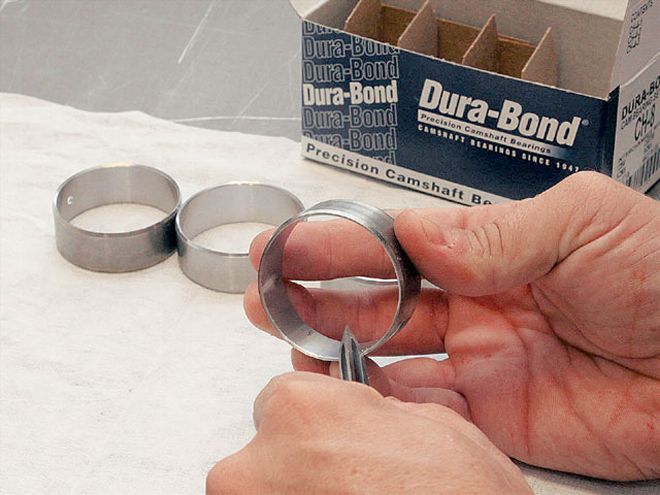
It's time to install the cam bearings. Before sticking them in the block, take a carbide deburring knife and gently chamfer the edges on the i.d. to make sure none of the bearing babbit gets peeled back when installing the cam. Then thoroughly clean each bearing with a lint-free cloth soaked in lacquer thinner.
Properly installing the cam bearings requires a specialized tool because they must be installed square to the housing bore or they can become deformed. A tool, such as this one from Goodson, is a bit expensive, so if you plan on building engines only occasionally, you will probably come out ahead to have your engine machinist do it. If, however, you plan to build your engines regularly, a cam bearing installation and removal tool will prove invaluable.
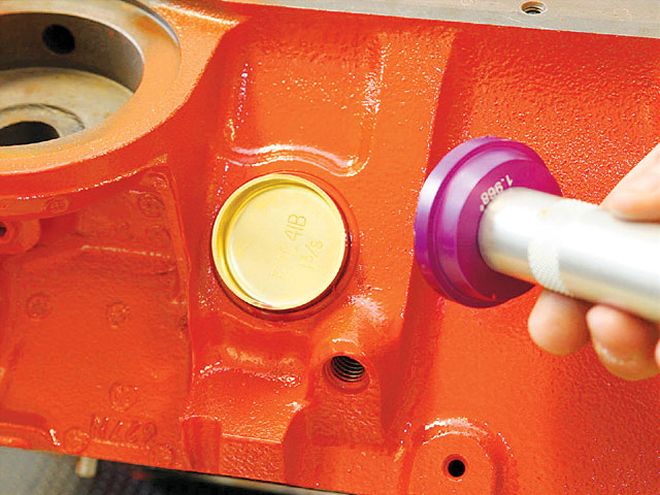
It's a good idea to spend an extra buck or two to upgrade to brass freeze plugs over standard steel. This is because most racers run pure water in their cooling systems instead of an antifreeze mix, and brass won't corrode with contact to water, like steel. An easy way to install freeze plugs so they don't leak is to use a seal driver just a bit larger than the outside diameter of the plug. Drive the plug until the outside of the driver contacts the block all the way around, and then you will know the plug is square in the bore. Also, it's a good idea to use red Loctite on the edges of the plug. It not only will help hold the plug in place, but Loctite also expands when it dries to help seal any scratches or gouges.
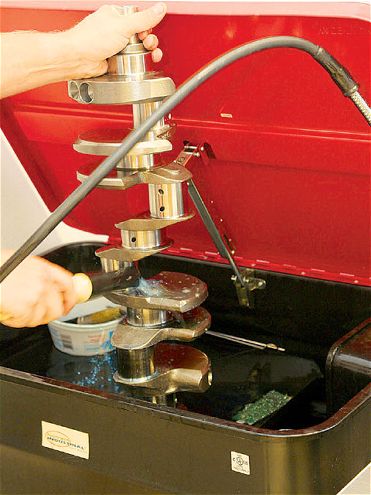
With all of the block plugs out of the way, it's time to start prefitting the rotating assembly. The first step is to completely clean all the components. Don't forget the galleries that feed oil from the main journals to the rod journals. Make sure to clean them out with a brush. If you don't have access to a parts washer (and if you're using your shop washer, please drain the old coolant and replace with fresh, first), you can use lacquer thinner or brake cleaner.
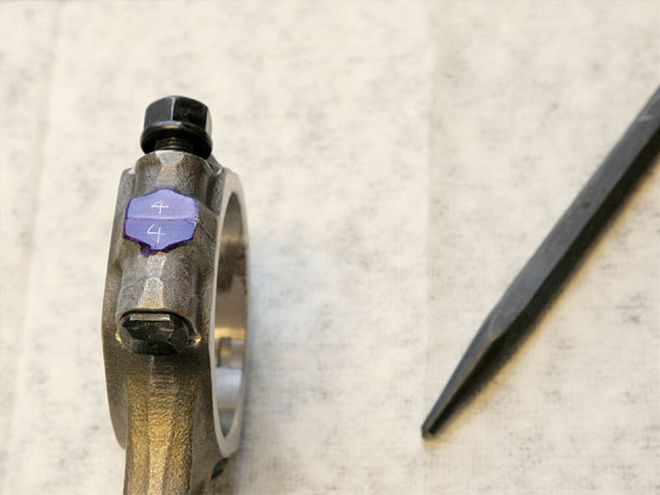
During the prefitting process, you will have the rods apart several different times. To keep from getting the caps confused, paint the side of the rod with machinists' dye and scribe a number (from one to eight) on both sections of the rod. This way, when you have them all separated, you always know which cap mates to which rod. We use a sharp-pointed punch for a scribe because it makes a nice, legible line.
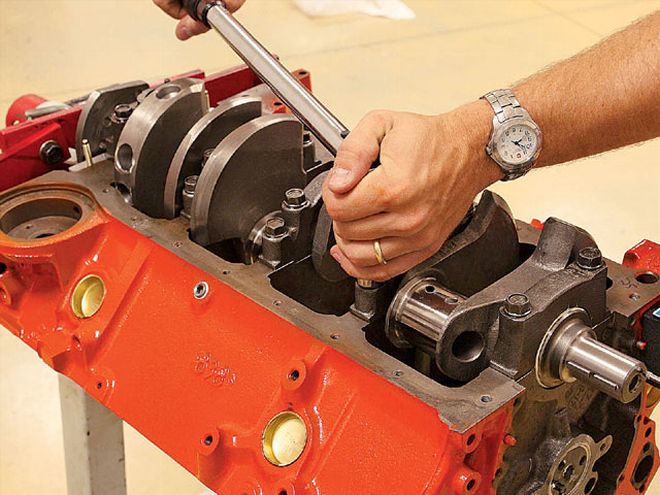
The idea of prefitting the rotating assembly is to make sure you have the proper clearances at the rod and main bearings. Too little and you run the risk of spinning a bearing. Too much and you waste oil-tighter clearances allow you to run thinner motor oil. As a general rule, you want 0.001 inch for each inch of journal diameter. For example, a standard Chevy main journal is 2.45 inches thick, so you want the clearance between the journal and the bearing surface to be 0.0024 inch (give or take a half of one-thousandth). You can see that this requires some pretty precise measurements. Begin by installing the bearings into the main housing bores (the grooved half always goes into the block) lubricating the threads and underneath the heads of the bolts with motor oil and torquing them down to 70 lb-ft for the inner bolts and 65 for the outer. Although we're using a truck block with four-bolt main caps, blocks with two-bolt mains are usually good for upwards of 400 hp safely.
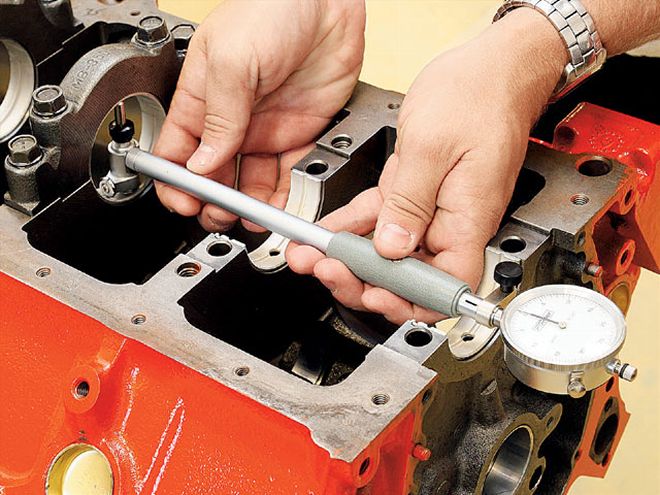
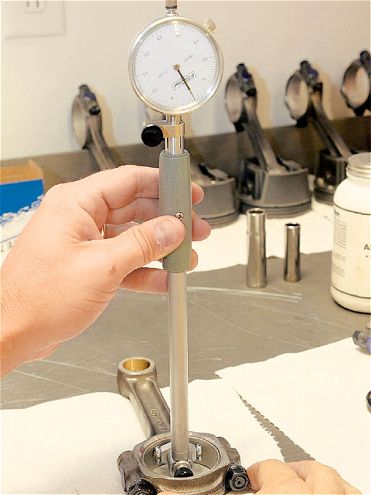
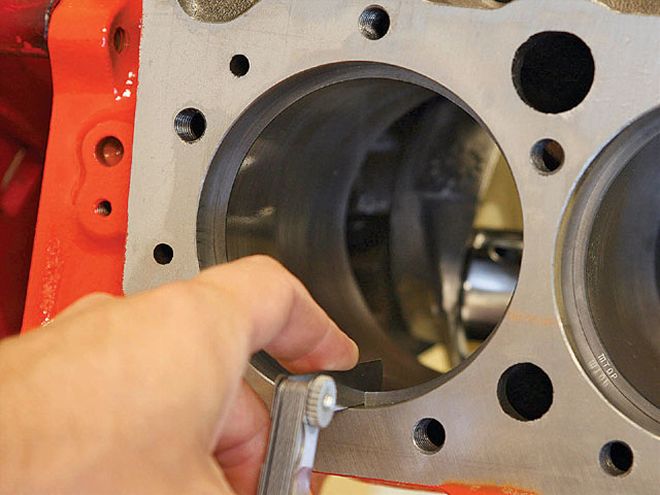
This is a dial bore gauge, and economical models are available from Powerhouse and Goodson for around $100. Starting with the rear of the block, install one cap and bearing and zero out your dial indicator vertically to the i.d. of the bearing. Do not catch the gauge in the groove in the upper bearing shell, and do not measure near the bearing's parting lines, as it gets thinner there.
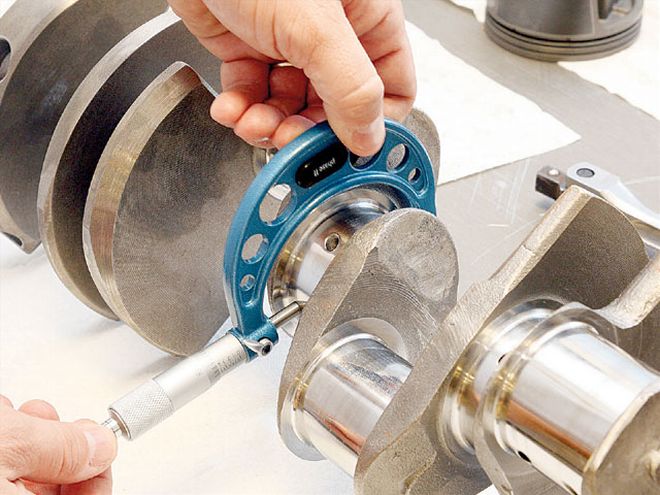
Use a micrometer to get the o.d. of the matching journal on the crank for the bearing you just measured. Again, good micrometers can be had economically from the same engine tool supply houses, and for this exercise you don't even have to be able to read the instrument. Just make sure to measure at least 30 degrees away from the oil gallery holes in the journal because they will throw off your measurements.
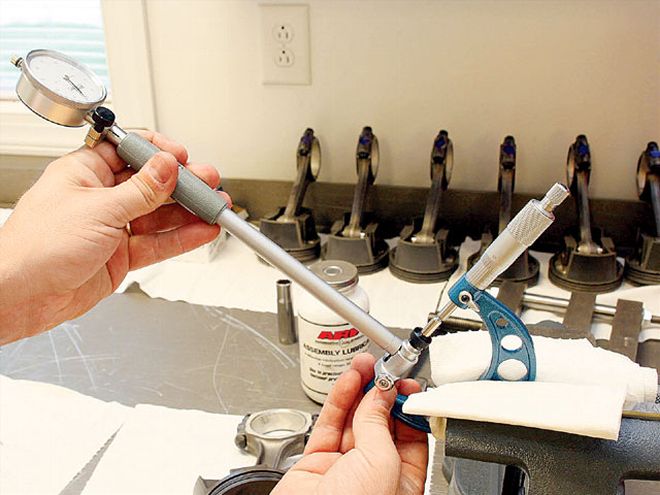
Lock the micrometer in position so that it won't move, and secure it gently in a vise. Now, place your dial bore gauge inside the micrometer like so. You will know you have the gauge square inside the micrometer when you get the smallest number. With a 2.45 main journal size, you're looking for a bearing clearance between 0.0021 and 0.0029 inch. If your measurements don't fall inside this range, you can get a set of undersized or oversized bearings in either plus or minus one-thousandth of an inch in diameter. By putting in just the upper shells of one set with the lowers of a standard set, you can make changes to bearing clearance by increments as small as 0.0005.
Repeat the process with the rod journals and bearings. Install the bearings inside the big end of the rod and torque to spec. (We'll get into measuring rod bolt stretch later, but this is a good time for that, too.) Rod-bearing clearance follows the same ratio, so for a standard 2.100 rod journal on the crank, the bearing clearance should be between 0.0018 and 0.0022 inch. If in doubt, err on the side of too much clearance to avoid the chance of a spun bearing.
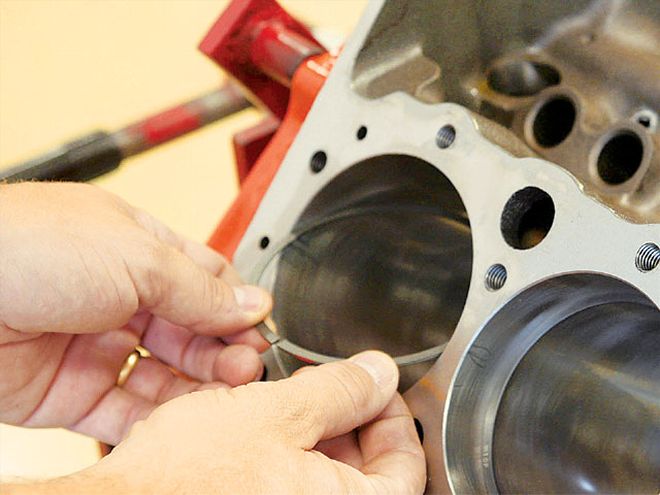
Piston rings have to be file-fit. Proper ring gap depends on horsepower and compression. For a midlevel engine such as this, ring gaps for the top ring between 0.0022 and 0.0024, and 0.0018 and 0.0022 for the second usually work well. Begin by sliding the ring into the bore sideways and then spinning it until it fits fully inside the cylinder.
To properly measure ring gap, the ring must be level inside the bore. A cheap tool for doing this is to install a ring on the oil-ring gap of one of your pistons and insert it upside down inside the bore. The piston should push the ring down until the ring on the piston catches on the deck of the block. When you pull out the piston, the ring should be square in the bore.
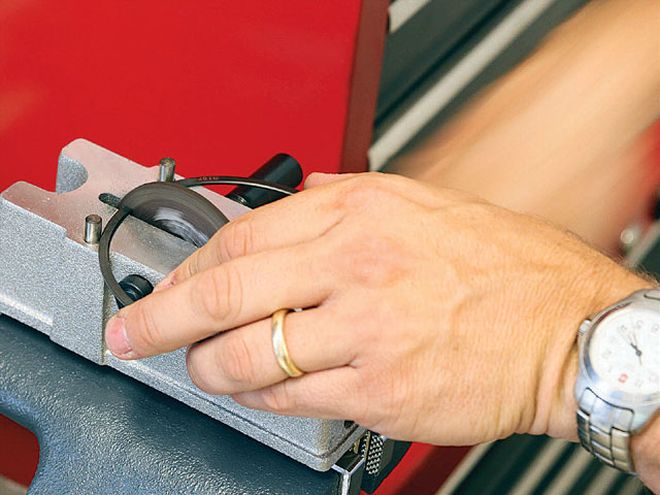
We got this ring filer from Powerhouse Products, and it works well. Lower-priced ring filers such as this have no provision for measuring how much material you cut off, so you have to slowly inch your way up to the proper ring gap. But as long as you're careful, they do an excellent job.
Periodically reinstall your ring in the bore-always match each ring to a specific bore, and do not change its location-and measure the gap with a feeler gauge until you get the gap you're looking for.
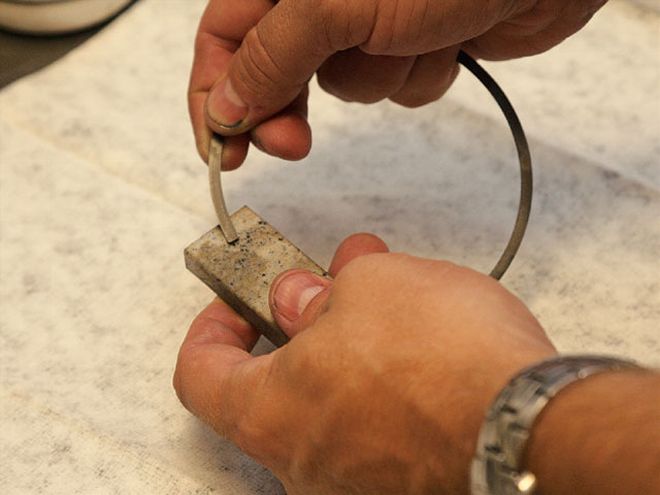
Use a honing stone to knock off any burrs you've created on the edge of the rings. Just be careful not to round off the ends, which will allow cylinder leak-down. Reinsert each ring into the bore it has been sized for, and leave it there until you're ready to install them on the correct pistons. This will ensure they don't get mixed up.
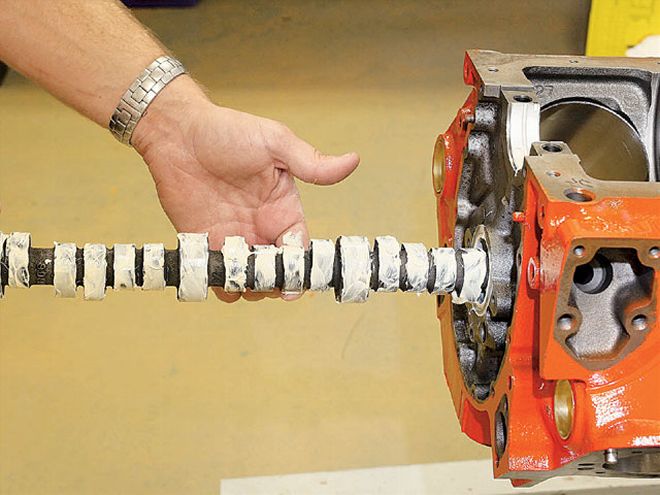
It's time to install the camshaft. Make sure to liberally lube it up-we're using white lithium grease because it's good and sticky, but you can also use thick assembly lube-and slowly side it into the bore. It's easier to install the cam before the crank is in place so you can reach down and help guide the cam from the inside of the block. One trick to help you control the cam is to attach the cam-timing gear, which will give you a little more leverage.

Next, it's time to check crankshaft endplay. Lubricate all the main bearings with either lithium grease or assembly lube, and gently set the crank into the saddles. Make sure to only lubricate the i.d. of the thrust bearing, not the thrust faces. Grease on the thrust faces of the thrust bearing will throw off your endplay measurements.
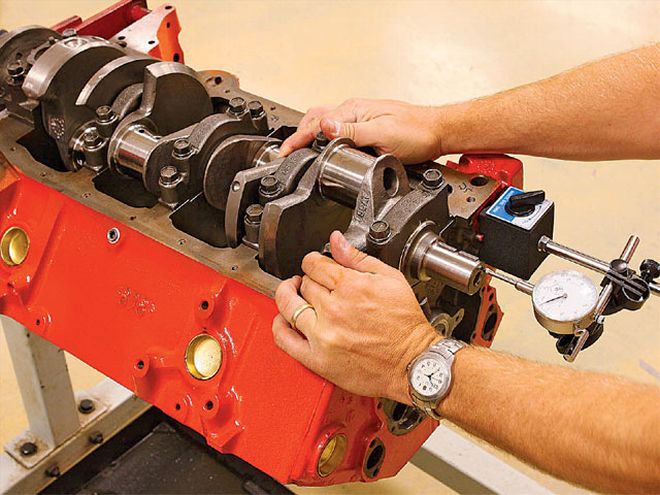
After torquing down the main caps, mount a dial indicator so that it contacts the nose of the crank like you see here, and move the crank back and forth. You may need to pry a big screwdriver between one of the caps and the crank's counterweights, just make sure not to scratch any machined surfaces. You should have between 0.005 and 0.010 inch of crank endplay. If you don't have enough, you may have a main cap misaligned, or you may have to rub the thrust faces on the thrust bearing very lightly on ultrafine wet sandpaper laid on a flat surface. If this doesn't take care of it, or if you have too much clearance, you likely have a poorly ground crankshaft.
Once your crankshaft endplay is documented and correct, you can pull the thrust bearing to completely lubricate it and recheck all the torque specs on your main caps. That may seem like a lot of work to only have the crank installed, but next month, things will really get moving!