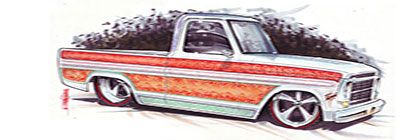
Baptism by fire is often the fastest way to learn, but boy does it get hot! When it comes to knowing what makes modern EFI motors tick, I'm not exactly "with it." Nonetheless, I needed to figure out how to make the '05-08 Ford 4.6L SOHC V-8 in my '68 F-100 get the go juice necessary for good ol' internal combustion.
After a few calls to Ford Racing Performance Parts (FRPP) and Aeromotive, it was apparent that there was light at the end of the tunnel. FRPP was interested in using the fuel system I was soon to compile as a guideline for the customers who purchase one of these three-valve, modular V-8s for their vintage automobiles. Remember, this particular engine is still fairly new and hasn't been used in any non-stock production, late-model vehicles to the best of our knowledge (especially since we just got the first prototype wiring harness from FRPP to control the motor. Stay tuned).After the fuel system experts at Aeromotive mulled over what the engine needed, it was decided that they would make a basic needs kit consisting of their A1000 submersible electric fuel pump, a 13101 fuel pressure regulator, a pre-pump 12304 100-micron fuel filter, a 12301 post-pump 10-micron filter, and all the applicable fittings as well as a special fitting to adapt the Ford fuel rail fitting to a male -8AN fitting. These pieces would be the heart of the fuel system and most other parts would vary from vehicle to vehicle. As for what was required for fuel lines, materials, styles, fittings, and so on, those components will still need to be gathered per application.
The other big variable in an EFI fuel system is the gas tank/pump configuration and whether the pump is mounted inside the tank or outside, presumably on the frame. Both ways can be done depending on your needs and budget, but most people installing a late-model motor in their truck will likely be moving the gas tank from inside the cab to under the rear of the bed. If this is the case, two birds can be killed with one stone by calling Rick's Hot Rod Shop. As luck would have it, Rick's has been working with Aeromotive for many years and has built and sold thousands of tanks set up for EFI using Aeromotive products. They have handcrafted stainless steel tanks for '48-72 Ford and '47-72 Chevy trucks or they can build a custom tank to suit your needs, which is the call I made. I gave Rick's the dimensions I had to fill with a tank since raising the bed floor in my F-100 and gaining lots of extra room. I also told him to prep the tank for an Aeromotive A1000 pump and 100-micron filter, and the tank showed up with all the necessary hard lines to make this happen inside the stunning, fully baffled tank. And remember, stainless is forever.
As far as what to use to connect all these pieces together and finally to the engine, I was somewhat at a loss. I'm fairly green when it comes to AN fittings, braided stainless hose, EFI, and the like, but Aeromotive guided me in the right direction over the phone and via their highly informative Web site. For most street applications, you would run a -8AN line to the engine and use a -6AN line for the return, but what do those numbers mean? Well, AN stands for "Army/Navy" and has been a standard size in hydraulic fittings that use a 37-degree flare to create the seal. AN line sizes will also have a dash (-) preceding the line size. The number after the dash refers to the amount of 1/16-inch O.D. (outside diameter). Therefore, -8AN would be 1/2-inch and -6AN would be 6/16 or 3/8-inch.
With that out of the way, I decided on a mix of 1/2-inch stainless hard line to run along the frame, and braided hose to jump from the frame to the tank and to the motor so vibration/engine movement wouldn't become a problem. I also chose to run -8AN line both ways instead of -8 and -6. That way I would only need to order lines and fittings in one size as well as only needing one size tubing bender, but -8 both ways is probably overkill.
Installing the goods from Aeromotive and Rick's was essentially a snap, but I won't lie and say that for a first-timer, the hard and braided line installation/creation from scratch was easy. It isn't for the faint of heart or those with a short fuse. In fact, it was the most difficult thing I've done since building a ship in a bottle, but I finished and I'm pleased that the effort was worth the end result. It'd be a good idea to get your tank in and the essentials from Aeromotive installed first, then carefully map out the lines and fittings you need since unneeded AN fittings can add up. One more important tip is to use antiseize lubricant on all your AN fittings and stainless hardware. It's very cheap insurance. Every company involved with this story has helpful tech lines and Web sites for those needing more assistance, answers, or products for your projects.
Anyway, I hope this is half as informative for you all as it was for me. Now I'm that much closer to firing this puppy up! CT