
 The Orphan attacks the dragstrip, but this time we've loaded it with nitrous, allowing us to lay down a 10.73 at 132 mph.
It's been five months since we first started blabbing about our LS1-powered Mustang, and we're happy you've stuck around to see if it meets our dragstrip, fuel economy, and budget goals. In case you're tuning in for the first time, you should be made aware of our schizophrenic project car. We took a perfectly good 5.0L Ford Mustang LX coupe and jammed in a Chevy LS1, complete with a T56 six-speed gearbox for motivation. It's already slapped the Chrondeks silly with an 11.26 at 122 mph, and has pulled in an honest-to-goodness 25 mpg in mixed driving. It's even managed to cost us less than $10,000 to build. Our progress has been steady; with careful planning and with the car tuned and mostly sorted, getting into the 10s has been our new priority.
Now that we've been able to pluck low 11s from our orphaned LX, we've realized that diving into the 10s will require a bit more horsepower; however, our project's self-imposed budget of $10,000 will not permit any type of exotic components. After some late-night bench racing with the staff, it was clear that nitrous oxide was the tool we'd need to get us solidly into the 10s.
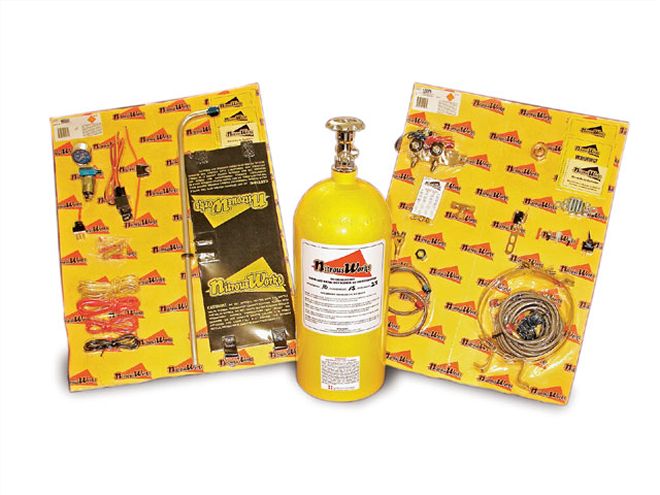 Nitrous Works makes one of the best pro-style nitrous systems we mere mortals can afford.
The Nitrous Really Works
Why nitrous? It's simple. If we want 10s on motor, we would have to lay down some serious coin for the next round of engine mods. It requires better-flowing heads (read: big bucks), and a change to a larger, higher-flowing intake manifold with an equally bigger throttle body (read: more big bucks). Combined, these components can set you back anywhere from $2,500 to $4,200, and we could expect maybe another 45 or so horsepower at the wheels, on top of our existing 414.
The other way we could go about it is by forcing air into our engine. If it weren't for project-mandated budget and time constraints, our cranial blueprint would have called for a 76mm turbocharger with a nice intercooler in front. But the incredible number of hours needed to develop and fabricate the kit, as well as the associated weight gain, made us turn our attention to good ol' nitrous oxide.
 The first order of business was to mount the preassembled solenoid bracket to the engine in a suitable location. We opted for the front of the passenger-side cylinder head.
For a fraction of the cost, we could add 75, 100, or even 125 hp with a simple-to-install nitrous system. So the plan was clear, and the next day, we called our local drug, er, speed-parts dealer for a complete LS1 nitrous system from Nitrous Works. This enabled us to build and tune a reliable, normally aspirated engine that didn't require huge injectors or trick computer tweaks. This simple and steady single-nozzle wet kit would allow us to add up to 125 additional horsepower, without breaking a sweat.
Installation was handled in the home garage, and didn't call for any exotic tools. As a matter of fact, anyone with a moderately stocked toolbox can find themselves putting on this straightforward nitrous system in about a day. We started at 9:00 a.m., by first mounting the solenoids to the engine, tapping into the fuel rail, and installing the nitrous nozzle into the air inlet pipe. By noon, the fuel tank was lowered, and the trunk's floor was drilled for the bottle brackets. By 2:00 p.m., we were halfway wired, and by 5:00 p.m., all systems were go. Not a bad to way to spend a Saturday, eh?
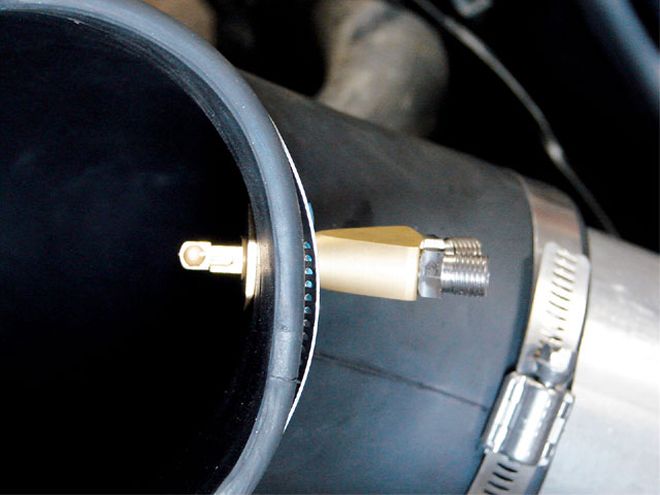 With the air inlet pipe off, we simply drilled into our rubber elbow and installed the PowerWing nozzle that is part of the Nitrous Works kit.
Doing the Math and Getting It HookedOur Mustang has a basic street/strip suspension setup. In back, it consists of UPR Product's chrome-moly rear control arms with ploy bushings and a Suspension Techniques factory-location sway bar. On the front end, UPRs' chrome-moly tubular crossmember-with a coilover conversion, 175 lb/in springs mounted on the stock struts, and lightweight tubular control arms-free up unnecessary poundage and help ET. Our best short time to date is a 1.56 with the original Ford struts and shocks
Because of our 4.10 gears, our 25.7-inch Nitto 245/50-16 Drag Radials had us banging on the rev limiter through the traps at 6,700 rpm. Despite this slight mathematical setback, we were able to crank out an 11.61 at 122 mph, by using a steady 3,000-rpm slip of the clutch and 6,500-rpm powershifts. Since our test day was a balmy 91 degrees Fahrenheit with 76 percent humidity, we were happy with the run, especially considering that when we last had the car out, it was 50 degrees when it ran an 11.26 on the 26x10 slicks. Next up, we slapped on a set of used 28x10.5 slicks, and made a run on motor-just to see how the car would respond. With a nice burnout and a 5,000-rpm launch, the car responded with an 11.21 at 121 mph on the taller slick. Stoked by the .005 drop in ET (despite the terrible weather conditions and corresponding loss of trap speed), we let the car cool down, and prepared our next run to include a nitrous injection.
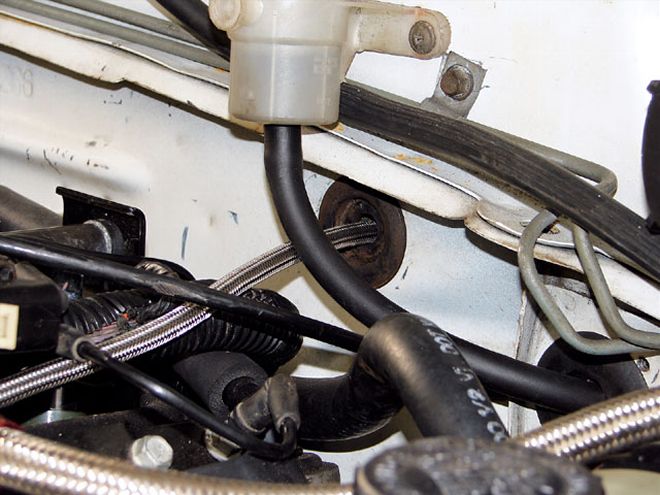 The supplied 4AN feed line is laid along the driver side of the LS1's intake manifold, and feeds from the interior through the original speedometer cable's firewall grommet.
With a significant gain in trap speed expected by using the 125hp jets, we were glad we switched to the taller 28-inch slick to kill some of the gearing on the big end. Doing the math, 4.10 gears on a 28-inch tall tire theoretically gives us the ability to run 136 mph at 6,700 rpm in Fourth, not taking tire growth into account. Therefore, we were comfortable with our top-speed safety margin.
With the coolant temp down to 160 degrees, we strapped on the helmet and headed to the burnout box for another session of rubber-roasting tomfoolery. Once the nitrous switch was armed, we lowered the launch to about 4,500 rpm. Then we let the clutch pedal fly, and felt the front wheels come up; the car sounded angrier as it moved through the gears. The short time was rather pathetic at 1.57, revealing how it spun most of First, and on the 1-2 powershift, the car hazed the tires once again, grappling for traction. Crossing the stripe, we saw the tach read 6,500 rpm, and when we got the timeslip, we promptly proceeded to do the Snoopy dance, relishing in the 10.73/132-mph run. The car was still running fine with no mechanical issues-a 6,700-rpm testament to the robust LS1 engine management system and factory-built bottom end.
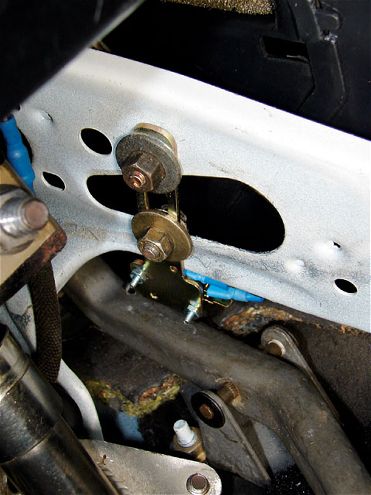 While many folks prefer to mount the wide-open throttle switch near the throttle body, we like it located near the pedal.
With a 10-second timeslip finally in hand, we bring to you another completed project car, even if some of you don't particularly like its mixed-up DNA. Several of our brand-faithful readers have been a bit upset with us (truthfully, they are madder than hellfire, and lucky for us they don't know where we live), but you can't argue with a fully streetable 10-second car that gets 25 mpg with a six-speed tranny. Our cross-bred LX demonstrates how nitrous can be your best friend, and, more significantly, how simple and proven components with subtle chassis tweaks can improve dragstrip performance no matter what type of engine motivates your ride. In the end, we hope this exercise has inspired you to finish your existing project or pick up a new one. Either way, do it smart, do it within your budget, and, most importantly, do it right.
Where the Money Went
Our modest financial investment is the result of many hours of sitting behind the computer looking for deals on message boards and eBay. We also followed up with phone calls whenever we had a lead on an incredible deal on parts. We promise you that if you put in the time and wait for deals, you will get results as good as ours, if not better. Let's face it, someone else's incomplete project often sits for years, and when it's collected several layers of dust, it's ready to be sold off to whomever can cart it away. It doesn't take much to convince someone that you can help empty their garage for far less than they paid up front.
Based on a real-world budget with quality used parts, we were able to build a dependable, incredibly quick street car for less than $10,000. Granted, we did get some hook-ups along the way, but we plugged in the street values on variable-cost items, like dyno tuning.
'{{{90}}} {{{Ford Mustang}}} LX $1,000 Used '02 {{{Camaro}}} long-block $1,500 Used T56 transmission with shifter and good McLeod clutch $800 Used Camaro wiring harness, PCM, LS6 intake manifold, and coil packs $710 Used ported 5.3 heads and cam $800 Custom American Racing headers $1,400 Ported stock throttle body $108 McMahon Motorsports LS1 adapter harness $199 Fuel system (255-lph pump, C5 filter, AN lines) $220 Nitrous Works LS1 nitrous system $570 Nitrous Works Purge Kit $95 Used aftermarket cat-back exhaust $150 Miscellaneous wires and connectors $85 Dyno tuning ${{{300}}} UPR tubular front suspension $699 UPR rear control arms $199 Used rear antisway bar $45 Used 28x10.5 slicks $183 Used Weld Draglites with skinnies $250 Used Nitto drag radials $150 {{{Thunderbird}}} Turbo {{{Coupe}}} pedals $40 Custom driveshaft $275 New battery $60 DRAG TEST RESULTS: Best on Nitto 245/50/16 Drag Radials 11.61 at 122.11 Best on 26x10.0 slicks 11.26 at 122.79 Best on 28x10.5 slicks 11.21 at 121.44 Best with nitrous (28x10.5 slicks) 10.73 at 132.02 Observed fuel economy 25 mpg (combined, mostly highway)