
Racing in the heat of summer is not only hard on you, it is also hard on your engine. Many racers find that the cooling system that worked adequately for them in the spring suddenly can't seem to keep the engine cool enough once July and August roll around. It's all a question of using the most efficient cooling system possible, because the last thing any of us want to see is that telltale stream of steam venting from the overflow tube. The more power your race engine is capable of producing, the more heat it will emit. But don't worry, many overheating issues can be resolved with careful planning and the right components.
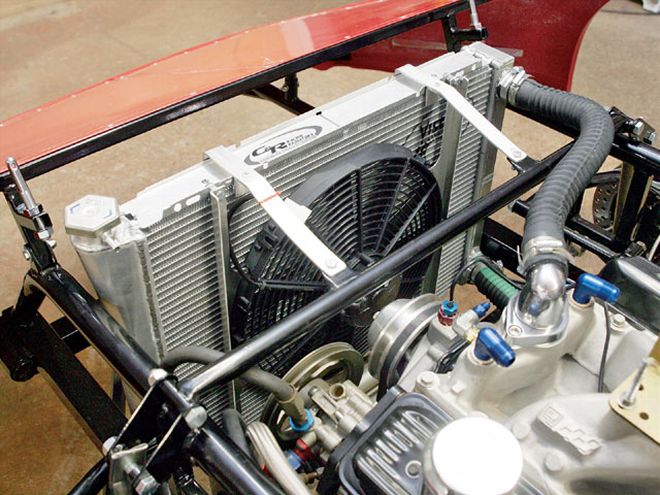 Properly installing your cooling system is another big key to achieving good cooling efficiency andlongevity. We traveled to Custom Chassis & Fabrication to photograph the process as owners Steve Davis and Mike Wyles installed a two-core aluminum radiator from C&R into a dirt Late Model.
Matters of Flow For most racers, maximum radiator size is bounded by the height of the hood. In racing, most radiators are no more than 19 inches tall by 31 inches wide. Instead of going bigger, radiator manufacturers must use a little ingenuity to improve cooling. First, almost all racing radiators are constructed of aluminum because it can so efficiently transfer heat from the water flowing through it to the air outside.
The transfer of thermal energy from the coolant to the aluminum radiator only happens when water is in direct contact with the aluminum. Manufacturers increase the surface area of the radiator tubing (versus its volume) by making it very wide from front to back but slim from top to bottom. Dozens of these slim tubes can be stacked on top of each other, with small air spaces between them. Water or coolant flows into a header or large, open cavity on one side of the radiator, where it can then pass through one of dozens of these slim aluminum tubes before it collects into another header on the other side.
If the coolant just moves across the radiator one time, this is known as a "single-pass" radiator. But most performance radiators for Saturday night racing are "double pass." This means that the water flows across one set of tubes and then comes back on a second set. This second set of tubes is placed right behind the first, making the radiator a two-row core. You can also purchase three- and four-row cores, but they are generally not the best option for Saturday night racing. The more rows of cooling tubes there are, stacked one behind another, the harder it is for the air to get through. A three- or four-core radiator may work well in a Nextel Cup car racing at Atlanta, but considering the speed achieved on most half-mile or smaller Saturday night racetracks, a two-core radiator provides the most efficient cooling.
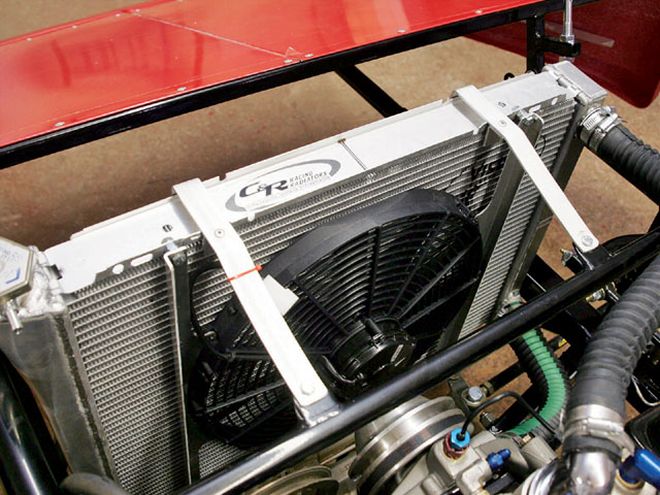
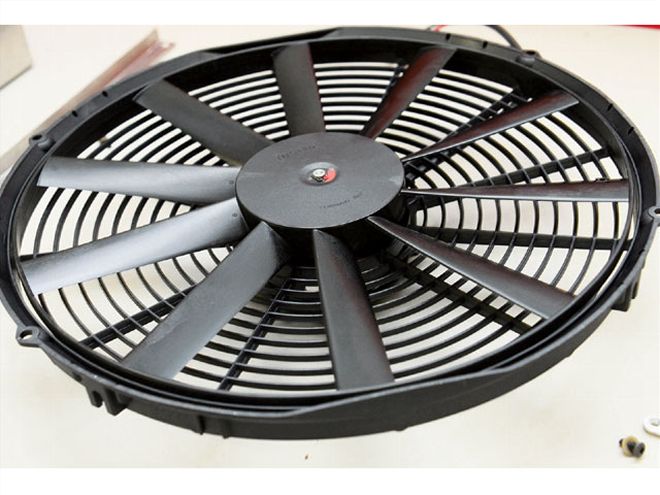 Many dirt racers are fearful of using anything but a mechanical fan, but in the right situations an electric fan, such as this one from Spal, can provide plenty of airflow without drawing horsepower from the engine. If you are racing alcohol, electric fans are also useful because you can cut them off to allow the engine to warm up more quickly.
In addition, thermal transfer can be improved even further by using tubing with extremely thin walls. Of course, sealing narrow strips of thin-wall aluminum tubing to the aluminum headers on either side can be difficult. In street applications, this is commonly done by using epoxy to seal the tubes to the headers, but epoxy is also a good insulator, which reduces the efficiency of the radiator. High-end performance radiator manufacturers, such as C&R Racing, have ditched the epoxy method of sealing the cooling tubes in favor of TIG welds to secure the tubes to the headers. The seams are then sealed by a process known as furnace brazing. In this process, the radiator is heated under a vacuum until it is in a near-molten state. At this temperature, all the components are essentially fused together.
Fins Also important to a radiator's ability to cool your racing engine are the fins. Cooling fins are the thin strips of aluminum that form "V" shapes in between the cooling tubes. How tightly packed these fins are in your radiator is known as the "fin count." Fin count is measured in terms of fins per inch. A higher fin count means there is more surface area for the aluminum to radiate the heat it absorbs from the coolant into the air. But if the fin count is too high, it can actually form a barrier to the air trying to pass through the radiator. When this happens, the air stacks up in front of the radiator or moves around it and doesn't reach the cooling tubes on the second row. This obviously hurts cooling.
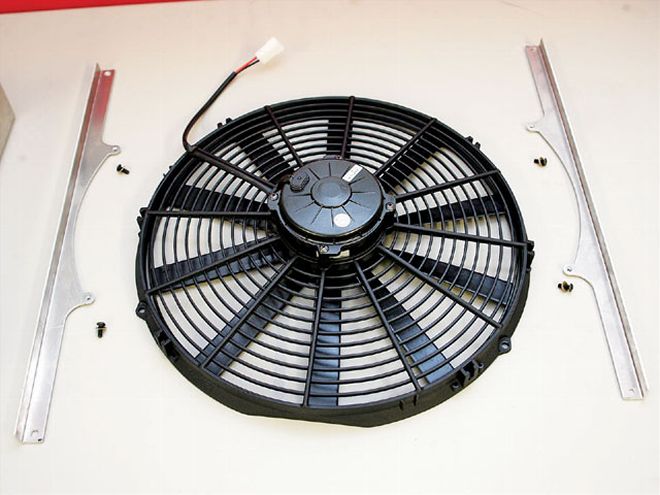 Here's the bracketing system C&R provides to mount the fan to the radiator. It is more secure than zip-tying the fan through the core and less likely to cause leaks.
As a general rule, a faster race car can use a higher fin count, while a car that is slower-either because of less power or because it is racing on a tighter racetrack-should have a lower fin count. If you are racing on tracks between 31/410 and 11/42 mile in length, you should look for a radiator with a fin count between 14 and 18 fins per inch.
Oil Coolers In some cases, you may choose to cool your engine oil as well to help maintain proper engine temps. Or you may need to cool the oil in your transmission. There are two main ways to go about this. First, you can use a heat exchanger in your radiator. A heat exchanger routes the oil through the radiator header that holds the coolant before it flows through the radiator. This way, the hot engine oil transfers some of its heat into the coolant before the coolant flows through the radiator core to be cooled. A heat exchanger that is integrated into your radiator is compact and generally cheaper than using a dedicated oil cooler, but it also raises the coolant temperature
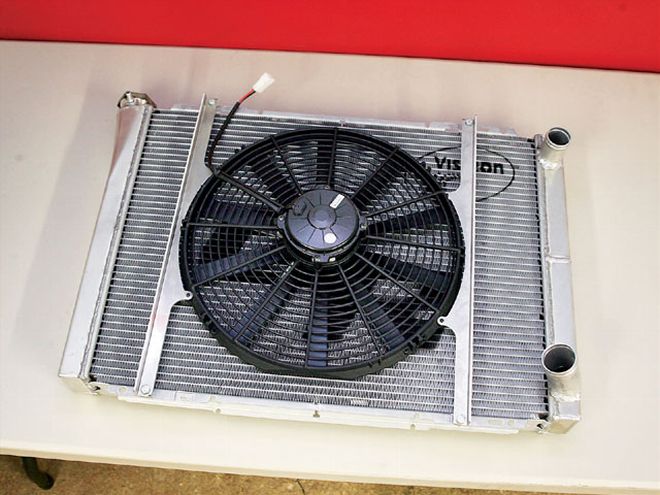 After mounting the brackets to the fan, the fan is positioned over the center of the radiator so it can be bolted in place. This is known as a "puller" fan because it mounts to the backside of the radiator and pulls air through.
A second option for cooling either engine or transmission oil is a separate oil cooler. An oil cooler is simply a smaller radiator with larger tubes designed to flow more viscous oil. Usually, an oil cooler is mounted on the front of the radiator. Technically, it does not reduce the efficiency of the radiator, but if the oil cooler is mounted so that it heats the air before that air reaches the radiator, then you can expect the radiator to be less efficient. If you have an oil cooler mounted in front of your radiator and are having problems keeping your coolant temperature low, you may want to consider moving your oil cooler to another location.
Ductwork One of the best-and cheapest-ways to increase the efficiency of any radiator is to increase the volume of cool, clean air flowing through it. And the best way to do that is to fabricate radiator ductwork that forces air from the grille opening in your bumper cover to the radiator.
A moving race car forms a high-pressure zone in front of the radiator. Without some form of ductwork, some of the air flowing into the face of the radiator will reach this high-pressure zone and simply flow around it. Ductwork is designed to keep this air from escaping.
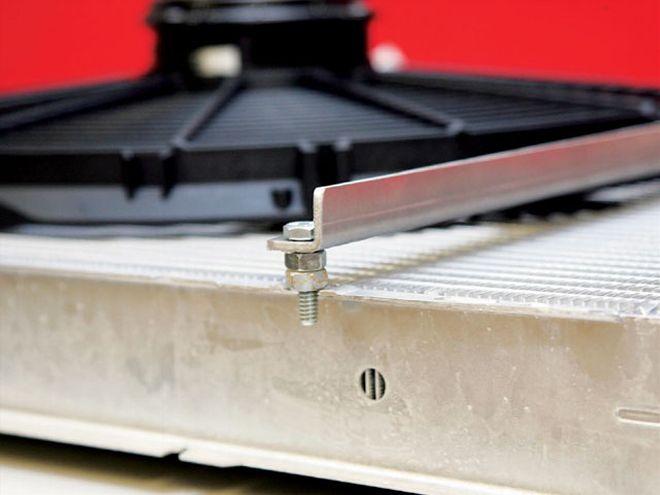 Holes have to be drilled into the aluminum lip at the top and bottom of the radiator for the bracket.
On the other side of the radiator, fabricating a fan shroud that seals the radiator and reaches beyond the blades of your mechanical fan at the other end will help create a low-pressure area behind the radiator, which will help pull air through. If, however, you are running an electric cooling fan that mounts directly to the radiator, this isn't necessary. Finally, when it comes to electric fans, pullers that mount behind the radiator and pull the air through are generally considered better than pushers that mount in front of the radiator and push the air. This is because a pusher fan blocks airflow to the portion of the radiator that is directly behind the motor unit.
Care and Feeding Once you have the right cooling system mounted in your race car, make sure that it stays at peak efficiency throughout the season. The first step is to inspect and clean your radiator after every race. Look for damage from trash that has been thrown from the track into the radiator and cracked or abraded coolant hoses. When you clean your radiator, these things can still be in the car. Just make sure not to use high-pressure water, as this can bend the cooling fins. Bent fins block airflow and seriously damage your radiator's cooling efficiency.
 The key to getting a radiator to live through a wreck is to mount it so that it can move a little if the front end of the race car takes a lick. In most race cars, the bottom of the radiator simply sits on a piece of 1-inch square tubing (shown). Some racers prefer to place a small strip of rubber between the tubing and the bottom of the radiator to prevent vibrations from causing the steel tube to wear into the bottom of the aluminum radiator.
At least once or twice a season, you should also pull your radiator from the car for a more thorough cleaning. If you are racing on dirt, soak the radiator in a solution of soapy water and then rinse it with clean water from a garden hose (without a squirter nozzle) to remove any dust and mud that have collected between the fins. If you are racing on asphalt, your radiator will collect chunks of rubber, which won't come out in a soap-and-water bath. In this case, Chris Paulson of C&R Racing recommends soaking the radiator in a solvent instead of soap and water.This will help dissolve some of the asphalt and rubber and make it much easier to remove. Before soaking your radiator, however, make sure to cap the openings so that you do not allow solvent inside the cooling tubes. After soaking the radiator, pull it from the solvent bath and rinse it with clean water from the back to the front. This prevents track debris from going farther into the radiator. When reinstalling the radiator, make sure that your hoses are not breaking down. If they show signs of collapsing, it is time for them to be replaced.
All in all, having the right radiator in your race car and properly maintaining that radiator will allow you to perform better each and every weekend. And you'll never have to deal with that telltale stream of steam.
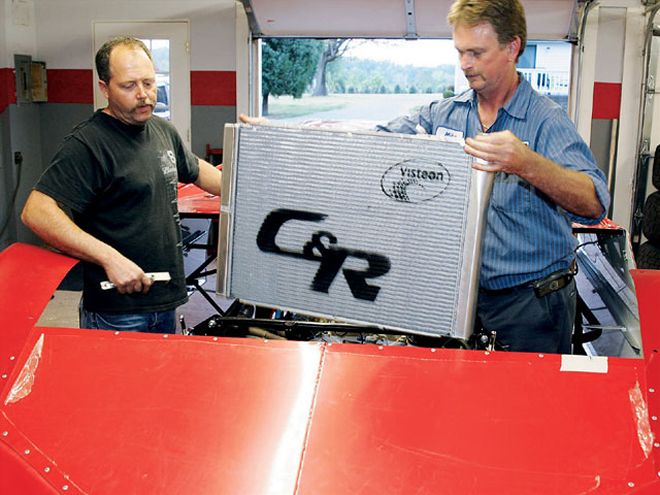
After test fitting, Davis (left) and Wyles carefully lower the radiator into position.

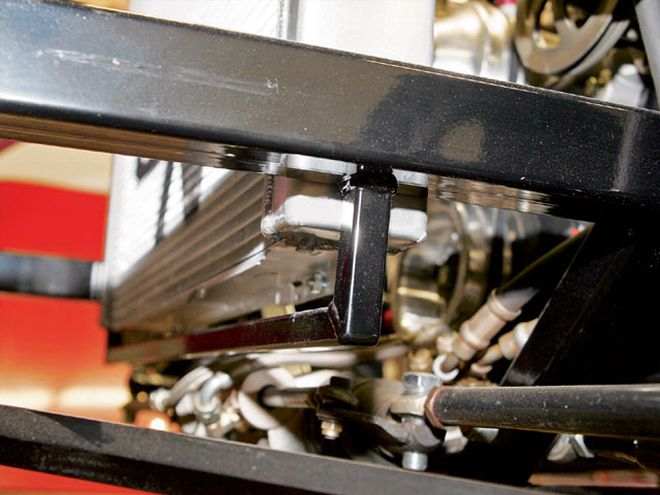
Brackets Davis and Wyles fabricated from 1x11/48-inch aluminum strap bolt into place on a crossbar and hold the top of the radiator in position. In the event of a wreck, the aluminum brackets should bend instead of the radiator.
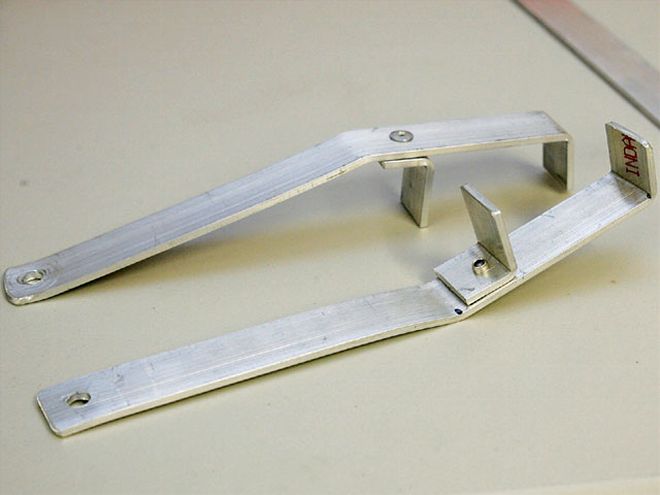
Here's another look at the brackets.
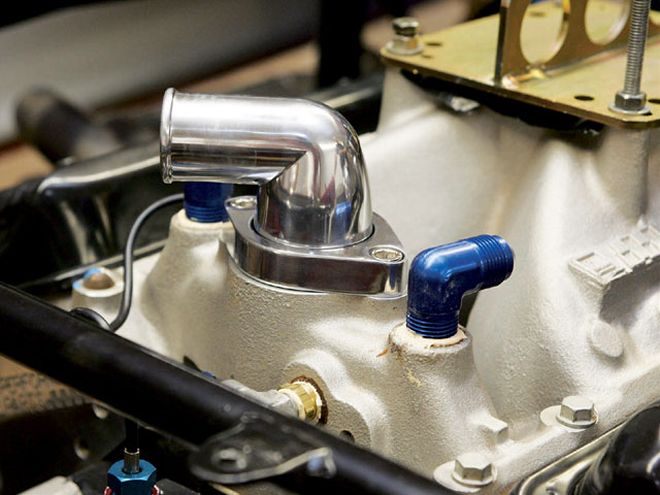
This two-core radiator has both the inlet and outlet on the right side, which is more of a Ford style. To simplify plumbing with a Chevrolet 604 crate motor, Custom Chassis uses a water neck that features a swivel. The water neck and hoses came from Bradley Auto Parts, a local speed shop.
Flexible radiator hoses make custom installations a lot easier. Just make sure they are reinforced to resist collapsing if the water pump pulls a vacuum. On this install, the upper hose is 1.5 inches in diameter and 22 inches long. The lower hose is 1.75 inches in diameter and 16.5 inches long.
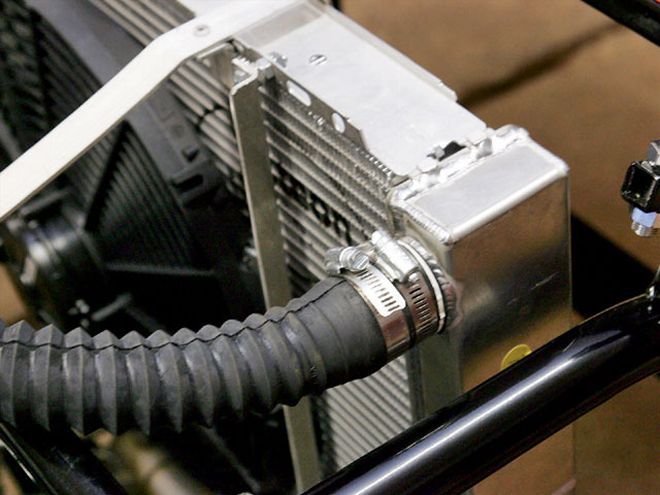
Always double-clamp both ends of all your water hoses. One clamp can break too easily or allow the hose to pop off. Some racers also prefer to install the clamps facing opposite directions, as you see here, so that they "pull" the hose opposite each other.
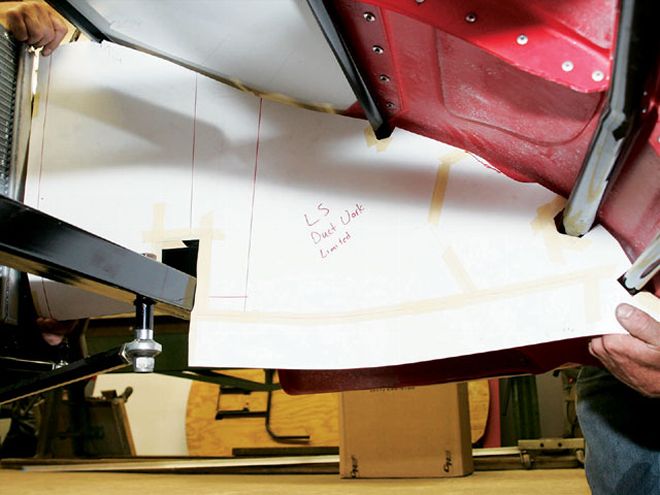
After completing the radiator installation, Davis and Wyles begin fabrication of the ductwork. This car will not have a bottom, because the two sides force enough air into the radiator. After completing your ducts, save your patterns because they can be reused if your ductwork gets destroyed in a wreck. If you are only constructing two sides, you may also consider using plastic instead of sheetmetal because it pops back to shape easier if the nose is subjected to minor damage.

This flexible radiator ductwork is an alternative to solid ones. In the event of a wreck, it will pop back into shape.
The Parts List
In case you were wondering, here's the parts list for our radiator install. The electric Spal cooling fan is available through C&R Racing.