Here at Mopar Muscle we attend countless car shows and races, and are fortunate to have the opportunity to see hundreds of beautiful Mopars from around the world. We always appreciate the effort put into a car and try not to criticize anyone's ride, but we have noticed an area that is often neglected by the car's owner or builder-the engine bay. In fact, an ugly or poorly detailed engine bay is one of the top reasons we can't put an otherwise awesome ride into the pages of Mopar Muscle. Fortunately, getting that engine bay to be a picture-quality, show-winning work of art is not that difficult or expensive. With less than $300 in paint, supplies, and new parts, plus a few weekends of work, your engine can be sitting in a properly painted, well-detailed compartment that will turn heads at any race or car show.
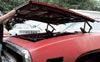
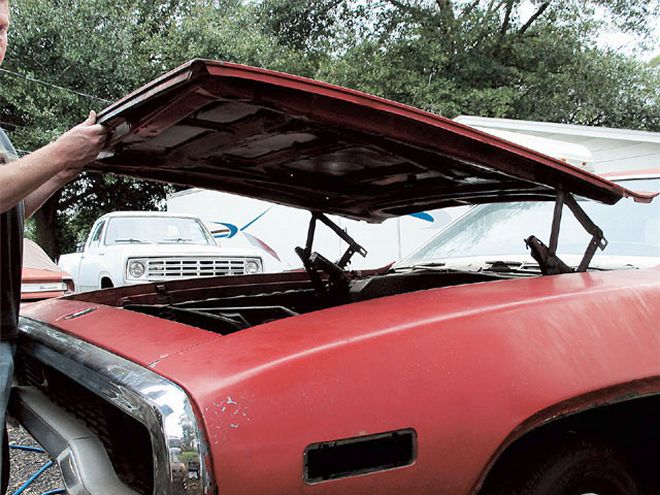
In the first of this two-part series, we'll concentrate on stripping, cleaning, repairing, and applying great-looking paint to the engine compartment of our '71 Road Runner. Next month, we'll finish up by detailing the engine and accessories, and installing everything to complete our engine bay and get our car moving under its own power.
We've all seen beautiful rotisserie restored cars at the shows and thought, wouldn't it be nice if I could restore my car that way. While we do appreciate expertly restored cars that actually look far better than they ever did when new, the reality for most of us is that the cost, time, and space required for a rotisserie restoration prohibits us from exercising this option. We tend to fix our cars the more "old-school" and economical way of painting and detailing the engine bay ourselves, installing our engine, and drivetrain components so we can drive the car, then concentrating on the interior, saving the exterior paint for last. We achieve a couple of goals this way, the first being budgeting of time and money. Sure, it's nice to have an unlimited budget when beginning a restoration, but we're more on the paycheck-to-paycheck plan and enjoy doing the work ourselves. Performing the engine bay refurbishment in our garage or driveway allows us to spend a little at a time getting the engine compartment ready for a motor, then concentrating on the engine itself, and getting the car driving, which is where our interest really lies. Secondly, we quickly lose interest in a project we can't drive. By taking the time to prep the engine bay and getting our drivetrain installed, we can enjoy our car while we fix it up, keeping us motivated to complete the project we started.
Every gearhead has either seen it or done it-build an engine, then hurriedly blast the engine bay with black Krylon or speckle paint (yuck!) before installing the engine. Well, we've got news for you, unless you're building a C-Body, the engine bay in a Mopar only came in black if the car's exterior paint was black. The proper color for a Mopar engine bay is the color of the body, nothing less. How well the job turns out depends on the amount of time you spend cleaning, repairing, and prepping the engine bay for paint. Years of use and abuse take their toll on the sheetmetal under your hood, so taking the time to repair the holes, rust, dings, and dents will set your engine bay apart from the average. Remember that time spent on preparation will result in a better finished product. If you're like us and have more time than money, it's worth a few extra hours of work for a quality finished product.
We began our engine bay restoration by stripping the engine bay of the engine and all of the accessories, hoses, and wiring harnesses. During this process we make note of any parts, such as the washer jar, wiring harness, and so on that are missing or will need to be replaced or repaired. We try to carefully evaluate items, such as the blower motor and wiper motor, by testing them prior to their removal. To save ourselves some money, the items that work will be cleaned and painted and not replaced. The nice thing about an engine bay restoration is most of the appearance items don't cost that much money. We always count on replacing small parts like the washer jar, rubber hood bumpers, and the decals; these parts make a big difference aesthetically and are available from Year One for a few bucks each. In fact, we usually count on Year One as our one-stop shop for the items we need; they speak Mopar fluently and generally have all of their catalog items in stock and ready to ship.
Once our engine bay was stripped of accessories, the actual cleanup and repainting began. Remember that paint and oil do not mix, so all the leaked oil, blow-by spray, power-steering fluid, and so on must be removed prior to beginning the body work. Cleaning up the K-member and suspension components for paint is also advisable during this step. We have found that spray engine degreaser from the local auto parts store works well. Removing caked-on grease and dirt may require a scraper and wire brush. Once the engine bay, K-member, and suspension have been degreased, the real work can begin. We started with the area of our battery tray where we had problems. Evidently a battery had leaked or exploded at some point in our car's life, severely corroding the inner fender under where our missing battery tray would go. The only real way to fix this was to replace the metal, so we cut out the corroded area and hand-formed a sheetmetal patch, which was welded in place. A new battery tray was ordered from Year One and installed prior to painting. Don't be intimidated by this type of repair, we are not expert metal craftsmen, welders, or painters, but our theory has always been-if someone else can do it, so can we. The engine bay is actually a good place to practice these skills. Mopar engine bays are notorious for their lack of quality paint, and our car was no exception. We found no less than 34 runs in the original underhood paint of our car, as well as hardware missing from nearly every piece bolted to the front end and in the engine bay. Talk about a Monday car, ours must have come down the assembly line on the Monday after a long weekend of partying '71 style. Our point is, no matter how little experience you have at metal work, bodywork, or painting, chances are you'll do a better job than the guys who originally assembled your car. If you end up with runs in the paint, don't sweat it, the cars came that way new. If it makes you feel better, just tell people you're duplicating the original finish!
After patching our inner fender, the bodywork began. This was performed just like bodywork on the outside panels. We began by sanding the entire engine bay with 180-grit sandpaper so we could see what we were dealing with. Fortunately, our engine bay had only one coat of black spray bomb over the original Winchester Gray. We don't recommend sanding through the original paint unless it's necessary to remove corrosion. Once sanded, rusty areas were treated with OSPHO (any rust preventative with phosphoric acid as the main ingredient will work) and then primed to prevent further oxidation. Now it gets monotonous, using filler we filled the low spots, paint chips, and such prior to block sanding with 180- or 220-grit paper. This step is repeated until all of the low spots and chips are gone, which in our case took going over the entire engine bay three times. Time consuming? Yes, but the end result was worth it. Remember the quality of the paint will only be as good as the prep work underneath, so take your time and get it right. A trick we use to find low spots while doing bodywork is to mist the entire area with dark spray paint, then block-sand it lightly. Low spots will show up the color of the spray paint. After the bodywork is complete to our satisfaction, we are ready to tape off and prime the engine bay.
Since our car will eventually be painted, we didn't worry about overspray on the tops of the fenders or top side of the hood and concentrated on taping off the windshield, front bumper, and other areas where we didn't want paint. The K-member and suspension can either be painted first and taped off, which is how we chose to do it, or the inner fenders, framerails, and firewall can be painted and taped off before painting the K-member and suspension. Either way, remember the body color goes all the way down to the bottom of the framerails to be correct. We painted our K-member and suspension with black, semi-gloss engine paint. Engine paint is more resistant to oil and grease and is durable. The semi-gloss black color is also similar to the original color of these components. Once the K-member was painted and the taping was complete, we sprayed the entire area with a lacquer-based primer. Lacquer primer is compatible with both original and modern paint systems, fills well, and is sandable-making it a good all-around choice for primer. After priming, you guessed it, more sanding-this time with 400-grit. Anything less than 400 will allow the sanding scratches to be visible through the paint, so our final sanding is always with 400 or finer paper. Spend extra time with a 400-grit Scotch-Brite pad scuffing the tight areas where the inner fenders meet the firewall, the bolt heads, and other places hard to reach with sandpaper. This scuffing will help the paint to adhere to the primer, keeping it from peeling later.
For paint, we called our local auto body supply store and purchased a quart of single stage urethane enamel with reducer and hardener. we took the advice of the paint store and used fast-acting hardener since we'd be spraying in fairly cool weather. If you don't understand the dynamics of paint, the place you buy your paint is a good place to ask questions or to ask for recommendations. Don't forget the mixing cups, sticks, and strainers while you're at the paint shop and always ask for the Material Safety Data Sheet (MSDS) for the type of paint you're using. The MSDS gives you information on mixing, spraying distance, air pressure, and clean-up for the paint you're using and is invaluable to complete the job correctly. Another item we picked up was an in-line water separator for our air hose. This is an inexpensive alternative to high-dollar units and is placed between the air hose and paint gun where it separates any fisheye causing water from the air coming from the compressor. The engine bay can be painted with a base/clear paint system, but for simplicity we chose single stage paint. we are not painters by any means, but by following directions on the Material Safety Data Sheet and having a clean, well-prepped surface, our engine bay paint turned out better than when the car was new. We didn't have a paint booth or fancy HVLP paint gun, but have found that we don't really need those items to perform a quality job. Painting, especially the engine bay, can be accomplished outdoors on a calm day with good results, or by creating a makeshift paint booth by hanging plastic in the garage bay to keep overspray off the rest of the stuff in your garage. Once the paint is given a day or so to cure, we'll be ready to start restoring the accessories and putting everything back together.
So there you have it, we stripped, prepped, and painted our engine bay in about two busy weekends worth of work and at a material cost of less than $100. Be sure to follow this project in our next issue as we clean, repair, paint, and replace the engine bay accessories, paint and detail our engine, and install it all so we can get our Road Runner back on the road.