As time moves on, more and more aftermarket parts become available for cars we never thought would be popular restoration projects, let alone considered classics. This is because cars from the 1960s and early 1970s are becoming more difficult and more expensive to get our hands on, so people are turning to alternative models, cars formally snubbed by enthusiasts. Our 1978 Z28 Camaro, ZedSled, is such a car. Yes it’s a “Z,” but it’s the rubber-nose F-Body, and there was a time not so long ago that these cars were much more popular on a dirt track over a tube chassis, rather than a serious competitor at an autocross or road-course track day. That’s why Car Craft chose this car to work on; we’ve been able to stick to our plan to build a competitive Pro Touring car from the ground up for less than $20,000, including the cost of the car. We’ve needed to replace a lot of systems, and the car’s wiring wasn’t immune from the cruel march of time.
Thankfully, Painless Performance has expanded its product line beyond the traditional muscle car, and the company now offers a drop-in system for our late second-gen Camaro. The direct-fit system does exactly that—it fits directly and easily, without drama. The instructions are better than we’ve ever seen for a wiring system, and they are written in plain, easy-to-understand English that’s easy to understand. We’ll walk you through the highlights of installing the new nervous system into ZedSled and toss in a couple of curveballs along the way for style points.
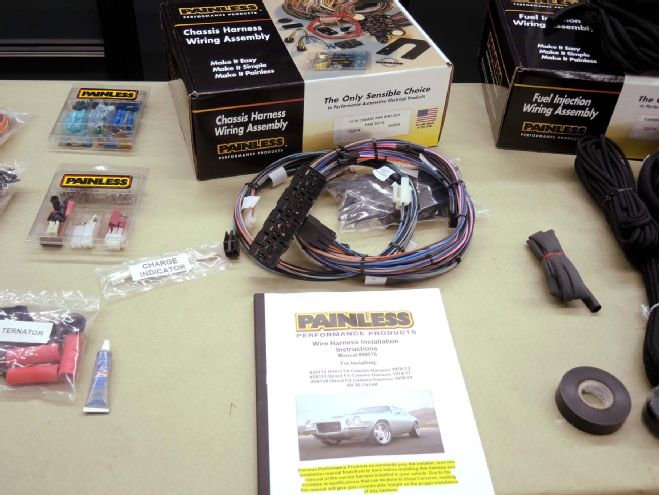
Description PN Source Price Direct-fit harness, 1978–1981 Camaro 20114 Painless $809.99 Power window and door lock harness 30715 Painless $262.97 Powerbraid wire loom kit 70923 Painless $174.99 Battery cable kit 40105 Painless $233.97 Optima battery mount, polished 120101P DSE $190 Battery 8010-044 Optima $141.96
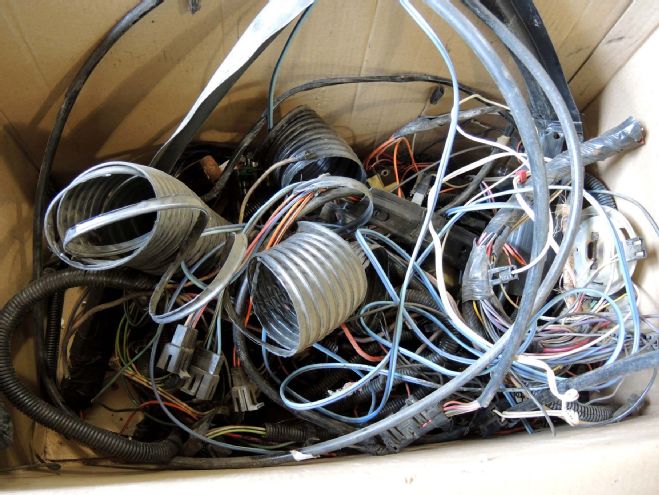 The original wiring was totally shot! The 35-year-old, dry-rotted plastic, frayed and spliced connections, and vintage glass fuses made it an easy decision for us to trash the stock wires and start fresh. Thankfully, Painless was there to help.
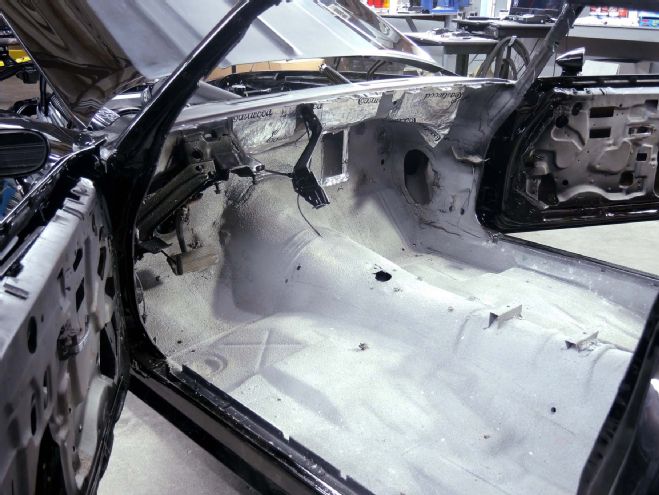 We are starting with a clean slate. The tub of our F-body is rust-free, empty, and sprayed down with Eastwood’s thermal insulation coating, as well as peppered with a few insulation tiles to dampen the transfer of road noise and heat from the engine and exhaust.
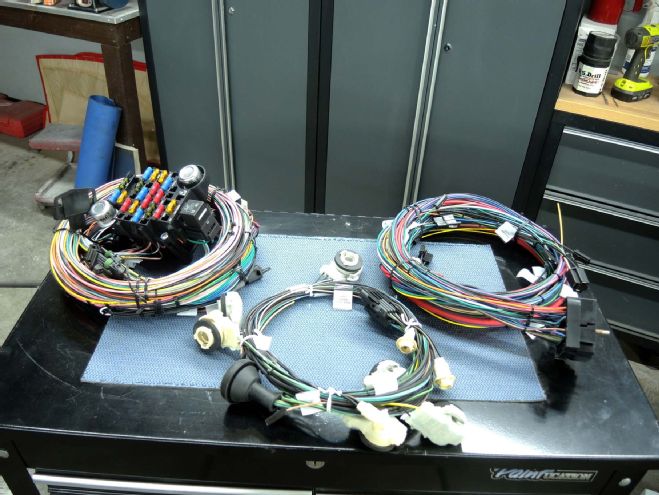 The direct-fit system consists of the main chassis harness (with fuse block), taillight harness, and engine harness. This system is designed to replace the original harness for the carbureted Gen I small-block, but most of the sensor connectors will come in handy for either the gauges or the Dominator engine-management system controlling our LS engine.
 We added the optional power door harness kit, which is a three-piece kit that connects the stock door-lock actuators and power-window lifts to the Painless main chassis harness. The star of the show is the comprehensive installation manual.
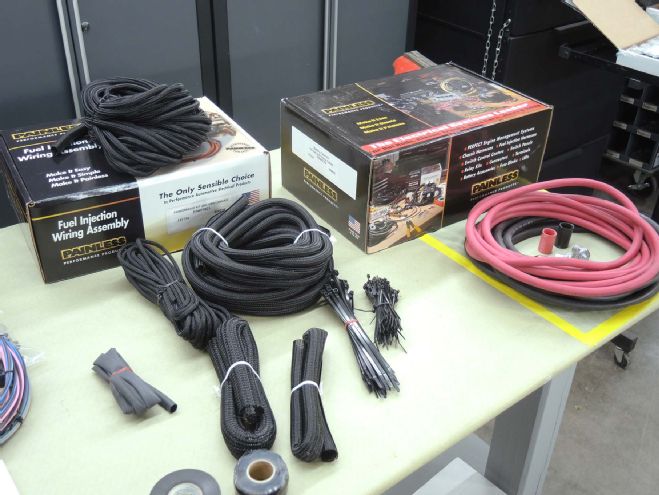 Powerbraid is Painless’ name for its unique wire loom. It’s strong, easy to use, and looks great! This is a kit with several sizes and lengths, and comes with enough to do our whole car and then some.
 Relocating the battery to the trunk is something we had planned all along, and Painless takes the guesswork out of the job with its battery-relocation kit. It comes with cable ends for any style battery and shrink-tubing for a professional-quality termination.
 Detroit Speed and Engineering offers this Optima battery box for remote locations. The right rear is a typical location for good weight transfer on launches, and this box tucks neatly into the corner, even in the tight confines of this Camaro’s trunk.
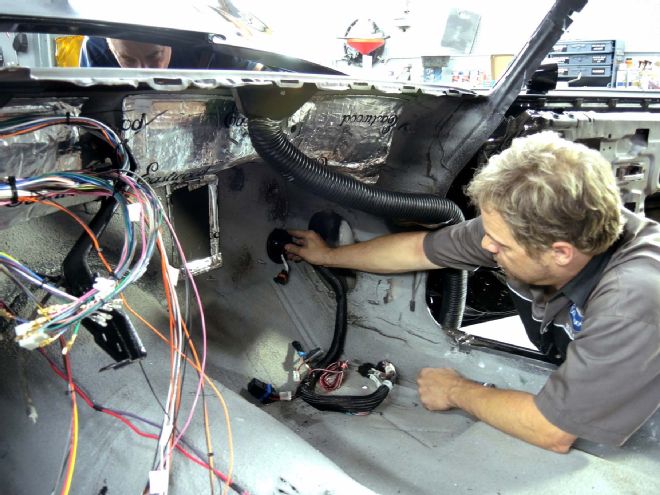
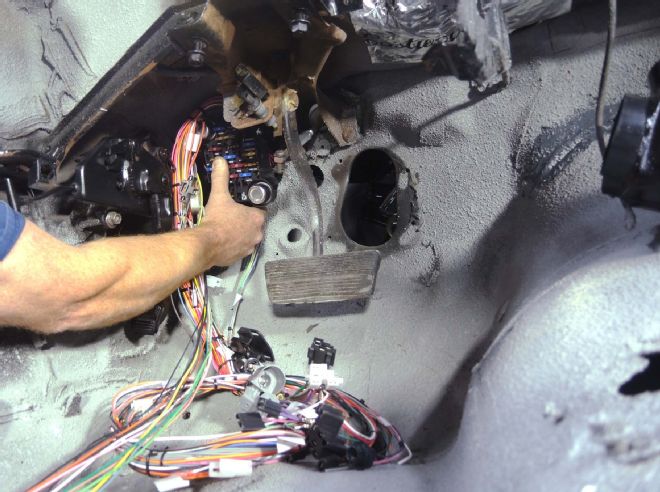 We started installing the main harness to the fuse block, which bolts into the factory location.
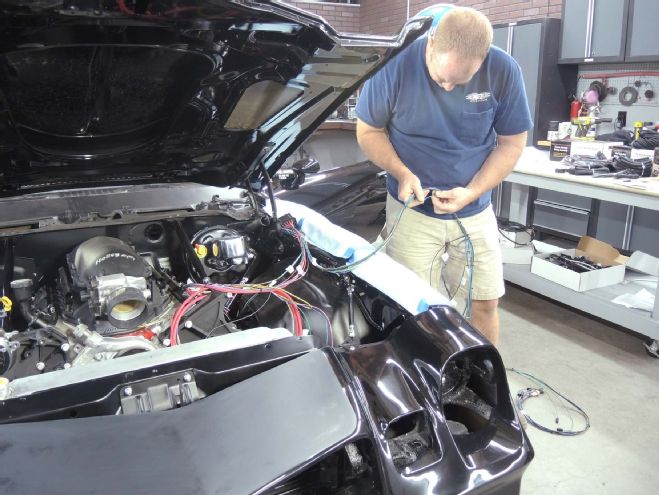
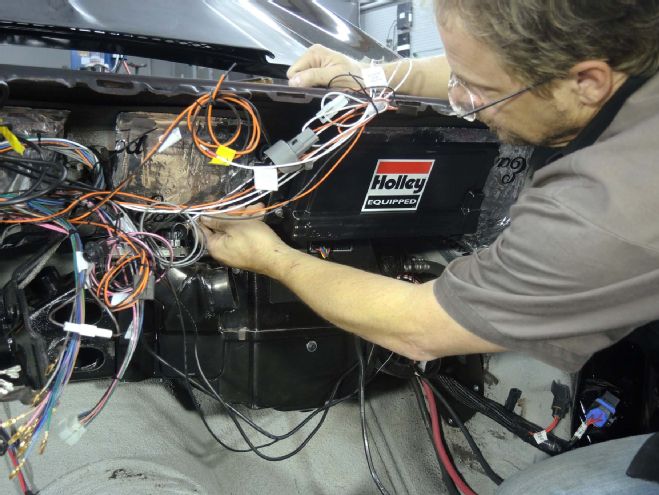
TC Penick, from Bay One Customs in Springfield, Tennessee, connects the engine harness to the bulkhead connector on the firewall. With the booster and PTFB support bars in place, it’s a tight fit, but TC got it buttoned up, inventing some new words in the process.
We started installing the main harness to the fuse block, which bolts into the factory location.
TC Penick, from Bay One Customs in Springfield, Tennessee, connects the engine harness to the bulkhead connector on the firewall. With the booster and PTFB support bars in place, it’s a tight fit, but TC got it buttoned up, inventing some new words in the process.
 Here’s a great example of Powerbraid wire loom being installed on the taillight harness. Because it is outside the car’s body, this section of wire needs some protection from chaffing and the elements.
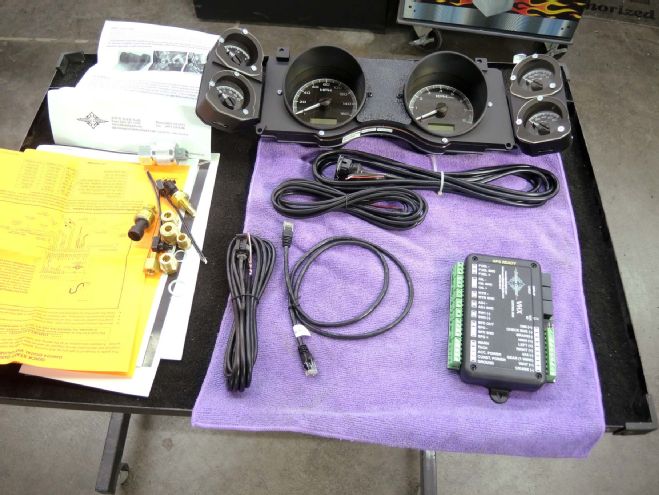 While it is possible to make the Camaro’s stock instruments work with our LS swap and Holley Dominator EFI, we decided to go with Dakota Digital’s direct-fit VHX Series gauge cluster. These are electronic analog gauges that are compatible with the Dominator ECM’s senders. The unit bolts directly into our original dash without having to customize or fabricate a bezel, which saves time and money.
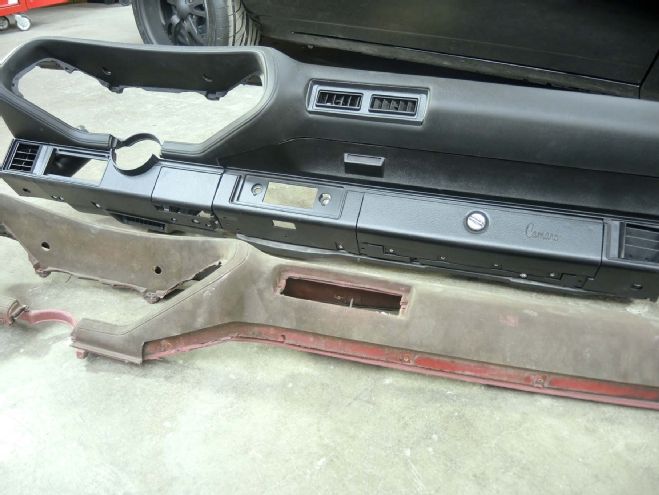
Using Eastwood’s Plastic Resurfacing Spray, we rejuvenated the tired, OE plastic dash. To it, we added National Parts Depot’s new replacement dashpad. The combination totally elevates the quality of Zed’s interior.
While it is possible to make the Camaro’s stock instruments work with our LS swap and Holley Dominator EFI, we decided to go with Dakota Digital’s direct-fit VHX Series gauge cluster. These are electronic analog gauges that are compatible with the Dominator ECM’s senders. The unit bolts directly into our original dash without having to customize or fabricate a bezel, which saves time and money.
Using Eastwood’s Plastic Resurfacing Spray, we rejuvenated the tired, OE plastic dash. To it, we added National Parts Depot’s new replacement dashpad. The combination totally elevates the quality of Zed’s interior.
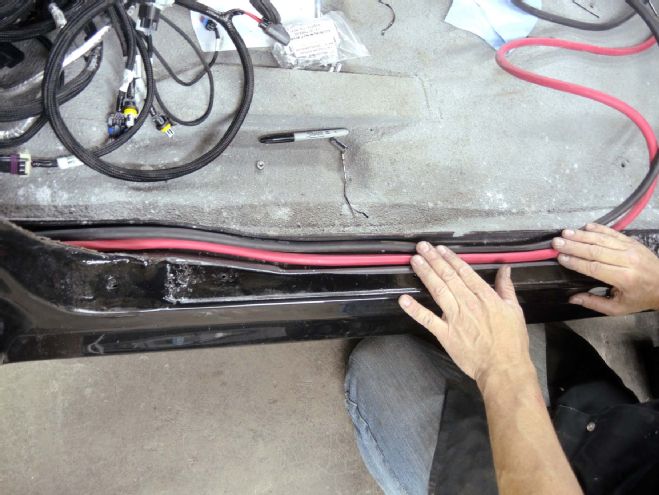 We ran the new battery cables along the passenger-side channel under the scuff plate. This way, they will fit neatly under the carpet and interior panels.
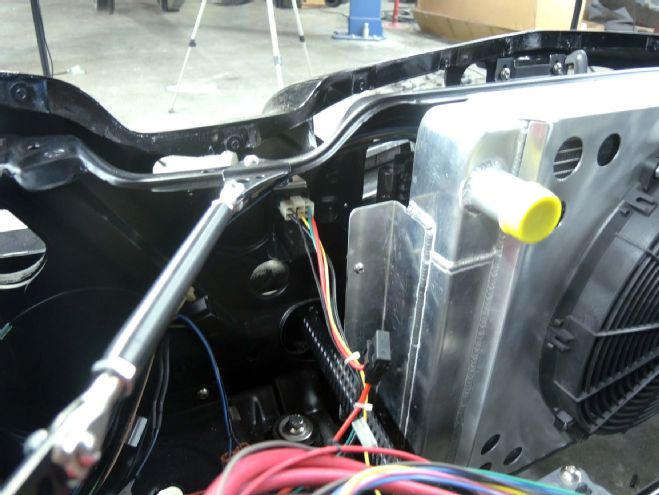
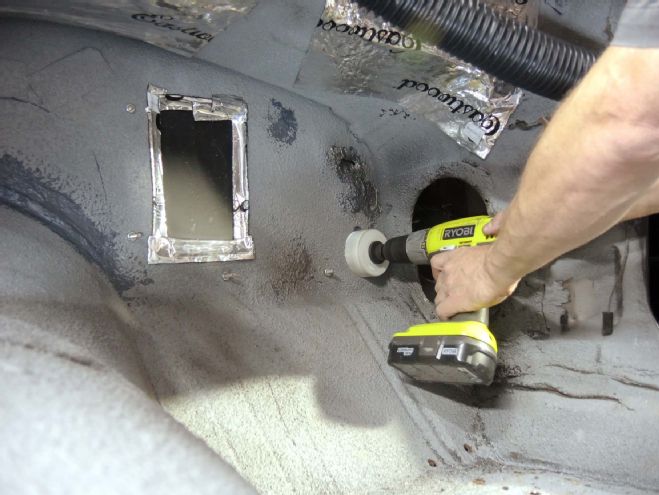 A 3-inch hole saw gives us a place to run our Dominator EFI harness and other wiring into the engine bay. We ran the wires through a rubber grommet to insulate against moisture.
 We mounted the Dominator ECM behind the dash and ran the harness through the firewall. We were able to position the ECM above the Vintage Air HVAC box, which is smaller than the stock ducting, making this LS swap even simpler and more efficient.
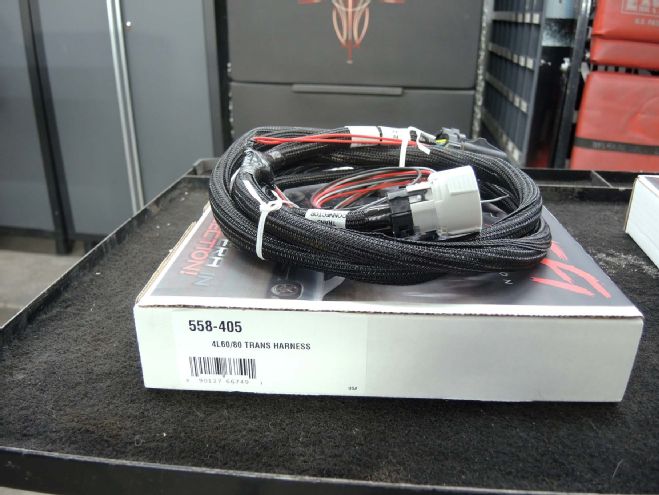 A quick scan through Holley’s catalog turned up this harness that will allow us to connect our 4L80E trans to the Dominator PCM. It’s a direct fit, so the connectors match the plug in the transmission, which simplifies the installation of the modern overdrive transmission. The only thing we’ll need from here is a shifter cable.
 With the car on our lift, TC from Bay One takes advantage of the extra maneuvering space while connecting the starter, O2 Sensors, crank trigger, and temp sensors needed for the Dominator.
 Eastwood’s new Tri-Flow triple-pass radiator came with an electric fan and shroud, as well as its own temp sensor. We mounted the unit on the radiator support and wired it into the Vintage Air A/C trinary switch.
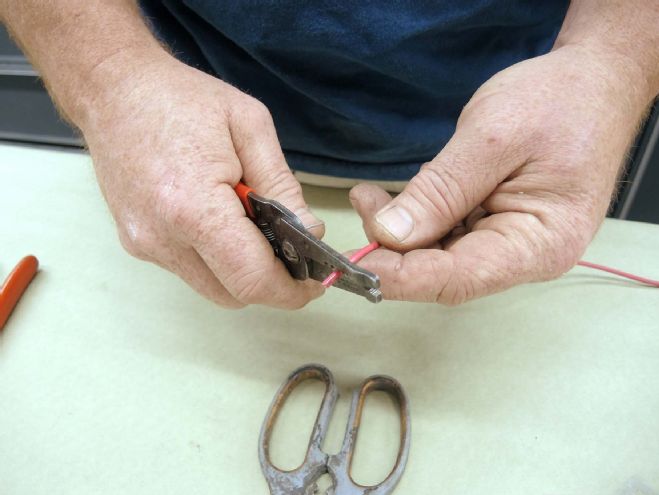 TC is an expert at automotive wiring and wanted to pass on some tips when it comes to making connections, since it’s inevitable in all but the most basic wiring jobs. Step one is to strip the insulation back about 3/8-inch. Simple tools are all that’s needed here.
 We also removed the plastic shield from the spade connector because we want to make sure we have a good crimp on the wires, and we plan to insulate the connection with heat-shrink tubing.
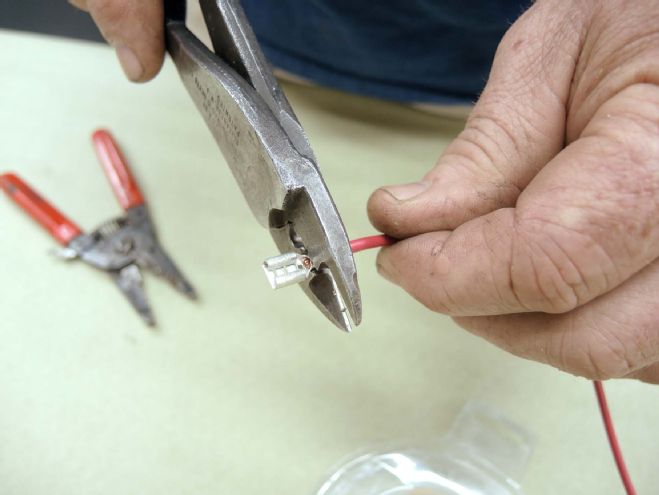 Using simple crimping pliers, TC crimps the center of the collar onto the wire. See why we removed the plastic collar that usually comes on these connectors? Now we can see if the crimp is good, instead of guessing and hoping.
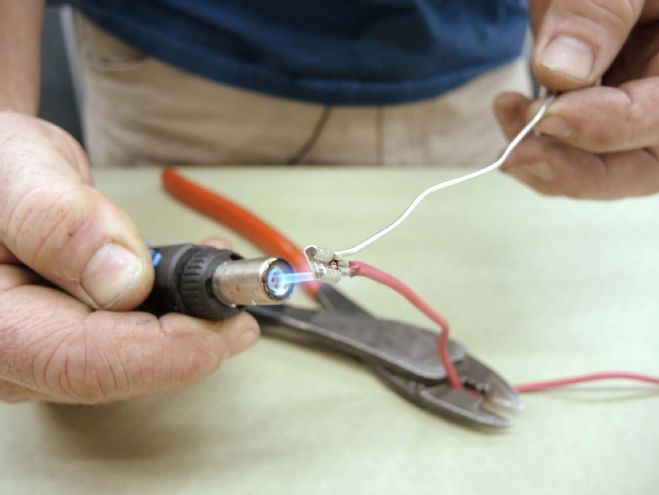 TC uses a small torch and flux core solder to complete the bond between the wire and the connector.
When the solder cools, TC cuts a section of heat-shrink tubing and shrinks it in place. Heat-shrink insulates the connector and strengthens its grip on the wire. Plus, it takes up less space than the connector’s plastic insulation, so it’s easier to route in tight places. TC’s methods have never let him down and are forged by experience. Nearly all problems are related to connections. Eliminate problems before they start by doing the job right
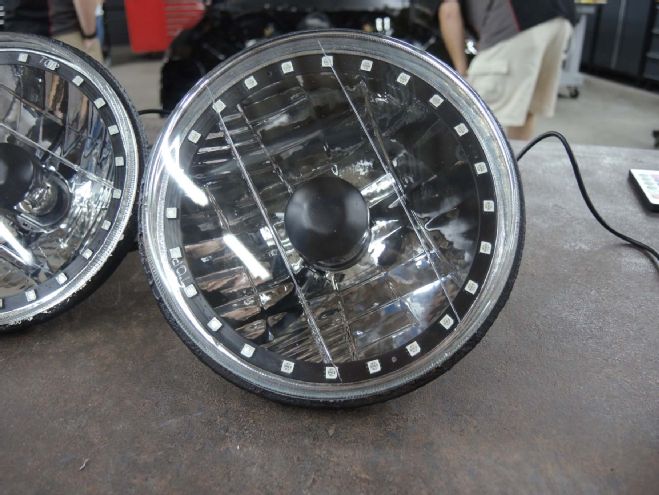
We wanted to change the front look of the car, and Black Illusion headlights from RedLine LumTronix fit the bill. These offer dozens of accent lighting and halo options, and they come with a modern H4 halogen lamp. They are definitely an upgrade in styling and function.
TC uses a small torch and flux core solder to complete the bond between the wire and the connector.
When the solder cools, TC cuts a section of heat-shrink tubing and shrinks it in place. Heat-shrink insulates the connector and strengthens its grip on the wire. Plus, it takes up less space than the connector’s plastic insulation, so it’s easier to route in tight places. TC’s methods have never let him down and are forged by experience. Nearly all problems are related to connections. Eliminate problems before they start by doing the job right
We wanted to change the front look of the car, and Black Illusion headlights from RedLine LumTronix fit the bill. These offer dozens of accent lighting and halo options, and they come with a modern H4 halogen lamp. They are definitely an upgrade in styling and function.
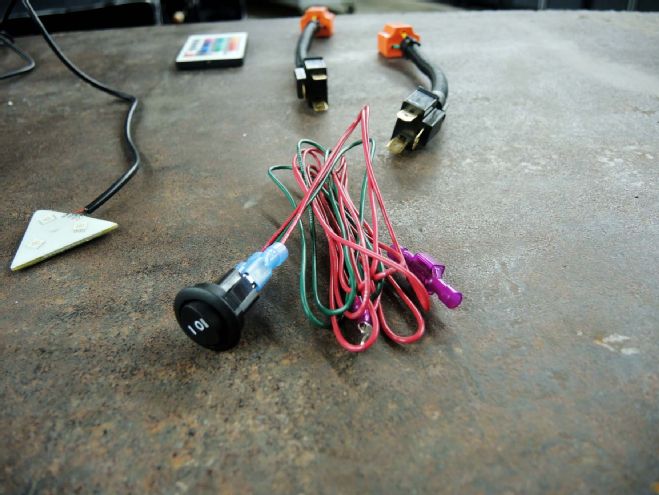 Wiring these headlights was super simple, with ceramic adapters that will insulate the Painless harness from the potential modern, high-output lighting. The halos can be activated with a separate 12V switch or tied into factory running light circuits at the fuse panel.
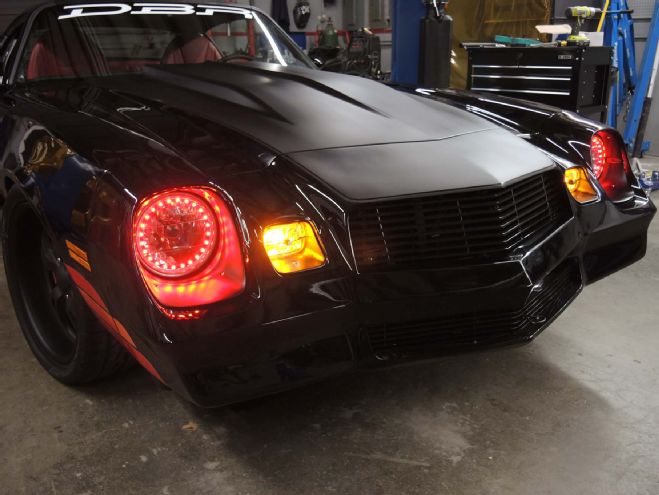 The result is striking and awesome! The LED marker lights are a nice touch as well. Remember, law enforcement frowns on running with red or blue accent lighting, so these colors are for show only. A wireless fob makes color changes easy and instant.
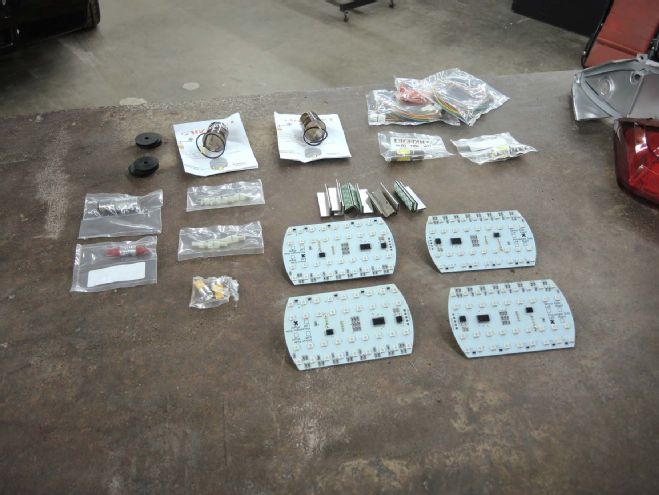 ZedSled has the honor of having the very first sequential LED taillight system for 1978–1981 Camaros. These are manufactured by Digitails and are available through RedLine LumTronix. This kit was very simple to install and replaces the original bulbs with LED circuit boards that are programmed to sweep when illuminated.
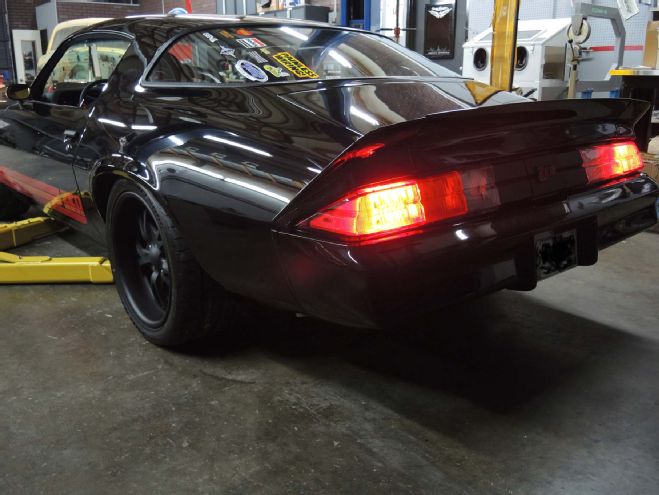 There is some splicing with this system, but the results are amazing as well. Obviously, we can’t show you the sweeping motion of the lights in a still photo, but there’s no mistaking the brightness of LED replacements. Not only do LED lights draw less current and run much cooler but they’re also far more visible in any situation.
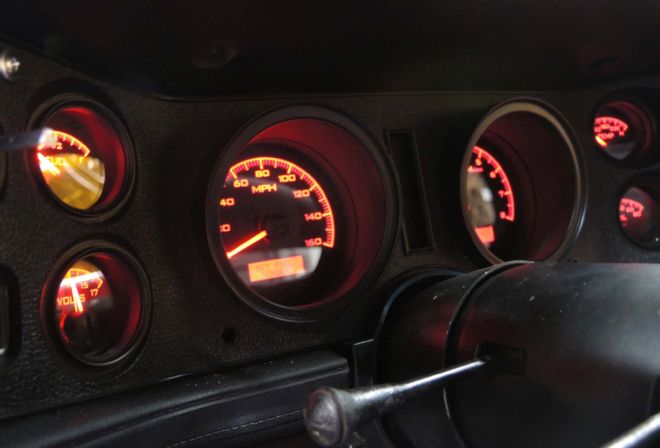 With the wiring system completed, we couldn’t resist showing off the red backlight our Dakota Digital VHX gauges. Combined with the halo lights and LED taillights, ZedSled is going to be riding in color-coordinated style. Painless Performance’s direct-fit system was a great choice for this project and got us up and running in record time. It’s great to know that the aftermarket is responding to the growing popularity of these rubber-nose Camaros.