While it's true that sheetmetal will rust just hanging out in a humid environment, the most serious damage usually occurs where water can repeatedly collect and linger for some time. Rust around the windshield frame then is not uncommon as water frequently gets trapped behind the trim and over time eventually gets under the paint and then eats away at the metal.
The damage to the cowl/firewall area of this 1970 Dodge Challenger though, was found to be much worse than was expected from what was believed to be an essentially rust free "Nevada" car. Most cars tend to rust from the ground up due to exposure to road salt in the Midwest or from just sitting over damp ground for many years, but this one seems to have rusted from the top down leading the crew at Muscle Car Restorations to conclude that it must have had extended exposure to salt air near the ocean.
Whatever the cause of the damage, a call to Auto Metal Direct provided MCR with both full firewall and cowl replacement panels.
As you might imagine, removing the entire cowl and firewall from the car will leave the surrounding parts vulnerable to shifting out of position. That's just the nature of unibody construction. It's understandable to think that installing the new panel would automatically realign any parts that may have moved a little during the process, but the experts at MCR have found the opposite to be true.
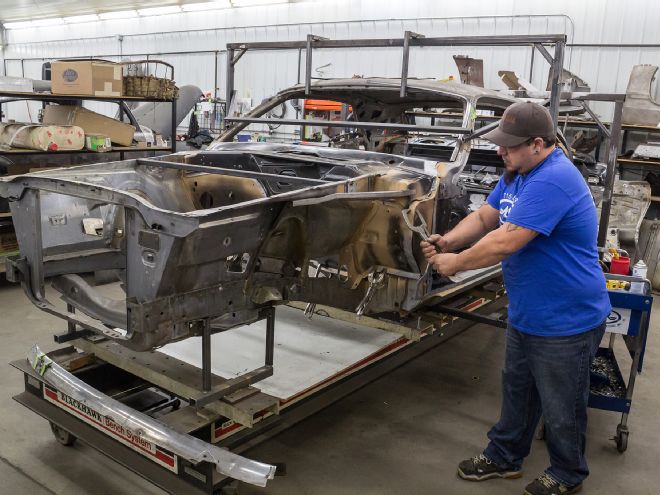
In order to retain the original integrity of the car, the new parts must be adjusted to fit the original car not the car to its new parts. That means adequate bracing must be attached to the car to insure that nothing original is allowed to move while the new parts are being installed. The best way to do this is on a solid frame rack, but what's critical is that sufficient bracing can be constructed to hold everything in place until it's all welded back together.
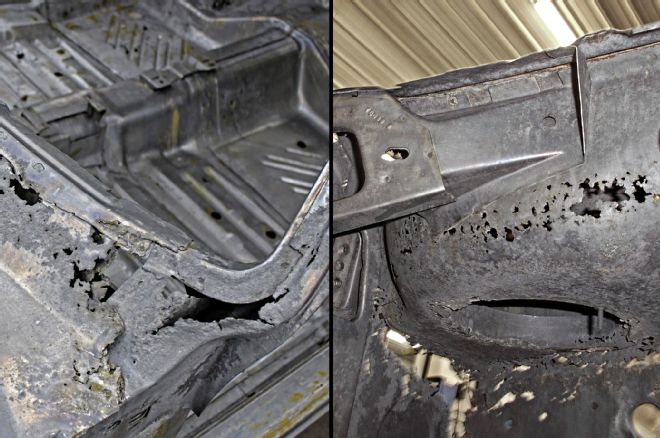
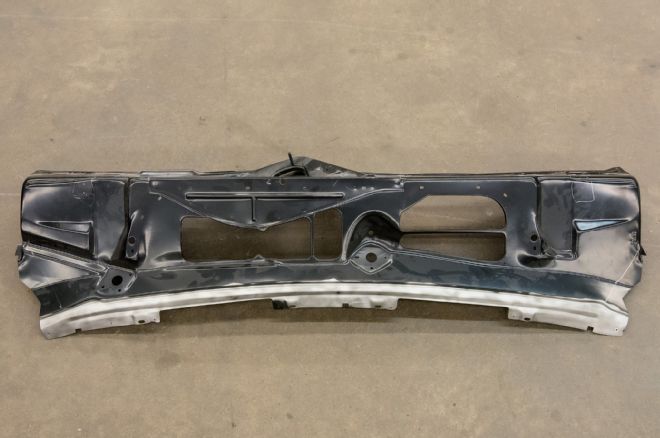
1. Given the condition of the rest of the car, this level of cowl and firewall damage seems a bit odd. Note that the windshield frame itself is relatively clean. Fortunately, AMD can supply the full firewall and cowl to make this repair possible.
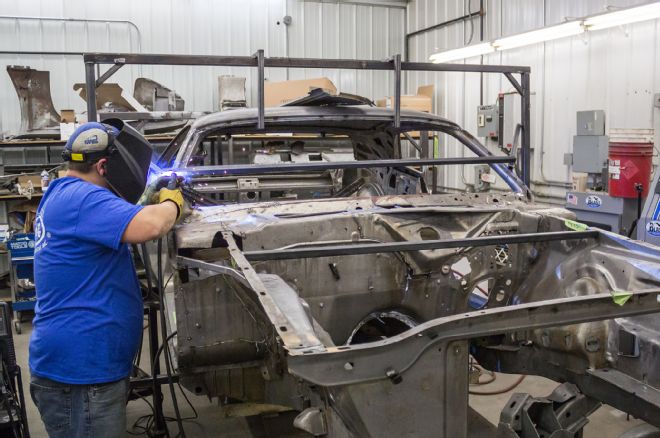
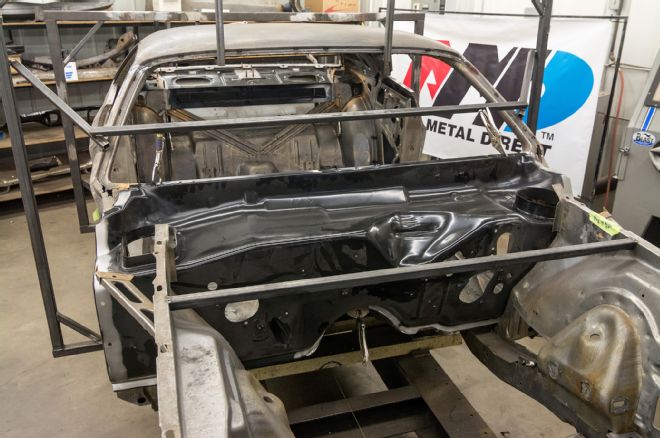
2. Solid bracing of the unibody structure is absolutely essential to the success of a job like this. Everything that could be structurally affected by removing these parts must be secured to ensure that nothing moves during the process.
3. The easiest way to gain access to the numerous spot welds that will need to be drilled to remove the old firewall/cowl assembly is to use a plasma cutter to remove whatever is needed to be able to reach them. Note that the factory stamping inside the box will be saved and inserted into the new panel to retain the original factory look.
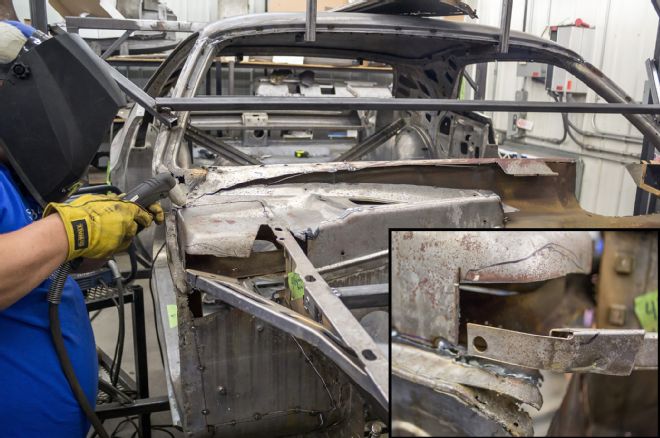
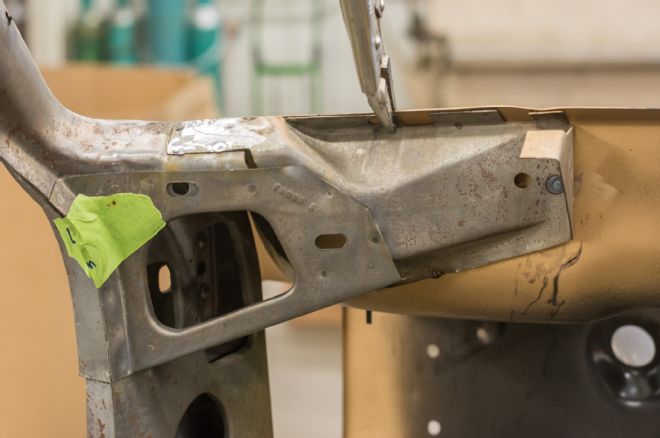
4. Note this tab at the end of one of the inner fender support brackets. There are four of these (two on top and two on the sides) that are used as a reference to align the new cowl panel.
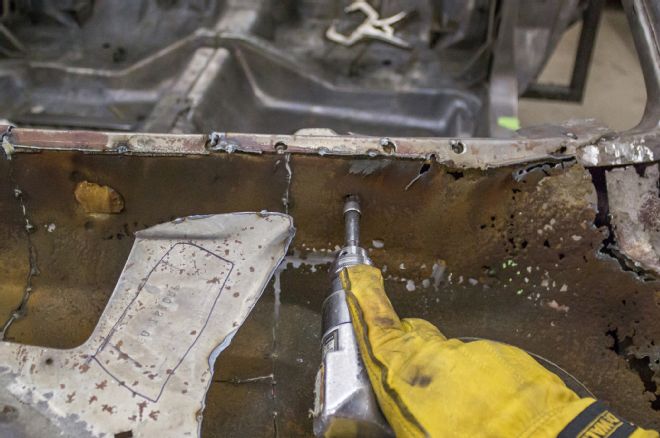
5. Here it can be clearly seen how much easier it is to reach many of the spot welds that attach the firewall to the inner fenders once much of it has been removed. These parts do not need to come out whole. MCR likes to drill the spot welds as that is the cleanest way to separate panels without in any way distorting the ones that are staying and are needed for reference for the new parts.
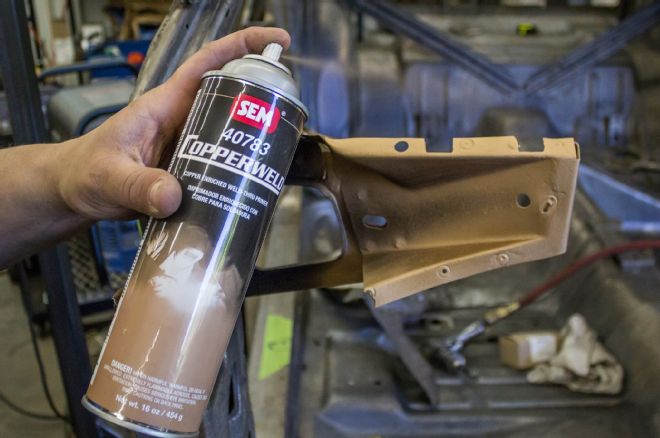
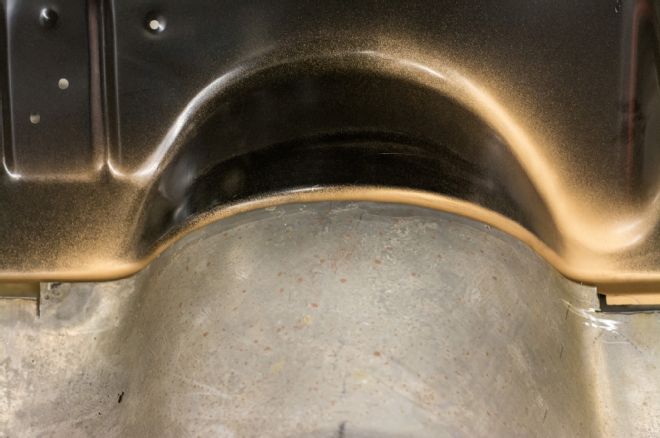
6. Between all surfaces that will be spot-welded together, MCR sprays a coat of SEM Copperweld weld-through primer to insure that these area stay rust free.
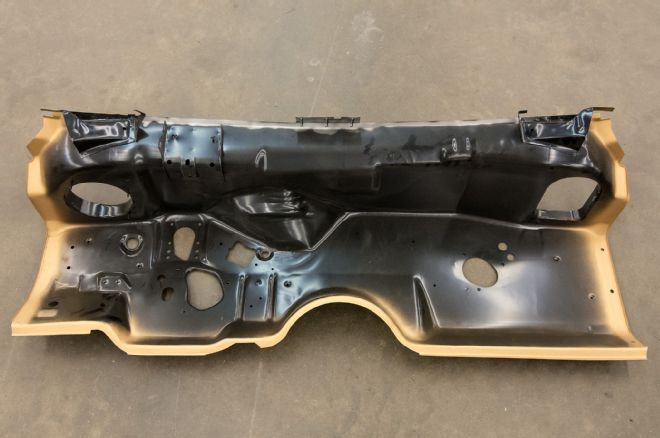
7. This is the interior side of the new AMD firewall. Note the two brackets on the upper left and right. These will both be removed from the AMD part as the originals were left attached to the A-pillar/door post as an alignment reference.
8. This is the top side of the AMD cowl. The e-coat is removed from all the weld seams before the Copperweld is applied, as MCR has found that the e-coat can interfere with the spot welds.
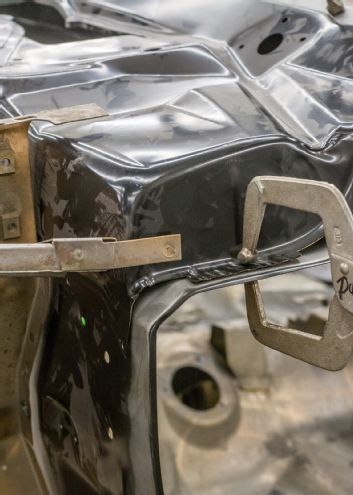
9. This small part of the original firewall was left attached to the doorpost so it could be used as reference point to help align the new firewall. This part was removed from the new AMD panel.
10. Since the firewall sits on top of both doorposts, the vertical positioning is fairly easy.
11. The left/right positioning of the firewall is best determined by referencing the transmission hump.
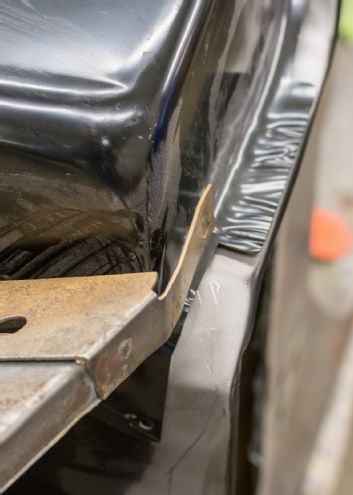
12. Cowl placement is a little trickier. Since the inner fenders were securely braced, this tab and the same one on the other side provide a sure point of reference for left/right alignment. Here it is clear to see that the cowl needs to move a bit to the driver's side of the car.
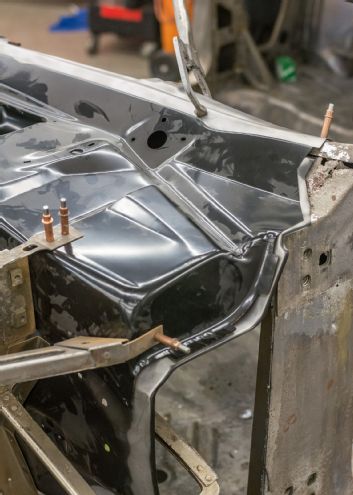
13. Here it can be seen that the front of the firewall and the cowl need to be raised up some. Without a secured inner fender, that reference point couldn't be trusted.
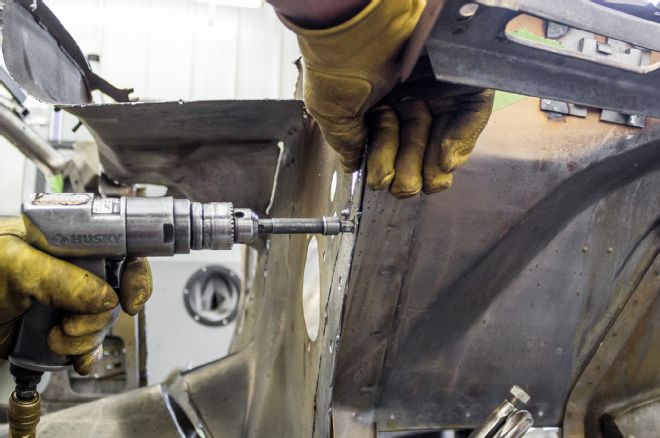
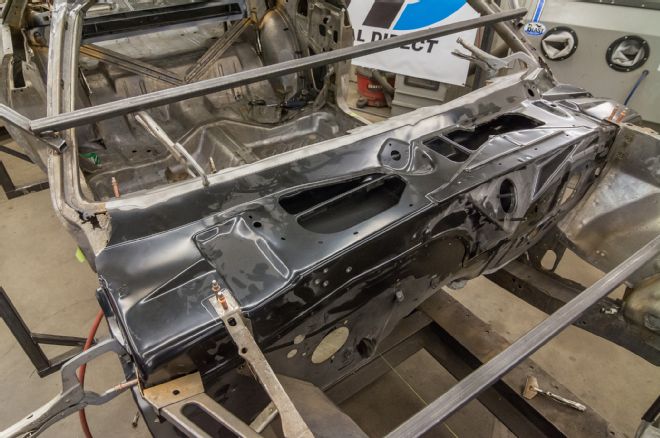
14. Once the panels are positioned, MCR will use Cleco fasteners and/or 1/8-inch sheetmetal screws to hold everything in place. They have found that these pins or screws will securely hold the parts in place until they are ready to weld. No temporary tack welding is needed which makes it much easier to remove these parts to begin replacement of the obviously damage doorpost. Now that the firewall/cowl is fitted, it becomes a reference for the doorpost parts.
15. Even though it is very likely that the cowl and firewall are exactly where they need to be, they will not be final welded until the doors, fenders, hood and even the windshield and trim are mocked up to be absolutely certain everything will fit perfectly. Essentially, the entire car is reassembled before any spot welds are done. It's an extra step that MCR takes to ensure that there are no surprises and that all the gaps and seams are perfect.