
Big back tires have been a part of hot rodding since way back before most of us were driving. In the past, the big-tire craze was driven by the Pro Street and drag scenes, but today it’s infiltrated the Pro Touring segment. Here, big tires are more than just an aesthetic deal, they help with traction, and when you’re trying to fly around a corner, traction is “numero uno.”
The problem is that most of our old Chevys weren’t designed to accommodate wide rubber, or at least what’s considered wide today. It may be possible for you to shoehorn in a 295, but that’s a dainty tire compared to the 315- and 335mm wide behemoths in vogue today. Drag racers would just fab up massive inner wheeltubs to hold their drag tires, but unless you’re rollin’ Pro Street then that falls into the “overkill” category. What’s really needed to get big tires under your Pro Touring ride are mini-tubs. As the name implies they are a lot like full tubs, just smaller. Chris Alston’s Chassisworks has recently released a mini-tub kit for 1967-’69 Camaros, and one nice perk is that they include precut closeout panels that makes trimming down the frame quite a bit easier.
To see what’s involved, we loaded up our gear and headed over to Best of Show Coach Works in Escondido, California, where they were getting ready to graft a pair into a 1967 Camaro.

01. Here’s the passenger-side wheeltub from the Chris Alston’s Chassisworks mini-tub kit (PN 5913-F10). The 18-gauge steel tub provides for an additional 2.5 inches of clearance and will accommodate 315- or 335mm section width tires. A unique aspect of the Chassisworks kit is that it includes pre-cut and laser-etched closeout panels to save fabrication time when patching up the required frame notches.
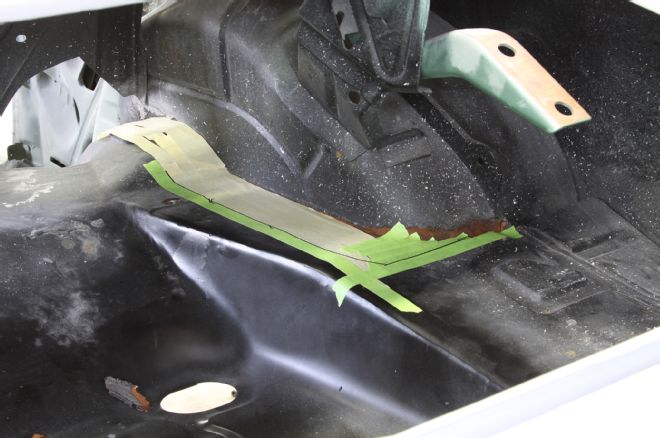
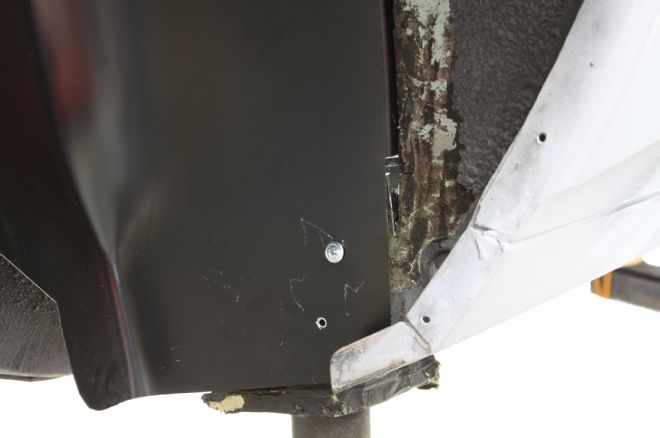
02. If your car is together, you’ll need to pull most of the interior and remove the fuel tank. We didn’t have that issue, so we started marking and cutting.
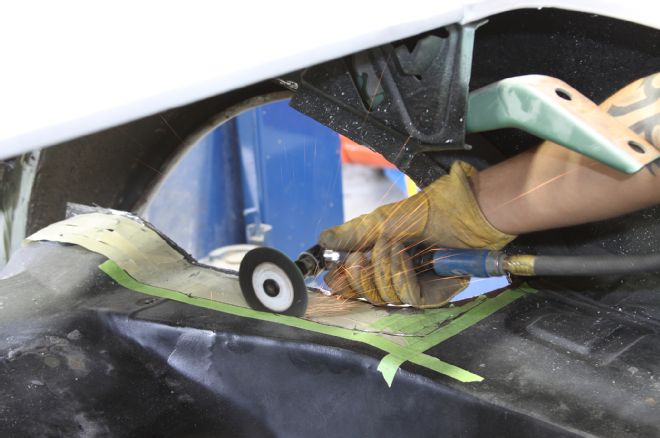
03. With the line marked about 2.5 inches out from the OE wheeltub edge, we broke out the cutoff wheel and got to work. The section we cut away contains the upper shock mount, so mini-tubs are only for cars with aftermarket coilover-type suspensions or ones where the upper shock mount has been relocated. We were careful not to damage the trunk hinge bracket since it’ll need to be removed from the old wheeltub and welded to the new one.
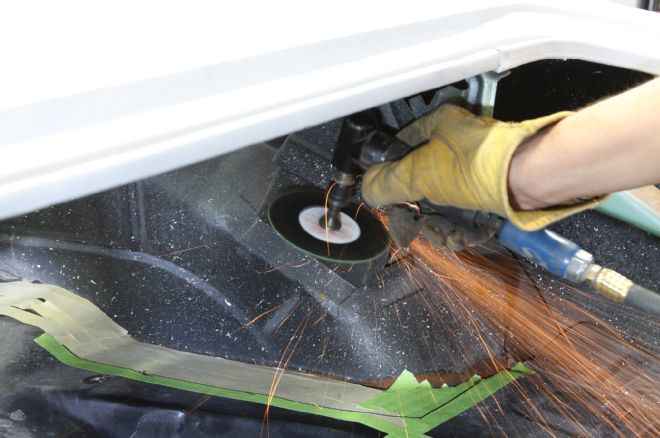
04. It was easier to take the tub out of the car in sections. We opted for a cutoff wheel, but you could use an air chisel or even a plasma cutter if you want. It’s better to cut too small and have to trim-to-fit rather than to cut too big and have to fill large gaps.
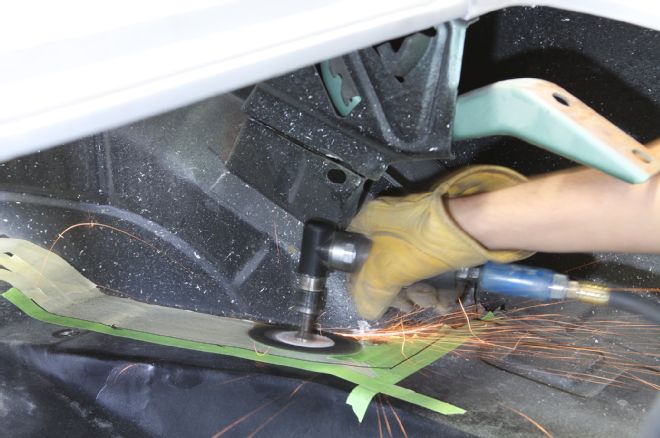
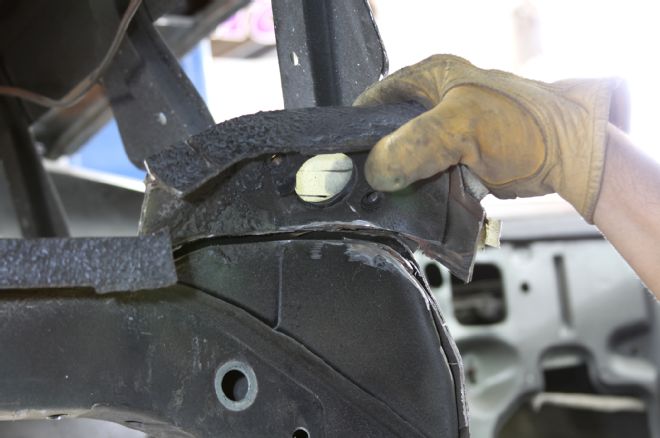
05. Here’s the main section of wheeltub we removed. To get the trunk hinge bracket off, we drilled out the spot welds and carefully removed it. In the end, this bracket will be welded to the new tub.
06. With the stock tub out of the way we were able to finish trimming away the metal. Remember, it’s better to cut off too little than too much.
07. With the stock tub out of the way we were able to finish trimming away the metal. Remember, it’s better to cut off too little than too much.
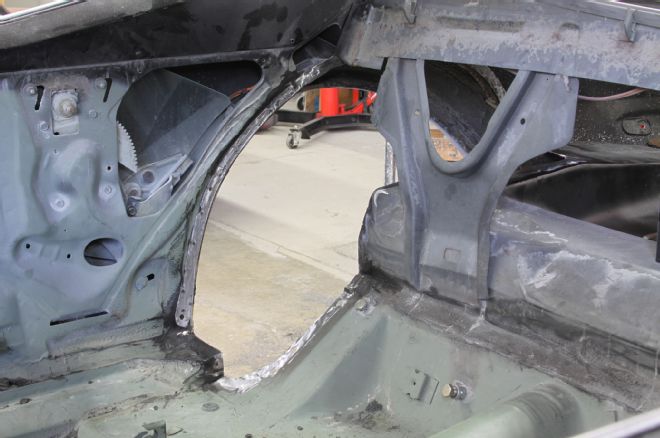
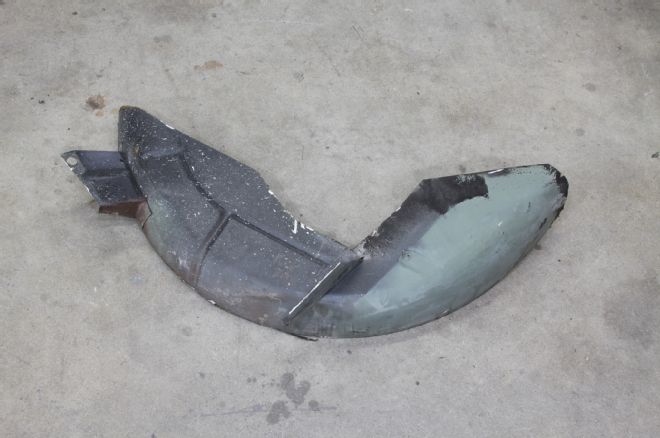
08. And here’s the resulting hole with the old wheeltub out of the way.
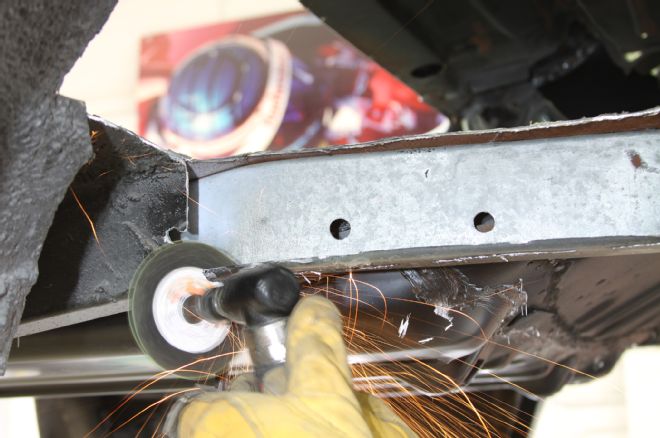
09. To maximize tire fitment, the frame also needs to be thinned down a bit. Following the instructions, we marked the frame and started cutting.
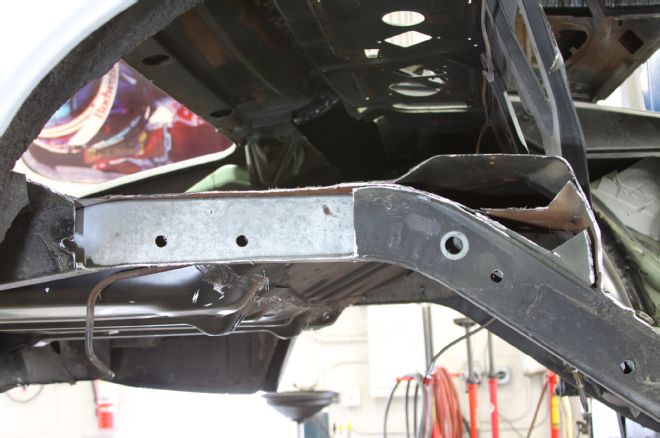
10. Here are the two areas of the passenger-side frame after being cut away.
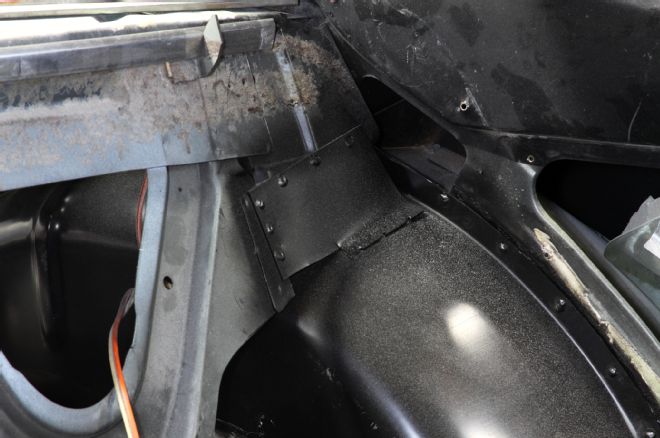
11. This is where the pre-cut closeout panels came into play.
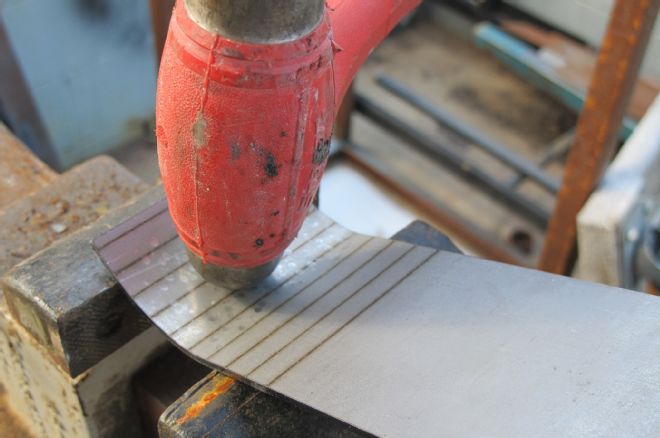
12. Where needed, the closeout panels have laser-etched guide marks to help make bending them easier.
13. Where needed, the closeout panels have laser-etched guide marks to help make bending them easier.
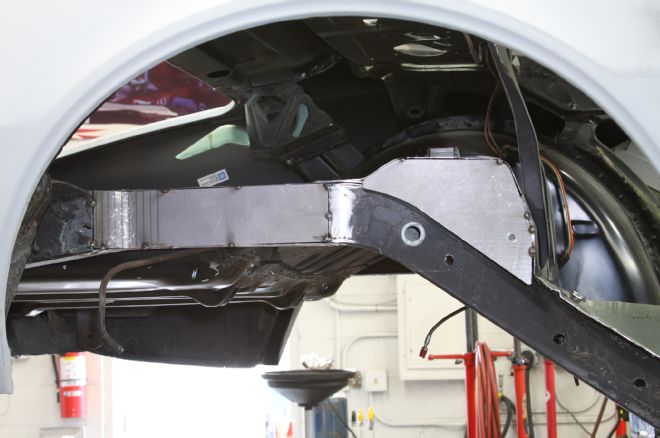
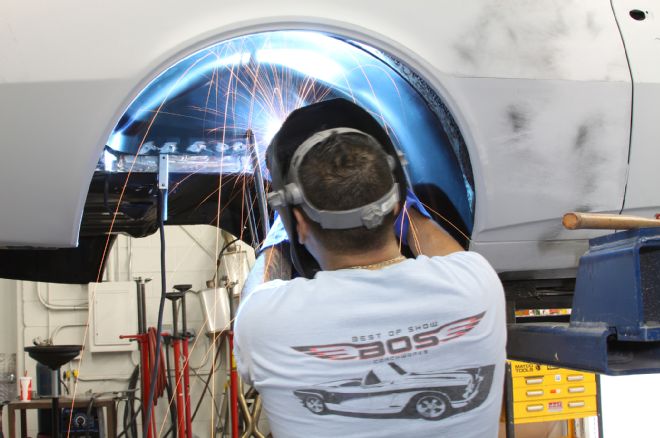
14. We then busted out our Miller 211 MIG welder and stitched everything in place.
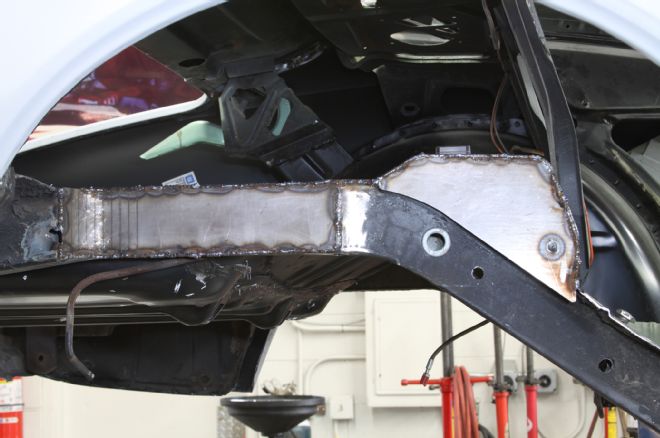
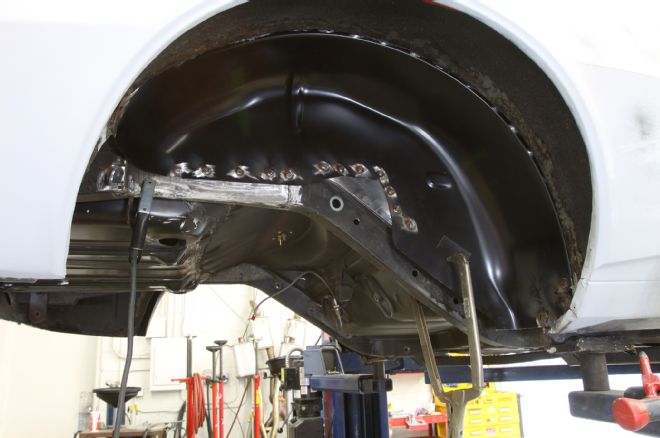
15. And here are the two panels fully welded in place. This gives us the extra tire clearance we need, and the frame is actually stronger than when we started.
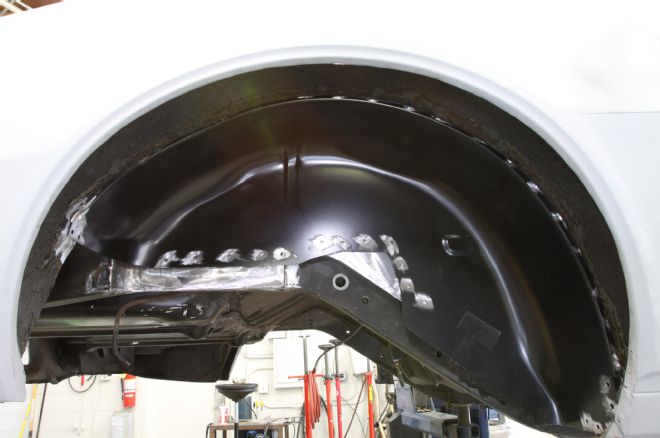
16. We then went back and ground down all the welds. Once seam-sealed and painted, the area will look like it came from the factory this way.
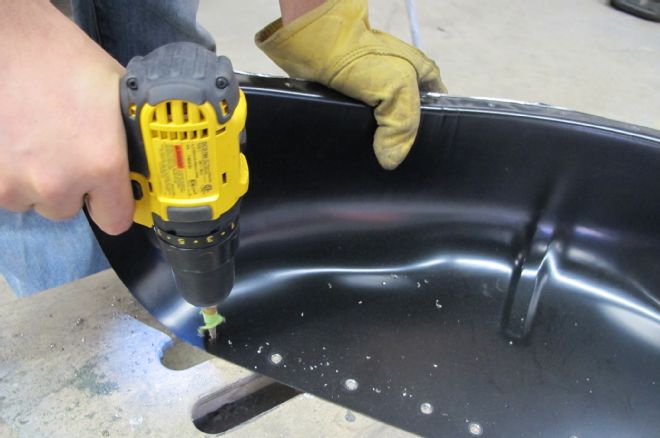
17. Prior to installing the Chassisworks mini-tub, we prepped it by grinding off the paint and drilling out holes for welding.
18. The new mini-tub was then slid into place. If it had not fit, we would have pulled it back out, trimmed a little, and then tried again.
19. To hold the mini-tub in place prior to welding, we used a combination of locking pliers and self-tapping screws.
20. Here’s the mini-tub in place and prepped for final welding.
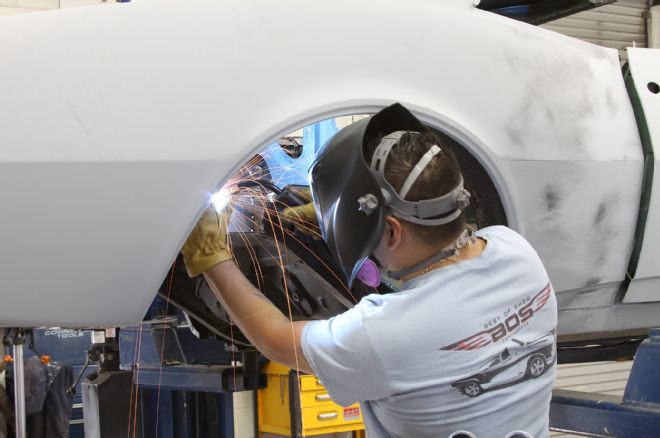
21. We then got to work with our MIG welder. Much of the welding is from inside the wheelwell, but the upper flange was welded from inside the car and trunk.
22. We then got to work with our MIG welder. Much of the welding is from inside the wheelwell, but the upper flange was welded from inside the car and trunk.
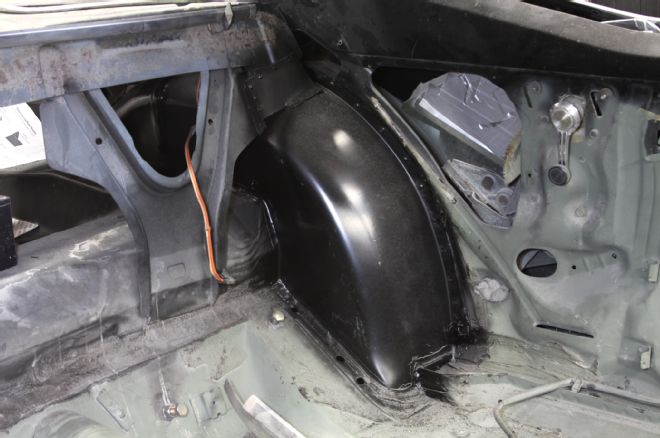
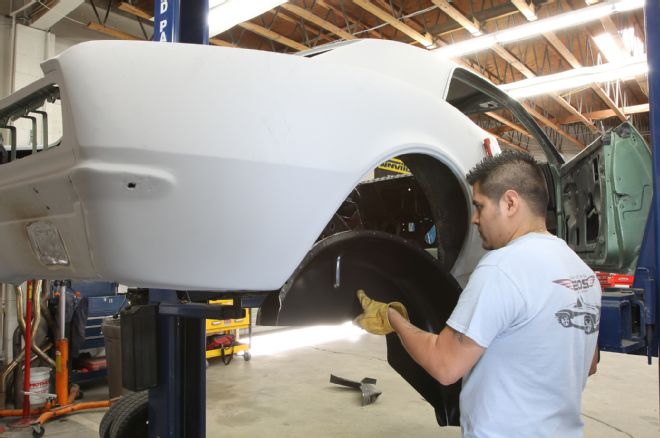
23. The driver-side tub was done in much the same way. Here it is welded, sealed, and given a coat of Eastwood Chassis Black paint.
24. We also made a couple of these small plates to brace the seatback metal to the new tubs. The install took a solid two days, and aside from some welding supplies and paint, we didn’t need anything other than the Chassisworks kit.