This concept illustration created by Chris Brown is a 1986 Dodge Ram – it's a project I started in 2006 during my tenure as editor of CUSTOM CLASSIC TRUCKS. The Dodge was billed as the "High School Custom." If one Google's Dodge Ram D150RT the article will pop up with images. The premise was, what could a high school kid or anyone who wanted to get behind the wheel of classic truck build for super low-bucks if they tried? I bought the Dodge for $500.
After a few mechanical tech features it wasn't long before the High School Custom went to college and the students in Riverside City College's autobody program got busy. The RCC instructors spearheading the project were Jerry Sievers and Mark Williams. The Dodge was at the college for almost a dozen semesters and provided numerous students a hands-on experience bodyworking and painting a "complete" from start to finish.
The drive from my Orange County base to RCC is just a little over 40 miles. I loaded up a gallon of Summit Racing's DTM epoxy primer and headed out to the college more than a few times during the project. There were students male and female alike who were quite dedicated to doing the best job they could. However, there was one know-it-all guy who really stands out in my memory of some of the trials and tribulations the students endured getting the Dodge ready for paint. I was watching the know-it-all grind the passenger side door down from silver bare steel into a cherry red glow that left a smoldering trail of warped purple metal. Typical of a know-it-all, he wasn't open to suggestions and the students around him cringed because they knew one of them was going to have to clean up his mess.
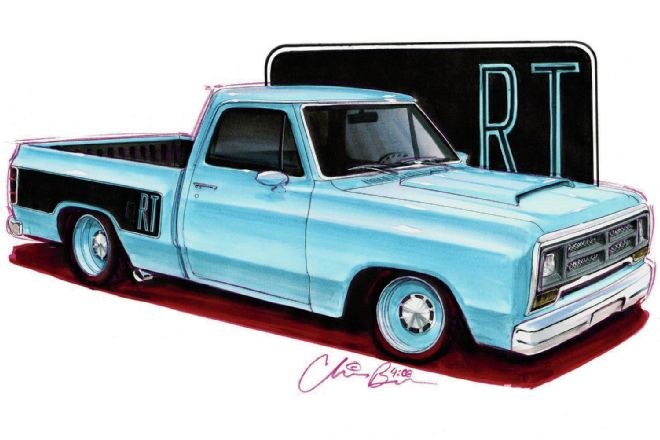 1. D150RT Illustration by Chris Brown.
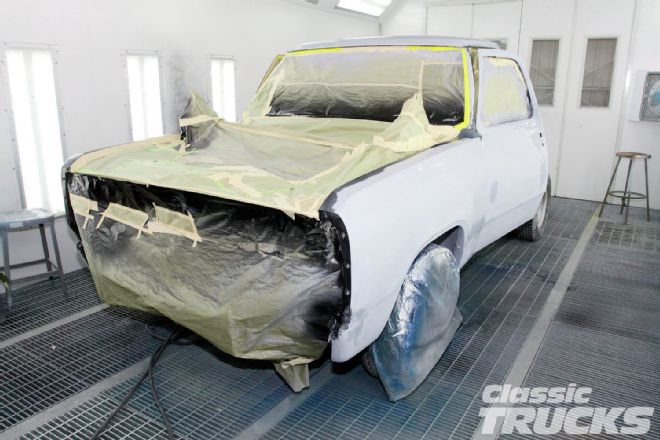 2. Still in original paint RCC autobody students sanded most of the dark blue to bare metal. After cleansing with prep solvent, Summit Racing DTM epoxy SUM-UP230 went on. DTM means direct-to-metal. Wait around 24-48 hours before sanding.
 3. Second, Summit Racing 2K urethane primer surfacer. Third, guidecoated and block sanded. The RCC students repeated this process until the Dodge was ready for black.
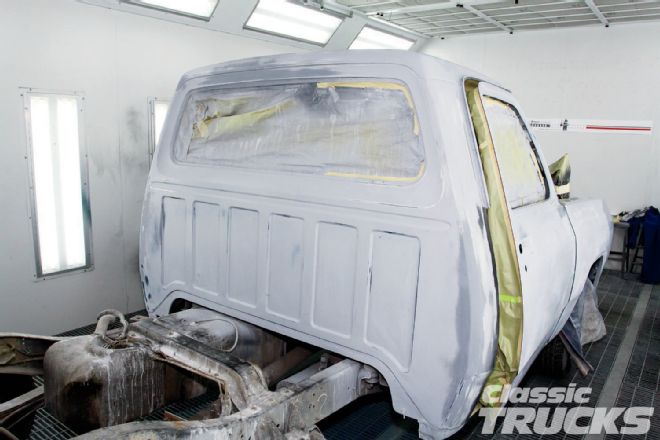
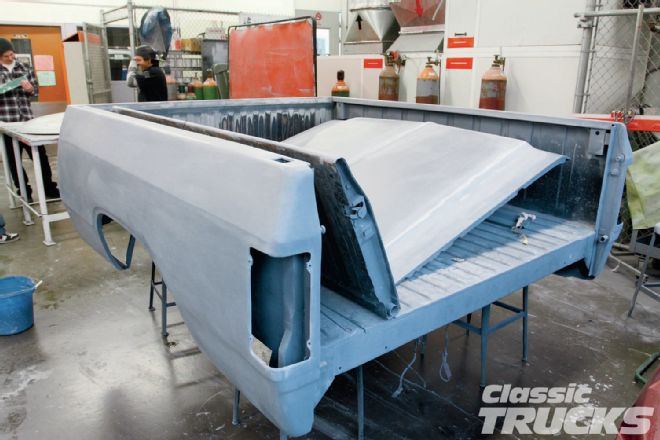 4. The best way to get perfect coverage, and make getting good results easier, is to paint body parts individually.
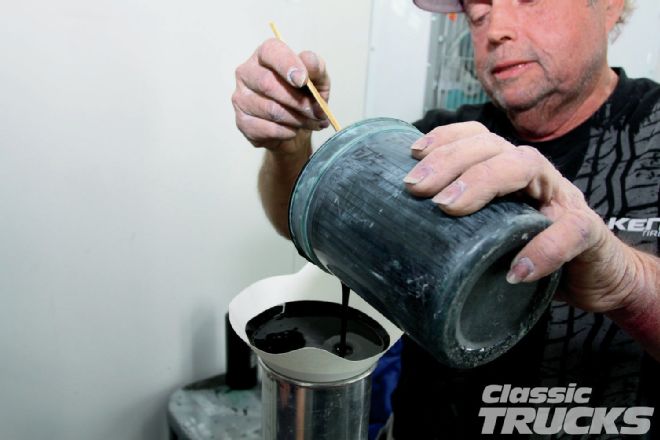 5. Jerry poured Auto-Air Colors dark sealer un-thinned (straight from the bottle) through a paint strainer into the gun cup.
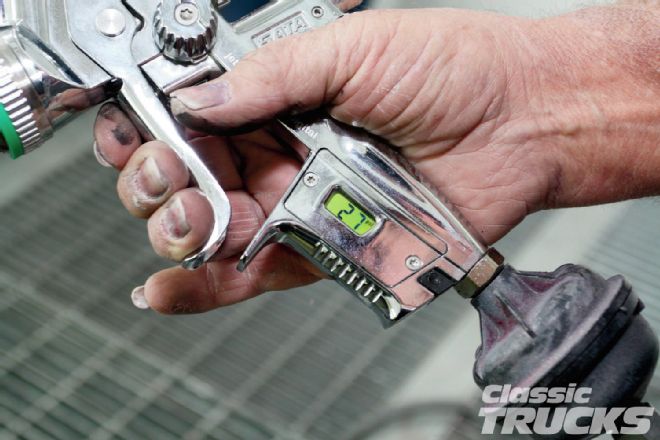 6. Then adjusted air pressure on the HVLP gun to 27 psi. If you're still using a siphon gun, it'll take more pressure, use more paint, and create beaucoup overspray...that means mucho.
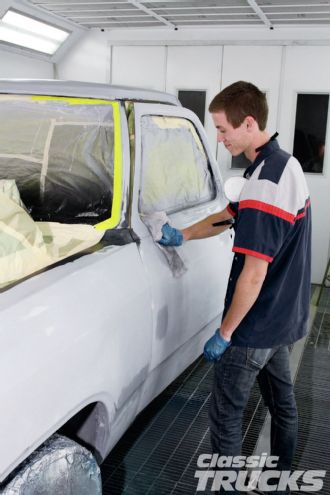 7. It's almost time to spray, but first the surface must be washed with a prep solvent, tacked, and blown completely dust-free. With the compressed air, pay special attention to blowing out areas that trap dust and dirt.
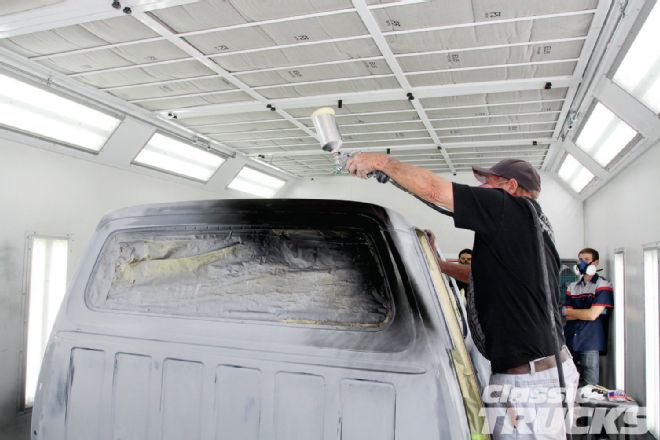 8. RCC instructor Jerry Sievers is an award-winning painter. He started at the roof, holding the gun flat, and moving quickly. Do not spray water-based paint on in a heavy coat.
 9. Jerry moved from the roof to the right rear half of the cab. Remember to keep the gun moving to avoid runs.
 10. Around the window frame and then to the top of the door. Notice each area is always started at its highest point and then painted completely down to the bottom.
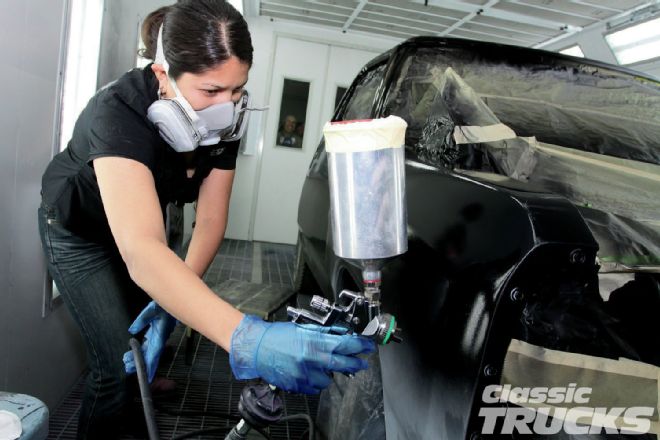
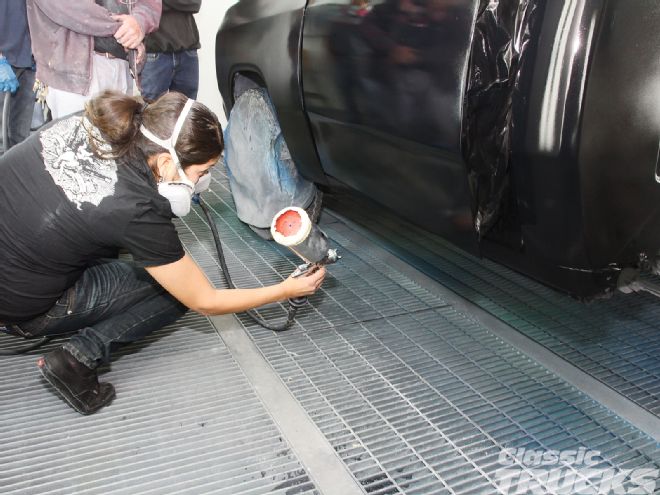
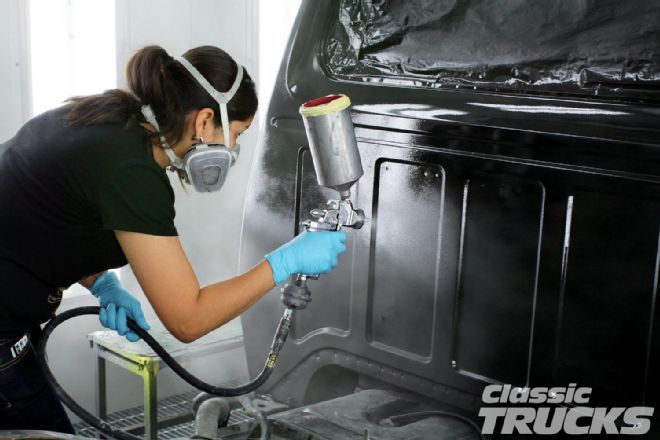
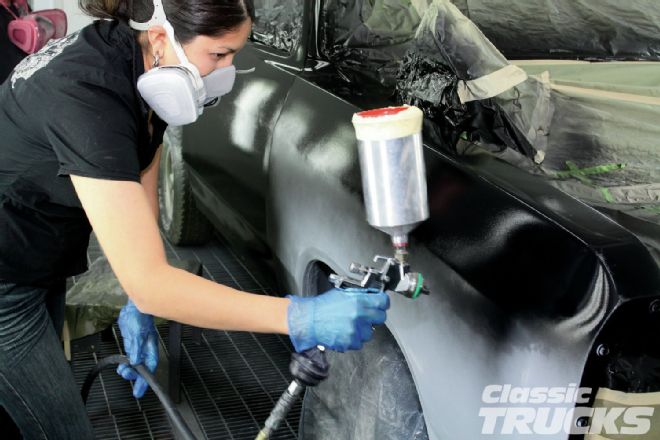 11. Jerry passed the gun to the teacher assistant and advanced autobody student. Notice she moves at a steady pace and starts at the top. This girl can paint.
 12. To deal with the wheelwell interrupting a long pass, she sprayed the entire rear lower half of the front fender, and then the front lower half of the front fender.
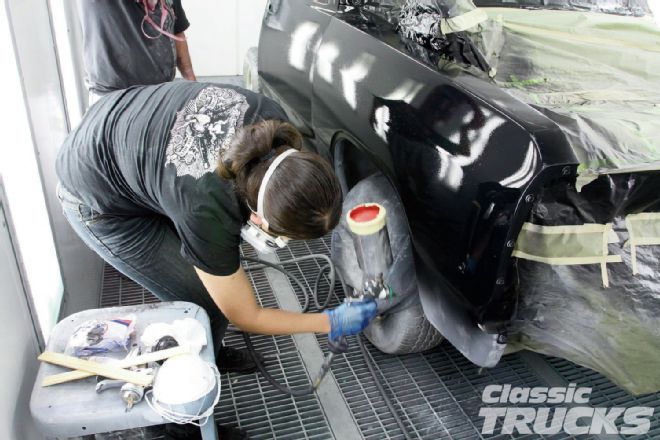 13. Special attention was paid to ensure the lower hard-to-see-and-reach areas got an equal coating of Auto-Air's dark sealer. Airflow and warmth facilitates drying water-based and waterborne paints.
Generally, an area of the truck, such as along the bedsides, the doors, or on the hood would be worked to perfection by an advanced student and then a student from a little lower on the learning curve would jump in and create a problem to be repaired. It's one thing to work with virgin body panels, but it takes a real "golden hammer" to be able to shape overworked sheetmetal back into something that matches original lines. Then advanced students would hop back on it and bring things back above par. A good learning experience for all concerned.
In 2013 Jerry called me and said his current class had the Dodge ready to go into color, and asked if I like to come out to watch it get sprayed. I said sure and hoped it was as straight as an arrow because I had decided against light blue; I wanted it to go black. I'm sure most of you reading this realize nothing reveals imperfections more, or confirms the bodywork is perfect, more than the color black...and yes, black is a color. In pigment theory, black is the presence of all color and in light theory black is the absence of all color. Anyway, the body was straighter than new and the DTM epoxy was ready to accept a coat of Auto-Air Colors water-based sealer, followed by Auto-Air Colors pure black.
Beyond the merits of using a paint that's absolutely VOC free, being water-based, Auto-Air Colors allow a second chance if things go wrong in the booth. It's something that at times can happen to even the best of painters. On the first passes a massive infestation of fisheyes makes the surface look like a cheese pizza or a heavy hand can create beaucoup runs. With solvent-based paints, washing the paint off to start over requires using thinner, or reducer, but all it takes for water-based is a garden hose.
After the Auto-Air Colors basecoat color has been completed there is no window to worry about before the clear topcoat must be applied. Unlike a specified amount of hours this means the day after or two weeks later like in the case of what the RCC students did with my Dodge. In this month's article we've covered spraying Auto-Air Colors water-based sealer and color followed by the application of Summit Racing's high-solids fast-drying urethane clear. In next month's edition we'll show how to color sand and rub Summit Racing's urethane clear followed with a spiffy polish and wax...spiffy?
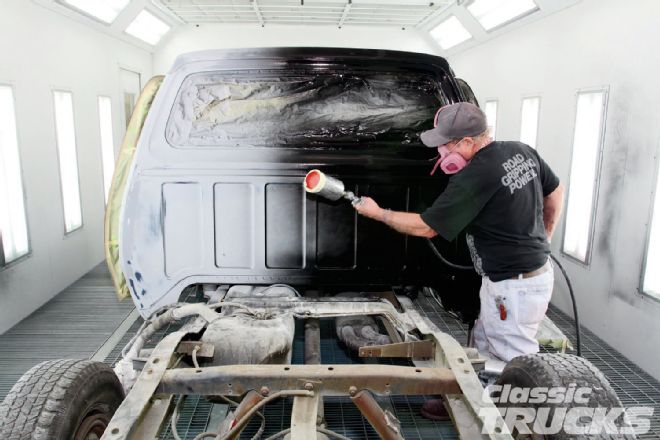
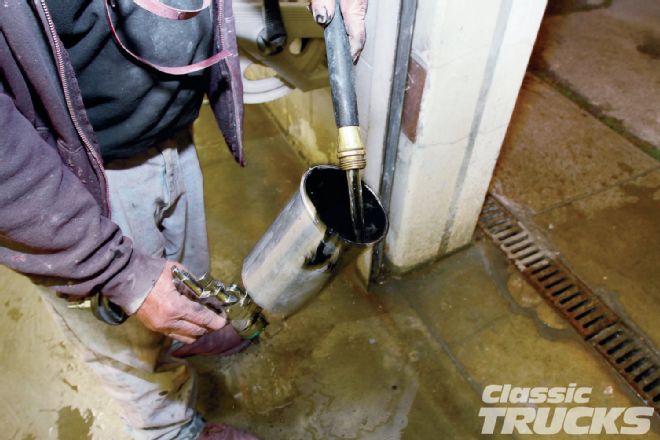
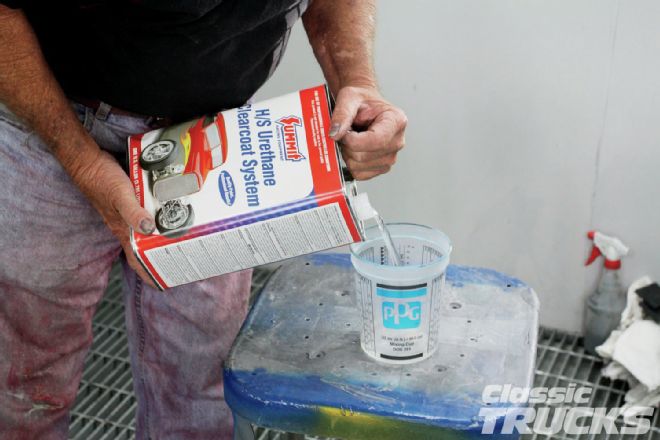
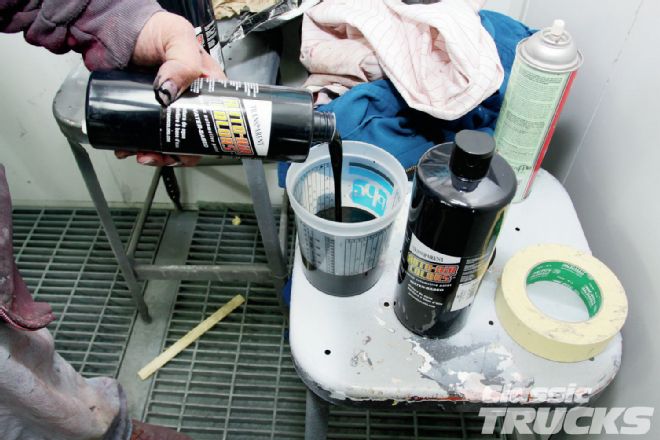 14. With the sealer drying the next step was to pour un-thinned (reduced) Auto-Air basecoat black color into a cup, then strain it into the gun cup.
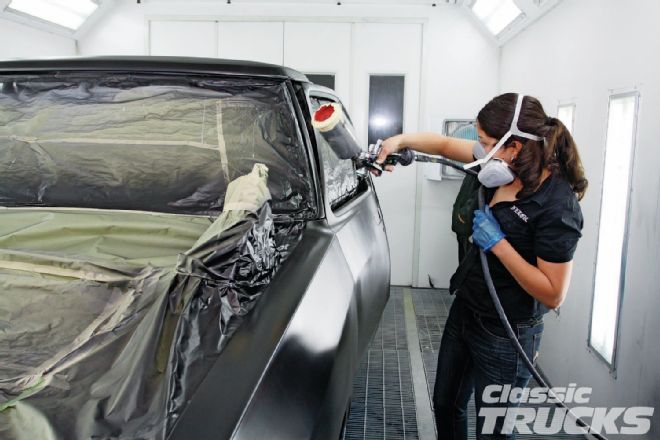 15. Spraying the black color on was a repetition of the sequence used to spray the sealer on – from top to bottom.
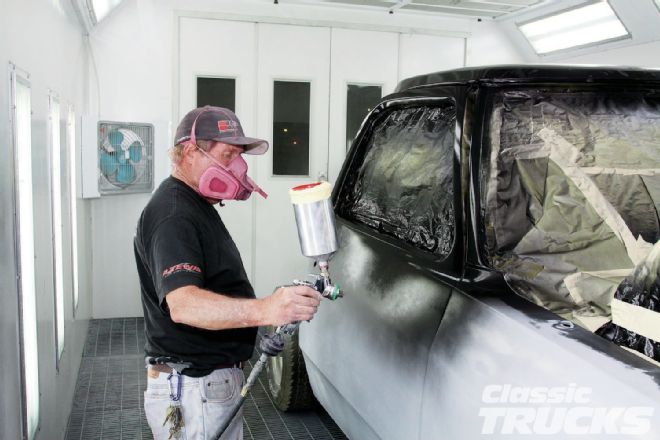
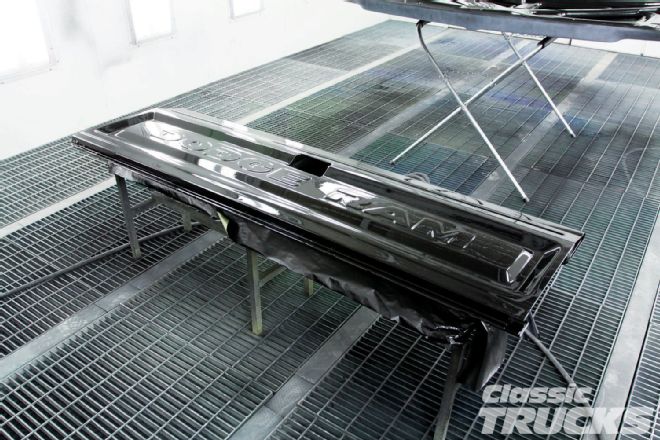
 16. The last areas to cover are the rocker panels extending to under the cab to ensure good coverage.
 17. All it took to clean the spray gun was water. We suggest flushing the cup to start, and then fill it with fresh water and spray pure water through the gun. Disassemble and clean the gun as you would with solvent paints.
 18. Auto-Air Colors can be second-staged with clear as soon as it has dried completely, or because there's no window many weeks can go by. After two weeks, RCC students scuffed the black Auto-Air before painting.
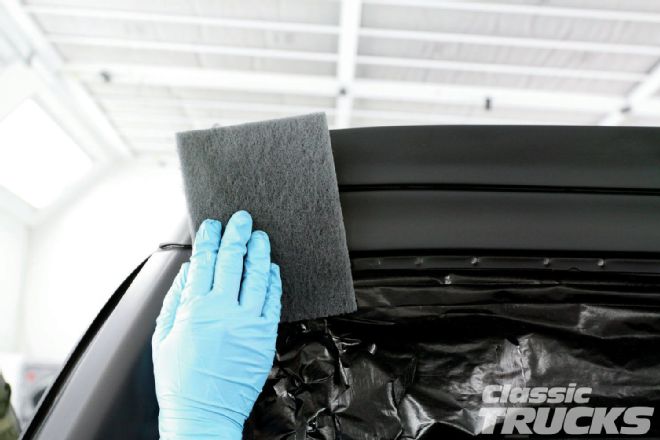
 19. After scuffing the entire truck with an ultra-fine 3M pad it was cleaned thoroughly with a prep solvent. Solvent will not harm dried Auto-Air Colors paint.
 20. The truck was tacked and blown completely clean with a tack rag, and oil-free compressed air.
 21. Summit Racing's high-solids urethane clear requires no induction time. From the mixing cup it was strained into the gun cup and then it was ready to spray.
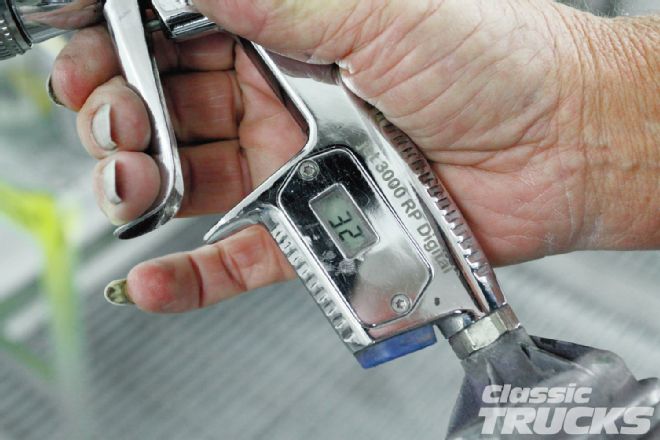 22. The air pressure for shooting Summit Racing's clear urethane was set at 32 psi.
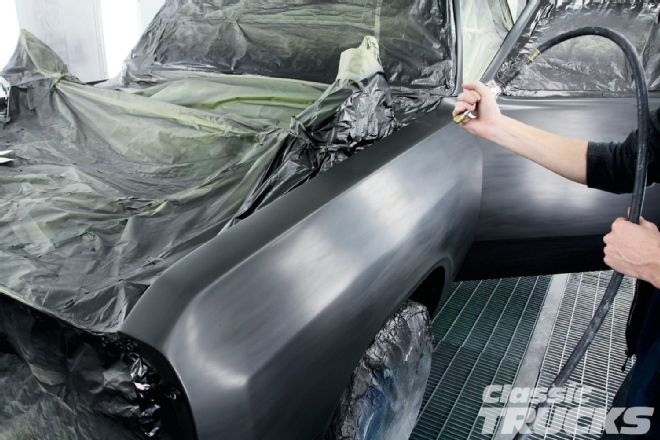
 23. The same sequence starting from the top of an area and working to the bottom was used to spray the clear. A wide vertical fan and moving briskly provided great results.
 24. Watching the clear hit the surface, and making sure one is laying on a good heavy last coat that will flow out will guarantee slick results.
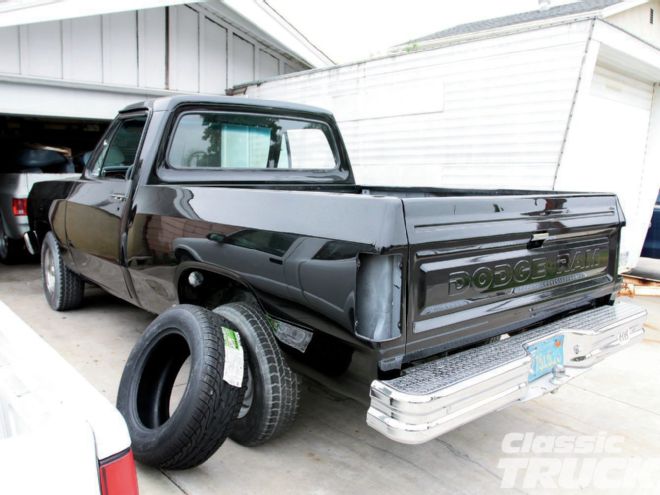
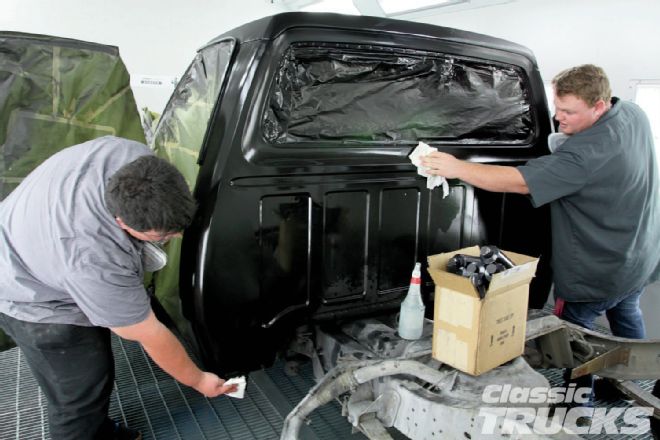
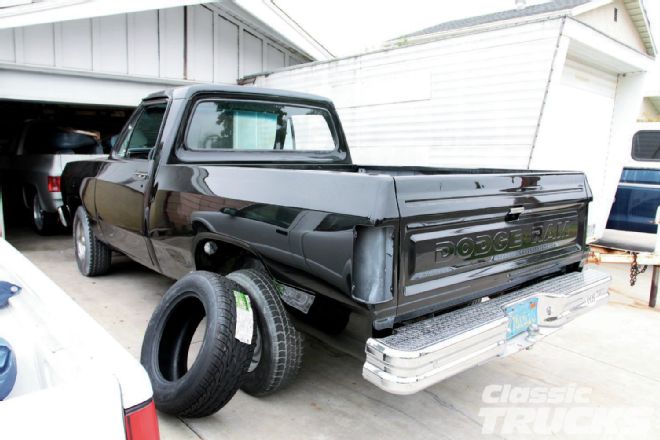 25. Here's the Dodge at home after the RCC crew color-sanded and rubbed it. Look for next month's edition where we'll show how to color-sand and rub followed by the final details.