To most people a flat coat of shiny paint defines the perfect finish to a job well done. It's really hard to beat: manufacturers invested heavily to create resins that flow out to create glassy, rock-hard coatings. A freshly cured coat of paint really is a thing of beauty.
To others, though, a freshly applied coat of paint, no matter how nice, is merely another step in the finishing process. No matter how flawless a finish appears, a good detailer can find flaws in it. They're minute flaws of course, and without the aid of a magnifying glass most aren't even visible; however, like barely distinguishable stars in a night sky they culminate into a visual feature of their own. Only nobody waxes poetic about the multitude of barely perceptible specs in a paintjob.
Perfection is impossible but you can get damned close to it by color sanding the finish. In a nutshell the process removes the outermost skin of a paintjob, the surface with the flaws in it. But by color sanding you can also get damned close to the primer if you don't know what you're doing. So we consulted a guru of sorts. We asked Jason Killmer to show us how.
He forgives you if you don't recognize his name. Killmer is but one of the army of craftsmen stuck in a no-man's land in the sense that his best work is literally invisible. His objective is to remove the defects that people don't expect to see. Here's the cruel irony: the painter usually gets the praise for his best work. Those in the industry know the value in what he does and as a result literally fly Killmer around the country to work his magic on show cars as they reach various stages and at the big events to give cars the final once-over. Fortunate for us, though, he co-owns Polished Image, a detail shop in nearby Tacoma. Even luckier, he hosts seminars on how to make a finish shine like no other. Best of all, he puts up with me.
To understand how color sanding works it pays to know what determines the quality of a finish. Light reflects much like a billiard ball off a table cushion: both leave the surface at the inverse angle by which they arrived. In real-world terms, push a ball into the cushion at a 90-degree angle and it'll bounce right back at you at 90 degrees. Reduce the angle to say 15 degrees and it'll leave the cushion at the inverse angle, in this case 165 degrees (consult a protractor if that doesn't make sense). If a billiard table or protractor isn't handy then shine a flashlight in a darkened bathroom's mirror and see where the beam goes. And if that doesn't work then focus the beam upward on your face and summon a ghost to explain it for you.
They appear completely different but a mirror and the felt on a billiard cushion are similar in another respect. "A surface may look perfectly smooth but if you were to magnify it you'd see a bunch of tiny peaks and valleys," Killmer observes. Though seemingly insignificant, the miniscule transition from each peak to its respective valley reflects light. The severity and complexity of the reflective angles determine the surface's reflective qualities. The deep and infinitely complex crags in the felt, for example, reflect light rays in so many random directions that the surface appears dull. A mirror has the same peaks and valleys but they could hardly be described as craggy. The relatively small and shallow surface angles reflect light rays in a consistent direction thereby making the surface appear shiny. That's what we're going for.
"Color sanding is just an extension of the block-sanding process," Killmer continues. Only instead of flattening waves it levels all of those tiny ridges that scatter light indiscriminately. In fact, the same techniques used in block sanding largely apply to color sanding.
Killmer chose a driver-quality '56 Cadillac to show that nearly any finish can benefit from color sanding. It's a perfect candidate for at least two reasons. For one, the poorly applied paint has the ideal combination of dry spots, extreme orange peel, and a haunted mansion's worth of cobweb-like scratches. For another, its prior owner elected for a clearcoated finish, an essential component in this specific case.
The clearcoat is essential in this case because the car has a metallic finish. The resins that float to the surface of a single-stage metallic finish as it cures protect the metallic elements from oxygen. Color sanding, however, eliminates that thin protective coating thereby exposing those metallic elements, at which point they oxidize rapidly. A conventional clearcoat, on the other hand, is far thicker than the film that protects the metallic elements from oxygen. Provided it was applied sufficiently thick, the clearcoat will successfully protect a metallic basecoat. And just to clarify, a non-metallic finish needn't a clearcoat to benefit from color sanding. It has no metallic elements that would oxidize if exposed to the elements.
Which brings up something to consider. "If you're painting a car then spray a few more coats on there," Killmer suggests. By the time you finish color sanding and polishing a car, he explains, a really thick paintjob ends up about as thick as a normal paintjob that hasn't been color sanded. Bear in mind that this applies only to single-stage paints and the clearcoats in multi-stage finishes. The base and intermediate coats in a multi-stage finish needn't be any thicker. If you sand into them you've got bigger problems anyway.
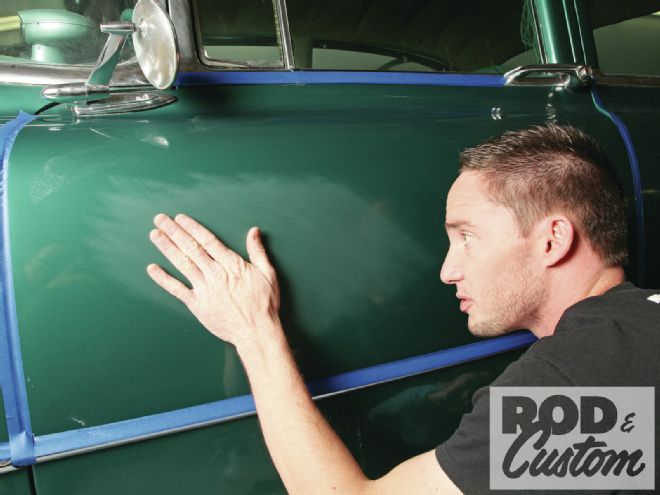
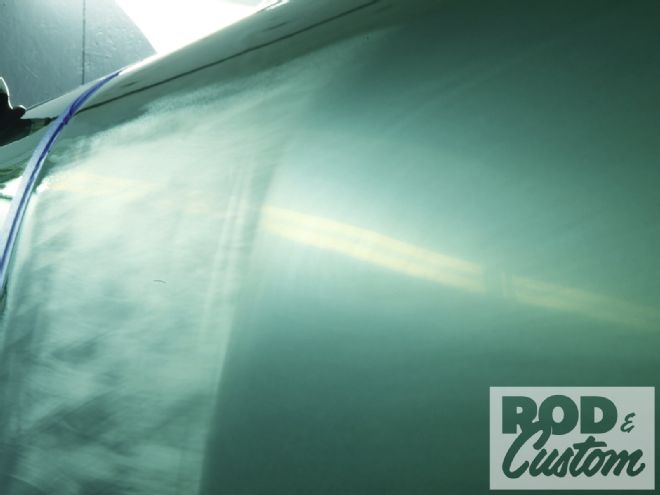
You'll also need to develop a new way to gauge your progress. We're all used to examining things head-on but that perspective doesn't reliably reveal a surface's finish. For reasons defined in the reflectivity explanation you'll have to study the reflections that appear in a panel from an oblique angle. Killmer studies the light pattern created in the panel by a stand-mounted utility lamp. My camera preferred the dimmer and larger reflections created by the fluorescent lamps mounted to the walls. You'll likely find your own ideal light source.
But just as the case with paint, color sanding isn't the final step in a truly finished paintjob. Color sanding is merely the preparation for extensive polishing that follows, a task that warrants its own entry, an entry that will follow in the near future.
1. To most, heavy orange peel like this is a damning feature. Note at this point the difference between the shape of the light source (relatively narrow) and the shape of the reflective area (very wide). Those are all of those random bright dots. Those are the transitions between the peaks and valleys reflecting light.
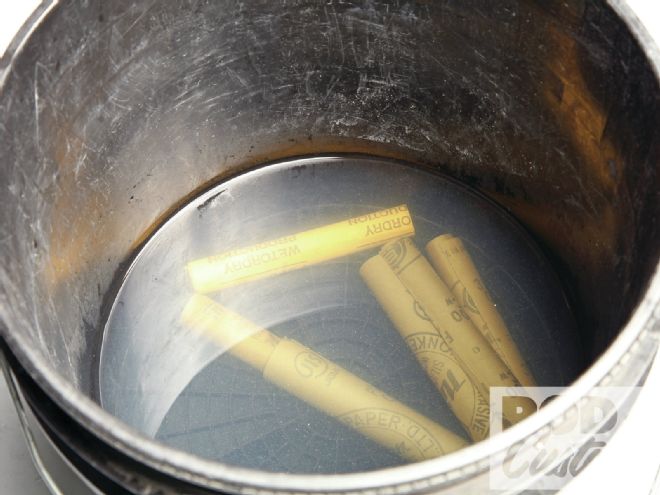
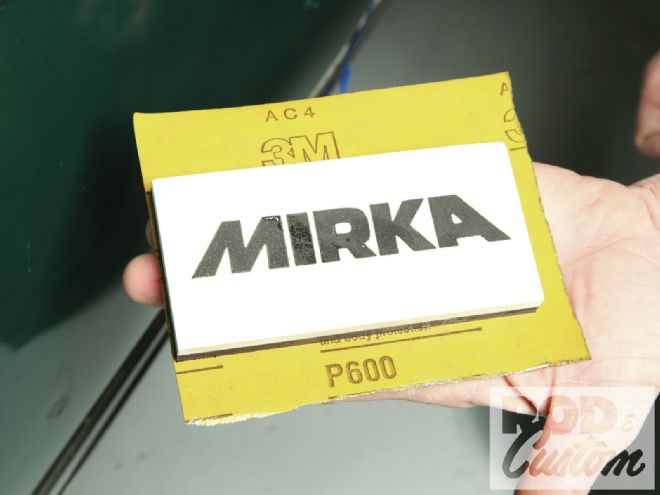
2. Fine-grit sanding papers rely on water to prevent sanded material from clogging the grit. Killmer recommends soaking the papers for about 30 minutes prior to use to make the sheets more pliable.
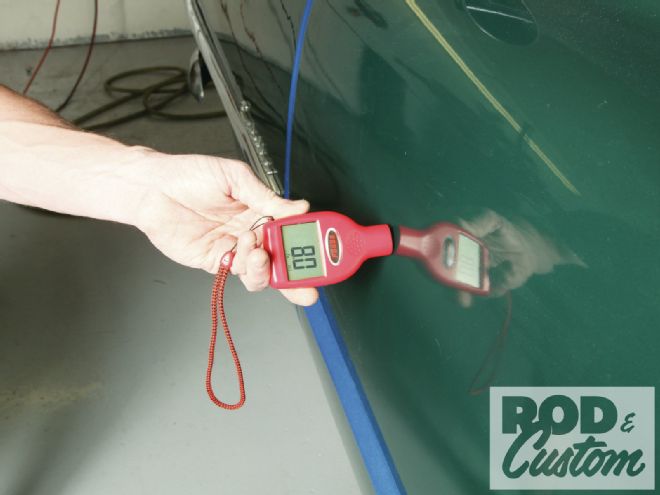
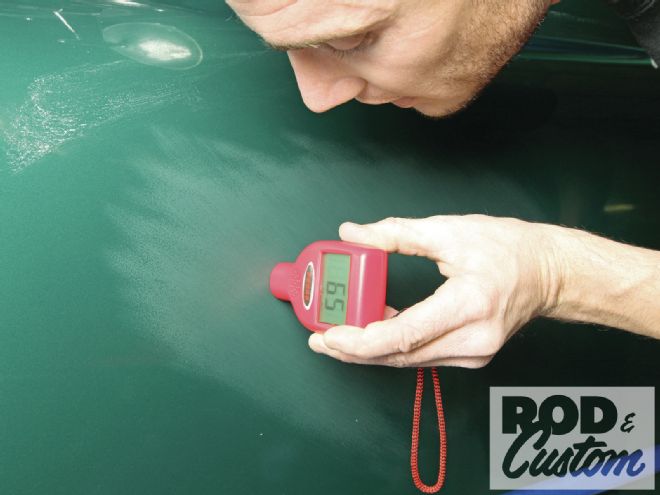
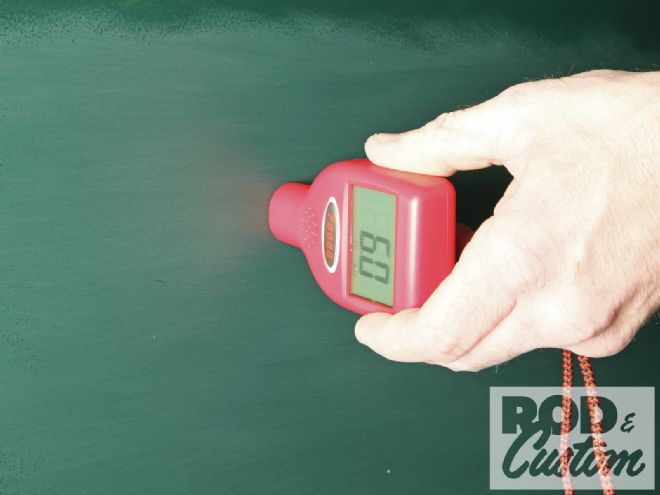
3. Killmer checked the paint thickness with a gauge but it's not a completely reliable method unless the car has been stripped prior to painting. Measurements taken over a broad area give a reasonable indication of the finish thickness though. The finish in this area measured 8 mils thick.
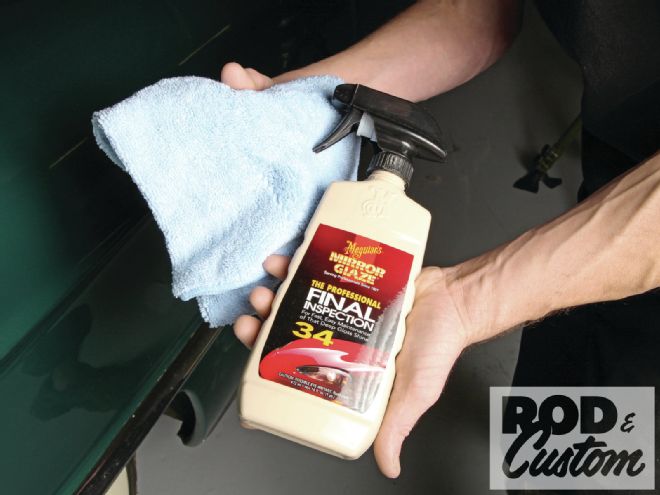
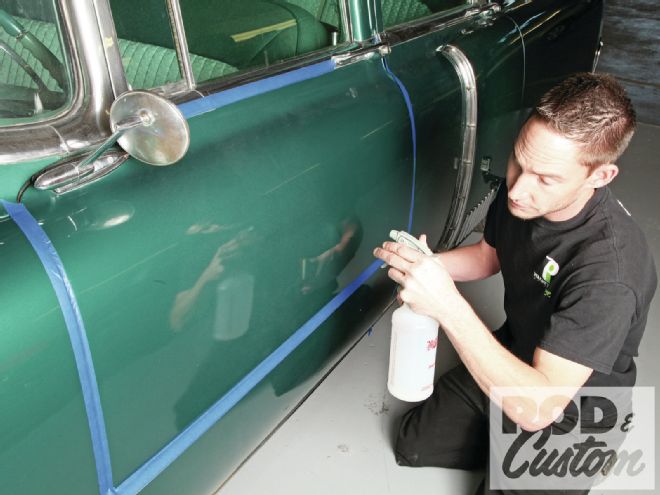
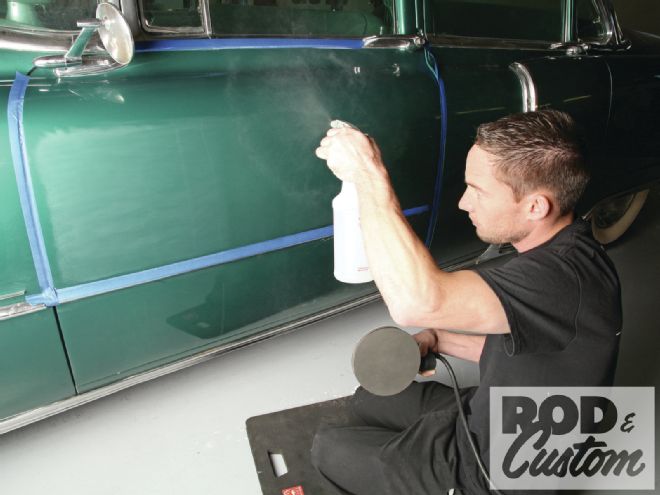
4. Any wax or grease residue will contaminate the sandpaper. Though he washes every car prior to sanding it, Killmer still spritzes it with an inspection spray and wipes the panels dry.
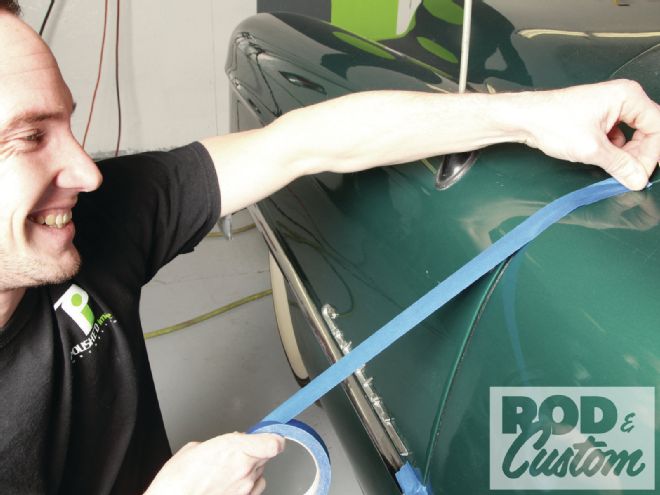
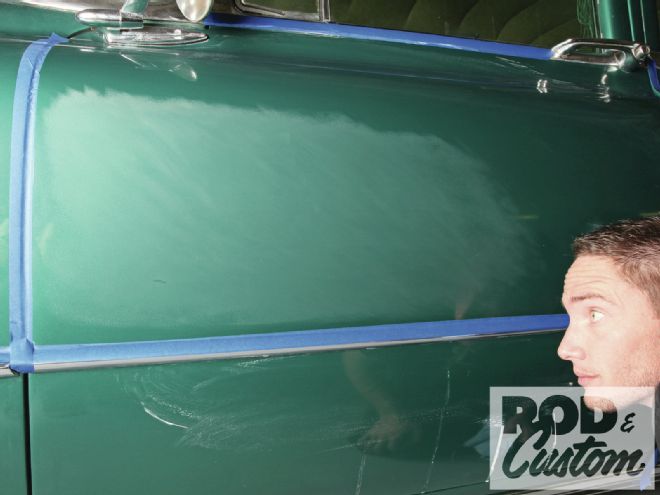
5. Paint tends to thin out around corners and on edges making them potential disaster areas. Killmer protects edges with low-tack masking tape and works them more delicately at a later point. He also masks off trim as the paper will mar polished surfaces.
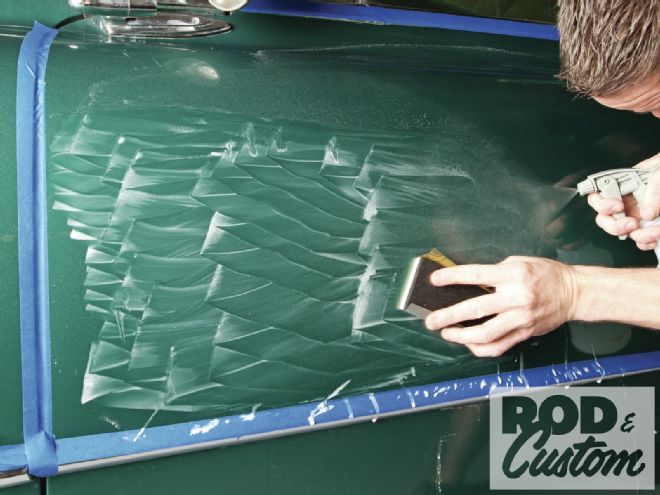
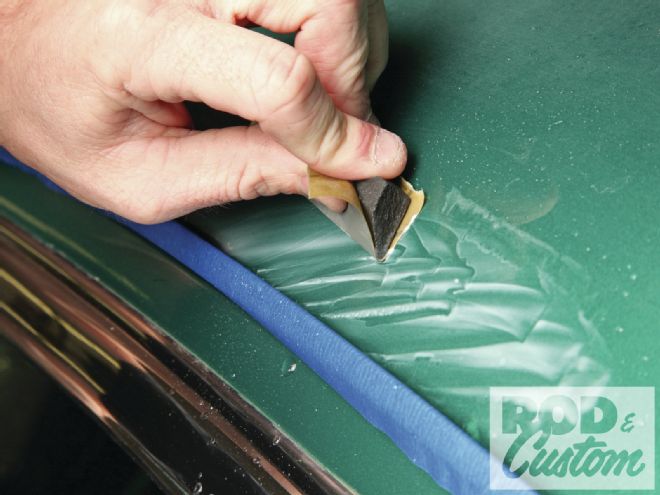
6. Killmer recommends matching sanding blocks to surface shapes, in this case stiff foam board for a low-crown panel. "Whatever you do, don't use your bare hands," he says. The uneven surface will cause the paper to dig troughs into the paint. The paint's rough finish means Killmer will have to remove a lot of material. He chose a relatively coarse 600-grit paper.
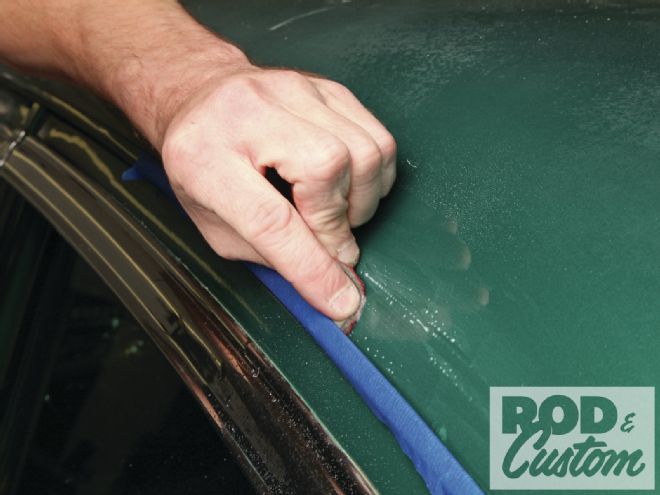
7. Though the paper is wet Killmer suggests frequently spraying the panel to slough off displaced material. He began by spritzing the panel.
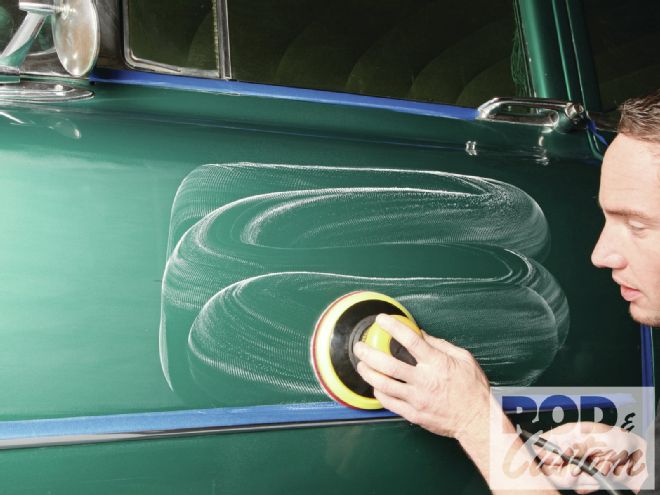
8. Killmer recommends concentrating on relatively small areas to ensure thorough coverage. Note that he's holding the block horizontally yet sanding diagonal to its shape.
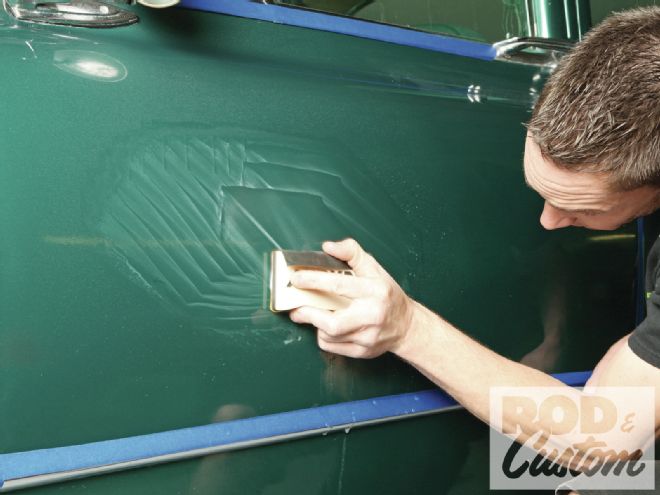
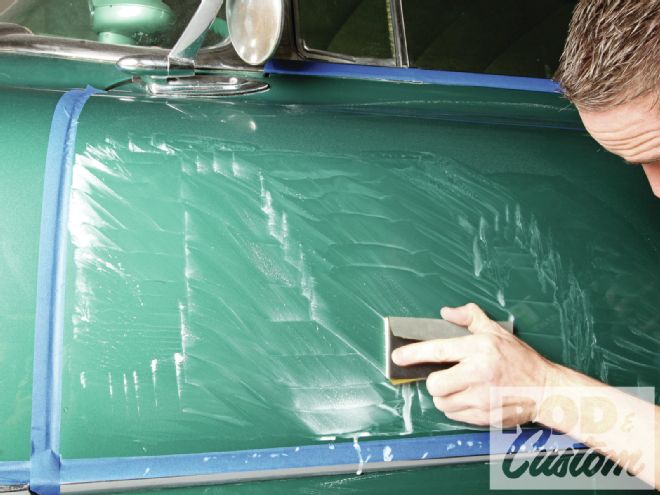
9. Here's why Killmer sands diagonally to the block's shape. "The edge of a block can sand a hard ridge in the paint," he says. "But this way the corners of the block make a softer transition to a small corner." That small corner can't dig an edge. Note that the block's diagonal orientation means he'd sand horizontally or vertically but not diagonally.
10. Killmer checks his progress at every stage of the process looking for thin spots or missed areas. At this point he began to suspect that the clear under his fingertips was thinner than he suspected so he made a mental note to treat the area gingerly.
11. Rather than rely solely on a hunch, Killmer measured the area around the suspected thin spot. Though still a fat 6.5-mil thick, much of that film is likely another finish or two beneath the top surface.
12. Coarse papers remove material quickly but leave scratches. Killmer chose an 800-grit paper to remove those. He also chose another sanding style, in this case holding the block diagonally and sanding horizontally. The presence of diagonal scratches will indicate missed areas. Note that he kept the panel and paper saturated. "You can tell when you're really making progress when the wet builds up a lot of residue."
13. Confident that he adequately covered the area with the 800-grit paper, Killmer graduated to 1,500-grit. Note the direction he adopted: back to holding the board horizontally and sanding diagonal to its shape.
14. The eye can't accurately gauge a non-reflective surface, making the hand a better tool to measure progress when block sanding fillers. A reflective surface makes the eye keenly precise, though, which explains why Killmer urges frequent visual checks.
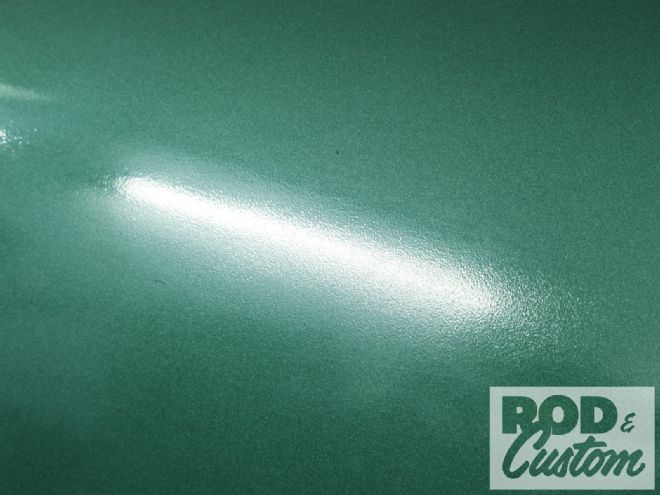
15. In this case this is what Killmer saw from that perspective. The sanding marks reflect light, making the area appear blurry, but check out the diagonal stripes. Those are the reflections from a pair of fluorescent tubes, the source that made the white blob in the second photo.

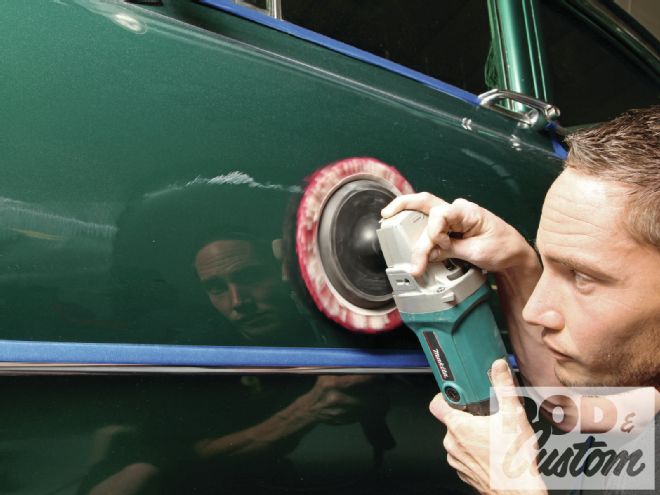
16. Killmer says at this point that a panel could be further sanded with 2,000-grit sandpaper or even polished to a full shine; however, he took the opportunity to show off an electric orbital sander. Its converter varies the oscillating speed from 4,000 to 10,000 rpm, making it ideal for a broad range of applications.

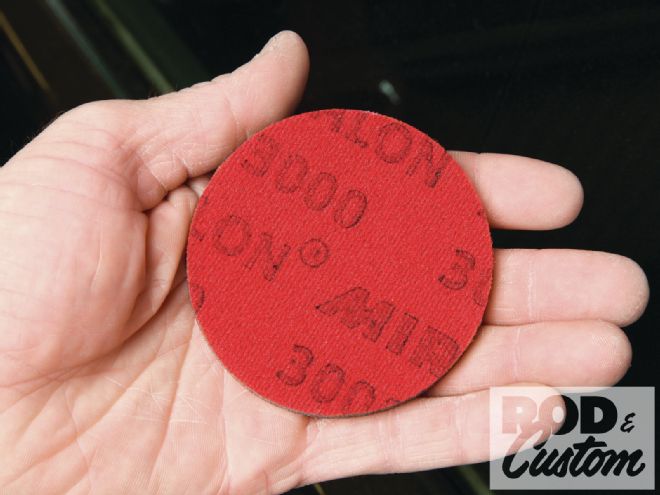
17. Because the Mirka sander is electric, Killmer can't dunk it in water. However, the foam-backed 3,000-grit pad he selected acts as a sponge. He sprayed down the panel and saturated the pad.
18. Killmer then played the sander gently across the panel. Note how he overlapped each course by approximately 50 percent to ensure adequate coverage. The residue starts out watery but turns rather thick, an indication that the sander has done its job thoroughly, according to Killmer.

19. Once again Killmer visually checked his progress. He intentionally worked only half of the sanded area to illustrate the difference between the area finished with 1,500-grit paper (background) and the area finished with the 3,000-grit pad (foreground). Note the fluorescent tubes' definition. This was taken from the exact perspective shown four steps earlier.
20. Upon completing the sanding stage Killmer checked the end result. The gauge indicated that the finish was about 8mm thick when we started. A 2-mil loss sounds dramatic but bear in mind that first measurement was established from the highest peaks and the valleys actually represent the paint's effective thickness. At this point this finish requires polishing, something that we'll show next month.
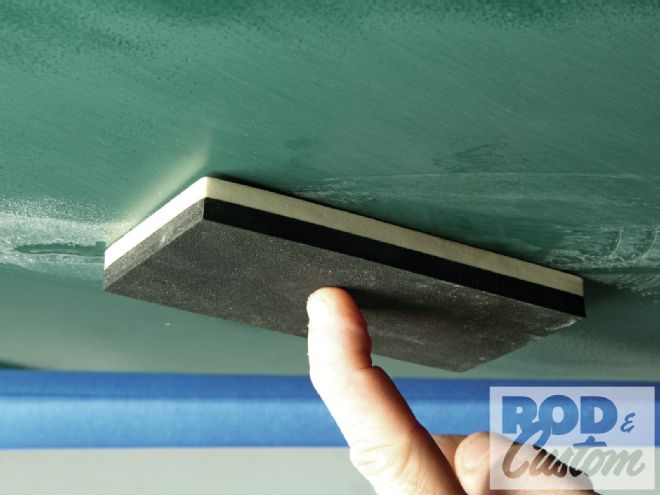
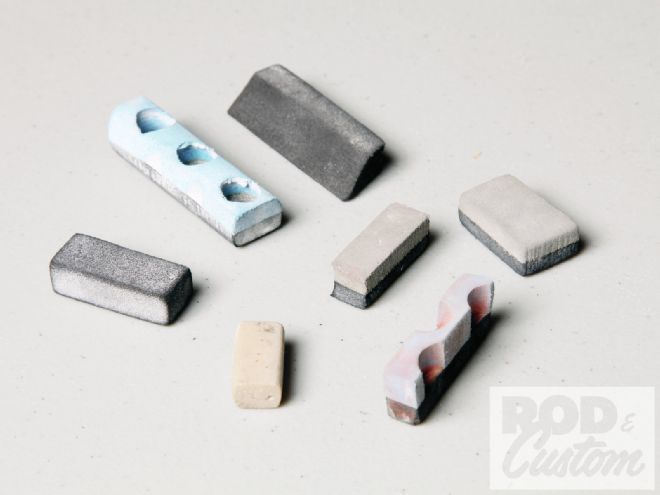
21. The same principles used to color-sand large, low-crown surfaces translate almost directly to small, highly crowned surfaces. The greatest difference lies in the blocks themselves: they're smaller and cut differently to address more complex shapes.
22. Killmer employed the same techniques on this door pillar that he used on the doorskin: sand diagonal to the block's shape.
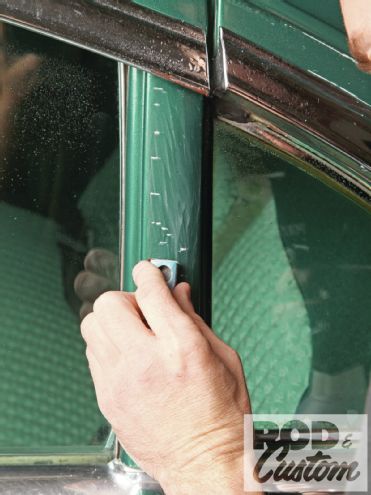
23. Complex areas benefit from creativity. For example, Killmer recommends folding a sheet and working it into a tight groove. But consider yourself warned: polishing crevices is neither easy nor fun. Then again, those details make the difference between an ordinary finish and an incredible one.
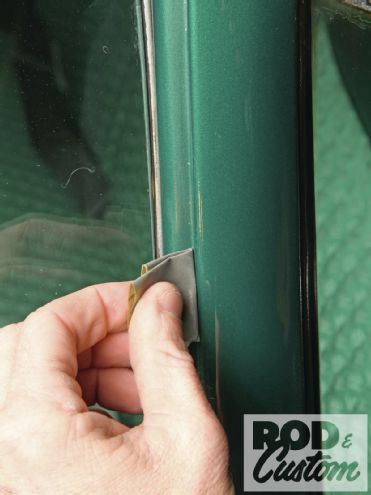
24. Every pro has a pet peeve and one of Killmer's is a gutter. "People usually sand them lengthwise and that digs a deep groove," he says. Instead, he recommends wrapping paper around a wedge-shaped block and sanding diagonally.
25. Killmer maintains that the foam backing makes Mirka orbital abrasives ideal hand-sanding tools. Here's a small-diameter orbital pad in its natural form.
26. And here's that same pad folded over and jammed into the gutter. While Killmer discourages sanding gutters lengthwise he maintains that it's OK for the last fine-grit steps that don't remove a lot of material.
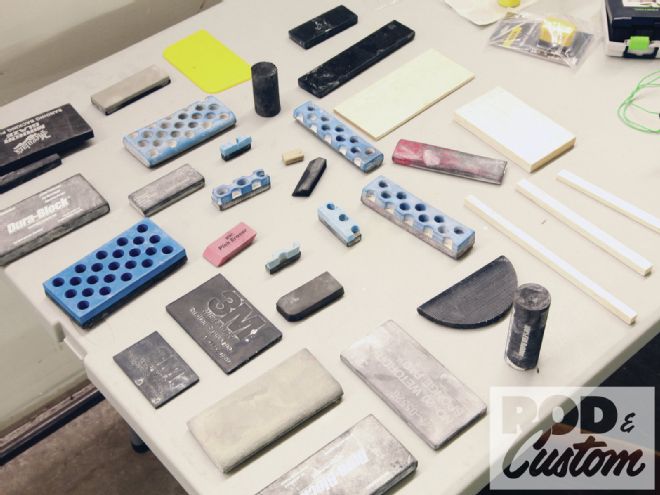
27. This concludes the color-sanding portion but we'll leave you with this photo. These blocks represent just a few that Killmer carved for specific applications.