As a fit-for-television hoarder of ol’ trucks, yours truly is already deep into a pair of personal pickup projects, and surrounded by others (some already scattered) waiting their turn for attention. With numerous skeletons in the ol’ closet, I do feel guilty. Even so, there’s nothing quite like tearing into yet another truck.
When beginning a new project, the “fun” begins with the initial teardown. Whether it takes place in a well-lit, comfortable, well-outfitted garage, or in the ol’ backyard with frayed extension cords and dangerous incandescent droplights, the quick ’n’ dirty disassembly phase can be quite the hoot. This is where our inner junkyard dog gets to come out and play. However, once this tired ’55 Chevy (second series) ½-ton shorty is sufficiently scattered, we’re committed. As the project turns serious, a photo inventory will be conducted as pallet racks are stocked with the salvageable road-tested parts. Later when it’s time, a well-worn wish book from Brothers Truck Parts will indeed come into play—again.
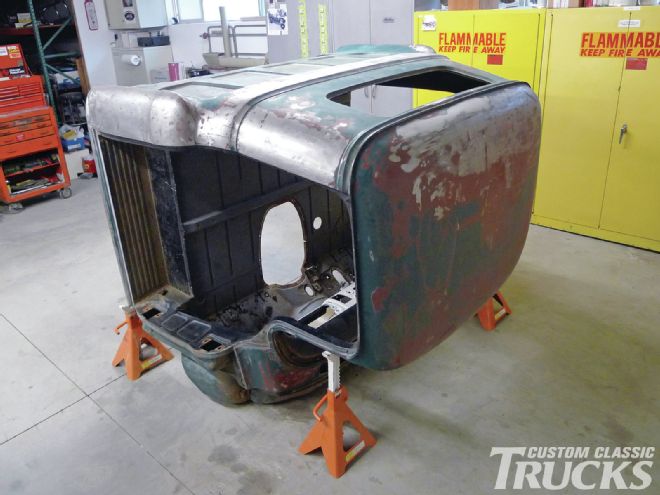
Ordinarily my right hand, Mrs. Rotten, and I prefer to tackle each build in phases, in sequence. On this job the chassis, engine, and drivetrain should be tended to first, but when hidden collision damage necessitated an extended stay for the chassis at the frame shop, we’d decided to skip ahead and pay some attention to the cab. The truck’s original Forest Green lacquer topcoat and primer substrate below will eventually be abrasive-blasted away, but before that can happen, there’s undercoating to be removed, and we wouldn’t dream of taking it in greasy. That would contaminate the blaster’s abrasive, which would almost certainly compromise the job, as well as the next job up—possibly yours.
Since there are various alternative methods for stripping away old finishes, the options were thoughtfully weighed out before any one approach was decided upon, so know that abrasive blasting is not our automatic first choice. For the cab of this particular truck, however, it is indeed appropriate. From here we’ll guide you through the dirty job, step by step in an attempt to illustrate what happens at the blaster’s place, as well as what must happen at ours, or yours, before our blaster of choice can begin.
About the Blasted Media
Why do they call it “media?” After years of wonderment, the answer to my question was only a rotary dial phone call to Escondido, California. According to Hot Rods & Custom Stuff proprietor, Randy Clark, the term “media blasting” was indeed coined about 25 years ago. Before that time, only sand was used, and because of the high air pressure required to push it through the gun, sandblasting could and often did ruin precious metal very easily. Since that time, professional abrasive blasters have a variety of alternatives available, ranging from shot peening, baking soda, ground walnut shells, corn cobs, plastic, and so on. With the expanded variety a “blanket word” became necessary to describe the numerous new forms of abrasives as a whole. We’re not sure who chose it, but “media” became the word.
Since our project pickup’s cab does have some rust peekin’ out through its original lacquer finish, a decision to use garnet was made by Clark and crew. Garnet media blasting takes about three times as long as the same job would with sand, but a high volume of garnet can be shot at much lower pressure, therefore it’s much more user-friendly and much less likely to cause damage when used by an experienced professional. Hot Rods & Custom Stuff knows how to treat precious metal. We’ve used them a number of times over the years with great success, so we’re very comfortable leaving this cab in their care and custody.
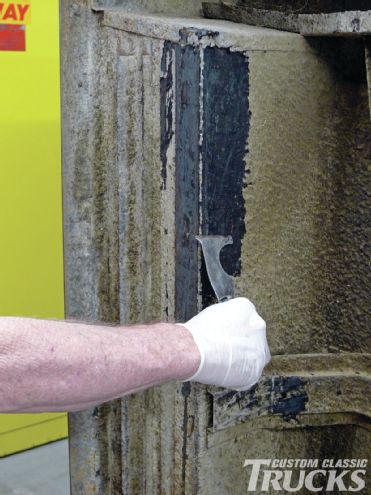
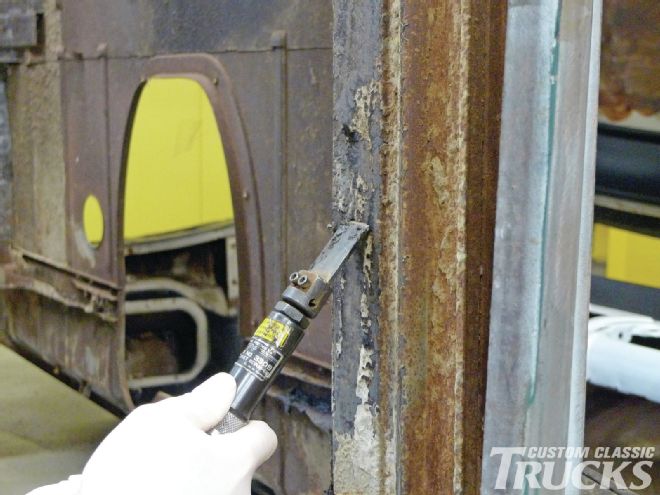
1. First things first. Before this cab can be hauled to our local abrasive blaster, we’ll need to remove all the greasy goo as well as some half-century-old undercoating from the floor’s underside.
2. Knowing full well that this’ll get ugly, we’re now past the “fun” phase on this job. Sometimes a little oven cleaner or a little heat applied to the scraping utensil of choice can make the job go easier. Either way, strap on a decent respirator to ease the effects of toxic smoke and/or nasty household cleaning product vapors.

3. Heating the scraper helps. You could also aim the flame directly to the undercoating, but we prefer to heat the tool only, which creates much less smoke to inhale. Still, even with the heat advantage, it didn’t take long for ol’ repetitive motion injuries to begin screamin’ at yours truly.
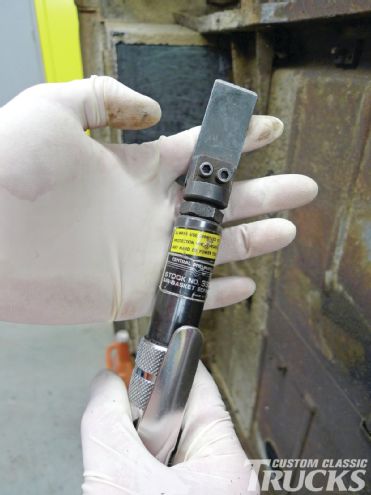
4. At times like these, it’s good to have a Central Pneumatic gasket scraper in the bottom drawer. I’d actually forgotten I had this little jewel. Mine is an early to mid ’90s model, but I’m pretty sure Harbor Freight still carries them today.
5. In some areas this worked very well—just the break that my aching wrist and elbow were in need of. However, other areas were just plain tough and in need of more serious chemical persuasion.
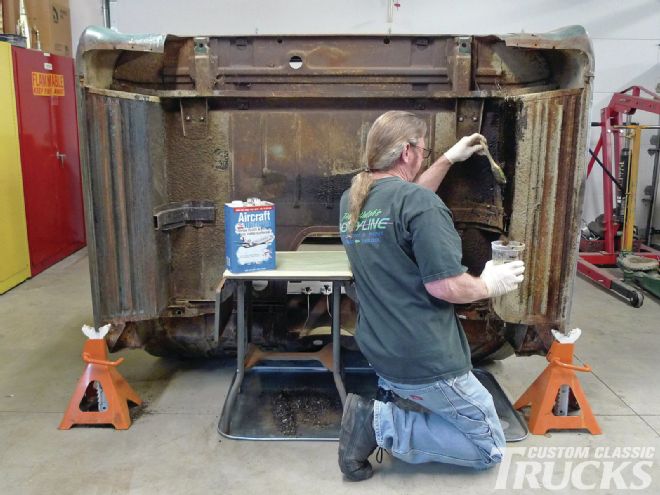
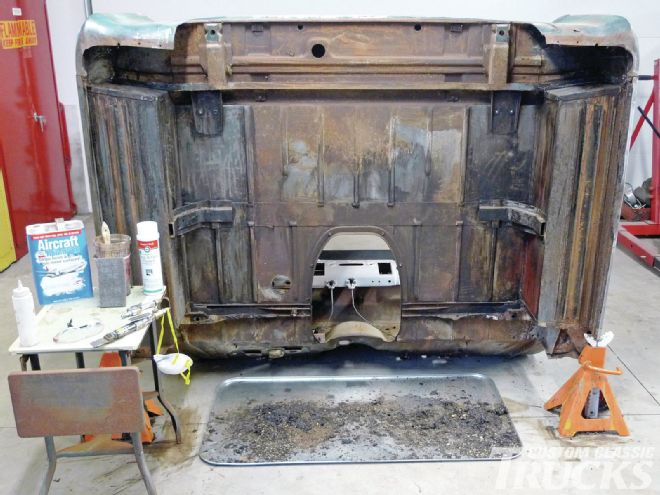
6. I had hoped it wouldn’t come to this. For sarcastically special occasions, I do keep aircraft paint stripper on hand.
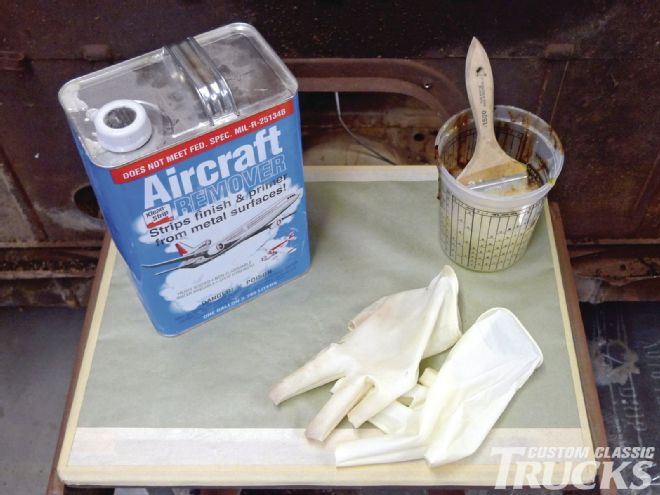
7. Taking this in small steps, in roughly 2x2-foot sections, this nasty chemical concoction will all but liquefy the rock-hard undercoating, which is about to be escorted toward the floor with a bondo spreader. In this case softening occurred quickly, so a properly placed drip pan seemed like good mess insurance.
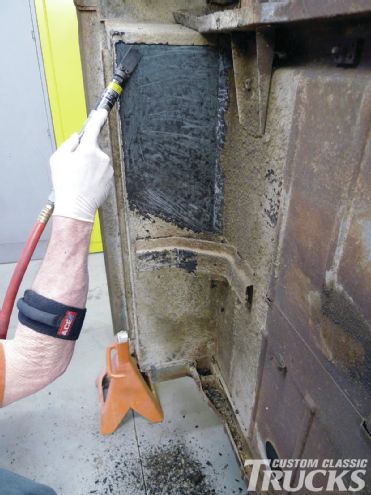
8. As we near the finish line, our pneumatic gasket scraper comes in handy once again. This tool has proven to be invaluable for ribbed and/or channeled areas like the bottoms of these rocker panels. Here eye protection is a must to avoid injuries associated with airborne undercoating projectiles.
9. The incriminating stains on the garage floor may cost us our cleaning deposit, but the underside of the cab’s floor is now fairly clean. From here I’ll open the garage doors, extinguish all flames, fire up the fans, take a deep breath, hold it, spray on some starting fluid and run. This “flash-evaporation” helps to dry things up a bit more.
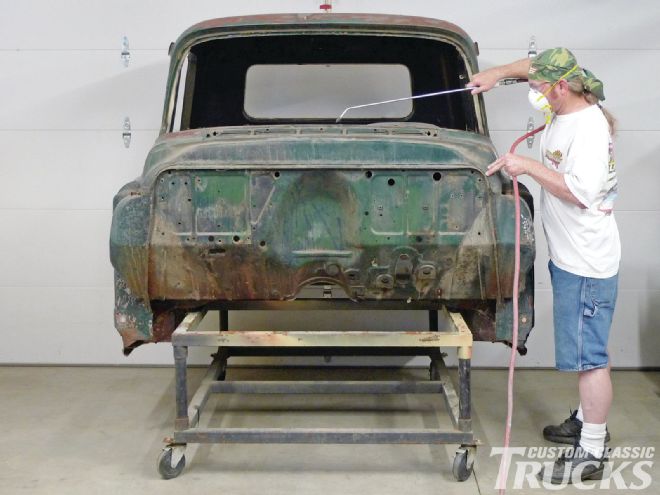
10. With the cab back on the cart, the final preparations for abrasive blasting get underway. Blowin’ out the crooks ’n’ nannies will help us enter the next phase with a clear conscience. This is all about keepin’ the blaster’s “media” free of foreign contaminants.
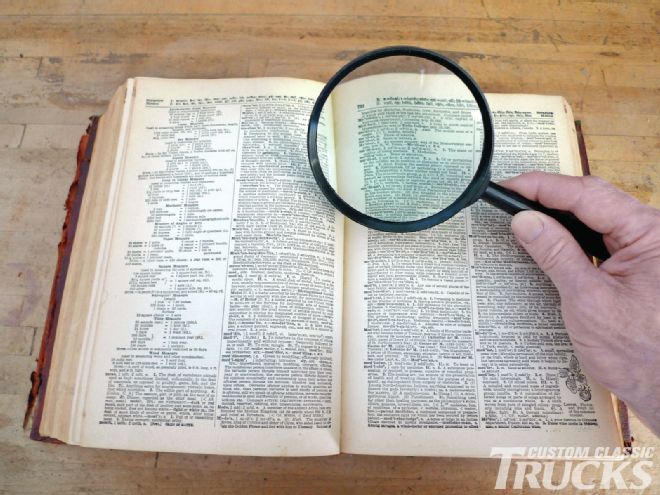
11. The word “media” as applied to abrasive blasting has puzzled yours truly since it first became fashionable around the mid to late ’80s or so. Today we hear the word used often and it’s generally accepted without question, but I’ve looked it up in my Funk & Wagnall. There is no connection to blasting mentioned within these pages.
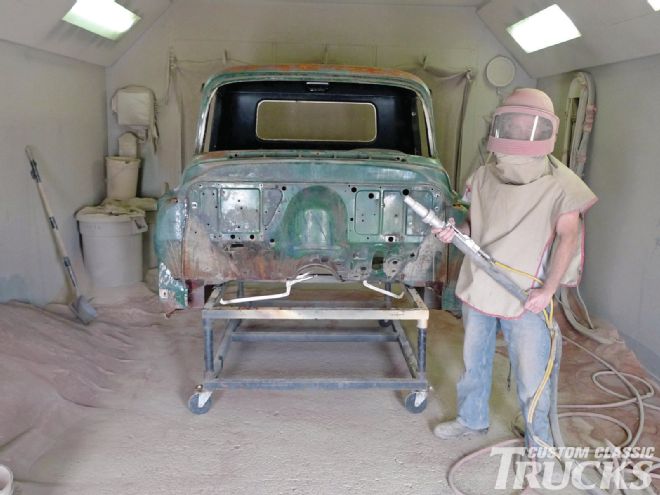
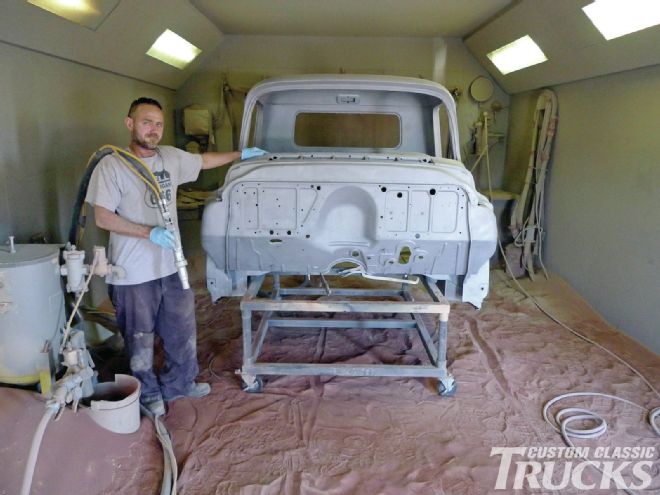
12 After eight hours in the booth, Zack Jackson has come through for us again with another job well done. Inside, outside, top ’n’ bottom, we now have a clean start. Have you hugged your media blaster today?
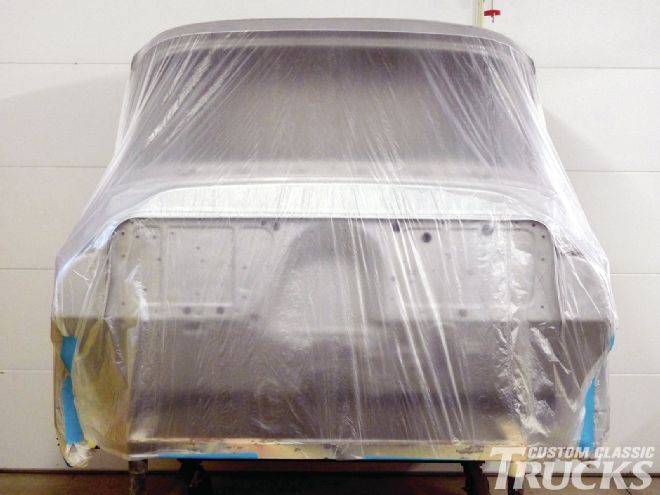
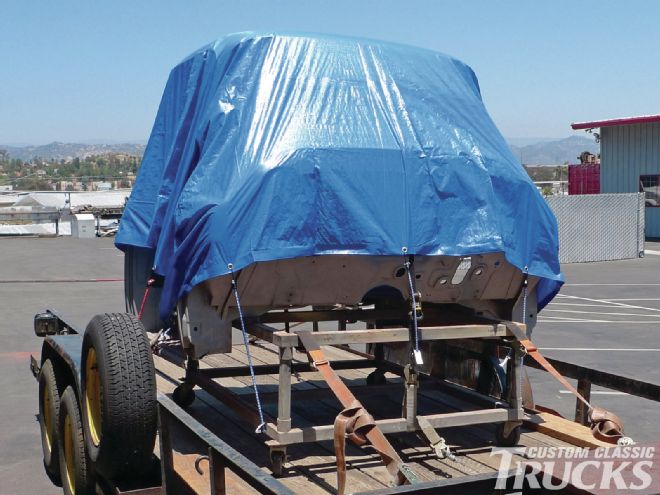
13. For the journey homeward an enclosed trailer would be nice, but we don’t have one of those. We might be able to dodge birds and sprinklers, but what about smog and diesel exhaust? Theoretically steam could form between the surgically clean tarp and bare metal on this warm summer day, but even so, the tarp is the lesser evil.
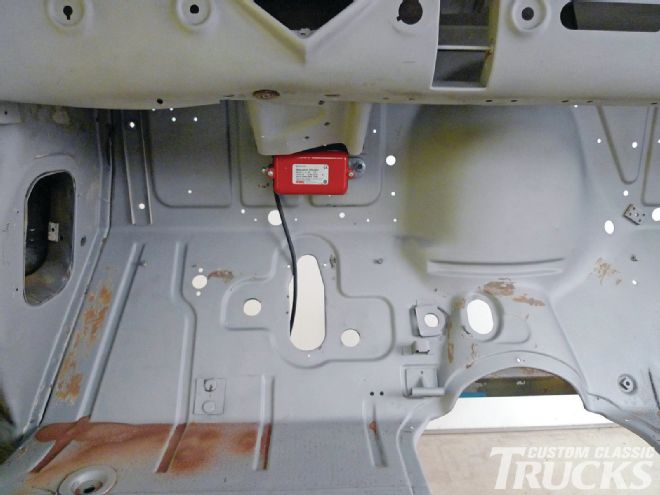
14. If you’ve ever had a cab blasted, you already know you can blow and blow until you think you’ve got all the abrasive/media out. Then later when you hit a bump while rolling the cab cart across the shop floor, out falls more. This magnetic electric vibrator (arrow) was sourced from the scrap dumpster in a dark alley that I frequent—and it works!
15. As we anticipate the call from the frame shop, the bare metal cab is set for clean, dry, temporary storage while we step back into sequence and resume work on the ol’ truck’s chassis. Then there will be patch panels grafted and bodywork, and all that’s necessary to achieve better-than-new panel alignment—you know—the “fun” part.