Last month, Star Kustom Shop began a 2-inch section on a ’51 Chevy and left off right after the cowl got welded back together. Well, here’s the state of the union: with the body back together Star Kustom can section and fit the doors, and then move onto the fenders. If you remember, the material taken from the body was at the bottom of the car, and this month things will follow similar suit.
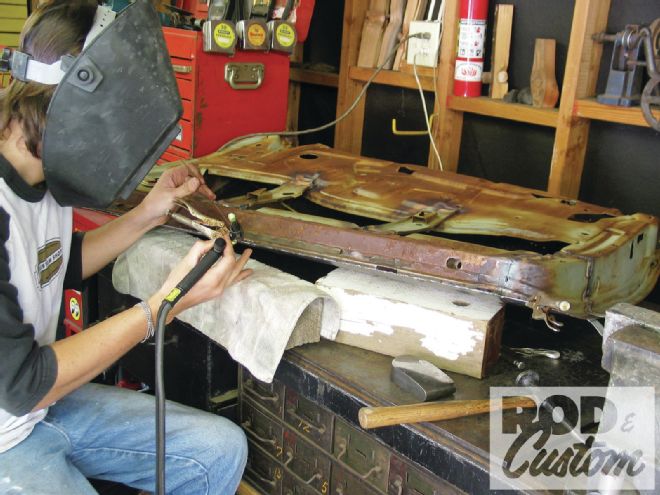
 1 As mentioned before, the material will be removed from the bottom of the door, so the first thing is to grind the edge of the folded flange on the doorskin until it can be separated.
With the body set back in position, the first order of business is getting the doors to fit. Instead of worrying about slicing and welding the doorskin out in the open range we’re going to take the material from the bottom of the door; here’s how. By grinding along the bottom of the door edge, and about 8 inches up the sides, the folded edge of the doorskin can be ground away, which will set the doorskin free. From there 2 inches, which is the 2-inch section, will be marked and cut along the inner ’jamb structure of the door. Once cut, the bottom half of the door will pull apart, and the top half of the door and skin will remain intact. When it comes to gluing things back together it’s simple: first, the upper and lower portion of the door will bolt directly back to the hinges. Being that the section came from the structure of the door, the inner structure will coincide with the 2-inch section of the body. When the door is shut though, things won’t exactly be kosher because the skin of the door will hang down into the rocker. In order to get things back on an even keel, Star Kustom will measure 1/4 inch up from the top of the rocker and mark our findings on the doorskin. At that point it’s a matter of using a long straight edge to draw a line and trimming the skin—that is roughly 2 inches of overhang—to coincide with the rest of the door gaps. Instead of folding the skin back over the inner structure, the skin and structure will get welded along the ground edges.
Throughout the section of the Chevy there have been several key elements, which have been highlighted, that really intrigued Star Kustom about this method of sectioning. Well, the buck hasn’t stopped yet! Another factor is the fact that by not sectioning the rear quarters whatsoever, the wheelwell opening stayed the same in the rear. However, being that the cowl does get sectioned it brings the front wheelwell down 2 inches, which puts the height of the front wheelwell on par with the rear wheelwell. Another small styling cue that will have folks second-guessing themselves! But still the fender will need to be sectioned. Yet, again we’re only going to take material out of the bottom of the rear of the front fenders, as opposed to sectioning the entire fender and moving the wheelwell up 2 inches. For some this method of not increasing the wheelwell opening may not work because there won’t be enough room for tire clearance up front. But given the fact the frontend of the chassis has received a Mustang II clip, and it’s going to get a custom engine bay with new inner fender panels, it measures out that things should be just fine. Lastly, the core support has to get 2 inches whacked from it to accommodate mounting the fenders, frontend, and hood. That pretty much wraps things up in terms of words, so let’s delve into the work at hand.
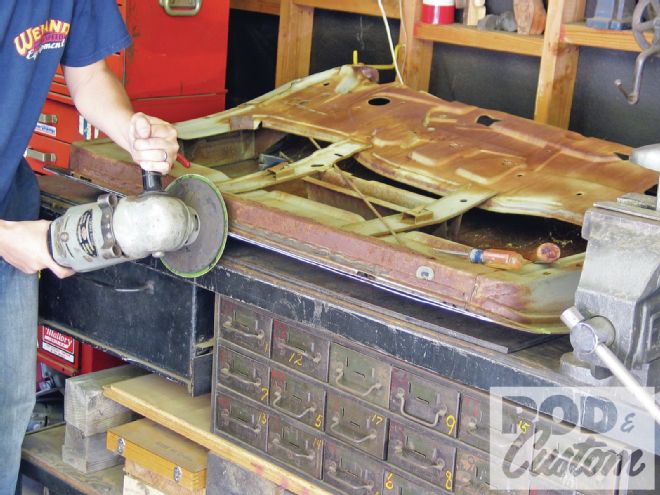
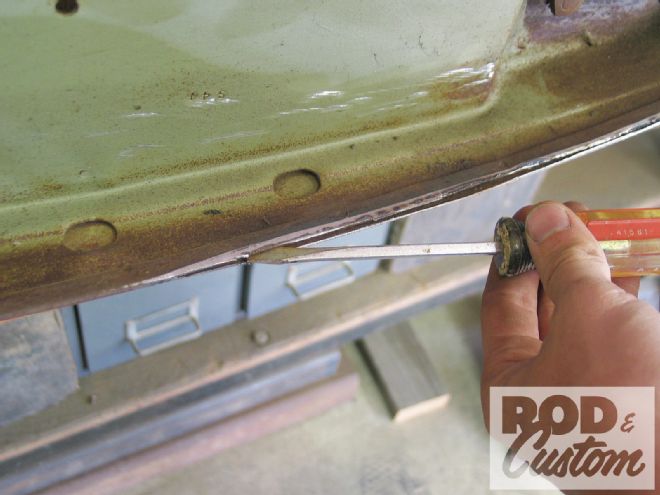 2 As you grind, slowly might I add, you’ll notice the two halves will slowly begin to pull apart. A few spot welds will also need to be broken loose. Note to self, the doorskin only needs to be ground to the point the two halves can separate, and nothing more.