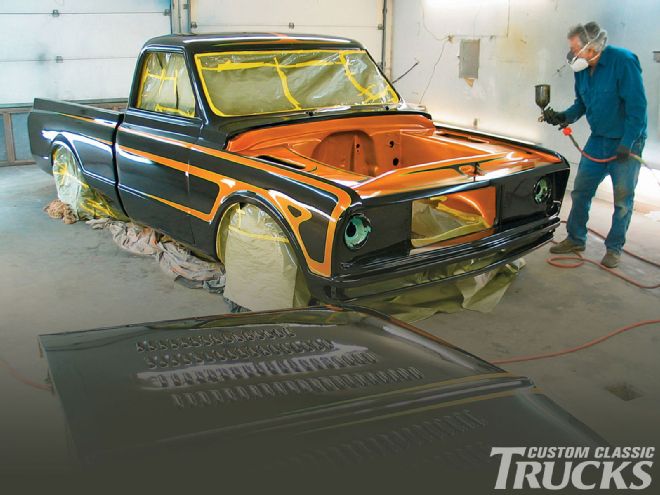
Last month we left the Project Get Shorty saga smack dab in the middle of a paintjob. Well, as Led Zeppelin would say, "The Song Remains the Same," because this month we again find ourselves knee deep in the throes of painting. As mentioned last month, the painting of Get Shorty was going to be broken down into two parts, due to the vast amount of material we wanted to cover. The image we left off last month with was a freshly sanded and assembled truck. For some, they would move on to cutting and buffing. But for us, our work has just begun.
For some reason I always pictured the '71 with some artwork, and because of that vision I doubled my workload. When it comes to graphics it's sort of like painting the car twice; being there's twice the materials, twice the painting, twice the masking, twice the sanding ... I think you get the picture. I have done a little bit of layout in the past, things such as racing stripes, scoops, small scallops, and other things that followed some sort of natural body line. Yet, when I looked at all that black real estate across Get Shorty, saying I'm a bit overwhelmed would be an understatement.

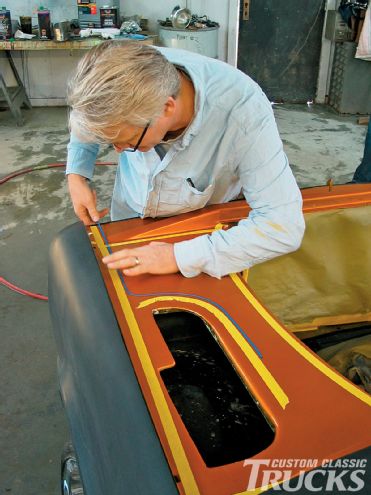
Therefore, I called in someone with a little more experience to lend a hand: Fritz Schenck, of Spritz By Fritz. With Fritz at the helm, I was able to concentrate on watching, studying, and of course taking notes so I could pass along what I observed. One thing I learned is that making an outline using tape really sets things in perspective. On one hand it lends itself as a rough guideline, and on the other it allows you to set the gaps evenly across a panel. From there it's just a matter of exercising your brain to see what you can come up with, and then duplicating that design to the opposite side. Like many things, getting a quick Lesson 101 will set you down the right track-as you'll see later.
Although 3M automotive masking tape is good for masking off vehicles, a change is needed to lay out graphics. 3M Blue Fine Line tape is the way to go. This tape will bend, curve, and form much easier. It's also less susceptible to bleed. Fritz Schenck of Spritz By Fritz creates a makeshift guide out of refinishing tape, and then begins to pull lines with the Fine Line. When it comes to graphics it's whatever floats your boat, so go crazy.
Once the layout portion of the job was done it was time to move on to spraying the scallops, and then cutting and buffing the finish. Unfortunately, paint doesn't lay down flawless out of the gun. In fact, it's really pretty crude. If you want your paint to look like a never-ending pool of depth then you're in for some work. It all starts with more sanding. Armed with three grits of 3M wet/dry paper: 1,000, 1,500, and 2,000, it's a series of steps. The first step is to wet-sand with 1,000 and then move onto 1,500. From there the finish is hit with 2,000 grit to remove scratches the previous two steps left behind. Any small scratches remaining will be removed using rubbing compounds. Once again, it all starts with a coarse compound and then steps down to a finer compound. It's a vicious cycle concocted by some sadist if ya ask me! But it's all part of the necessary evil to end up with a killer paintjob.
Throughout the story we'll cover everything needed to round out the paintjob. All the supplies can be picked up at any local paint supply house, and even many auto parts stores. If something local is out of the question then buying supplies direct from the manufacturer, or companies such as Eastwood are a viable option as well.
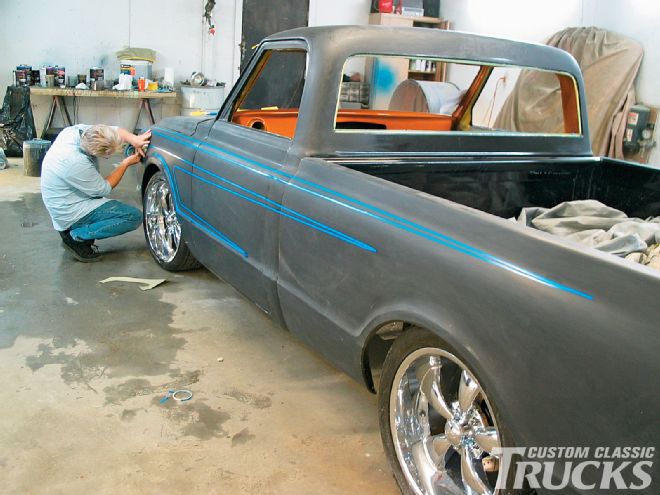 For long, straight lines Fritz likes to use 3M 1/4-inch Fine Line, and 1/8-inch Fine Line for more intricate bends. Fritz laid out the driver side freehand.
Between the past two stories we've covered all the basics, and really all that's left is for you to begin planning your next paintjob. As mentioned in Part One, it's impossible to cover every little thing about paint and body, let alone trying to do it in a two-part series. It's something that is mainly acquired through doing. However, if you run across some hiccups while putting these basics to the test we suggest you check out the "Troubleshooting Paint Flaws: Cause, Effect, & Correction" article in the March 2009 issue of CCT. (The story is also available by logging onto CCT's website at www.customclassictrucks.com.) The story concentrated on paint troubleshooting, which is a good place to start. Beyond that, all we have to say is good luck.