In this restoration tech series' previous two installments, we began deconstruction and analysis of the world-famous '68 Pontiac Firebird Grand Marque VIII factory show car. In Part 1, our partner in this series, Classic Pontiac Rescue (CPP) in Honea Path, South Carolina, removed the front clip and diagnosed misaligned sheetmetal gaps as subframe shifting.
In Part 2, CPP removed the Firebird 400's code-YT Pure Pontiac engine from the subframe, examined its internals for damage, and prepped the block for a journey to the machine shop. This month, we intended to show you more of the long-block's trip down disassembly lane, but due to the shop's extra-busy workload, we'll hook up with them in a future installment.
To keep the restoration moving full throttle ahead, in this installment we will watch and explain as Classic Pontiac Rescue owner Joe Jackson and his team set their sights on removing the First-Gen Firebird's rear axle. We'll share what they discover.
Let's jump right into the action.
Conclusion
Classic Pontiac Rescue will order new axles, a ring-and-pinion gear set, a Posi unit, and hardware. We will cover the rearend restoration in a future installment.
Next month, we'll travel back to Classic Pontiac Rescue and watch as Joe strips the subframe down for the first chapter in its restoration. We hope to see you then.
This chapter in our crusade to resurrect Pontiac’s ’68 Firebird Grand Marque VIII factory show car is to remove its rear end and inspect it for damage.
1. Like most Pontiacs from decades past, this Firebird’s factory-issued exhaust system was replaced with a muffler-shop special, and even that is now old and rusty. Removing it gives the Classic Pontiac Rescue crew more working room and better access to all of the nuts and bolts they will need to remove to extract the rearend.
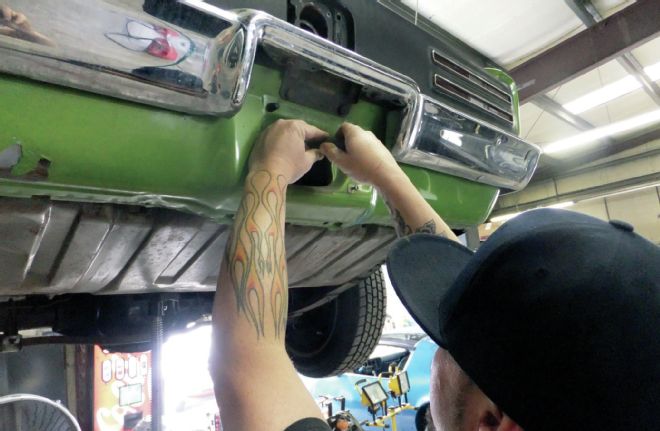
2. Dropping the fuel tank is an easy job and will help the men gain access to the work area. Joe explains: “To remove the rear-end housing with the leaf springs still attached, you have to remove the fuel tank because the lower leaf springs’ attaching bolts slide out towards the fuel tank. If the tank is in place, the bolts will not come out far enough to clear and release the shackles, and the springs will not come out.” Joe unmounts the tank by taking the two nuts off of the strap bolts at the rear tailpanel, and then removing the clamps that hold the filler hose to the neck. Access to the filler-hose clamps is through the hole behind the license plate, as shown here.
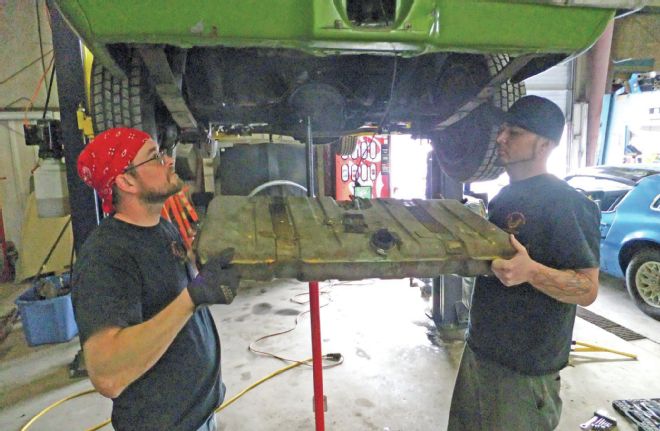
3. Joe uses a helper to remove the fuel tank because it still retains some fuel. “Don’t try this alone,” he says. “A tank with fuel and can be heavy and cumbersome.”
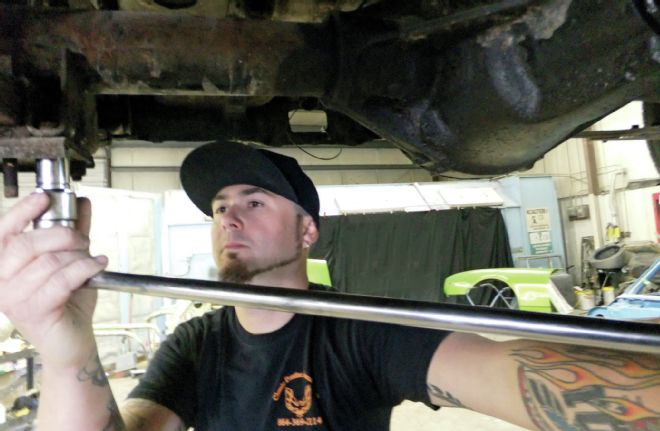
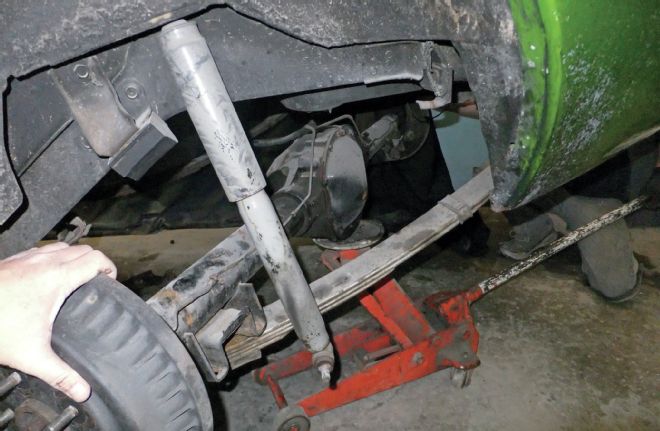
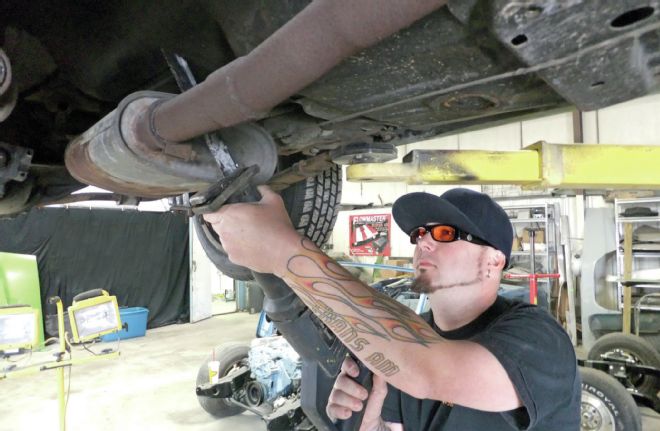
4. An aftermarket rear sway bar is next to come out. Then Joe separates the shocks from the rear axle and loosens up all of the nuts holding the rear axle to the springs. “On a leaf-spring F-body, there is no danger loosening up the rear from the springs as everything attaches from underneath and all of the weight will hold the axle onto the springs.” Note that Joe keeps a barber-pole jack under the differential case as he removes the shocks. This is so the rearend will not drop dramatically once the shocks are released from the mounting locations on the rear. This ensures the rear can be lowered slowly and safely.
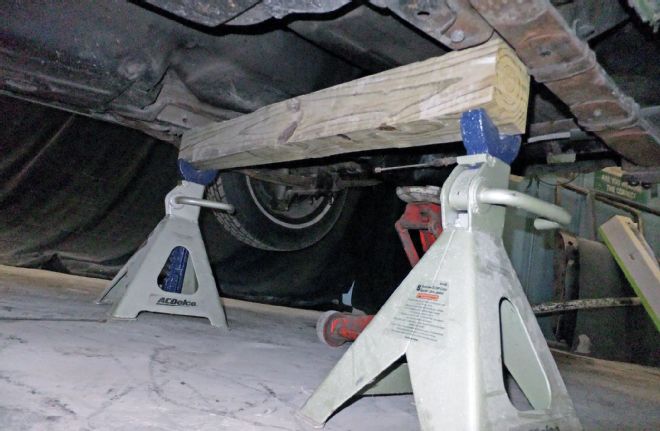
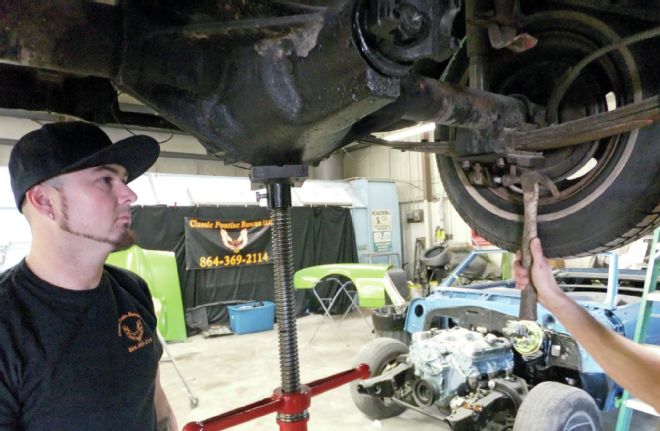
5. Now that all of the nuts and bolts are loose, Joe rolls the Firebird back to a permanent location, where he will remove the rear axle. He says: “The first step is to raise the vehicle. It must be in an area where it is safe for someone to work under it and properly supported so that no damage can occur to it.” He runs a 4x4-inch piece of lumber cut down to fit exactly across from each framerail. This supports the Firebird on its strongest structural area and leaves access to the front spring pocket bolts.
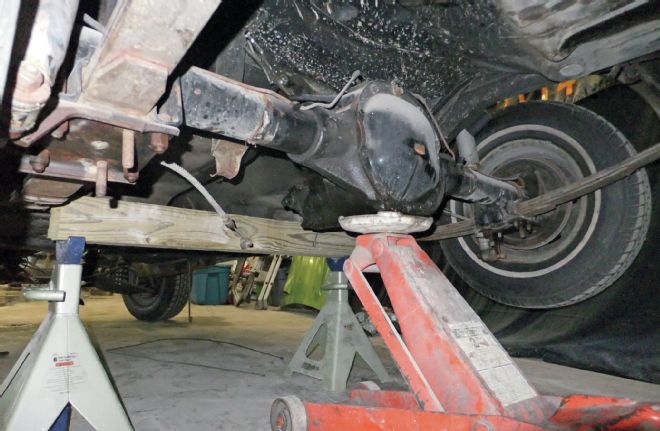
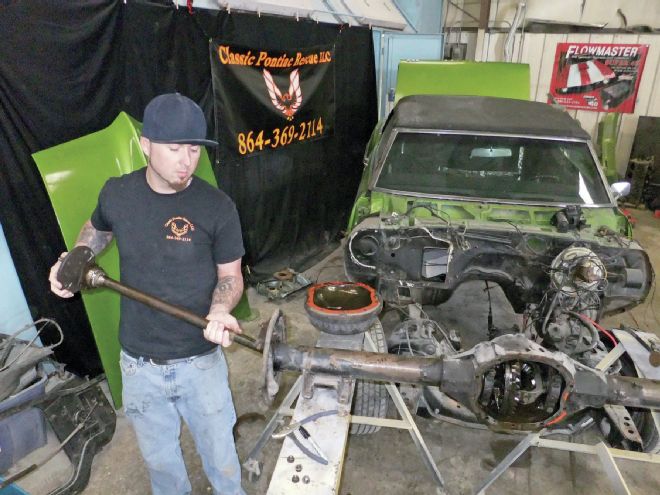
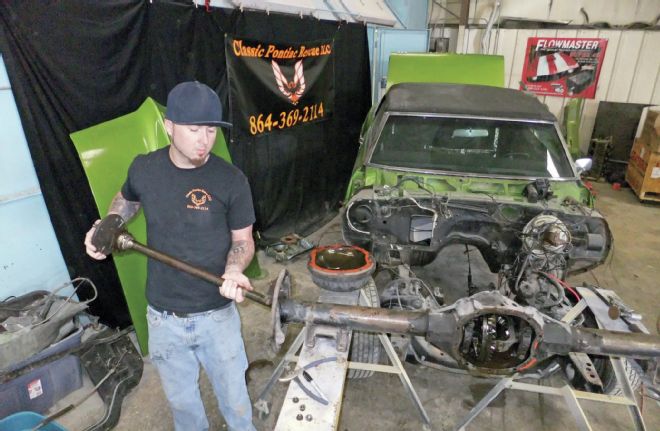
6. Joe positions a floor jack under the rear differential housing to secure and stabilize the rear axle. He removes the previously loosened nuts, bolts, and U-bolts holding the rear end in place, and then uses the jack to maneuver, lower, and remove the assembly.
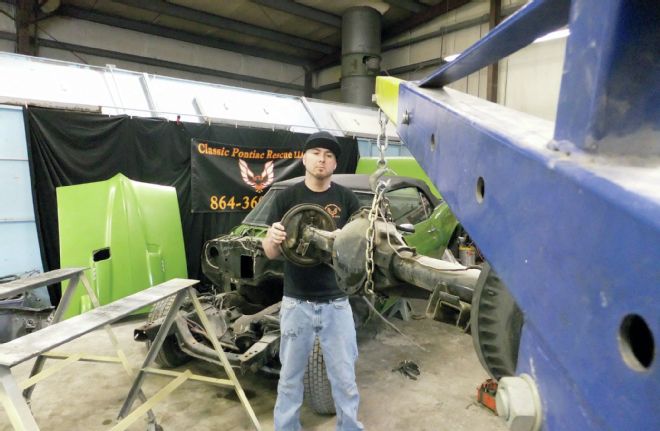
7. With the help of a hydraulic engine hoist, Joe lifts the rear-axle assembly up and onto two metal saw horses.
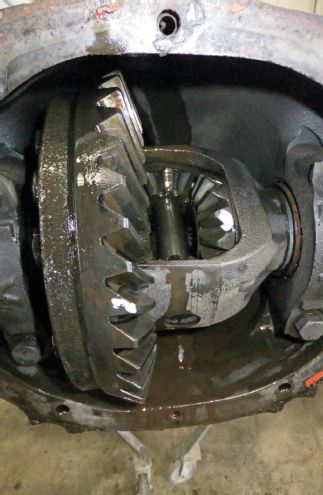
8. It’s time to crack the differential open and check out its inner workings.
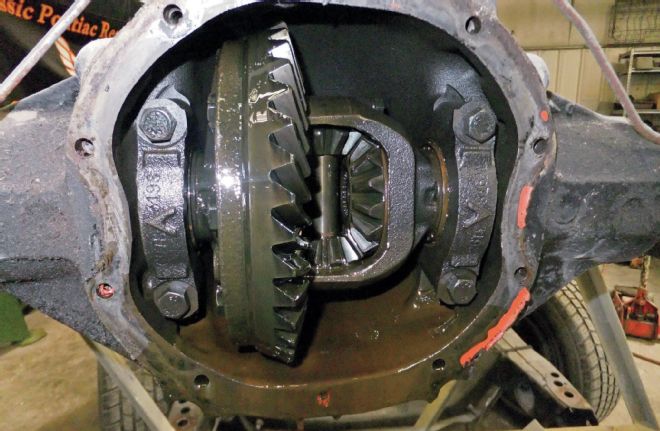
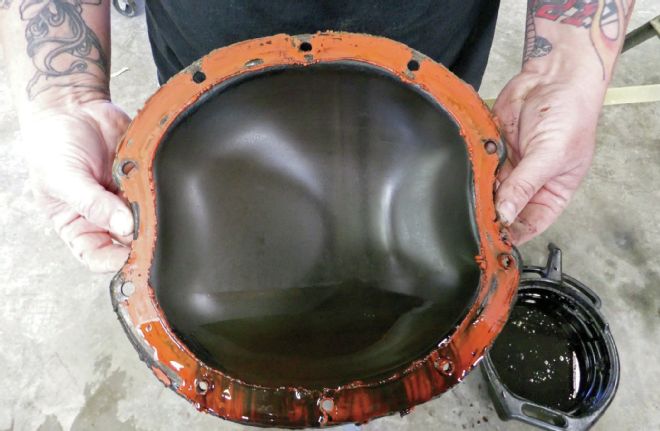
9. Joe removes the rear differential plate. “See the orange silicone gasket maker. That’s not factory. Somebody has previously been in here.” He then observes that the rear plate is very clean, the fluid is clear and does not smell burnt, and he can find no evidence of metal filings, which would indicate a ring-and-pinion problem. He also notes that the gears are clean with no wear.
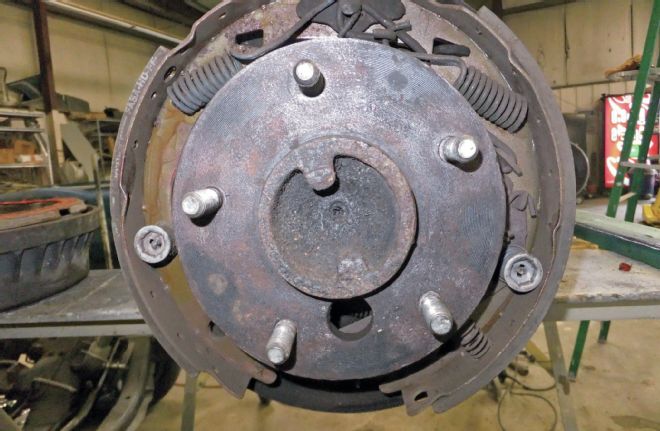
10. He removes a brake drum and observes that the shoes are dirty, but show little wear. They could be reused, but since this is a full restoration, he will replace them with new hardware, shoes, and cylinders before reinstallation onto the Firebird.
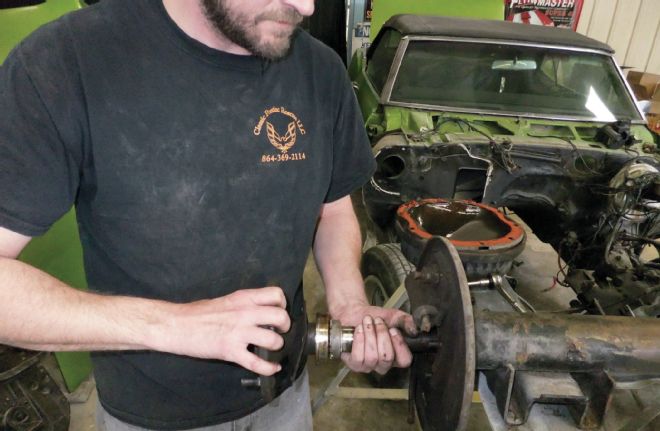
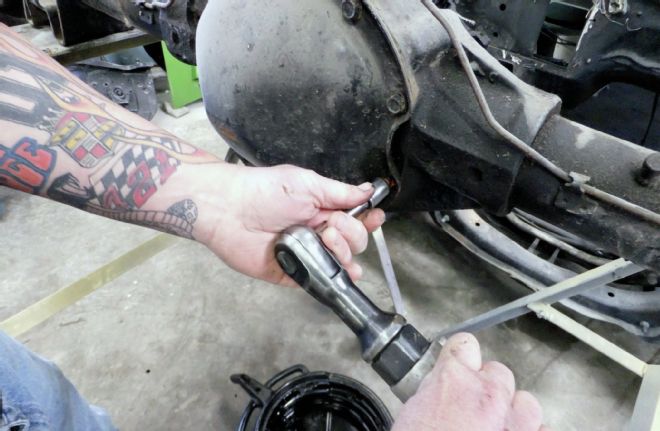
11. A helper takes off the four retainer nuts behind the axle-to-wheel flange and slides out the axles.
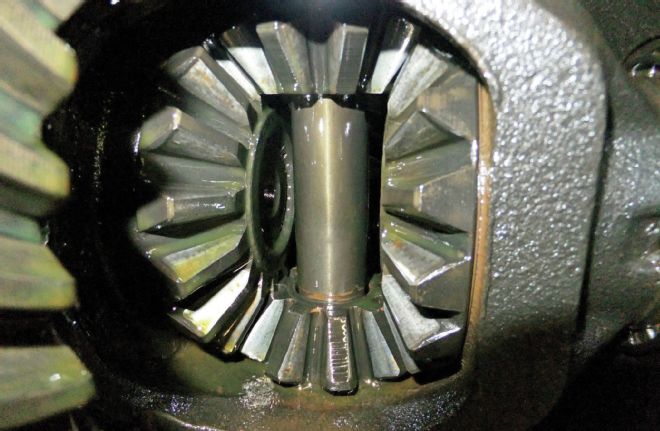
12. Joe uses white correction fluid to mark two teeth on the gears, as shown here, to approximate the rear-gear ratio. He counts one full revolution of the gears and observes how many times the rear passenger-side wheel turns 360 degrees. According to factory literature, the ’68 Firebird 400/automatic came standard with a 3.08:1 or an optional 2.73:1 gearset. Joe could not find a two-letter stamp on the top of the axle tube, which would indicate the factory-issued gear ratio. He will count the teeth in both the ring and pinion gears when he disassembles the differential housing later.