The GM 10-bolt rearend isn't considered by many muscle car enthusiasts to be a high-performance axle, mostly because earlier examples built prior to 1973 had a smaller, weaker 8.2-inch ring gear which had a low tolerance for extra torque created by a more powerful, modified engine. Most guys just stepped up to a 12-bolt or a Ford 9-inch rear and called it a day. But when GM updated the 10-bolt design for 1973 model year vehicles (and some cars as early as 1971), they increased the ring gear size to 8.5 inches.
The 10-bolt rear with the improved 8.5-inch ring gear can be easily identified by the two large triangular cast-iron lugs on the bottom of the center section in combination with an 11-inch wide differential cover. With its beefy ring gear as the basis for a robust performance-oriented rearend assembly, many upgrades are available for the 8.5-inch 10-bolt, including differentials (ours has a Detroit TrueTrac), differential covers with bearing support (we have a Summit version), and axle upgrades. (For more on identifying and building a stronger 10-bolt 8.5-inch rear, click here and here.) Our '75 Chevy Laguna project is just one of over 7 million 1973-'77 GM A-bodies that possess the corporate 8.5-inch 10-bolt. They are literally everywhere (did we mention trucks?), and their strength, aftermarket support, and sheer numbers make them a great choice for a warmed-over street machine.
The upgraded 10-bolt axles can be found primarily on '73-81 F-bodies (Camaro/Firebird) and 1973-'77 A-bodies (Chevy Malibu/Laguna, Pontiac Lemans/Grand Am, Olds Cutlass, and Buick Century/Regal). Later on, they also became standard equipment on the famed Turbo Buick G-bodies (Grand National, Turbo T, and T-Type). Equipped with the 8.5-inch ring gear, the 10-bolt rear in these Turbo Buicks would easily run quarter-mile passes in the 10s, proving the strength of the design. Simply put, these later 10-bolt rearends are worth keeping.
Recently, while upgrading the stock drum brakes to Baer SS4 discs on our 1975 Chevy Laguna (Installing Baer SS4 Rear brakes), we discovered that our stock wheel bearings and axle seals were worn. The OE wheel bearing rides along a machined, hardened surface on the end of the axle, and over time the heat treating on the axle can wear down from heat and friction. This is known as galling or spalling, and can be seen in its early stages as a small overheated rough area. We noticed some of this wear on our axles, so we decided to affect a simple repair while the axles were out for the brake upgrade.
Fortunately, Timken makes a cool problem-solver replacement bearing that can dramatically extend the life expectancy of your aging 8.5-inch 10-bolt rear. It works by changing the location of the wear surface on the axle where the bearing rides, moving it outward towards the end of the axle on a virgin section of the machined, hardened surface. Being closer to the axle's end, the bearing actually gives the axle a little more support, and allows Timken to incorporate the axle seal into the bearing, doing away with a separate seal. Note that there are two versions of the Timken bearing/seal assembly—our '75 Laguna took the smaller one (part No. TRP1563TAV, $27.97 Summit price, 1.399-inch inner bore summitracing.com). If performing this upgrade yourself, we recommend you bring one of your axles to the parts store to prevent getting the wrong size. (The computer at the parts counter won't say what size the bearing is. The larger bearing is part number TRP1559TV, $28.97 Summit price, and has a larger 1.622-inch inner bore.)
Follow along as Dutch Miller of Baer Brakes shows you how to make the upgrade.
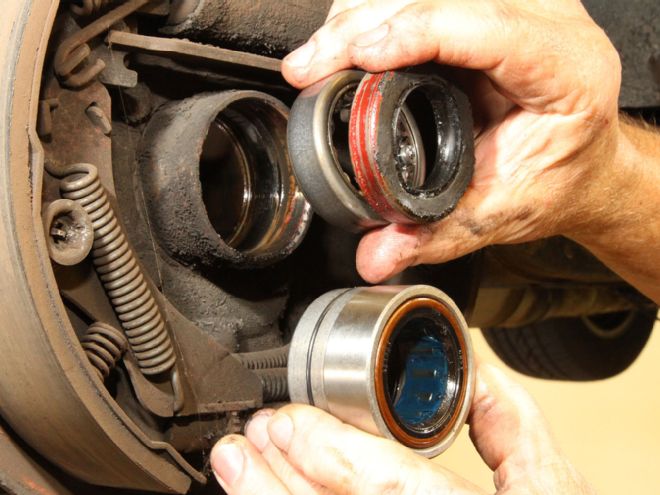
 The 8.5-inch GM 10-bolt rear employs separate axle bearings and seals (left). Timken's replacement unit (right) performs both tasks in one unit and moves the bearing wear surface outward to a virgin area on the machined section of the axle.
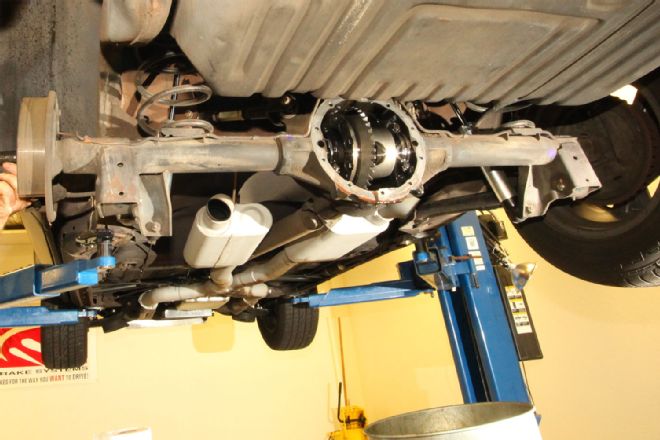 GM 10-bolts from the mid-'70s are worth saving. Their larger 8.5-inch ring gears can be identified by the two large triangular lugs on the bottom of the differential housing. Note that the 10-bolt in our '75 Chevy Laguna has already been treated to a much stronger TrueTrac diff and 3.73 gears.
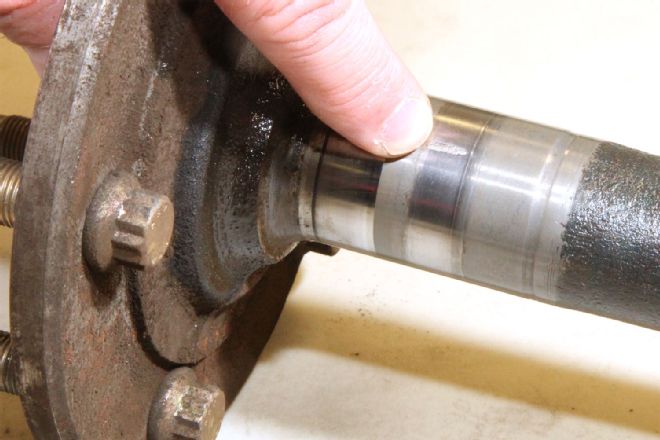 This close-up of the bearing race on our 10-bolt's axle shows a galled spot. If not addressed, the area will spread around the race, taking the temper out of the surface hardening, eventually causing an axle failure. The Timken bearing will move the bearing surface to the smooth area just behind the finger.
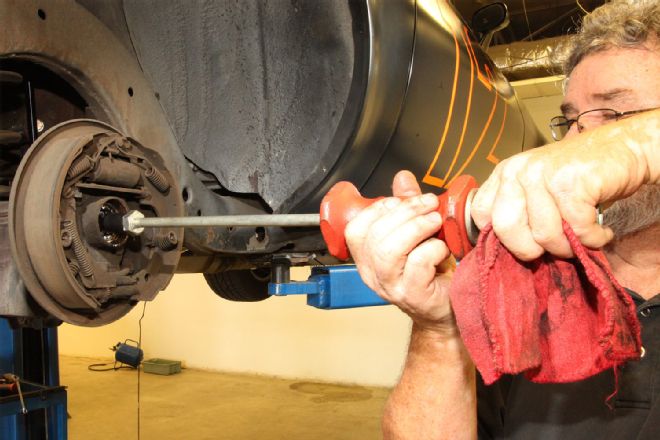
 The bearings on our 10-bolt were upgraded while we were at Baer Brakes upgrading the stock drums to Baer's SS4 rear discs. Here, Baer's Dutch Miller shows a trick for removing the stock axle seal. Dutch is using the end of the axle to pry out the seal, which will not be reused.
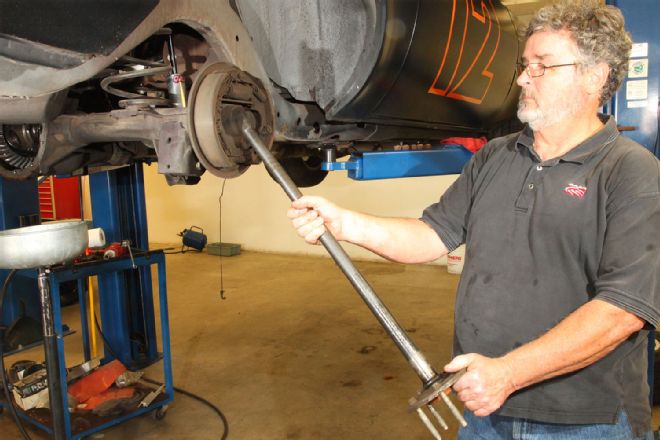
 Next, Dutch pulls the stock bearing out using a bearing puller with a built-in slide hammer. This specialized tool is often available on a check-out basis from local parts stores. Just leave the store a deposit for the cost of the tool, then get your money back when you return it.
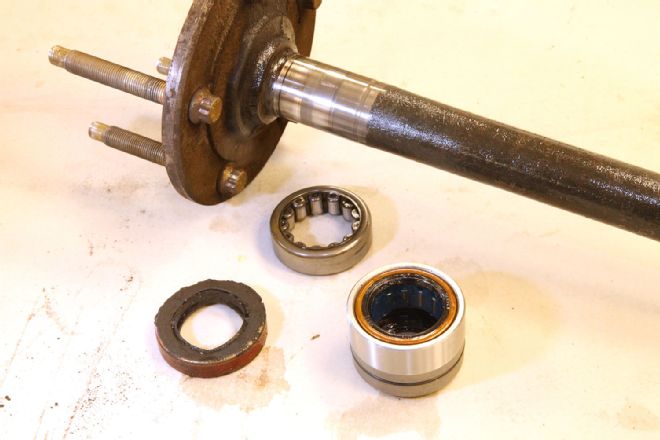
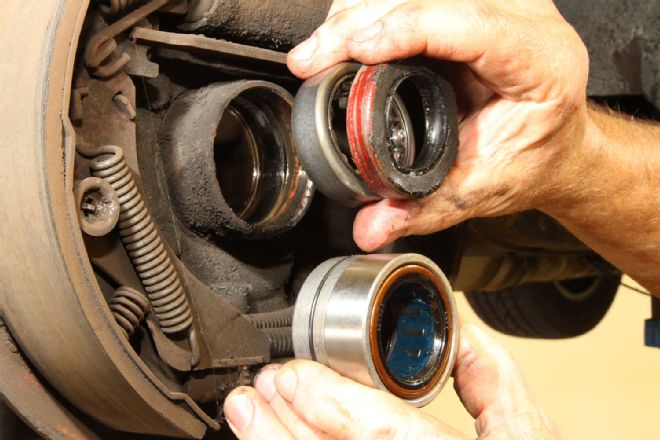 On top are the separate pieces for the OE bearing and seal, at the bottom is the new Timken unit (part No. TRP1563TAV, $27.97 Summit price) which is both the bearing and the seal. Note the locating ring inside the axle tube. This is the surface the bearing must seat against when installing the new unit.
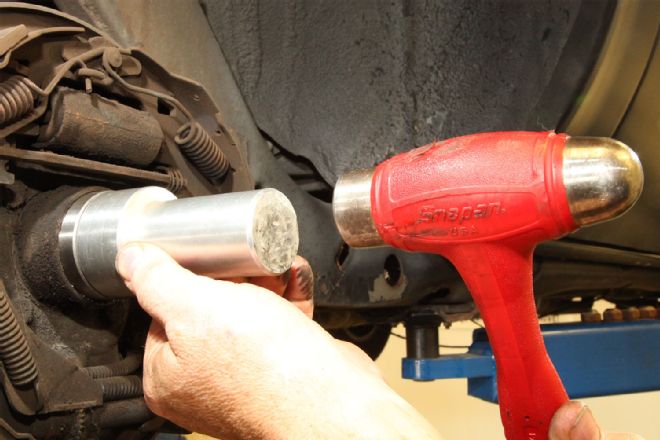 This specialized tool allows the bearing to be knocked in without accidentally damaging the seal or the bearing. A large socket or thick piece of steel plate can be used as long as care is taken not to damage the seal.