Vinyl application by John Sugata of JS Design Factory, and Promax Motorsport
Talent by Sasha Singleton and Lisa Kaye
In the October ’10 issue, tagged to the end of the feature of Nao Onishi’s Toda-ITBd and Art Factory-covered RSX Type-S, was a bit about the vinyl installation process we documented on our friend Ken Takahashi’s xB … and a hot photo of our John Sugata, our vinyl designer/installer, with the beautiful Sasha Singleton and Lisa Kaye. While you’ll have to contact John directly to learn the secrets of lady luring, we’re going to show you his master techniques of vinyl design and application.


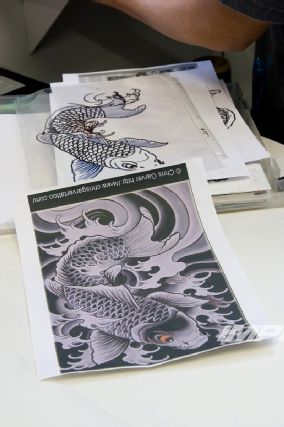
Here’s where our story starts: with this cool drawing of a koi fish xB owner Ken decided would look cool slathered on the flanks of his ride, and installer John’s hand-tracing of which parts of it he’ll use for the finished product. More will be going onto Ken’s xB than just this little guy, but we’ll get to that in a few steps.
 |
Vinyl Design & Application - Get Laid
|
Vinyl Design & Application - Get Laid
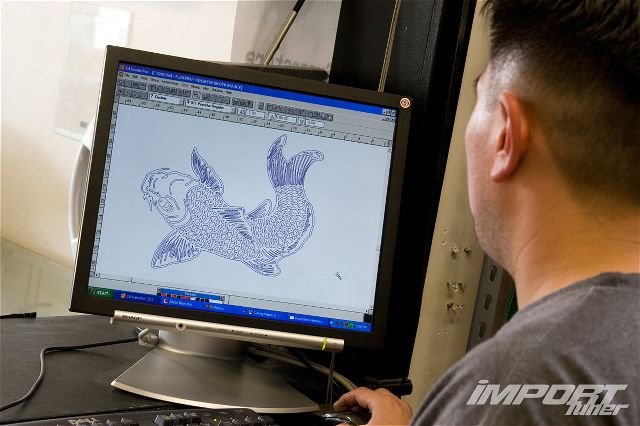
John begins by scanning a hand trace of the koi drawing into Adobe Illustrator and then adding some personal flare. Here we see the document opened in CASmate Pro, the navigating software that communicates to the machine that will be cutting the vinyl to be applied.
 |
Vinyl Design & Application - Get Laid
|
Vinyl Design & Application - Get Laid
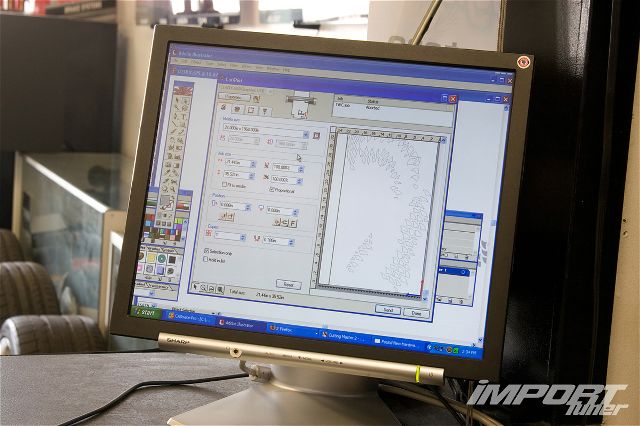
Think of this screen as a “page setup” box when printing a document in Windows. It allows John to identify which sections of the image will be cut—important in situations like ours, when different sections of the image will be cut from different colors of vinyl.
 |
Vinyl Design & Application - Get Laid
|
Vinyl Design & Application - Get Laid
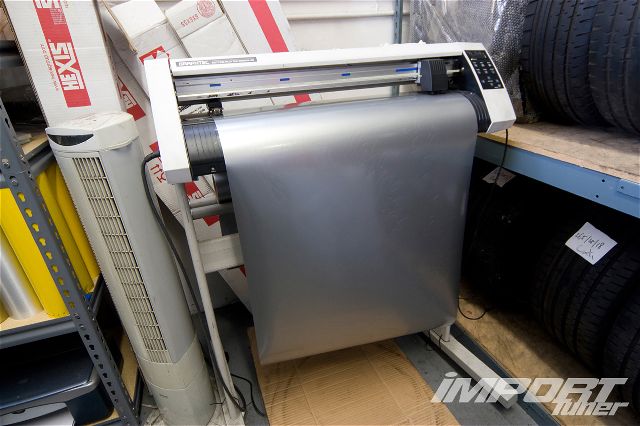
And here's John’s vinyl light-saber: a Graphtec CE5000-50 cutting plotter, seen here loaded with silver vinyl—one of four colors that will go into the final vinyl rendering of the koi.
 |
Vinyl Design & Application - Get Laid
|
Vinyl Design & Application - Get Laid
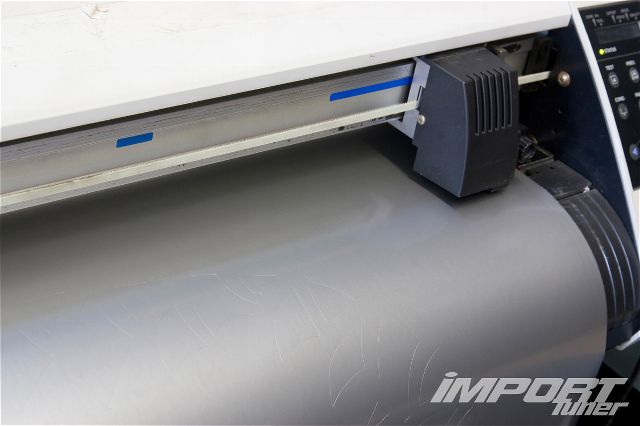
It’s difficult to see the cuts in the vinyl made by the plotter/cutter unless you’re close up. This machine has the precision to cut thin sheets of vinyl without scoring the paper it’s adhered to. Pretty impressive.
 |
Vinyl Design & Application - Get Laid
|
Vinyl Design & Application - Get Laid
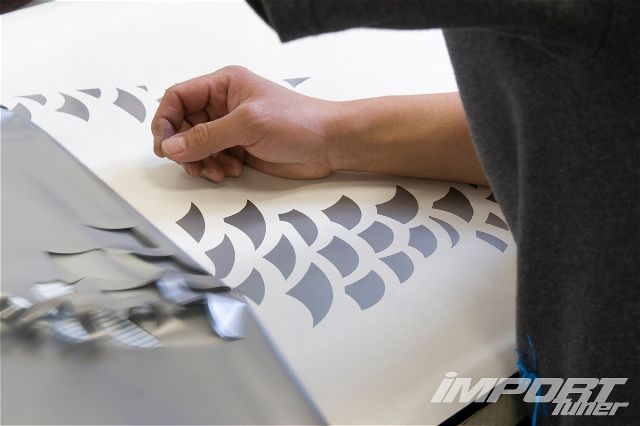
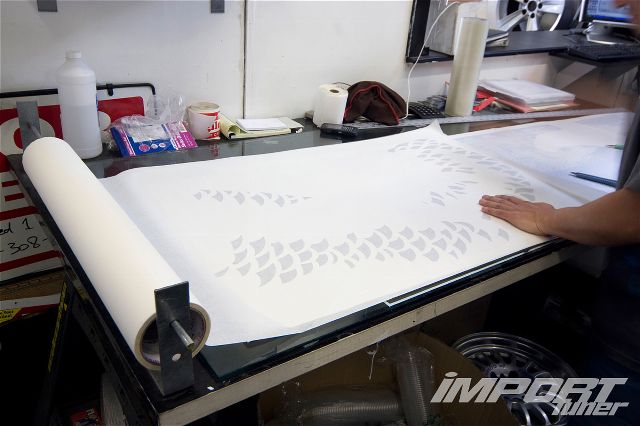
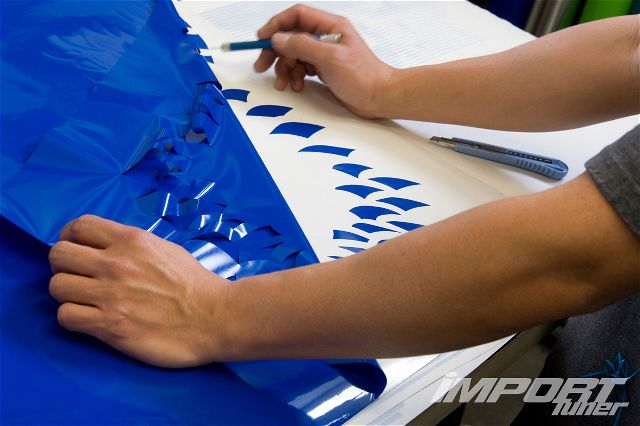
Once the plotter/cutter has done its job, the vinyl is laid across a table and John gets to work separating the vinyl he needs from the excess around it. It’s a tedious job that requires his full attention. And something along the lines of an X-Acto knife.
 |
Vinyl Design & Application - Get Laid
|
Vinyl Design & Application - Get Laid
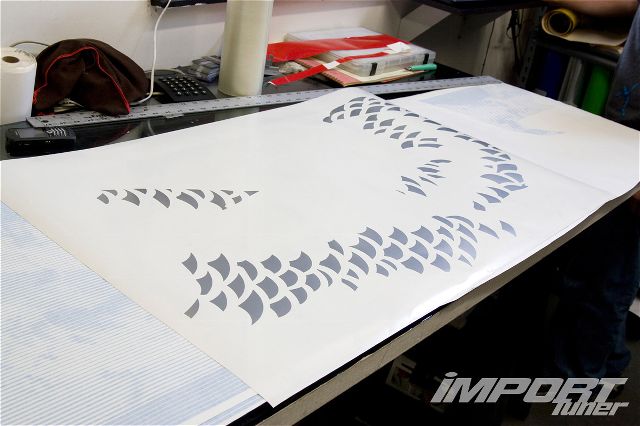
Of all the shiny, silver vinyl seen leaving the plotter/cutter three steps back, this is all that will be applied to Ken’s xB. Facing up is the non-adhesive side…
 |
Vinyl Design & Application - Get Laid
|
Vinyl Design & Application - Get Laid
…which John covers with adhesive transfer paper, seen here.
 |
Vinyl Design & Application - Get Laid
|
Vinyl Design & Application - Get Laid
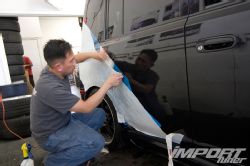
Now for the application. John’s first step was to thoroughly clean the side of Ken’s xB where the vinyl will be applied. As you can see he and Ken had already gotten a head start on the project. All those blue lines forming the image of the xBs in the background? We’ll be getting to that soon.
 |
Vinyl Design & Application - Get Laid
|
Vinyl Design & Application - Get Laid
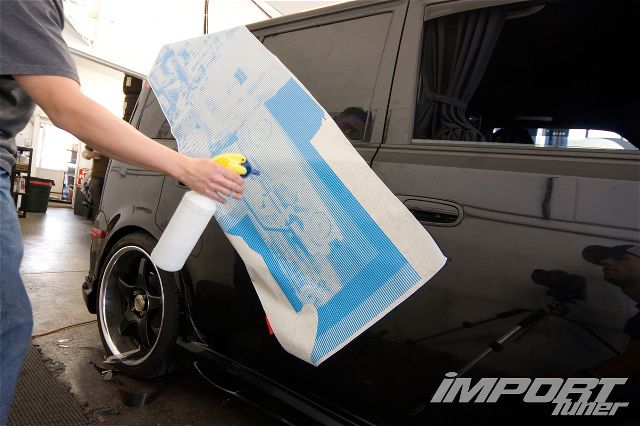
Next, John removes the vinyl’s paper backing, exposing the vinyl’s adhesive side. He sprays a solution of water and a soapy lubricant to it and the surface of the car where the vinyl will be applied. This is to allow the removal of air bubbles, and some re-positioning if the vinyl doesn’t go down perfectly in place.
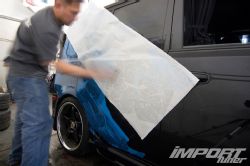
After the vinyl has been laid and positioned, and all air bubbles have been worked out with a squeegee or credit card (or by poking the vinyl with a pin in the case of really stubborn little guys), John smoothes the entire section over with the squeegee to force out as much of the soapy solution as possible, helping it stick more to the car than to the transfer paper for a clean release.


Pulling slowly, at as flush of an angle as possible, John carefully peels the transfer paper from the vinyl. Depending on the type of transfer paper used, a little water sprayed on the back might help it pull free easier … or it might eff everything up. Proceed with caution.
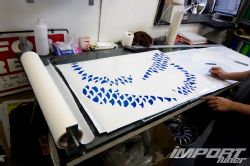
John repeats the process, but now with the sections of the fish that will appear in blue vinyl. It’s hard to tell from up here, but that’s a fully cut piece of vinyl laid across the table.
 |
Vinyl Design & Application - Get Laid
|
Vinyl Design & Application - Get Laid
See? Told you so.
 |
Vinyl Design & Application - Get Laid
|
Vinyl Design & Application - Get Laid
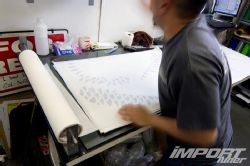
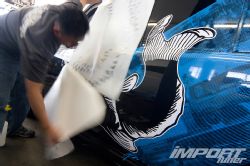
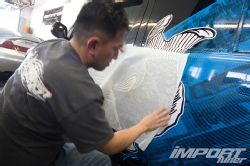
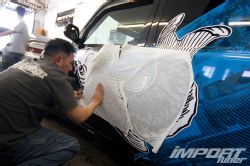
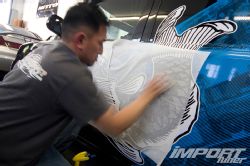
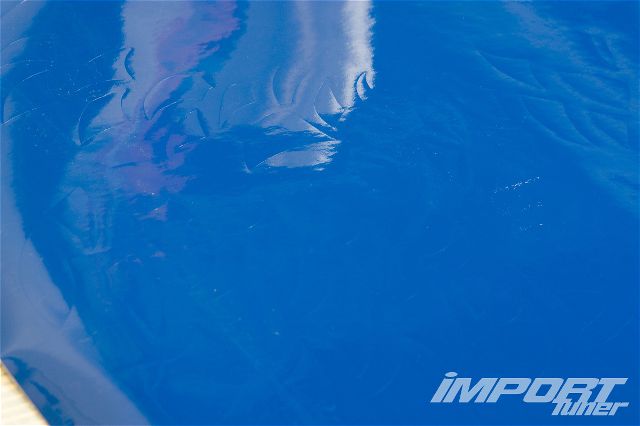
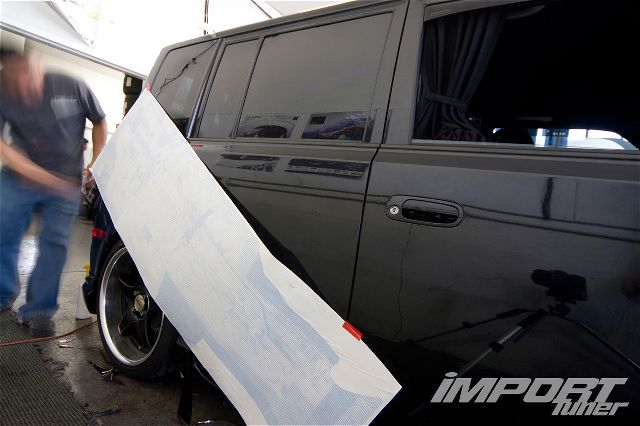
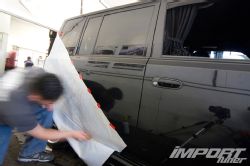
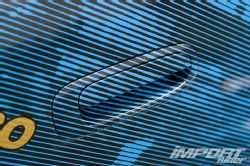
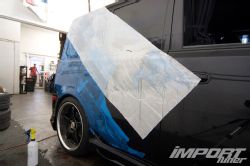
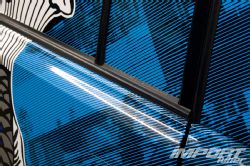
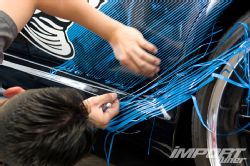
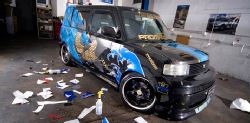
Now it’s time to get into the tricky stuff: that “line art” vinyl you see surrounding the koi on the left side of Ken’s xB. Most of the xB’s rear quarter panels will be covered in it, which means it will have to be laid in sections—twice as difficult as doing it once. Well, four times, but who’s counting? Here are the two sections, , already cut and covered in transfer paper, that will be needed to cover the right side of Ken’s xB.
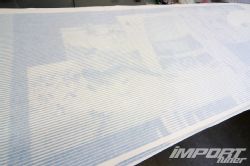

The concept behind line art is pretty straightforward: create an image using only equally spaced parallel lines, that vary in thickness to differentiate between positive and negative space. Up close the lines don’t look like much (especially when covered in transfer paper), but from a distance the image will become apparent.
Like before, John’s first step is to clean the surface to receive the vinyl.
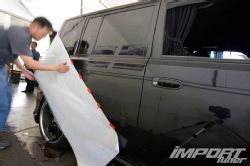
After John cleans the area of Ken’s xB to receive the vinyl, he suspends the cut sheet with painter’s tape to get an idea of where to place it.
 |
Vinyl Design & Application - Get Laid
|
Vinyl Design & Application - Get Laid
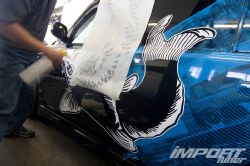
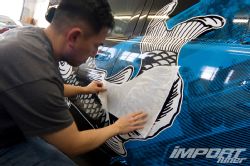
He then flips the sheet up and carefully peels the paper backing from the vinyl, exposing the vinyl’s adhesive side.
The vinyl is then flipped up and the paper backing removed to expose the adhesive side of the vinyl. Using the same water/lubricant mixture as before, he sprays down the entire sheet of vinyl and area of the car where it will be applied, making sure to get each surface nice and soaked.
 |
Vinyl Design & Application - Get Laid
|
Vinyl Design & Application - Get Laid
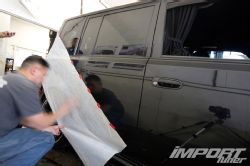
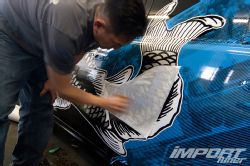
Finally, the vinyl/transfer paper sheet is flipped back down into position as guided by the painter’s tape, and John begins the squeegee process.
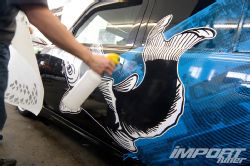
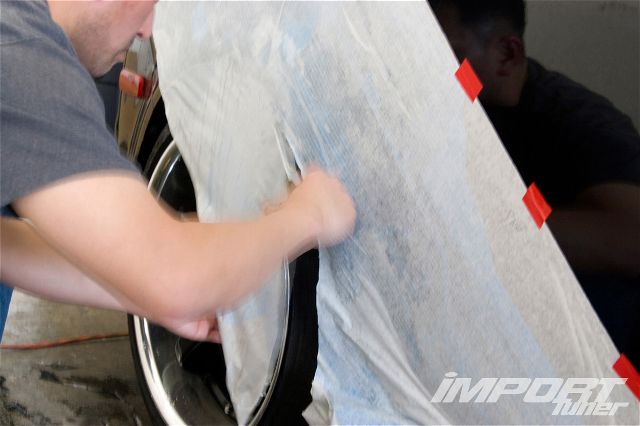
A lot of excess will be cut in this process. John starts by trimming what’s hanging down toward the wheel wells.
 |
Vinyl Design & Application - Get Laid
|
Vinyl Design & Application - Get Laid
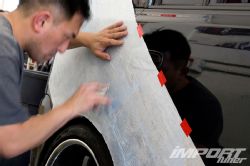
Next will be cutting reliefs for the doors, door handles, and fuel door, which John completes by using that X-Acto knife from earlier, taking caution not to knick Ken’s paint (or at least making sure he’s not around to see him do it).

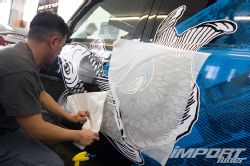
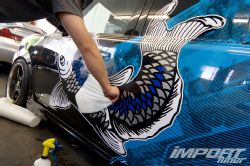
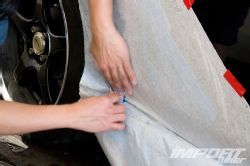
Even more carefully than before, John peels the transfer paper away from the thin lines of vinyl.
The process is repeated with the upper sheet of vinyl, and this time John has to take special care to line up the two sections by hand—even the slightest mistake when lining up two sections of line art will be visible in the finished product.
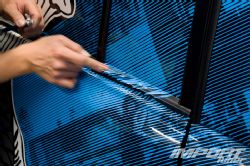
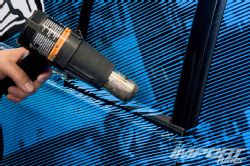
John uses his X-Acto to cut the vinyl around glass areas, then tuck it beneath trim/molding for a clean finish. A heat gun will help vinyl become more pliable and easy to position. Just don’t burn those moldings!
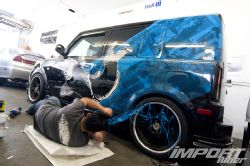
Inevitably, things go wrong. When John went to lay the vinyl on the left side of the car, some of it refused to release properly and he had to handle the application by hand. This is where patience plays an important role. We would’ve been talking Ken into flossing vinyl on only one half of his xB had it been us trying to deal with this.
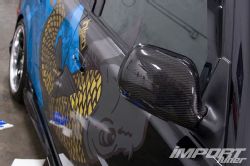
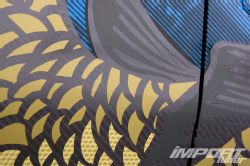
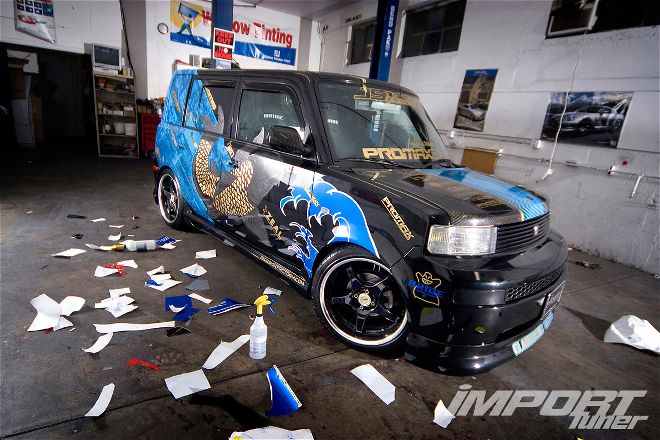
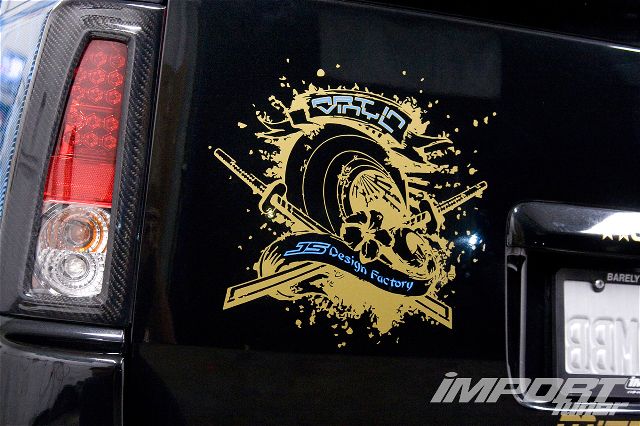
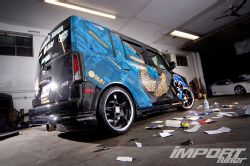
After the line art sections had been completed, Ken found a good deal on some carbon-fiber-look and metallic gold vinyl he liked better than his initial solid silver/red/blue color scheme for the koi fish, and had John redo it completely. We have to agree; it does look better.
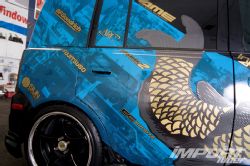
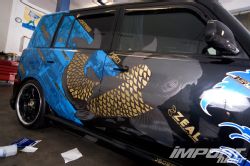
Together, with some matching sponsor stickers cut out and laid over the blue line art, the finished product flows together really well.
Of course, the most important sponsor ;-)
 |
Vinyl Design & Application - Get Laid
|
Vinyl Design & Application - Get Laid
…second only to JS Design Factory, that is!
 |
Vinyl Design & Application - Get Laid
|
Vinyl Design & Application - Get Laid
And now for the outtakes!


In case you’re wondering why Sasha and Lisa we even here for the whole process, there are two reasons. 1.) We were there, and chicks love us. 2.) Ken rendered a photo of the two of them on the hood of his xB in line art. We’re going to hang onto reason #1 ;-)
Sasha Singleton
www.myspace.com/sashasingleton
www.cybersasha.com
Lisa Kaye
www.myspace.com/lisadateeza