 | Ford Super Duty Power Stroke Head Gasket Tech 02
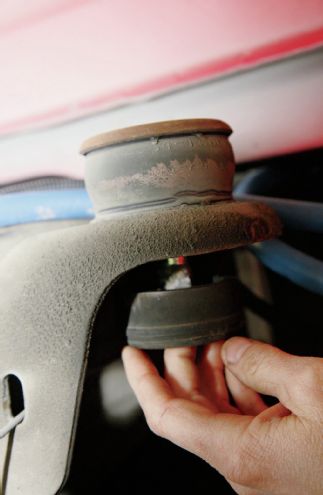
When coolant residue is visible around the degas bottle cap, it’s a telltale sign of a blown head gasket. Even with the slightest loss of sealing, combustion will slip past the head gasket and pressurize the cooling system.
| Ford Super Duty Power Stroke Head Gasket Tech 02
When coolant residue is visible around the degas bottle cap, it’s a telltale sign of a blown head gasket. Even with the slightest loss of sealing, combustion will slip past the head gasket and pressurize the cooling system.
 | Ford Super Duty Power Stroke Head Gasket Tech 01
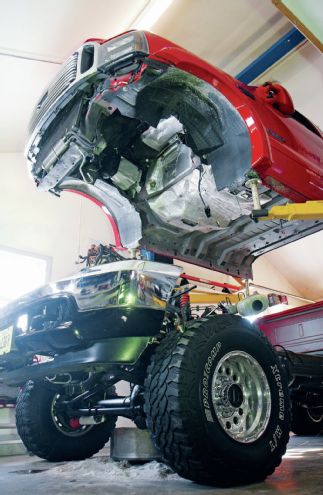
While pulling the cab on an ’03 to ’07 Ford Super Duty can be accomplished inside of two hours, a lot of work has to be done. For starters, all coolant has to be drained and the radiator disconnected, with the E-brake cable, antilock brake (ABS) wiring, brake master cylinder, ABS pump, ABS wheel speed sensors, and transmission shifter assembly all requiring disconnection as well. Then the A/C lines have to be vacuumed down and recharged later.
| Ford Super Duty Power Stroke Head Gasket Tech 01
While pulling the cab on an ’03 to ’07 Ford Super Duty can be accomplished inside of two hours, a lot of work has to be done. For starters, all coolant has to be drained and the radiator disconnected, with the E-brake cable, antilock brake (ABS) wiring, brake master cylinder, ABS pump, ABS wheel speed sensors, and transmission shifter assembly all requiring disconnection as well. Then the A/C lines have to be vacuumed down and recharged later.
 | Ford Super Duty Power Stroke Head Gasket Tech 04
Accessing the body mounts from inside the cab requires prying the interior carpet out of the way. The driver-side bolts require a 24mm (or 15⁄16-inch) socket, and the passenger- side bolts call for a 21mm (or 13⁄16-inch) socket.
| Ford Super Duty Power Stroke Head Gasket Tech 04
Accessing the body mounts from inside the cab requires prying the interior carpet out of the way. The driver-side bolts require a 24mm (or 15⁄16-inch) socket, and the passenger- side bolts call for a 21mm (or 13⁄16-inch) socket.
 | Ford Super Duty Power Stroke Head Gasket Tech Parts
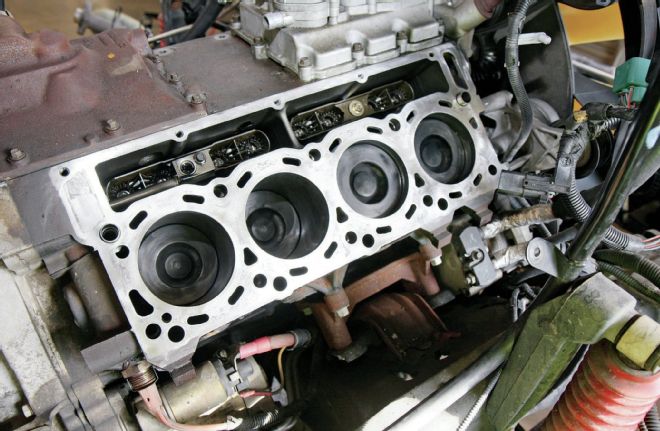
Once the cab was separated from the frame, Knoles began tearing into the engine. Here you can see:
| Ford Super Duty Power Stroke Head Gasket Tech Parts
Once the cab was separated from the frame, Knoles began tearing into the engine. Here you can see:
(A) alternator
(B) engine harness
(C) up-pipes
(D) FICM
(E) intercooler tubes
(F) radiator
(G) exhaust manifolds
(H) turbo pedestal
(I) intake manifold
All have been removed. We’ll note that Knoles removed the exhaust manifolds after pulling the heads off the block, before they were sent to the machine shop.
 | Ford Super Duty Power Stroke Head Gasket Tech 06
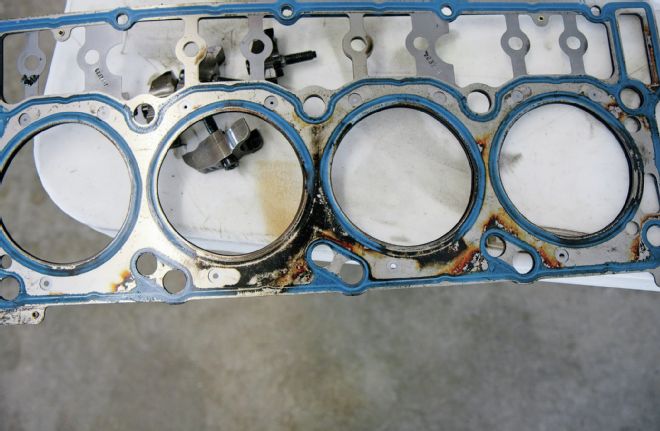
This is where the passenger-side head gasket failed, between cylinder numbers 3 and 5. We hypothesize that the shop that previously installed head studs in this engine employed either an improper torquing sequence, or the wrong torque spec values. Then again, as they say: stuff happens. For full disclosure: This particular 6.0L had been subjected to 40 psi of boost and 500 rwhp for quite a while before the mishap occurred.
| Ford Super Duty Power Stroke Head Gasket Tech 06
This is where the passenger-side head gasket failed, between cylinder numbers 3 and 5. We hypothesize that the shop that previously installed head studs in this engine employed either an improper torquing sequence, or the wrong torque spec values. Then again, as they say: stuff happens. For full disclosure: This particular 6.0L had been subjected to 40 psi of boost and 500 rwhp for quite a while before the mishap occurred.
 | Ford Super Duty Power Stroke Head Gasket Tech 07
In order to clean up the block’s deck surface, Knoles used a mid-grade Scotch-Brite pad on a dye grinder. After he was unable to slide a 0.002-inch feeler gauge under a level at any point along the block, he knew it was good to go. According to Ford, observing more than a 0.002-inch difference across any 5.9-inch area on the block surface renders the block unusable.
| Ford Super Duty Power Stroke Head Gasket Tech 07
In order to clean up the block’s deck surface, Knoles used a mid-grade Scotch-Brite pad on a dye grinder. After he was unable to slide a 0.002-inch feeler gauge under a level at any point along the block, he knew it was good to go. According to Ford, observing more than a 0.002-inch difference across any 5.9-inch area on the block surface renders the block unusable.
 | Ford Super Duty Power Stroke Head Gasket Tech 08
When it comes to the heads, no more than a 0.004-inch difference in flatness can be present across the total surface area. Lucky for us, Knoles’ local machine shop stated they were in near-perfect condition and required very little work in order to be resurfaced. On another note, it gets expensive quickly if your 6.0L’s heads are cracked (namely hairline cracks that protrude into the exhaust valve seats), as they run roughly $1,800 apiece. Luckily for us, ours checked out fine after being magnafluxed.
| Ford Super Duty Power Stroke Head Gasket Tech 09
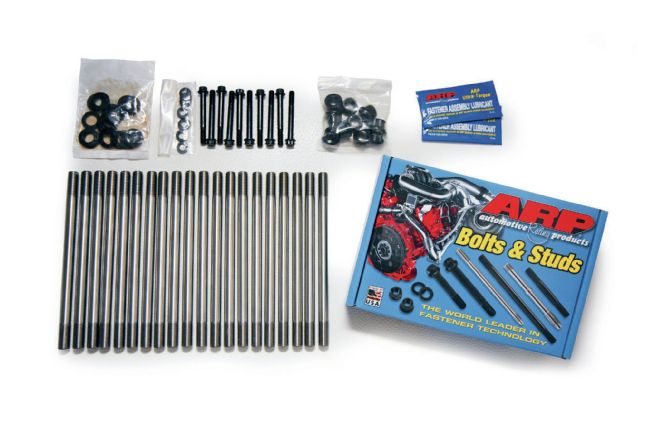
Independent shops will almost always opt for head studs over bolts when putting a 6.0L back together, and some dealerships will even install studs for a customer if he or she supplies them. The most commonly used head stud in all the diesel industry is made for the 6.0L and comes from ARP (PN 250-4202, shown).
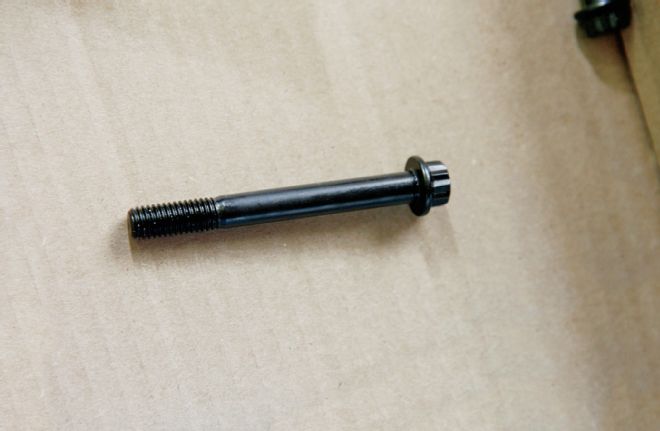
| Ford Super Duty Power Stroke Head Gasket Tech 10
Because we were dealing with a repeat offender—a truck that blew a head gasket even though it had already been studded—a set of ARP’s Custom Age 625 head studs (PN 250-4205) were employed on this particular engine. You pay a premium for this exotic, super-alloy fastener ($1,249 from our friends at MKM Customs), but the Custom Age studs feature a tensile strength between 260,000 and 280,000 psi (vs. 220,000 psi for standard ARP 2000 head studs).
| Ford Super Duty Power Stroke Head Gasket Tech 08
When it comes to the heads, no more than a 0.004-inch difference in flatness can be present across the total surface area. Lucky for us, Knoles’ local machine shop stated they were in near-perfect condition and required very little work in order to be resurfaced. On another note, it gets expensive quickly if your 6.0L’s heads are cracked (namely hairline cracks that protrude into the exhaust valve seats), as they run roughly $1,800 apiece. Luckily for us, ours checked out fine after being magnafluxed.
| Ford Super Duty Power Stroke Head Gasket Tech 09
Independent shops will almost always opt for head studs over bolts when putting a 6.0L back together, and some dealerships will even install studs for a customer if he or she supplies them. The most commonly used head stud in all the diesel industry is made for the 6.0L and comes from ARP (PN 250-4202, shown).
| Ford Super Duty Power Stroke Head Gasket Tech 10
Because we were dealing with a repeat offender—a truck that blew a head gasket even though it had already been studded—a set of ARP’s Custom Age 625 head studs (PN 250-4205) were employed on this particular engine. You pay a premium for this exotic, super-alloy fastener ($1,249 from our friends at MKM Customs), but the Custom Age studs feature a tensile strength between 260,000 and 280,000 psi (vs. 220,000 psi for standard ARP 2000 head studs).
 | Ford Super Duty Power Stroke Head Gasket Tech 11
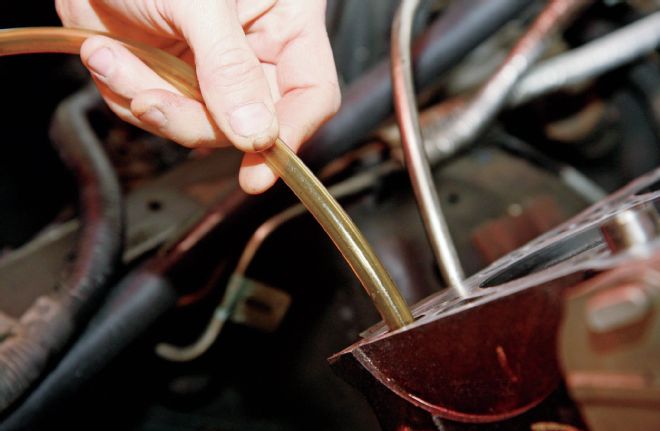
Failure to make sure the threads are clean can lead to improper thread engagement and inaccurate torque readings. So, once the block was prepped, Knoles used a Mityvac to ensure each head bolt bore was void of any fluid or debris.
| Ford Super Duty Power Stroke Head Gasket Tech 11
Failure to make sure the threads are clean can lead to improper thread engagement and inaccurate torque readings. So, once the block was prepped, Knoles used a Mityvac to ensure each head bolt bore was void of any fluid or debris.
 | Ford Super Duty Power Stroke Head Gasket Tech 12
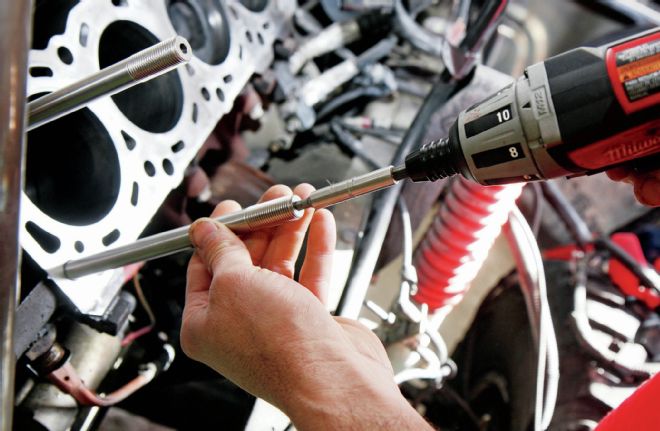
While an electric impact was used to run the ARP Custom Age 625 head studs into the block, they were handtightened until bottoming out.
| Ford Super Duty Power Stroke Head Gasket Tech 12
While an electric impact was used to run the ARP Custom Age 625 head studs into the block, they were handtightened until bottoming out.
 | Ford Super Duty Power Stroke Head Gasket Tech 13
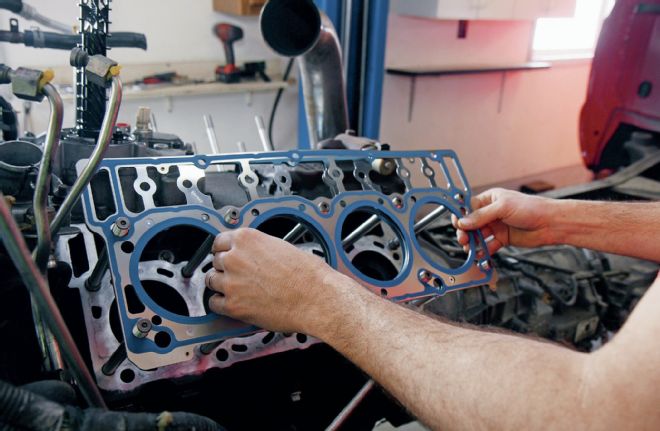
Next, an OE head gasket from Ford went on each bank (PN 4C3Z-6051-EB). Note that the head gaskets only install one way, with the stamped numbers facing up.
| Ford Super Duty Power Stroke Head Gasket Tech 13
Next, an OE head gasket from Ford went on each bank (PN 4C3Z-6051-EB). Note that the head gaskets only install one way, with the stamped numbers facing up.
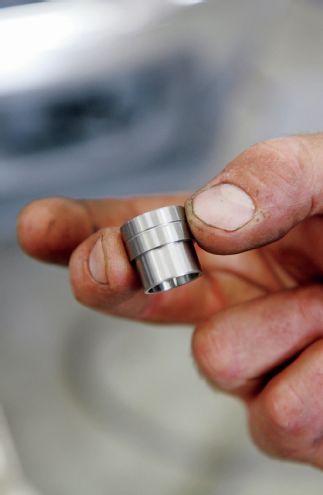 | Ford Super Duty Power Stroke Head Gasket Tech 14
Even though we retained the ’03 engine’s original 18mm cylinder head alignment dowels, it’s worth mentioning they’re no longer available due to Ford now only casting the later-style heads, which utilize 20mm dowels. If you’re installing new heads on an early block (built before January 2006), you’ll have to run this stepped alignment dowel. The end that installs in the block measures 18 mm (bottom), while the head side measures 20 mm (top).
| Ford Super Duty Power Stroke Head Gasket Tech 14
Even though we retained the ’03 engine’s original 18mm cylinder head alignment dowels, it’s worth mentioning they’re no longer available due to Ford now only casting the later-style heads, which utilize 20mm dowels. If you’re installing new heads on an early block (built before January 2006), you’ll have to run this stepped alignment dowel. The end that installs in the block measures 18 mm (bottom), while the head side measures 20 mm (top).
 | Ford Super Duty Power Stroke Head Gasket Tech 15
Once each head was lined up, it was carefully lowered onto the previously mentioned 18mm alignment dowel sitting in the block. It’s very important to lower the heads slowly, as denting, scraping, or damaging the new head gasket in any way could compromise its sealing capability.
| Ford Super Duty Power Stroke Head Gasket Tech 15
Once each head was lined up, it was carefully lowered onto the previously mentioned 18mm alignment dowel sitting in the block. It’s very important to lower the heads slowly, as denting, scraping, or damaging the new head gasket in any way could compromise its sealing capability.
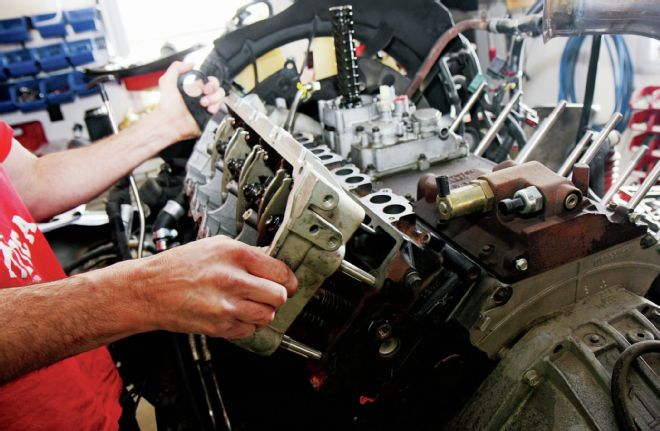
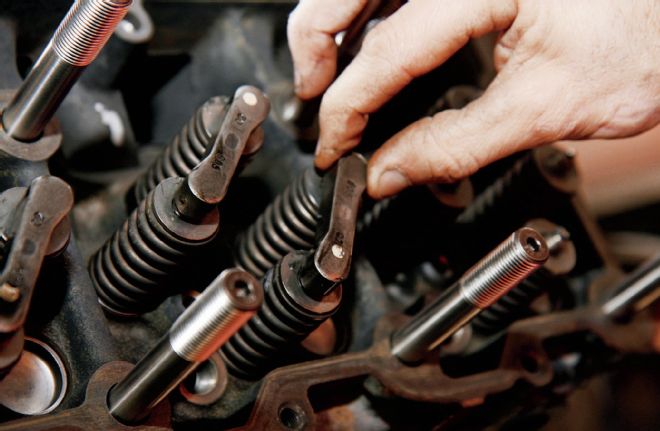 | Ford Super Duty Power Stroke Head Gasket Tech 16
After that, each valve stem was hit with a dab of grease, followed by the valve bridges (shown). The valve bridges were reinstalled the exact same way they came off the engine to keep the valvetrain in perfect sync and all wear points the same.
| Ford Super Duty Power Stroke Head Gasket Tech 16
After that, each valve stem was hit with a dab of grease, followed by the valve bridges (shown). The valve bridges were reinstalled the exact same way they came off the engine to keep the valvetrain in perfect sync and all wear points the same.
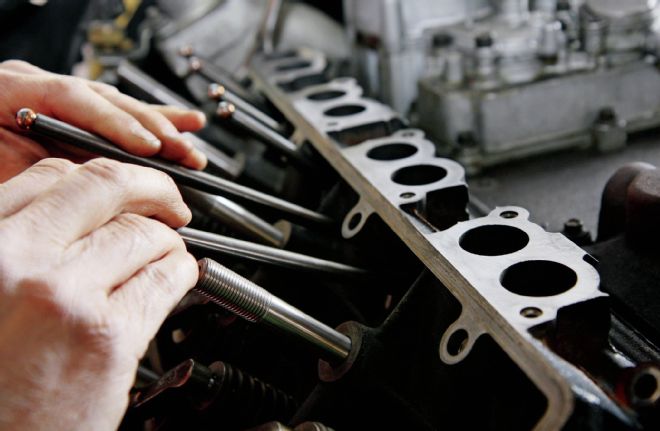 | Ford Super Duty Power Stroke Head Gasket Tech 17
Once inspected for cleanliness, the factory pushrods were dropped in. Like the valve bridges, the pushrods were reinstalled the same way they came off.
| Ford Super Duty Power Stroke Head Gasket Tech 17
Once inspected for cleanliness, the factory pushrods were dropped in. Like the valve bridges, the pushrods were reinstalled the same way they came off.
 | Ford Super Duty Power Stroke Head Gasket Tech 18
Before the rocker boxes went on, all head stud threads were hit with a coat of ARP’s Ultra-Torque assembly lubricant, as were the supplied nuts and washers. With the rocker box installed prior to applying the Ultra-Torque to the studs, it’s much more difficult to reach all the threads.
| Ford Super Duty Power Stroke Head Gasket Tech 18
Before the rocker boxes went on, all head stud threads were hit with a coat of ARP’s Ultra-Torque assembly lubricant, as were the supplied nuts and washers. With the rocker box installed prior to applying the Ultra-Torque to the studs, it’s much more difficult to reach all the threads.
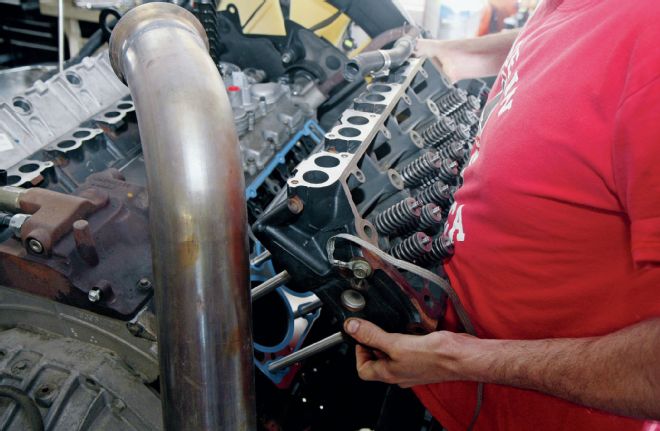
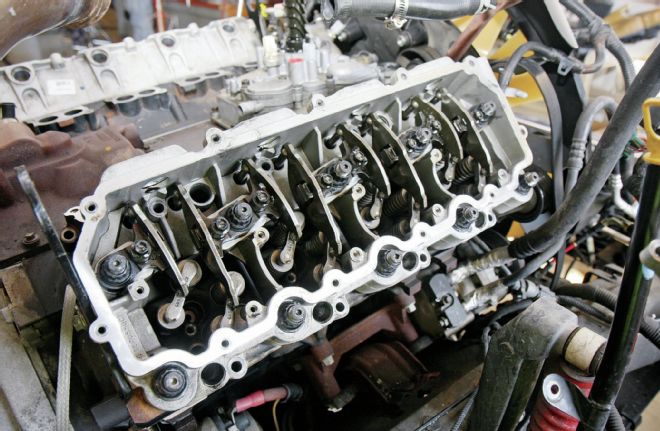
 | Ford Super Duty Power Stroke Head Gasket Tech 19
With the mating surfaces of the rocker boxes ultra clean, Knoles set them on the heads. But we weren’t home free yet… Remember, on a 6.0L Ford Power Stroke you can’t torque the head studs until the rocker boxes and rocker arms are installed (this was changed for the 6.4L Power Stroke).
| Ford Super Duty Power Stroke Head Gasket Tech 19
With the mating surfaces of the rocker boxes ultra clean, Knoles set them on the heads. But we weren’t home free yet… Remember, on a 6.0L Ford Power Stroke you can’t torque the head studs until the rocker boxes and rocker arms are installed (this was changed for the 6.4L Power Stroke).
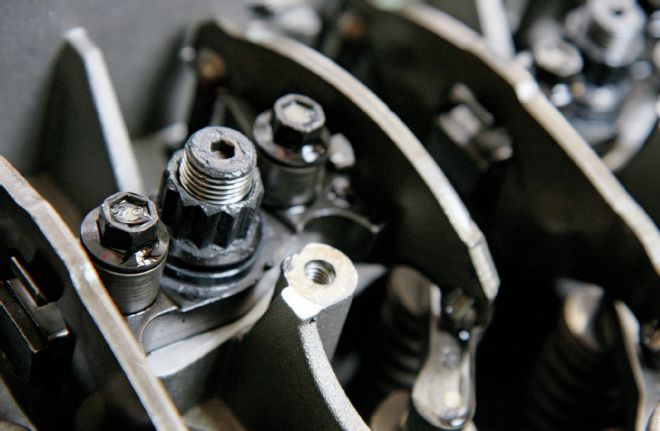 | Ford Super Duty Power Stroke Head Gasket Tech 20
Since the head studs effectively hold the rocker arms, rocker box, and heads to the block, the rocker arms were installed next, and torqued to 23 ft-lb. Then the supplied washers and 12-point, 11⁄16-inch nuts supplied by ARP were fitted to each Custom Age stud.
| Ford Super Duty Power Stroke Head Gasket Tech 20
Since the head studs effectively hold the rocker arms, rocker box, and heads to the block, the rocker arms were installed next, and torqued to 23 ft-lb. Then the supplied washers and 12-point, 11⁄16-inch nuts supplied by ARP were fitted to each Custom Age stud.
 | Ford Super Duty Power Stroke Head Gasket Tech 21
Prior to breaking out the torque wrench, each nut was slowly walked down (just past handtight) on its respective head stud. Then, starting with the innermost fasteners and working his way out, Knoles torqued the head studs in five separate sequences: 50 ft-lb, 100 ft-lb, 150 ft-lb, 200 ft-lb, and 265 ft-lb.
| Ford Super Duty Power Stroke Head Gasket Tech 21
Prior to breaking out the torque wrench, each nut was slowly walked down (just past handtight) on its respective head stud. Then, starting with the innermost fasteners and working his way out, Knoles torqued the head studs in five separate sequences: 50 ft-lb, 100 ft-lb, 150 ft-lb, 200 ft-lb, and 265 ft-lb.
 | Ford Super Duty Power Stroke Head Gasket Tech 22
ARP also supplied new M8 bolts, which thread into the top of each head (five per side) and require a 10mm socket. They were installed and torqued to the recommended 25 ft-lb spec from ARP. Once all head fasteners were in, the rocker box bolts were torqued to 23 ft-lb.
| Ford Super Duty Power Stroke Head Gasket Tech 22
ARP also supplied new M8 bolts, which thread into the top of each head (five per side) and require a 10mm socket. They were installed and torqued to the recommended 25 ft-lb spec from ARP. Once all head fasteners were in, the rocker box bolts were torqued to 23 ft-lb.
 | Ford Super Duty Power Stroke Head Gasket Tech 23
Up next, the injectors, high-pressure oil rails, and a fresh set of Motorcraft glow plugs would make it onto the engine, followed by the valve covers. The final steps in the head gasket job entailed lowering the cab, making sure the bodylines matched back up, and reinstalling everything that was removed during the teardown process. The full job takes most respectable shops 18 to 22 hours to perform (Ford bills the job at 23 hours) and will typically cost between $4,000 and $5,000 before it’s all said and done.
| Ford Super Duty Power Stroke Head Gasket Tech 23
Up next, the injectors, high-pressure oil rails, and a fresh set of Motorcraft glow plugs would make it onto the engine, followed by the valve covers. The final steps in the head gasket job entailed lowering the cab, making sure the bodylines matched back up, and reinstalling everything that was removed during the teardown process. The full job takes most respectable shops 18 to 22 hours to perform (Ford bills the job at 23 hours) and will typically cost between $4,000 and $5,000 before it’s all said and done.