In our quest to totally resurrect the former Motor Trend Truck of the Year test truck, we decided to time it just right so that it would benefit last month's 12-volt issue. After 18 years of moderate abuse, the old truck had one of those stock stereos that you have to set the fade and balance just right to minimize the rattles of the blown speakers (why is it always the right front one, anyway?), then add only enough bass so the sound was tolerable. The cassette still worked, so we had even been using one of those adapters to run our iPod, adding to the stellar sound quality. An upgrade was in order, and like the rest of the work we've done, it needed to be cool and functional without being overkill for the truck.
After a conversation with our friends at Pioneer Electronics USA, it was decided that we would install a setup that is typical of something you would purchase if you stopped by most audio installation shops looking for something affordable and in stock—and something you could drive home that day bumping some bass. We stopped in at OC Autostyle in Anaheim, California, settled on a double-DIN 6.1-inch touch-screen head unit, four 6x8-inch coaxials to replace the stock speakers, two 400-watt mini amps that are small enough to be mounted in all sorts of places, and finally a 10-inch shallow subwoofer and enclosure combo that squeezed under the rear seat. The folks at OC Autostyle made quick work of the installation and went the extra mile with a lot of little details, making for a clean and professional job. Follow along for the details below and check out the Pioneer and OC Autostyle websites for more info about how you can update the sound in your truck.
| Pioneer Avh X3600bhs Dvd Ipod Iphone Bluetooth Sirius Xm App Radio And Gm D 1004 Amps
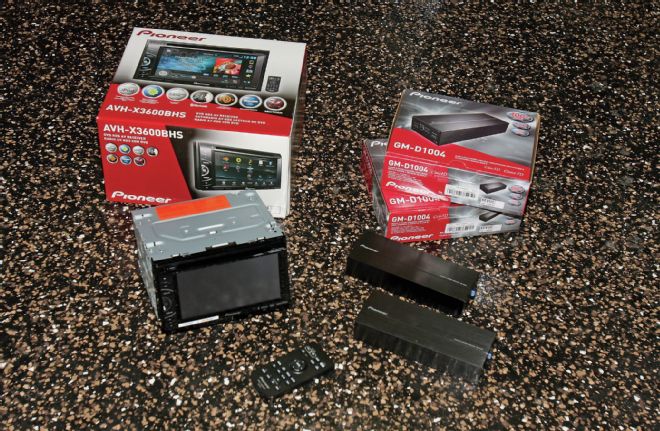
1. Upon arrival at OC Autostyle in Anaheim, Califonia, we consulted with the experts and settled on the Pioneer products we'd be installing in our audio-challenged '97 F-150. For the head unit we chose the Pioneer AVH-X3600BHS 2-DIN DVD/iPod/iPhone/Bluetooth/SiriusXM, AppRadio Mode and MirrorLink. Features including a 6.1-inch touchscreen, a DVD/CD player with 50 x 4 watts peak power, compatibility with iPod/iPhone/Bluetooth, playback and control through USB of music files on compatible Android devices, MIXTRAX, which is a DJ-like audio/visual feature, and a remote control. Inputs include front A/V, rear A/V and USB inputs, and rear-view camera input. Outputs include video output with six-channel preamp outputs. Basically, this unit packs just about everything into it at a reasonable price. Believe it or not, those two little boxes to the right of the head unit are a pair of the GM-D1004 amps. These Class FD bridgeable four-channel amps offer 400 watts max power or 45 Watts of power per channel, and a compact design—so much so that there are all kinds of new possibilities for mounting locations in your truck.
| Pioneer Ts G6845r Two Way Speakers
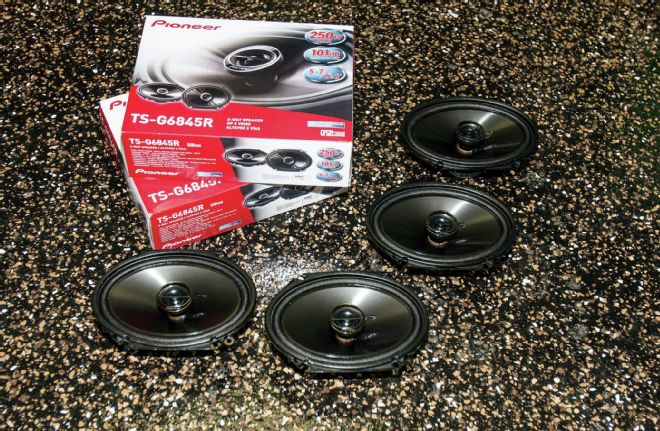
2. The TS-G6845R speakers were a great match for replacing our four junk factory 6x8-inch speakers. Their two-way design handles 250 watts max power and feature Pioneer's extremely strong and lightweight injected-molded polypropylene with MICA composite cone woofer, for improved sensitivity and reduced distortion. These speakers are designed with a shallow mounting depth especially for Fords.
| Pioneer Ts Swx2505 10 Inch Subwoofer
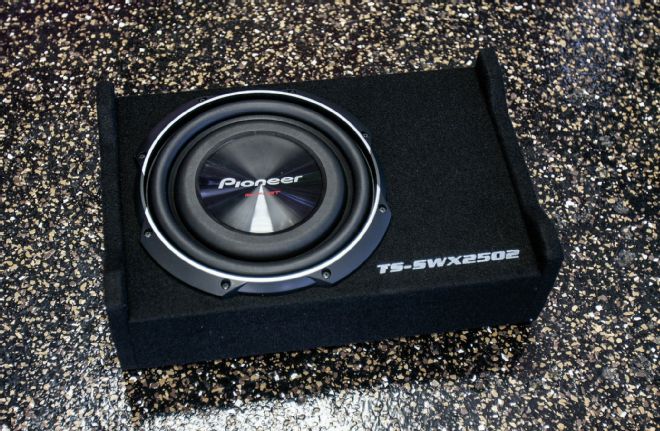
3. The TS-SWX2502 10-inch subwoofer and enclosure combo offers up tight bass from a shallow compact design. Features include a reinforced MICA injection-molded resin cone with an oversized surface that allows the subwoofer to produce louder, deeper bass by moving more air. The carpeted, nonslip and scratch-resistant enclosure surface sizes up at 18⅝ x 13⅞ x 6 inches.
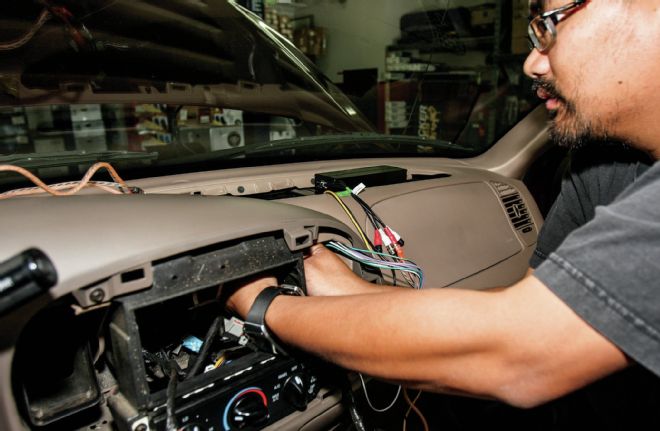
| 1997 Ford F 150 Dash Bezel Moved
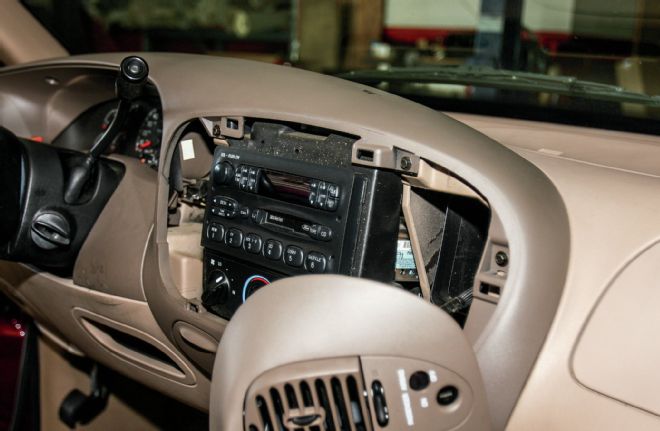
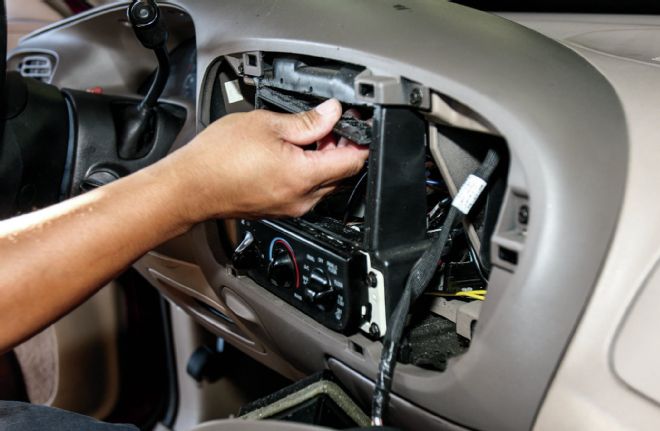
4. Yep, there's still a cassette player in the 'ol '97. We jumped right in by removing the dash bezel so we could slide the radio out.
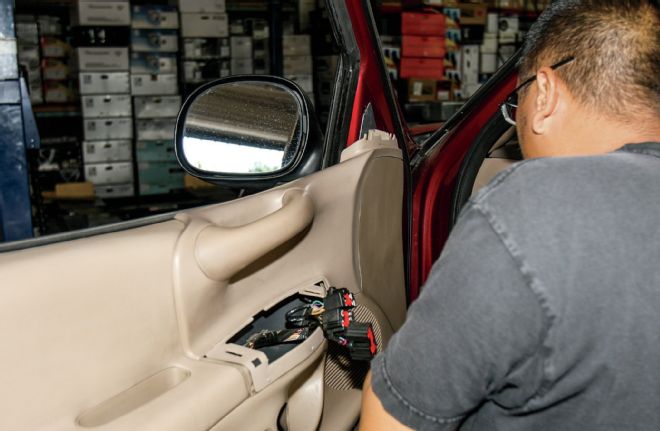
| 1997 Ford F 150 Door Switch Plate And Screws Removed
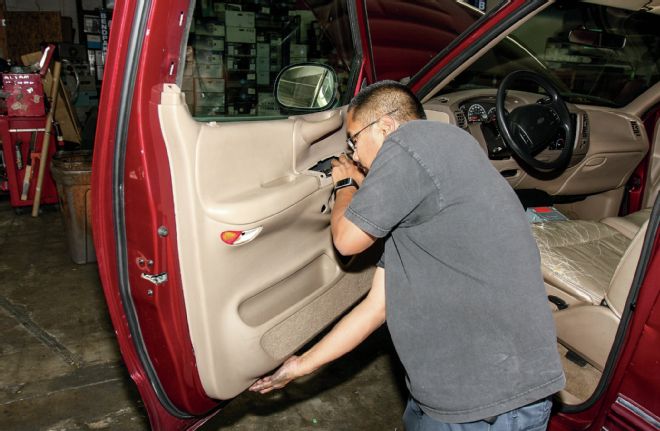
5. Then we got to work on the door, removing the switch plate and screws.
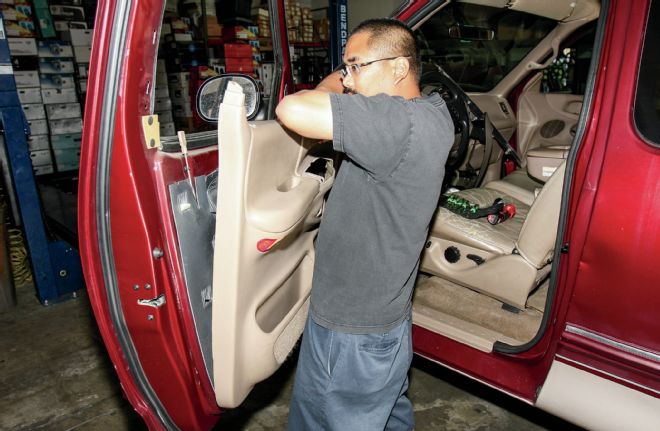
| 1997 Ford F 150 Door Panel Sliding Out
6. There is one more screw under the rear pillar cover that must be removed before sliding the panel upward and off the door.
| 1997 Ford F 150 Door Speaker Wires Removed
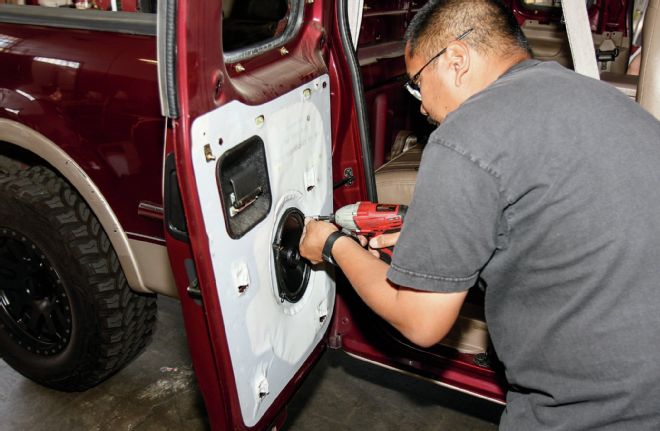
7. The four screws securing the speaker were removed and the clips that hold the stock wires on were removed.

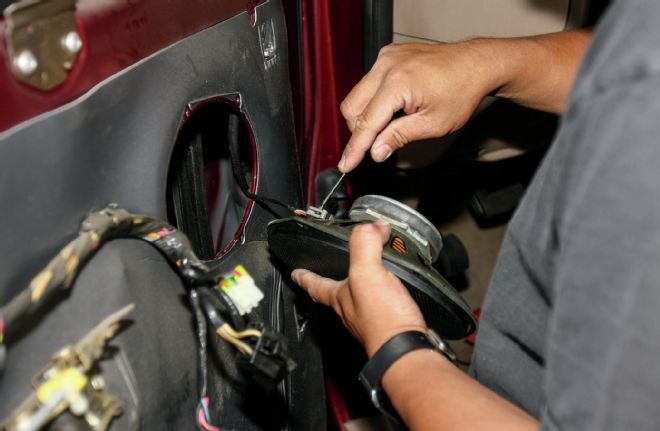
| 1997 Ford F 150 Stock Plugs Clipped Off Used To Attach New Wires With Terminal Ends
8. After the stock plugs were snipped off, connectors were used to attach the new wire with terminal ends.
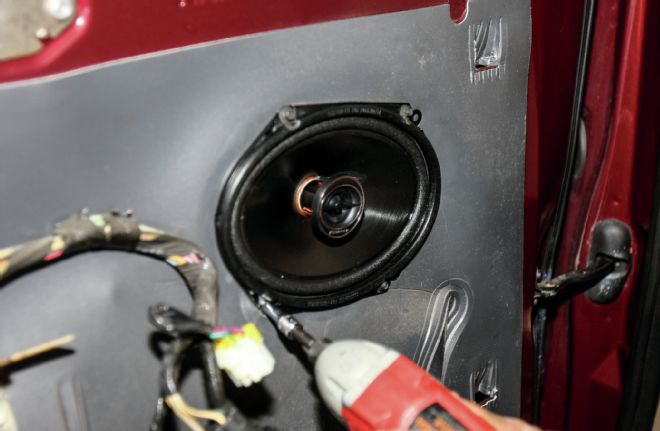
| 1997 Ford F 150 New Door Speaker Screwed In Place
9. The new terminals were plugged into the speaker, and the new speaker was screwed into place.
| 1997 Ford F 150 Door Panel Being Put Back In
10. Finally, the door panel was returned to the door and everything was buttoned up. The process was repeated on the passenger door.
| 1997 Ford F 150 Rear Passenger Door Panel Removed
11. On the passenger rear door, the panel was removed relatively easily and the speaker likewise.
| 1997 Ford F 150 Rear Seat Back And Rear Panels Removed
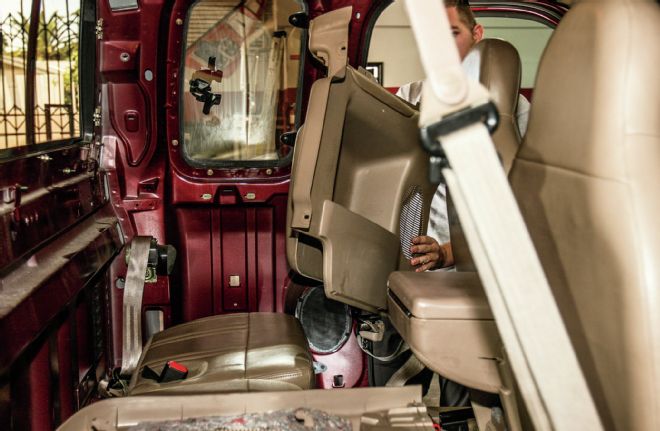
12. But remember, on the '97 F-150 there is no rear driver door. The rear seat back and all the rear panels had to be removed to get to that speaker.
| 1997 Ford F 150 Replacing Rear Drivers Side Speaker
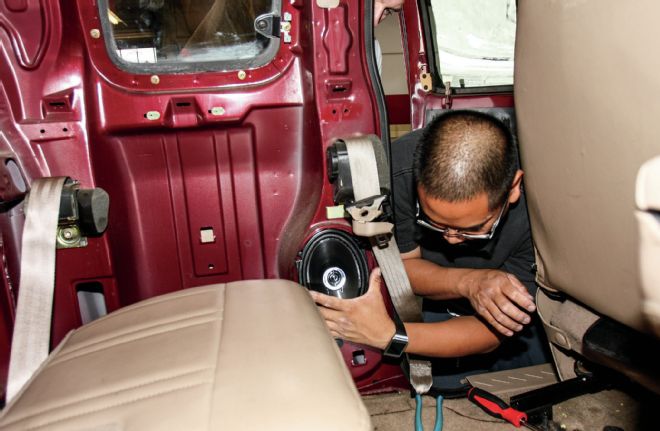
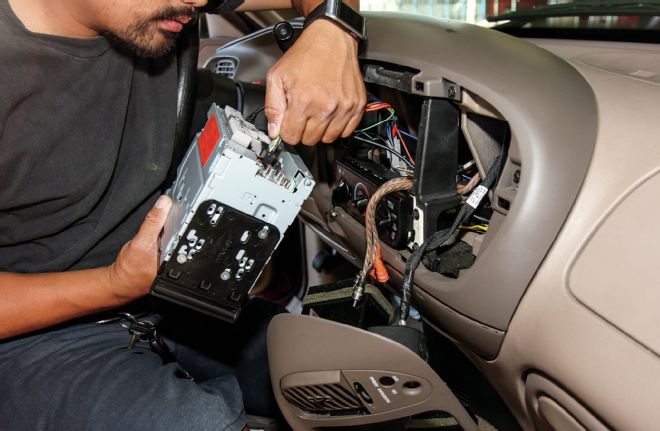
13. After the panel was out, however, the speaker was replaced in seconds.
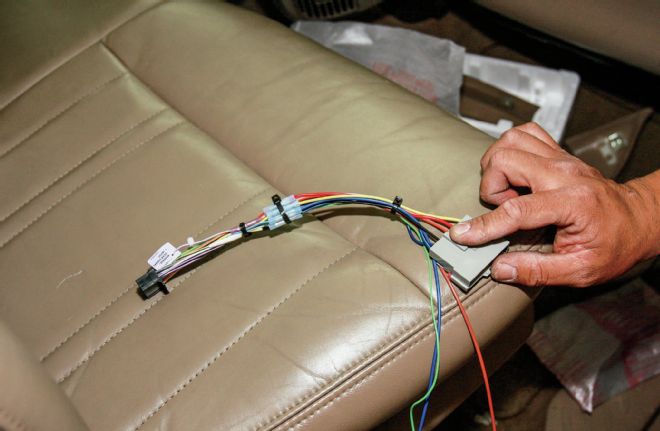
| 1997 Ford F 150 Wiring Harness
14. With the speakers replaced and the panels back on the doors, the crew at OC Autostyle prepared the wiring harness.
| 1997 Ford F 150 Beginning Connections For Pioneer Head Unit
15. As they began to make the connections for the Pioneer head unit, the crew let us know they had a trick up their sleeve.
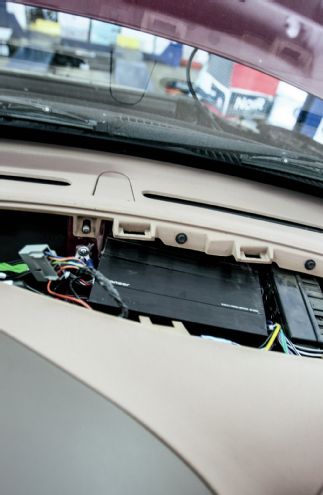
| 1997 Ford F 150 Access Panel Popped Off With Both Pioneer Amps
16. That's right; the access panel on the top of the dash was popped off to reveal space for not one, but both of the amps. The power and grounds, inputs, and speaker leads were all hooked up right there and the amps were tucked away.
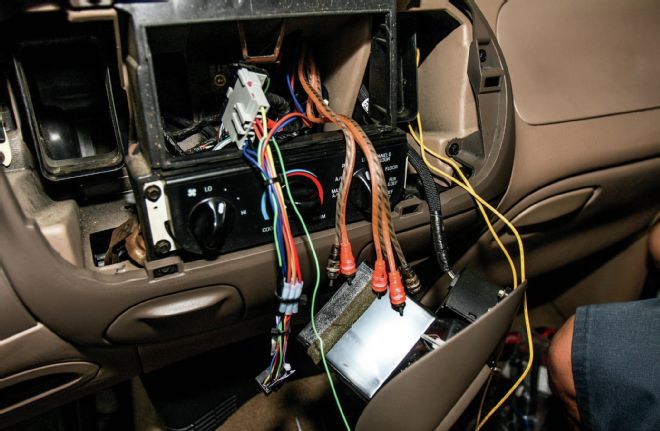
| 1997 Ford F 150 Wires Routed To Pioneer Head Unit
17. Now all the wires were routed on the head unit end, but we had some other loose ends to tie up first—pun intended.
| 1997 Ford F 150 Pioneer Usb Connector Routed To Glove Box
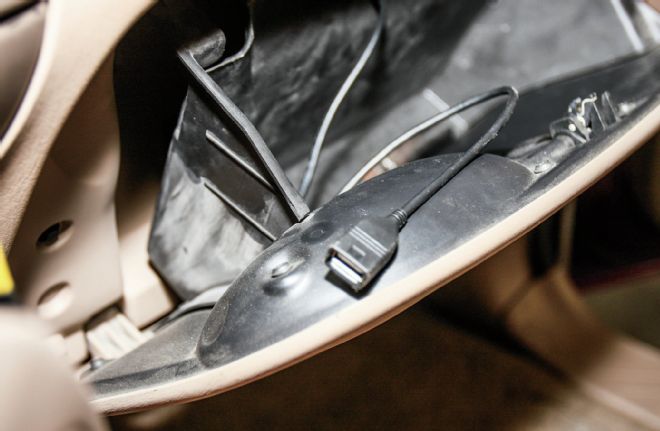
18. The USB connector was routed to the glove box for easy access.
| 1997 Ford F 150 Both Amp Wires Fed In 8 Gauge Wire
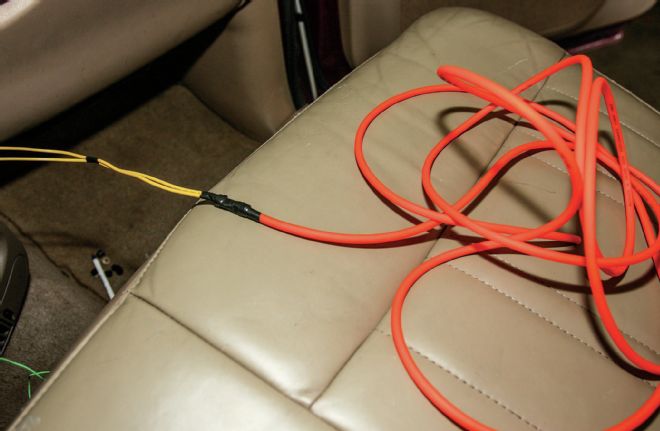
19. Both power wires from the amps were combined and a single 8-gauge wire was routed through the firewall to the battery.
| 1997 Ford F 150 8 Gauge Amp Wires Through The Firewall Routed Through The Harness
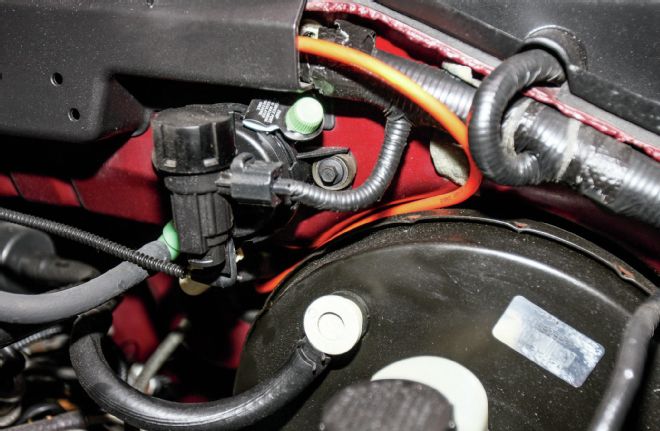
20. Once through the firewall, we routed the power wire through the harness.
| 1997 Ford F 150 Installing Optima Battery
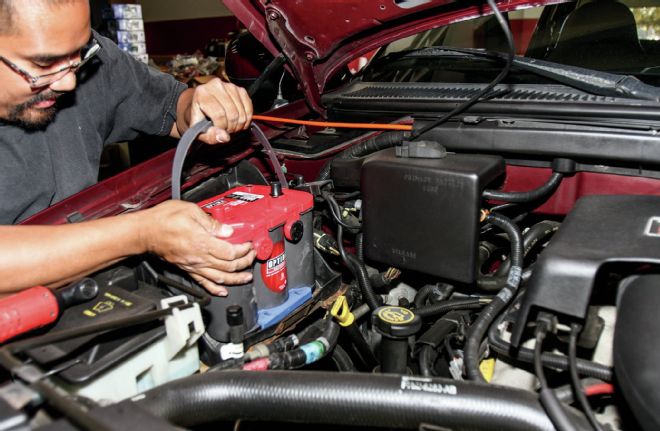
21. Before hooking up the battery, we went ahead and replaced it with an Optima RedTop. It will help with the added power requirements of the new audio system.
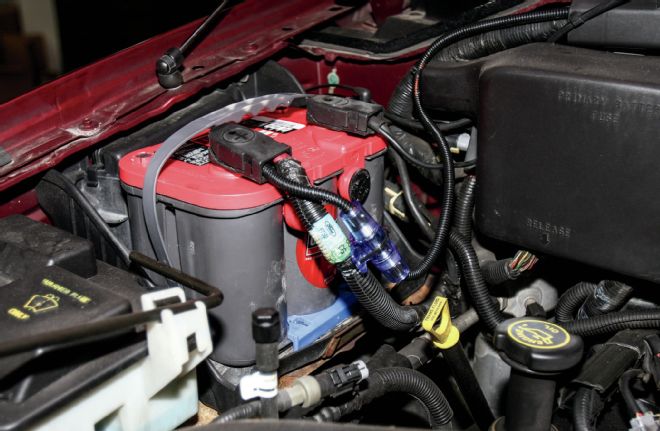
| 1997 Ford F 150 Power Wire Connected To Optima Battery
22. The power wire was set up with an inline fuse and installed along with the stock cables onto the new Optima.
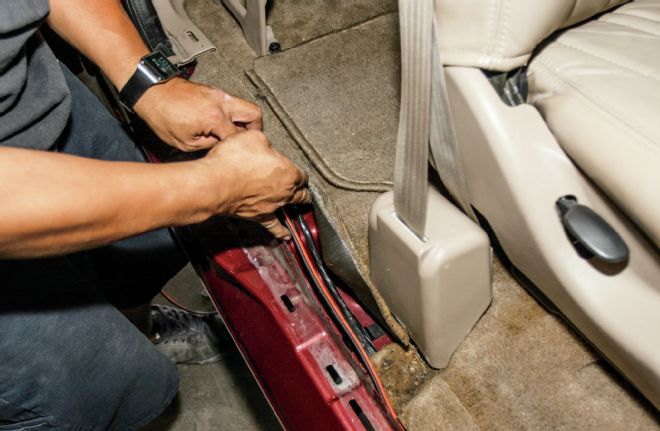
| 1997 Ford F 150 Running Sub Wire Along Doorsill
23. Meanwhile, on the other side of the firewall, the sub wire was run along the doorsill to reach the 10-inch sub and enclosure.
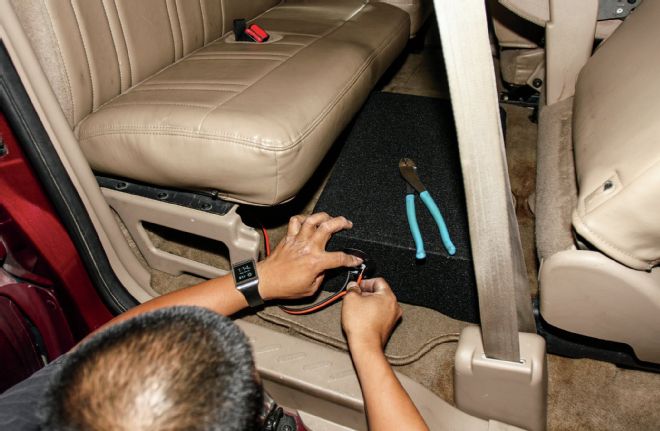
| 1997 Ford F 150 Pioneer Sub Woofer Hooked Up And Slid In Place
24. Now the sub was hooked up and slid into place under the rear passenger seat.
| 1997 Ford F 150 Everything Plugged In
25. We were in the home stretch but we still had to test the system before the final installation. With everything plugged in we gave it a shot and were golden.
| 1997 Ford F 150 Marks For Cutting To Fit
26. Our friends at Pioneer warned that we would need to do a bit of trimming for the double-DIN on this body style Ford. We made some marks, got out the Sawzall, and made our relief cuts.
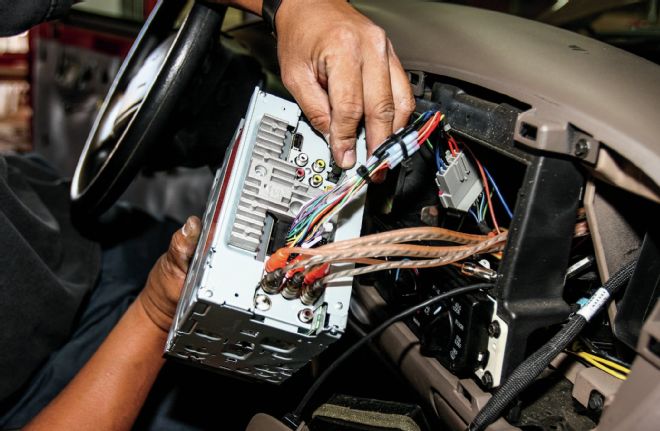
| 1997 Ford F 150 Connecting Pioneer Head Unit
27. The rest of the install kit was installed onto the head unit and the connections were made one final time.
| 1997 Ford F 150 Finished Pioneer Audio System
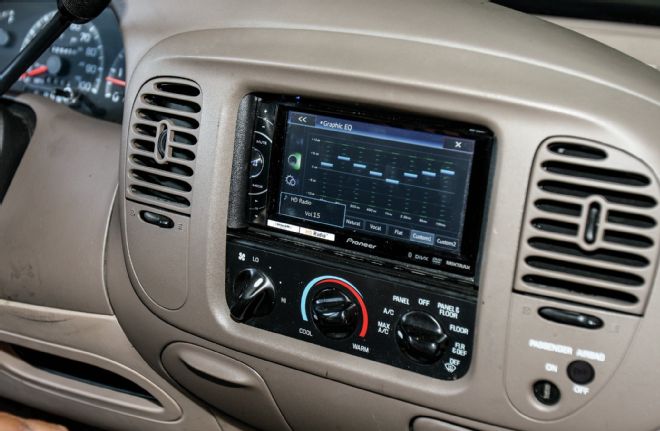
28. Finally, we powered up and began to make all the adjustments. OC Autostyle made quick work of the tuning, having worked with these components many times in the past. Soon we were cranking the sound, and we were seriously impressed with the quality we got for the relatively small investment. Listening to Pandora through Bluetooth couldn't be easier. Best of all was the level of bass we got from the mini amp and shallow 10-inch sub. Suddenly, driving our old project Ford got a lot more fun.