Many automobile enthusiasts, particularly those who love performance, look for ways to increase the power in their vehicles. With the help of automotive components like Garrett turbochargers, auto buffs can increase the power produced by their ride. Turbos work by compressing air before it enters the motor's combustion chambers, allowing more air and fuel to be efficiently consumed by a vehicle than would be possible without a turbocharger. To repair or upgrade turbo components, you might need to disassemble your Garrett turbocharger at some point.
Loosen the two half-inch bolts connecting the waste gate elbow to the turbo housing using a half-inch socket and ratchet combination. Remove the waste gate elbow from the assembly and set it aside.
Loosen all of the bolts holding the turbine housing together using the appropriate size wrench. Remove all of the turbine housing bolts, with the exception of the two bolts located at the top and bottom of the housing.
Rotate the turbine housing bolts left in place 1/4 turn at a time until they reach the center section of the housing. Slowly continue to turn the bolts in 1/4 revolutions, one at a time, to gently push the turbine housing away from the center section. After each turn, attempt to spin the turbo compressor wheel. If the wheel seems to bind, turn the bolts in the opposite direction and try again until the housing and bolts are being pushed at a parallel angle to the compressor wheel.
Remove the bolts securing the compressor housing in place. Detach the metal retainers and pull the compressor housing off of the turbocharger assembly. Mark the alignment of the compressor wheel and turbine wheel after the housing has been removed to aid in reassembly of the turbo.
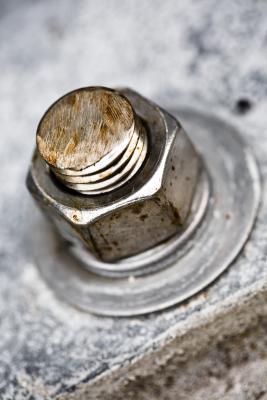
Place the appropriate size socket onto the turbine wheel nut, located in the center of the wheel, and carefully remove the nut. Pull the compressor wheel off of its spindle once the nut has been removed. Remove the turbine wheel and turbine shaft from the turbocharger assembly.
Remove the bolts that hold the compressor seal plate in place using the appropriate size socket and ratchet combination for your specific turbo. Take out the compressor seal plate once the bolts are removed.
Insert snap ring pliers under the snap rings holding the turbine shaft bearings in place on either side of the turbo. Remove the snap rings and tilt the turbo to encourage the bearings to slide out of the turbocharger assembly.