You don't need to be auto-savvy to know that you need to go to the engine to change the engine air filter. The cabin air filter, on the other hand, is a little more ambiguous, and not every driver will think to look behind the glove box. It will take disassembling to reach. However, if you have a screwdriver and a replacement filter, you can do this job in less time than it would take you to drive to the mechanic's garage.
Remove the front sash trim on the passenger's side, which is the molded plastic panel on the right side of the dashboard assembly. This panel is just held in place with plastic snaps, so you can remove it by gently lifting up and toward your body.
Look for a plastic nut and bolt assembly underneath where the sash trim was. Remove the plastic nut by hand, then pull off the plastic kick panel, which was held in place by the nut.
Get down on the floor of the passenger side and look at the bottom of the glove box. You will need to remove the panel directly beneath the glove box, which can be done by hand. Grab the side closest to the front and gently pull it straight down. That side will come loose and swing down toward the floor of the car, after which you can pull it completely off.
Stay on the floor and remove the two Phillips head screws on either side of the lower edge of the glove box.
Open the glove box and take everything out. Then remove the four Phillips screws along the top front edge of the glove box.
Remove the latch at the top of the glove box assembly by taking out the two screws on either side.
Pull the entire glove box assembly toward you and let it dangle down.
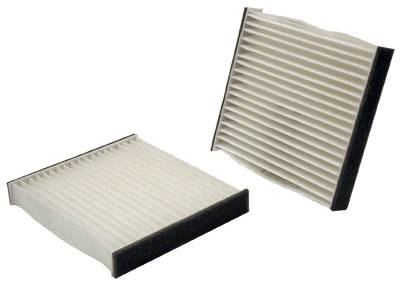
Look through the glove box cavity and find the filter compartment on the right side. It will be a plastic case about the size of your replacement filter.
Remove the front panel of the compartment and pull the dirty filter out.
Put the new filter in, making sure the arrow on the edge of the new filter is facing you and pointing up.
Replace the front panel on the compartment.
Screw the glove box latch and its original screws back into the top center of the glove box assembly.
Lift the glove box assembly back up and put it in its original position. You'll have to support it with one hand while you reinstall one of the top screws. But then you can let it go while you replace the other three top screws and the two bottom screws.
Replace the bottom panel of the glove box by pushing the back of the panel into the slot at the back of the glove box assembly. Then lift the front side up and push up firmly until it snaps into place.
Put the plastic kick panel back on, sliding the hole in the panel over the exposed plastic bolt. Tighten down the plastic nut by hand.
Put the plastic sash cover back into place and press it firmly onto the rest of the dash. The plastic clips that hold it on will click audibly when they attach.
Put everything back into the glove box.