Chrysler's 440 was always known as a cheap route to making respectable street power. In the days of old, the 440 cars were really something special, and a modified 440 car was just that much more formidable. If you didn't get a factory 440, the 440 was readily available for swapping in more power. After all, any of the popular Mopar bodies would accept 440 power, and because 440 engines were common in applications like C-Body cars, trucks, and motor homes, the 440's greatness was just a simple swap away. Maybe you were lucky enough to get a 440 out of a '70 'Cuda, or even a Six-Pack motor from a Road Runner, which would've represented the pinnacle of street cred back in the day. The fact was, any 440 would give you the oats, especially if it was going to be used as the basis of a custom build.
Any 440 block has the potential of a legend. While decades ago the goal was to find a factory high-performance version of the 440, these days we pretty much have to build our own high-performance big-blocks. Fortunately, all of these blocks were created pretty much equal, meaning your performance build will be no better off starting with a factory A12 piece than a late '70s truck block. Unlike many other noted performance engines, the Mopar 440 had the makings of a serious performer no matter what the original application. There are a few minor variations on 440 blocks, with the most notable being the extra reinforcing ribs added to the blocks in 1969, and the introduction of a cast crank in 1973. Even with those early and late shortcomings, the 440 can be the basis of a stout performer.
Our Build
We've built quite a few hot variations of the production 440 over the years, but changes in the marketplace have changed the potential of Mopar's big-block. In the pages of Mopar Muscle more than 20 years ago, we put together a 440 with highly modified factory 906 heads and put down 666 hp. That was a high-compression roller cam engine, but it redefined what could be achieved with production castings. We are not sure if that power benchmark has ever been exceeded with factory heads, but we know aftermarket cylinder head technology has moved up significantly since then. We put together a much less developed 440 combo several years later using Indy heads, and made 655 hp with Max Wedge–style ports and much more conservative cam timing. That engine was built on a well-used short-block with a couple thou of taper and ancient TRW 2295 short-domed pistons. This time around, we wanted to start with a fresh block, and pump up the compression ratio to see what a hot 440 can do with today's parts on race gas.
The foundation of this build is a '70 440 block, a casting that had already been bored 0.040-inch over. The engine was actually a junkyard find, and when we tore it down it turned out to be a remanufactured engine already bored 0.040-inch over. We thought it was a sweet score on a freshly machined block with virtually no wear showing, but upon full disassembly we found one of the pressed pins had let go and seriously scored the No. 5 cylinder. The cure was to sleeve the savaged bore and open the block to 0.060-inch over. In addition to the sleeve repair, the block was square decked and line hone as part of the typical machine shop full block prep process. The factory forged crank was already 0.010/0.010-under, so we had to have it ground to 0.020/0.020.
With the block and crank dialed in, the question was how to fill it. We already had a number of flat-top 440 engines with compression ratios in the 10-11:1 range. The idea here was to turn up the squeeze to make some serious power. The high-dome Arias pistons we selected deliver 13.5:1 compression with a 78cc head. To go along with the high compression, we figured this engine would see high rpm. The factory LY rods are proven pieces up to a point, but looking at spinning this engine to 7,000-plus rpm, an upgrade seemed advisable. RPM International rods with ARP 2000 fasters would definitely handle more rpm and power than the stock rods. We can remember plenty of big-block Mopars in the wrecker's scrap pile with the side of the block blown out by a thrown rod. We were hoping this wasn't going to turn out to be another one of them.
Summery
So, what do we have? We are starting with a junkyard block not any better than any other 440 you may find out there. We went 0.060-over, not out of greed for bore size, but because it needed it. We had a factory forged crank, a unit that was good to go with another re-grind. So far we are looking at no more cost than a pure stock overhaul, plus the cost of running high-octane race fuel or E85. Where we are stepping it up is a set of high-dome pistons from Arias. Those are going to give us the pop to make power. To hedge against blowing it all up, we are going with the RPM International rods and adding the Chenoweth girdle. These components should keep the bottom end together. Our big COMP Cams solid flat-tappet cam will call out the power potential, and it will be up to the top end combination we add in the next update to turn the cam and compression into serious horsepower.
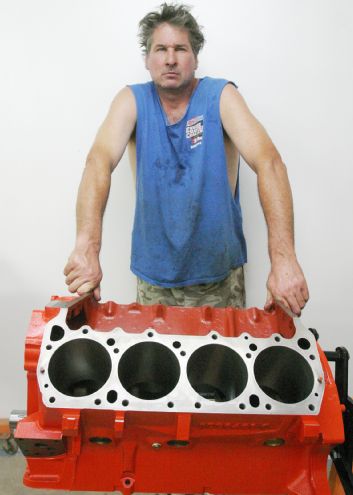
01 Author Steve Dulcich channels his inner hooligan "tough guy" for the camera, but the only thing readers need to worry about is the power lurking within that 440 block.
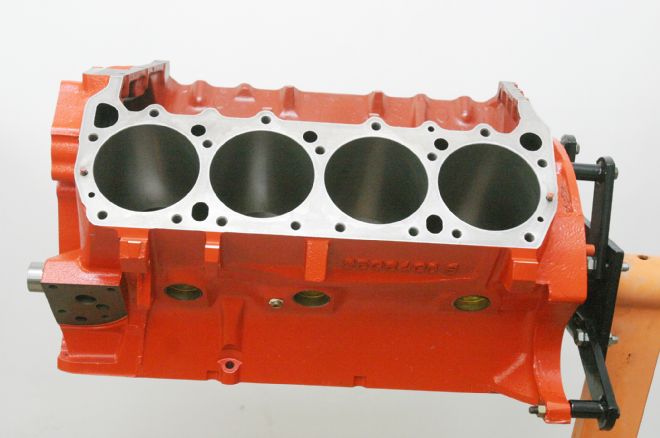
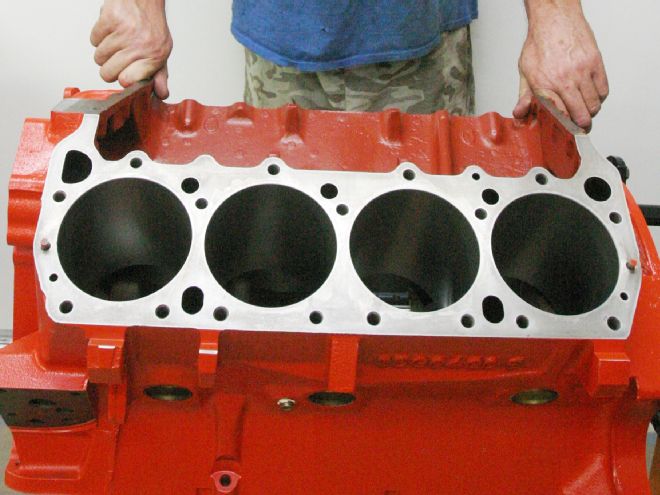
02 Our starting point is a 440 "F" block, denoting an engine built for the 1970 model year. The block had previously been built by a mass remanufacturer, and the bores measured 0.040-inch over. We had the block bored to 0.060-inch over, squared decked, line honed with cam bearings, and freeze plugs installed. This is basically the full block prep package from most machine shops.
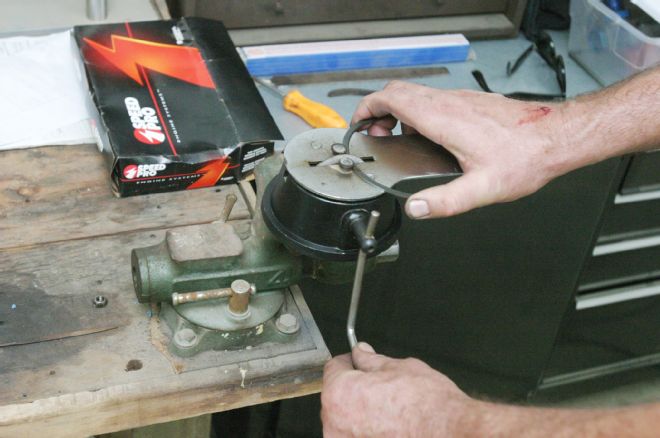
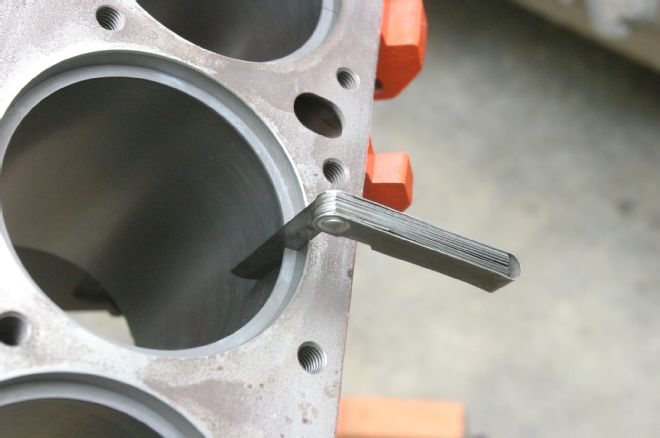
03 Our Arias pistons were manufactured to accept the common 1/16-, 1/16-, 3/16-inch ring package. We went with the proven SpeedPro plasma moly ring set. Step one was the tedious process of file-fitting the rings. We used a hand-crank ring filer from Summit Racing, taking the end gap down a little at a time.
04 An inverted flat-top piston with the top ring installed as a stop makes a handy piston squaring tool. If the ring is not square in the cylinder, the measured gap will not be accurate.
05 We set the top ring gap to 0.020 inch, while the second ring was set to 0.024. The wider second gap follows current theory, helping with top ring seal and helping the second ring control oil.
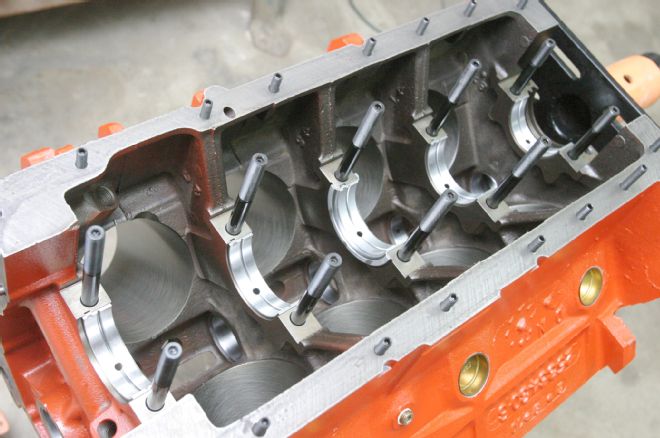
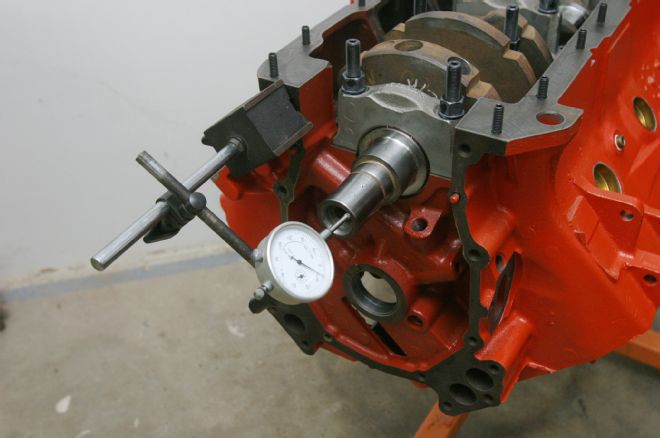
06 The bottom end build starts with crank installation, in this case a factory forged steel unit ground 0.020/0.020-under on the rod and main journals. Before the crank goes in, all of the journals and the bearing bores are measured to determine the bearing clearance.
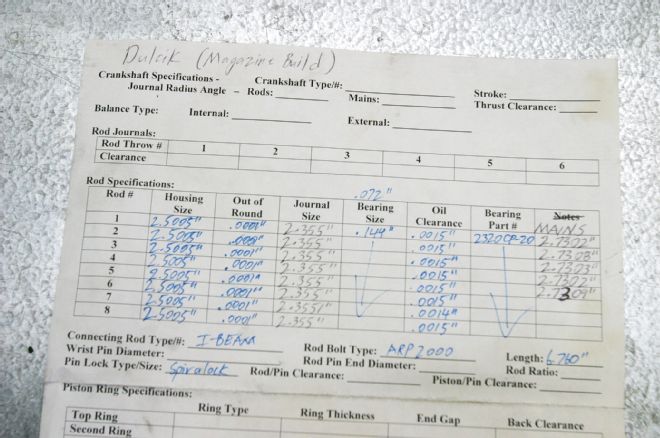
07 Measurements taken at the journals and at the bearings are recorded on a worksheet, and the bearing clearance is calculated.
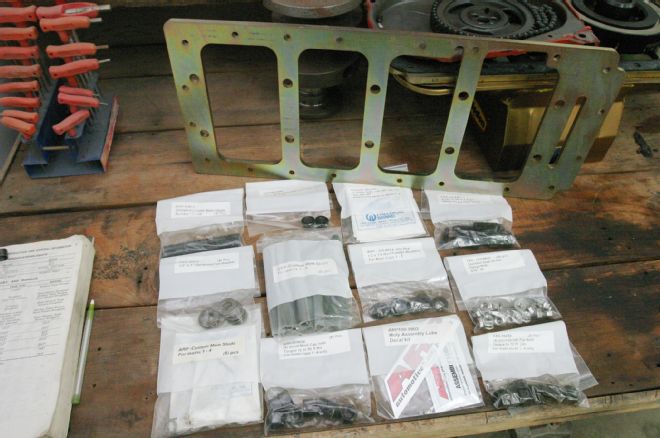
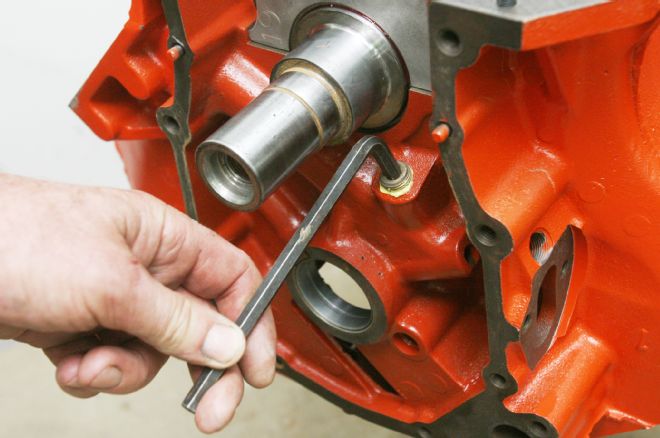
08 Our crank installation was more complex than a normal rebuild, since we were adding a main girdle from Chenoweth Enterprises. The girdle kit came with excellent instructions and all of the hardware was well organized in separate Ziploc bags.

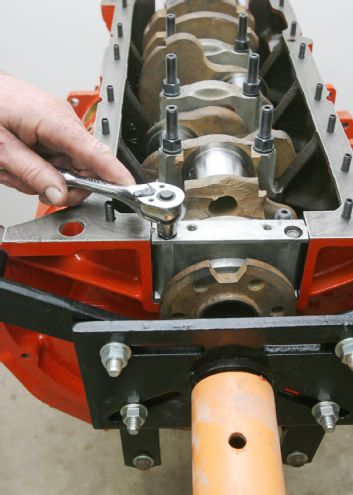
09 To prepare for the crank install, we began with running in the ARP studs included in the girdle kit. Our technique here is to bottom the studs hard, and then back them off half a turn before seating the main caps, otherwise the studs will angle off depending upon where the threads seat.
10 At a dimension of 0.020-undersize, bearing selection for this big-block Mopar gets limited. We used a set of Sealed Power mains, number 4924 MA 20 main bearings.
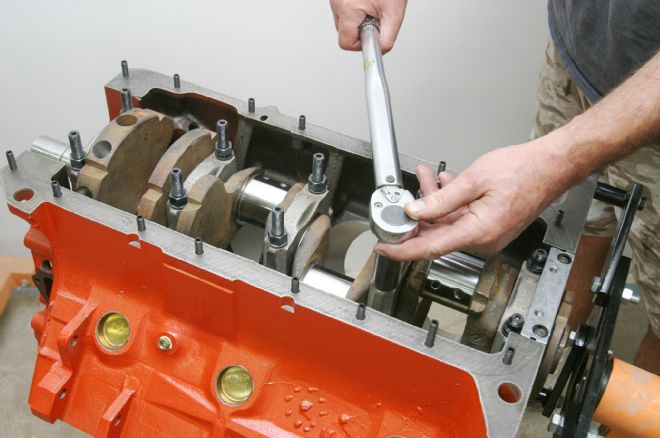
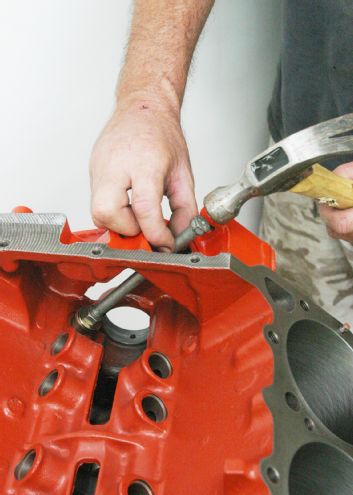
11 We carefully lowered the crank into position, and ran the main cap nuts down to seat the caps. Once the caps were seated, the nuts were backed off and the studs were fully bottomed. After this process, the mains were torqued to 95 ft-lb.
Tips For Proper Rear Main Sealing
To properly seal the rear main of a 440 wedge, we use the factory seal retainer and the standard rubber Fel-Pro rear lip seal from our FelPro #2716 RACE gasket kit. The first rule here is to have a perfectly clean surface anywhere a sealant is to be used. Our preference is to use Permetex Aviation #2 non-hardening sealer under the seal at both the block and the retainer. The same sealant is used on the seal retainer's fastener threads, and at the base of the retainer where it meets the block. This prevents oil seepage. We prefer the OEM-style packing strips to seal the sides of the retainer, since these help center and align the lower seal assembly. The side packings are installed with silicone at the retainer and the block, and are positioned to hang below the parting line, so they bottom out before the retainer is flush, forcing a tight fit. These techniques will seal a big-block rear main perfectly in most cases, unless the block has severe machining flaws.
01 Set the thrust bearing by loosening the thrust bearing cap and then running the fasteners down to just seated. Strike the nose of the crank with a heavy mallet, and then repeat the process at the crank's rear flange. This will align the bearing halves at the rear thrust surface of the crank. Use a prying tool to load the crank to the forward extreme of thrust and tighten the main cap to specs.
02 Big-block Mopars have oil gallery plugs at the front and rear of the block. You will find two under the front cover, one at the rear, plus the external plugs at the fuel pump pushrod and rear top of the block. These should all be inspected, then sealed.
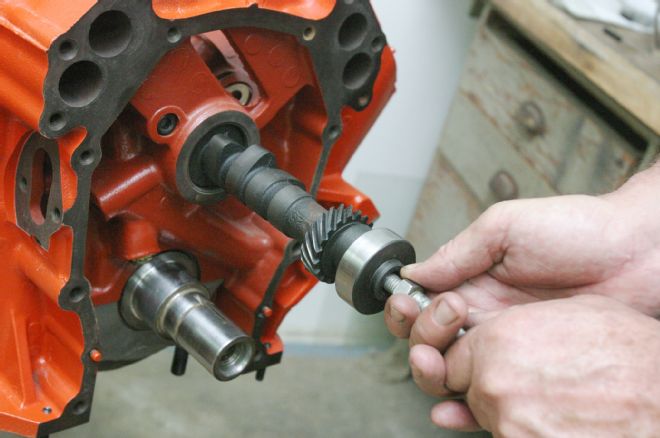
03 The distributor drive gear rides in a bronze bushing. The factory replacement bushing required burnishing to size after installation, however, rebuilder replacement bushings are pre-sized. A simple bushing driver tool can be fashioned from a long 7/16-inch bolt and nut, with a few winds of masking tape to protect the bushing ID.

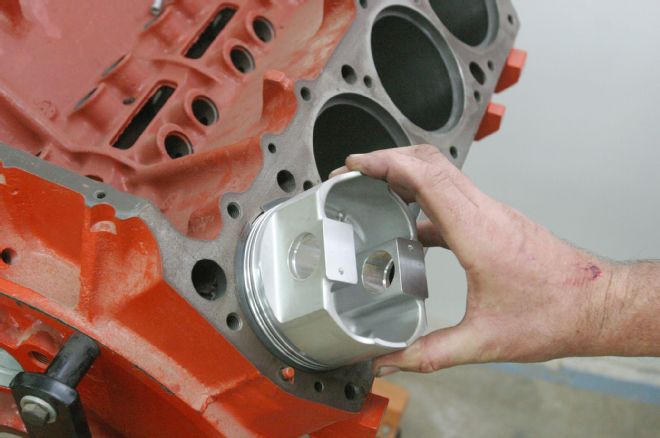
04 Hanging from the crank is a combination of Arias high-dome forged pistons and RPM International I-beam rods. The rods measure the stock 6.760-inch length, and feature factory-sized big-end bores and bushed stock-sized pin bores.
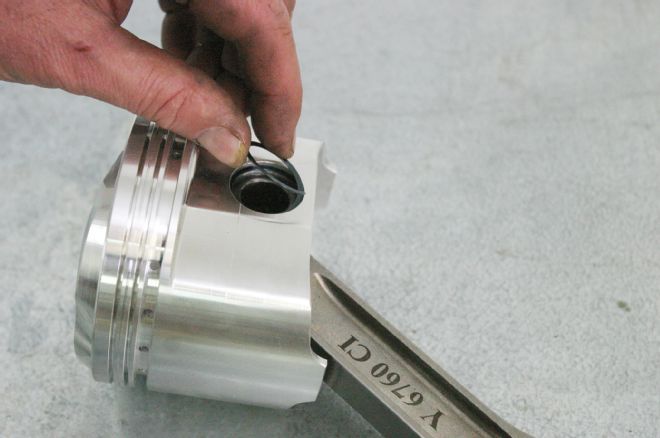
05 The pistons mate to the rods using spirolox retainers. We install these by stretching the lox and working them into the grooves by hand. Attention to the orientation of the parts is critical, making sure the piston is correctly oriented in the cylinder with the valve notches matching the valves, and the chamfer of the rod facing the cheek of the crank journal.
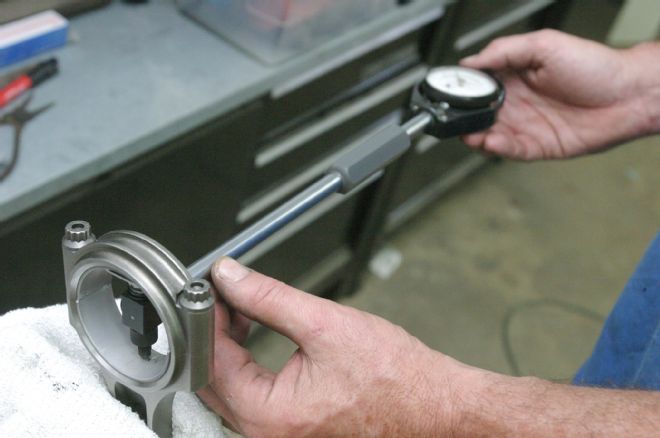
06 Rod bearings are also from Sealed Power, number 8-2320CP 20, again in the 0.020-inch under dimension. As with the mains, the rod bearing bore is measured with a dial bore gauge and compared to the journal diameter to determine the bearing clearance.
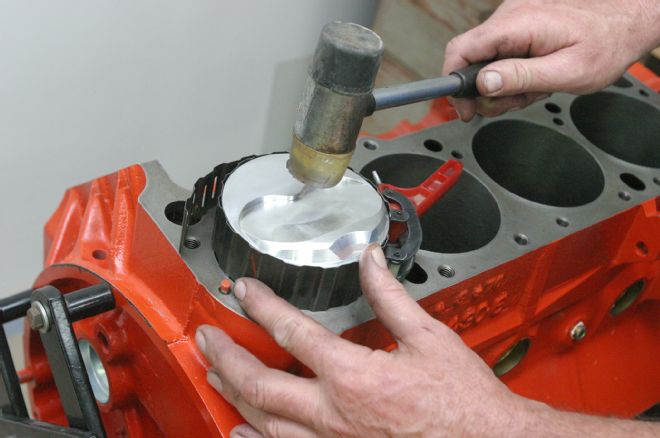
07 To prep for piston installation, the bores were given a wipe of clean oil, while the pistons were given a spray of WD-40 on the rings, and motor oil on the skirts and pins. The pistons were installed using a cam-lock ring compressor.
08 We went with a hot COMP custom solid-lifter cam, measuring 263/267-degrees at 0.050, ground on their 0.904-inch MM-series lobe profiles. The solid-lifter cam offers a good balance of power and rpm versus its cost.
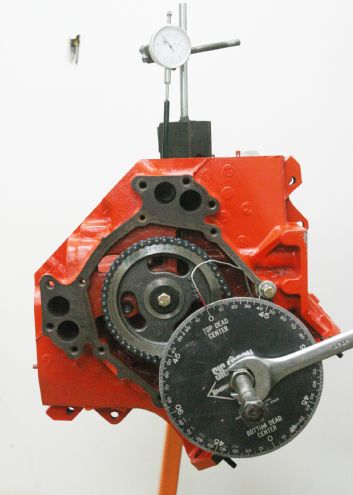
09 The cam was ground on a lobe separation angle of 110 degrees. We degreed the cam to an installed intake centerline of 104 degrees.