Nothing sounds more badass than a rowdy V-8 rumbling through a killer, dual exhaust system. There’s a method to getting just the right formula dialed in to couple the needs for performance with that of just the right tonal quality pushing through your pipes. Miss your mark and you won’t just lose out on sound, but you could compromise performance and wind up getting to the party empty-handed. Designing an exhaust to meet your needs is far more involved than simply bolting in some pipes and mufflers. Doing it right means evaluating your needs so your hop-up can maximize its true horsepower potential.
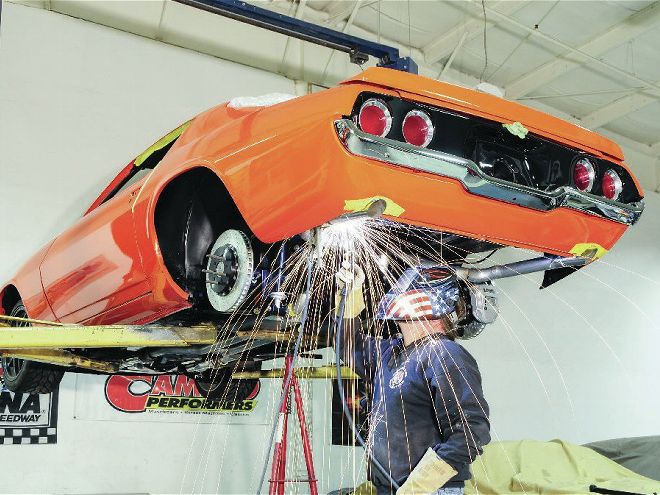
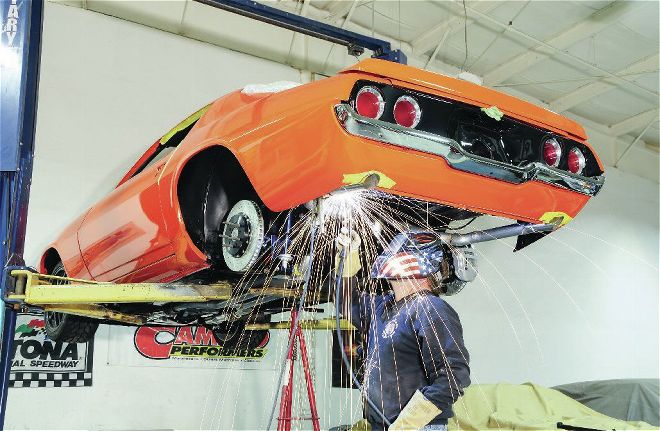
When looking into our stroked LS3-powered ’71 Camaro, we have a car bent on performance to be able to leap through its gears while racing on a road course, carving the cones at autocross, blasting off the line, or heading out for ice cream with the kids. With that in mind, it was time for Peter Newell at Competition Specialties in Walpole, Massachusetts, to set plans and parts in place for an exhaust system to mirror the car’s needs.
Getting started, we placed a call to Lemons Headers for a set of their expertly crafted handmade headers, designed specifically for our car, engine, and suspension combination. These ceramic-coated headers offer excellent flow, ample ground clearance, and ease of spark plug changes. For a rock-solid base to design our system from we contacted Flowmaster Mufflers for their American Thunder complete header-back dual exhaust system kit (PN 17149, $580) designed for ’70- 74 Camaro and Firebird V-8 installations. Constructed of 2 1/2-inch, 16-gauge aluminized steel tubing, the pipes are completely mandrel bent, and the kit includes their signature mufflers and all related parts for complete assembly. Designed to work with a variety of aftermarket headers, it was a snap to measure, cut, and fit the connector pipes to the H-pipe, which links to the new mufflers.
Having updated the car with a Detroit Speed QUADRALink rear suspension, the tailpipe sections would need to be custom fit. A call to Summit for some 2 1/2-inch aluminized steel 90-degree bends (PN SUM-670176, $20 ea.) gave us everything needed to get the job done.
To anchor the system in place, since many of the factory mounting points were unusable, we selected Stainless Works Trick Hangers. Their fresh design elements and ability to be welded to the system in any configuration was just what we needed.
Once Newell completed the fabrication and installation of the system, it was time to prepare it for longevity as well as killer good looks. There are a number of options available, from painting your system to ceramic coatings and powdercoating. For our purposes, we decided to go old-school by painting the exhaust, which is something you can do at home to save some time and additional expenses.
The completed exhaust fits the car perfectly and increases performance, is vibration-free, and sounds wicked!
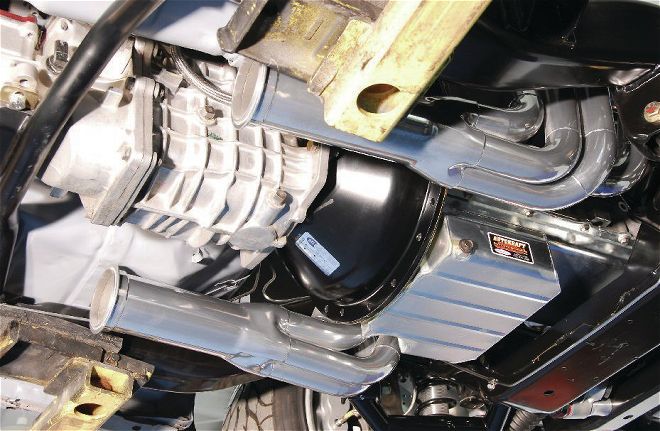
01. Flowmaster’s American Thunder 2 1/2-inch exhaust system is constructed from 16-gauge aluminized steel tubing and includes everything you see here to give you a complete header-back installation.
02. Our ’71 Camaro is running a set of superbly crafted Lemons Headers. They look killer and will up the ante in the horsepower department once the engine comes to life.
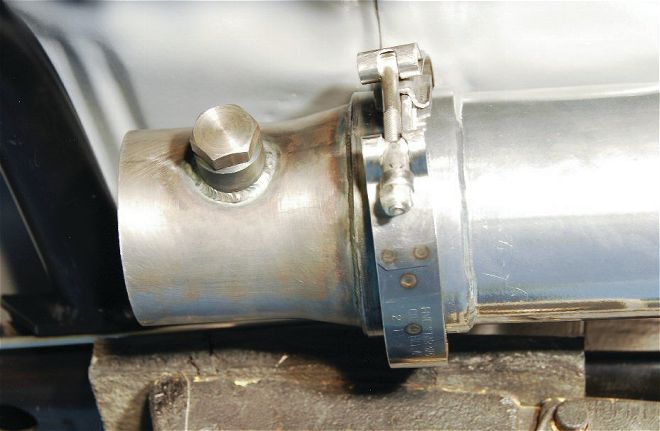
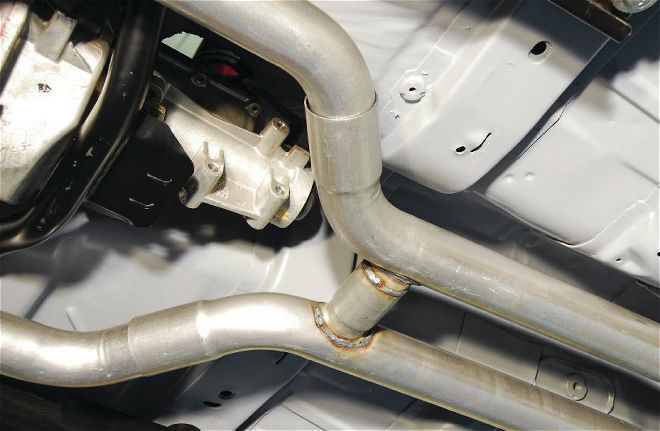
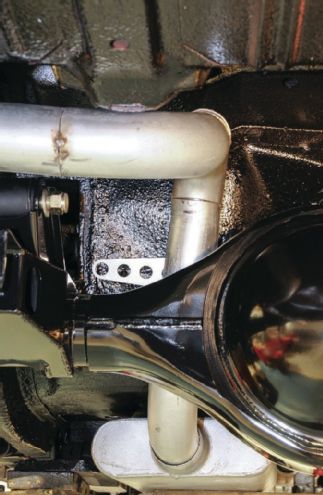
03. To create a flawless transition from the headers to the exhaust pipes, Lemons Headers provided a pair of their exclusive 2 1/2-inch collectors and V-band connection clamps. The new collector was set in place with the V-band connection clamp and secured using a 7/16-inch wrench. The bung placement for the oxygen sensor offers easy access.
04. For mock-up purposes, Competition Specialties’ Peter Newell used a combination of Vise Grips and C-clamps, with additional support from a transmission stand, to set the collector-back pipes, H-pipe, and mufflers in place. This allowed Newell to evaluate and adjust the front half of the system for a perfect fit.
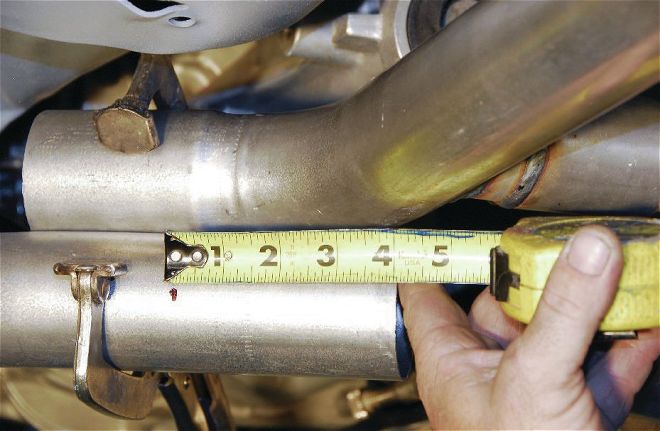
05. Since the system is adjustable to accommodate a number of header combinations, we needed to trim 4 inches from the connector pipes where it enters the H-pipe.
06. Using a cutoff saw, the connector pipes were trimmed and deburred using a small circular grinder. You can see the perfect slip-fit to the H-pipe here.
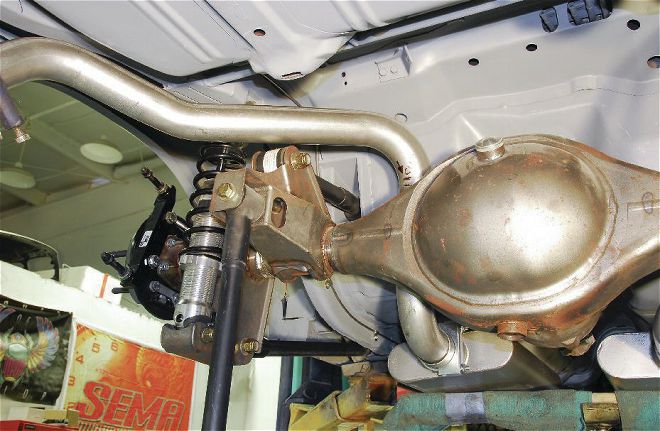
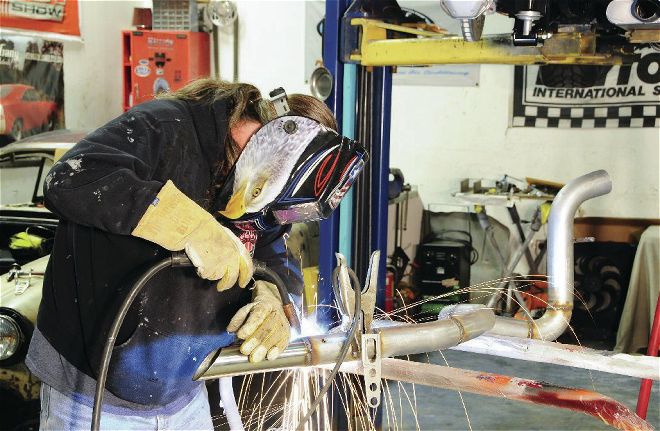
07. Since this ’71 Camaro was updated with Detroit Speed’s QUADRALink rear suspension, the tailpipe sections provided in the kit required a number of modifications to properly clear the upper arms for suspension travel.
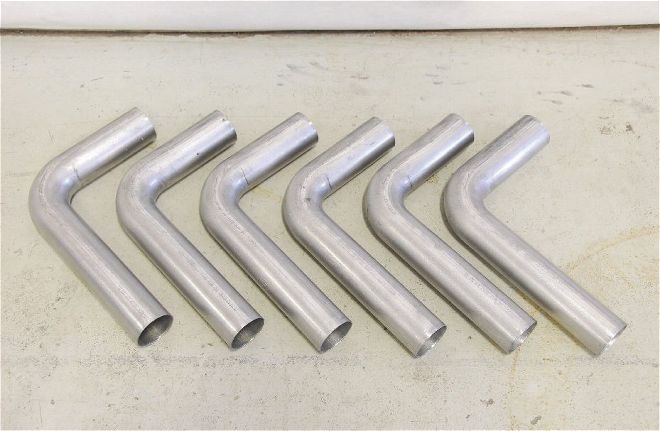
08. To create the updated rear tailpipes, we contacted Summit Racing for a number of their 2 1/2-inch aluminized steel 90-degree exhaust sections.
09. Measure twice, cut once is the best rule to live by since there are a number of transitions required to complete the tailpipe fabrication. With the sections MIG-welded together, Newell used a cutoff wheel and a disc grinder topped with 50-grit to remove the factory exhaust mounting points since the tailpipes were radically changed and would require custom mounts.
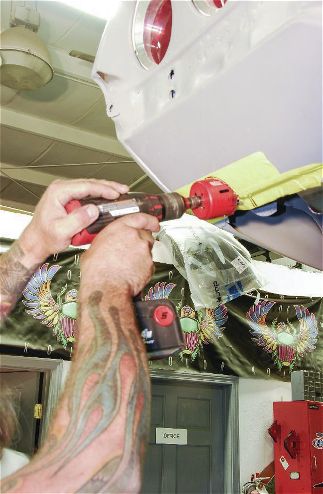
10. Newell decided to have the tailpipes exit through the lower portion of the rear valance panel for a slick look. Once measured, the area was marked and a pilot hole was drilled followed by a 2 1/2-inch hole saw to cut through the inner and outer panels.
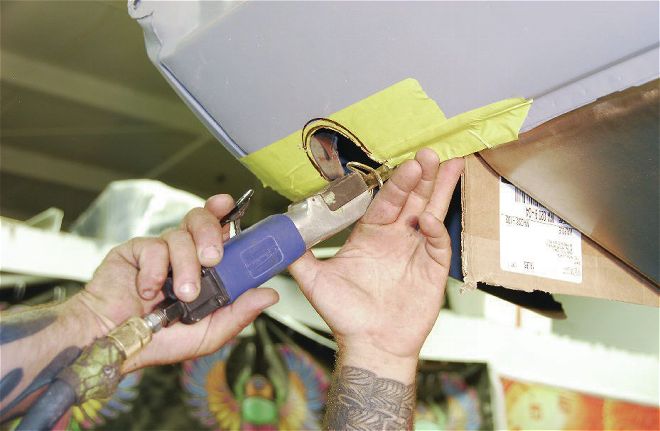
11. To finesse the opening for a perfect curve to match the tailpipe, a pneumatic hacksaw was used then followed up with a small disc-grinder to deburr the area.

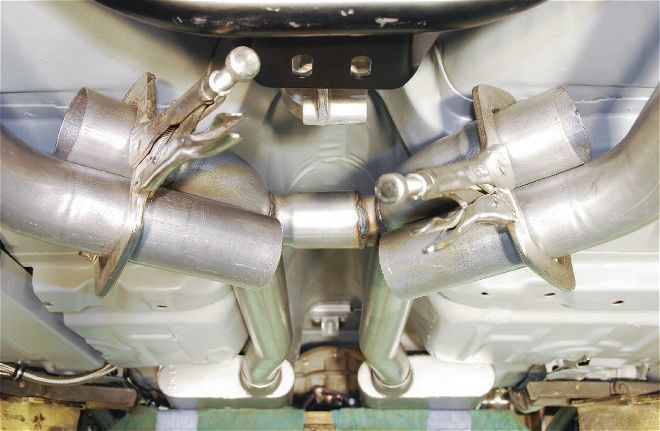
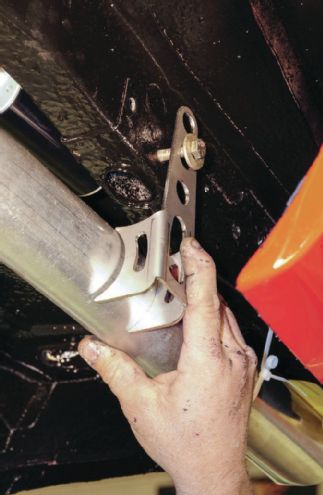
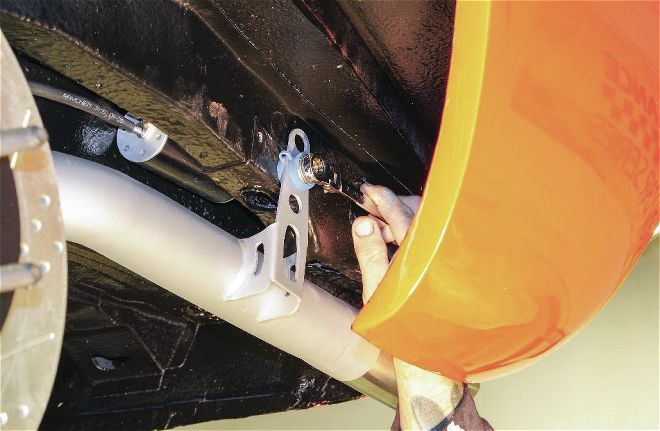
12. For our custom exhaust system, we went with Stainless Works Trick Hangers. They are made from 304 stainless steel and come in a variety of styles, each with body mount isolators for vibration-free operation.
13. To properly mount the tailpipes, Newell measured 2 1/2 inches off the rear driver-side framerail since it would be a solid base offering perfect balance. The initial mock-up worked out especially well since there was already an existing bolthole there. A 5/16-inch bolt and flat washer were used to secure it in place.
14. Once everything was aligned and ready, the hanger was then tack-welded in place. This process was then repeated on the passenger side.
15. The second pair of Stainless Works hangers were then mocked in place to be secured to the rear seat backrest area. These will work to help support the mufflers and H-pipe.
16. With the tailpipes out of the car, Newell used his MIG welder to finalize the welding on the hangers. This was also the perfect time to complete any of the remaining MIG-welding to the reworked tailpipes.
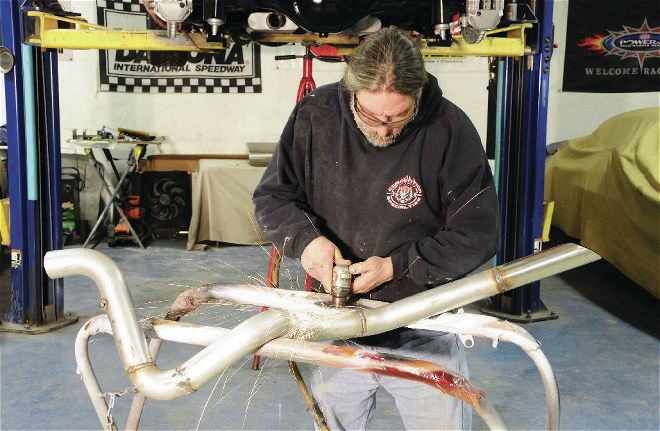
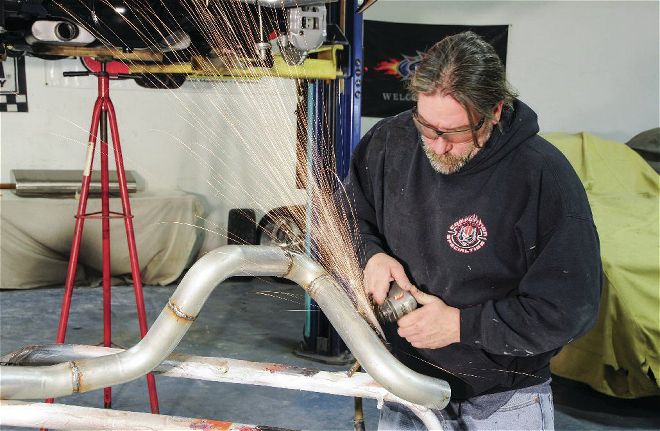
17. While wearing safety glasses, Newell continued to use a circular grinder topped with a 50-grit disc to grind all of the welds to a smooth finish.
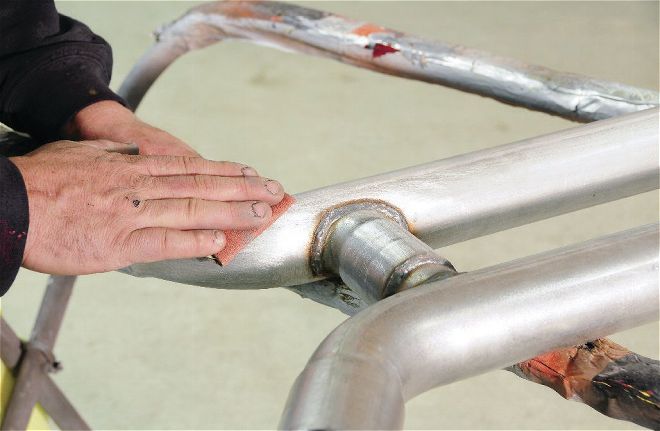
18. To prepare the exhaust for paint, all of the pipes were removed and sanded completely by hand using 80-grit sandpaper to ensure plenty of bite for the paint to adhere to.
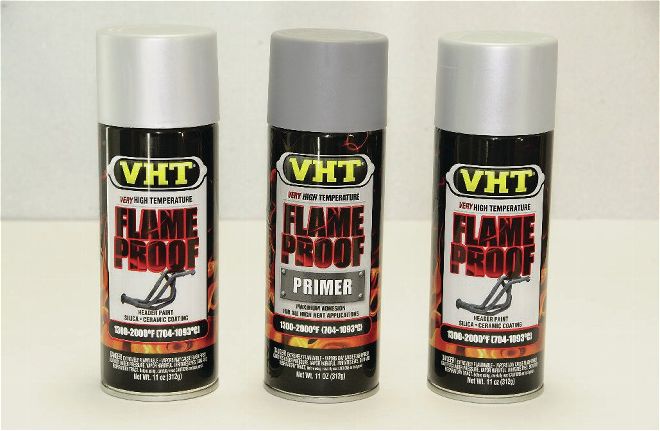
19. To protect the exhaust and give it a clean, fresh look, VHT offers their Flame Proof primer and Flame Proof topcoat. These paints are formulated where maximum adhesion and color consistency are required in high-heat (1,300-2,000 degree) environments.
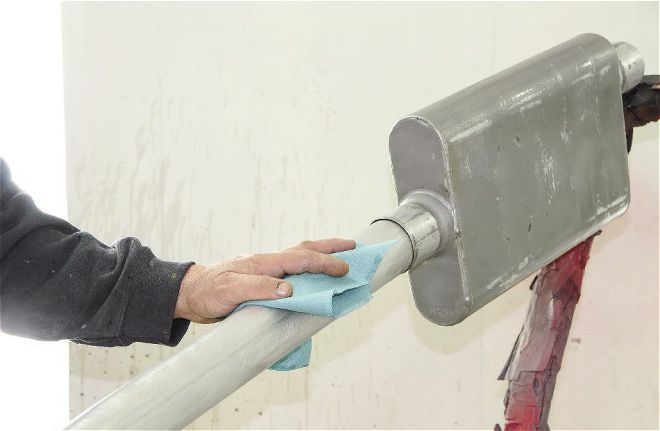
20. To remove all surface contaminants prior to painting, the exhaust was cleaned using Medallion’s aerosol Super Solv general purpose degreaser. Then a clean cloth was used to wipe down each section treated with the Super Solv spray.
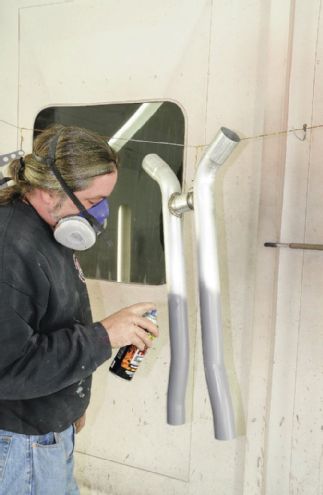
21. For a solid base, the exhaust was first sprayed using VHT’s Flame Proof Flat Gray Primer (PN SP100). This included all pipes and the mufflers.
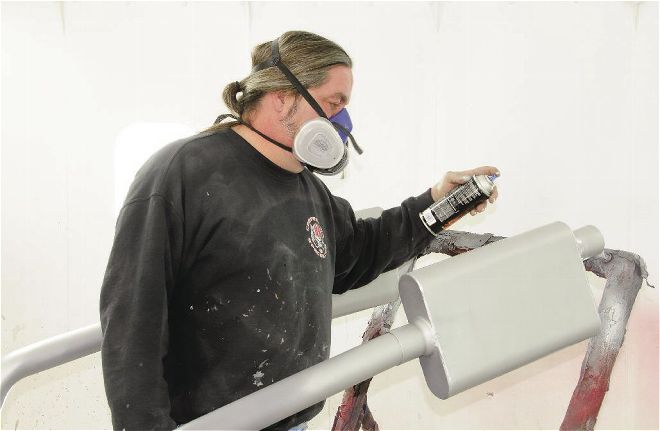
22. After sufficient drying time, a final coat of VHT Flat Aluminum (PN SP117) was applied, giving the surface a durable high-temperature coating.
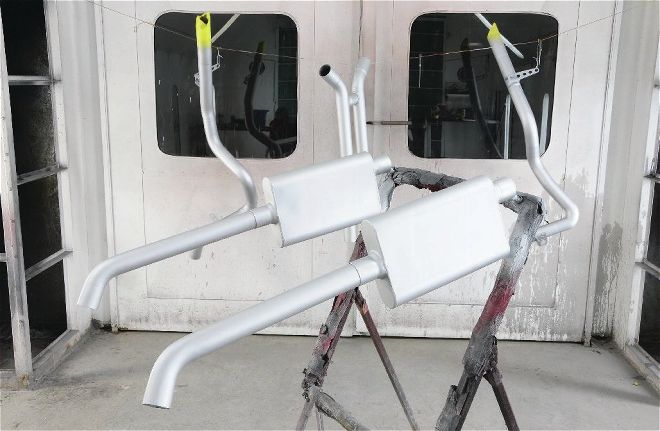
23. The completed coating to the exhaust gave it perfect protection from the hard abuse it will soon receive.
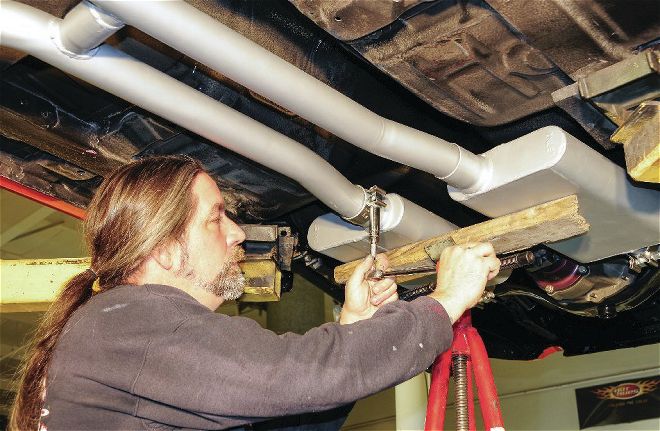
24. Newell began final assembly using AccuSeal stainless steel band-style exhaust clamps to secure the mufflers to the H-pipe using a 15mm socket.
25. The tailpipes were then secured using 5/16-inch bolts through the Stainless Works Trick Hangers.
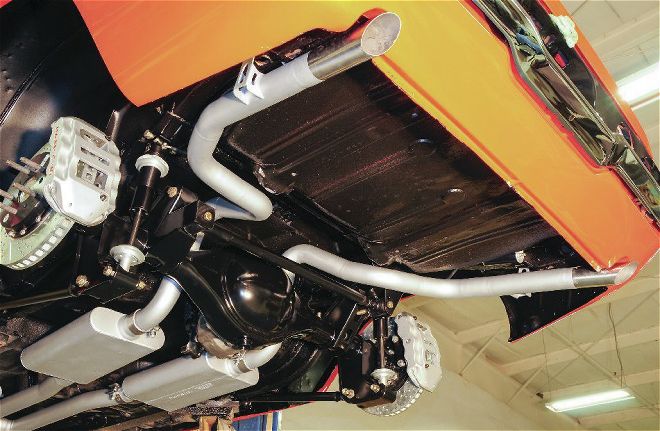
26. This shot lets you see just how nice the exhaust system came out. We’re talking exceptional fit and finish, and attention to detail thanks to the team at Competition Specialties.