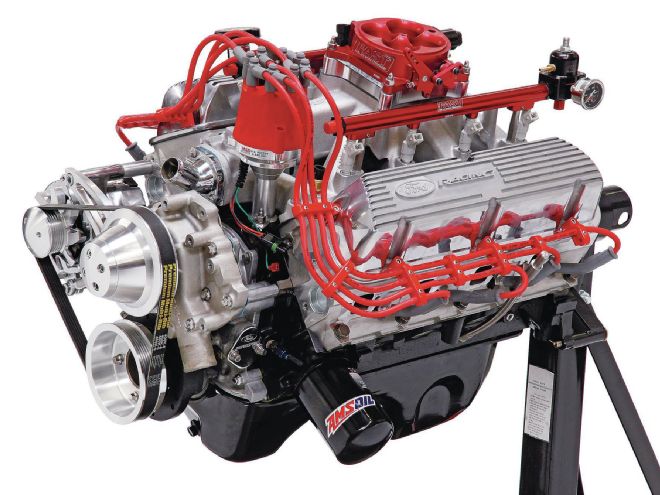
Outfitting a street rod with a muscular engine requires a fuel supply system that's up to the task of feeding it an adequate amount of fuel. In the case of our small-block Ford-powered Nostalgia Speed & Cycle Ford Model A closed-cab pickup we chose the EZ-EFI self-tuning fuel injection system from FAST (Fuel Air Spark Technology). The EZ-EFI system easily bolts onto any carbureted application in a single afternoon. We simply hooked up the system, answered a few basic "Setup Wizard" questions on the handheld unit, and the system tunes itself as you drive. Of course, before we got that far we had to choose and install the balance of the system.
Once the FAST throttle body and fuel rails were installed our attention was then focused on the throttle pedal and cable assemblies. We found a neat red-anodized throttle cable and return spring bracket from Summit Racing that went well with the red EFI components, though in order for it to work with the FAST throttle body a tiny bit of modification was in order. The actuating cable and traditionally styled throttle assembly (and brake pedal pad) were the next items in the system to be installed. The Lokar Lakester Series throttle pedal assemblies and pads are great looking traditional-style components that perform every bit as good as they look.
With the EFI and throttle component installation behind us, the next step (working front to back as we were) was the measuring, cutting, and fitting installation of the Aeromotive braided stainless fuel lines (attached to the frame with Kugel Komponents line clamps) and fittings used to plumb the fuel supply and return system. We also chose an Aeromotive in-line high-pressure 10-micron fuel filter and a Tanks GPA-Series in-tank fuel pump assembly as the heart of the system. Since no fuel system is complete without a tank, the choice of a Tanks Inc. Universal U3-series tank (which fit perfectly in the Model A's bed) was a no-brainer. Speaking of the fuel tank, we couldn't resist utilizing our pal Frank Wallic's immense metalworking talent to fabricate an awesome sheet aluminum and brass riveted fuel tank cover (to match his handiwork in the pickup's cab) as the finishing touch to a great-working and reliable fuel system to feed our beast.
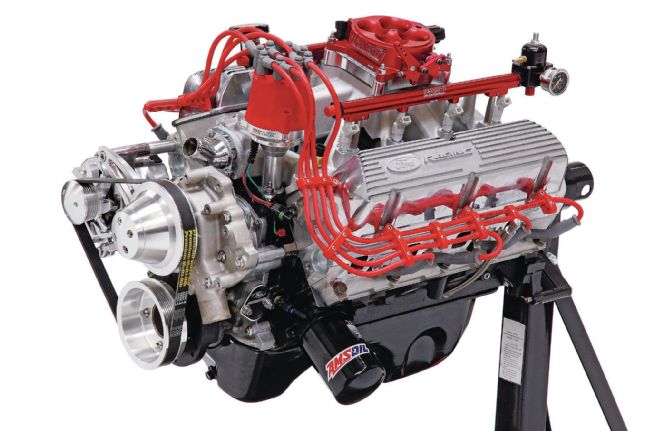
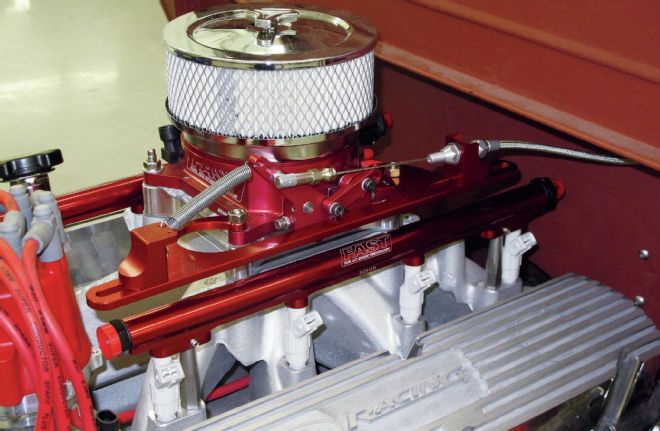
1. It takes a well-equipped fuel system to be up to the task of feeding a beast like the Ford Racing Performance small-block crate engine powering Brian Brennan's Nostalgia Speed & Cycle Model A closed-cab pickup.
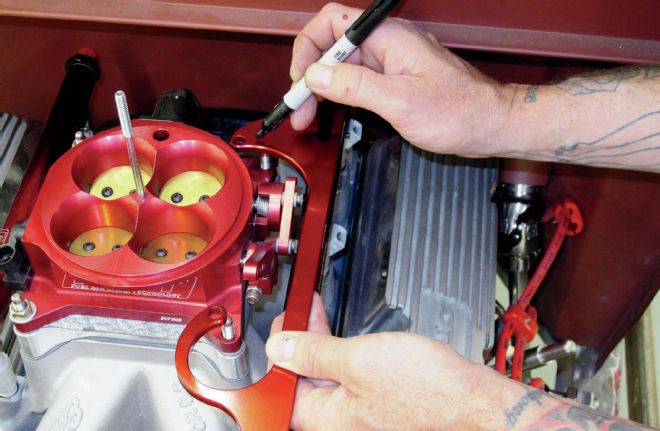
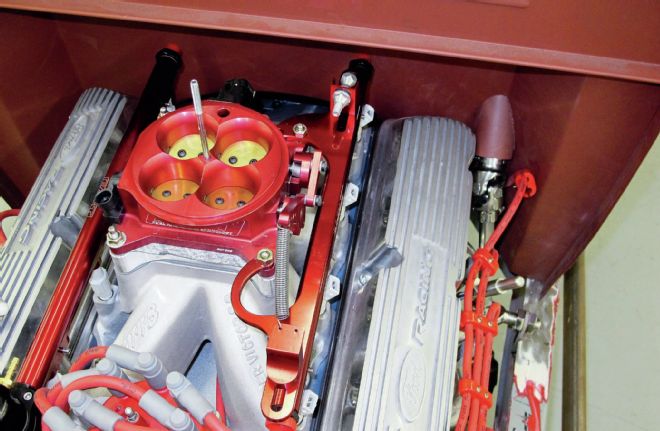
2-3. After installing our FAST EZ-EFI throttle body and fuel rails came a Summit Racing throttle cable and return spring bracket. In order for it to adapt to our throttle body it required a bit of a tweak and the addition of one mounting hole. After those minor adjustments it fit the throttle body perfectly.
4. Next we made our way inside the cab and located and installed the Lokar Lakester Series throttle pedal assembly.

5-6. Once the pedal assembly was installed the cable and casing were measured and attached to both the pedal and throttle body.
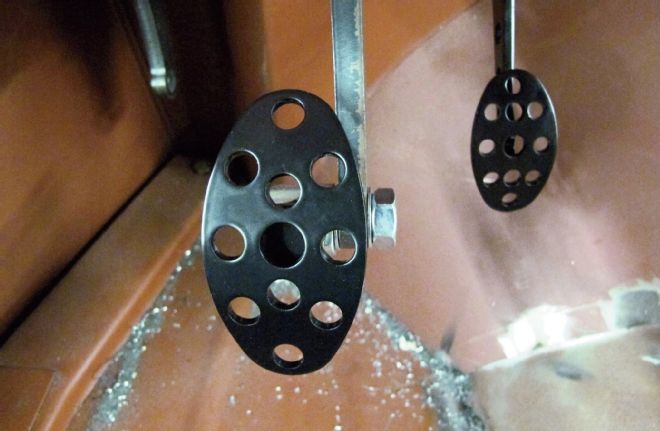
7. Before moving onto the next step we added a matching Lokar Lakester Series brake pedal pad as well—looking good.
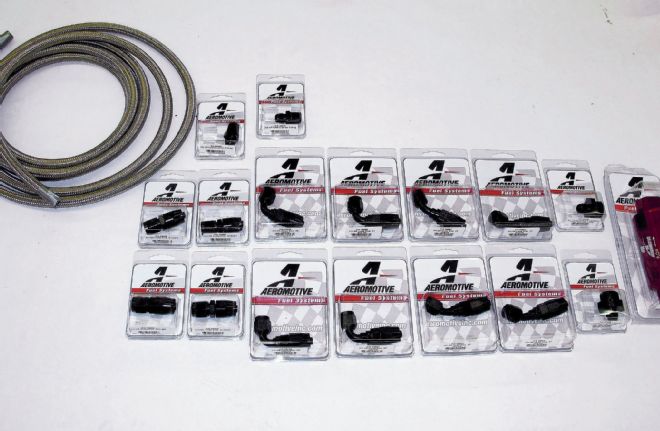
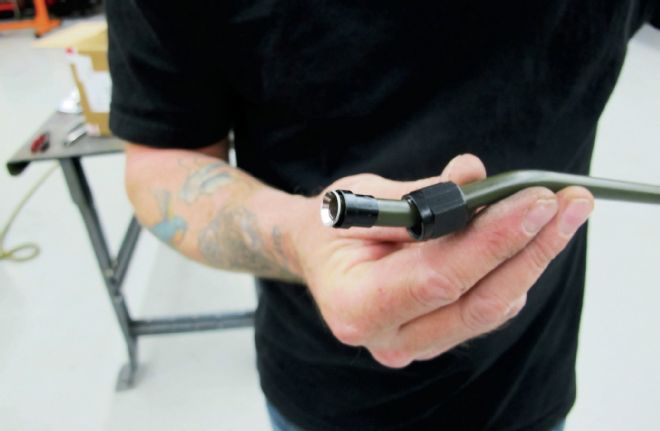
8. A throttle body injection system and a pedal assembly won't do anyone any good without a fuel supply, so with this in mind we pulled out a coil of braided stainless fuel lines and an assortment of Aeromotive hose ends and fittings and began fabricating the first section of our fuel supply system.
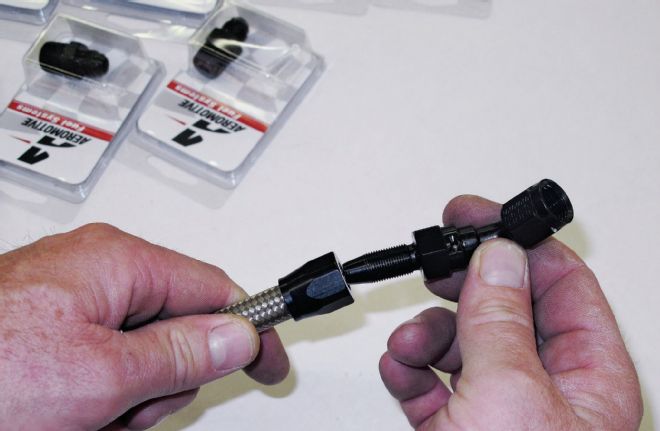
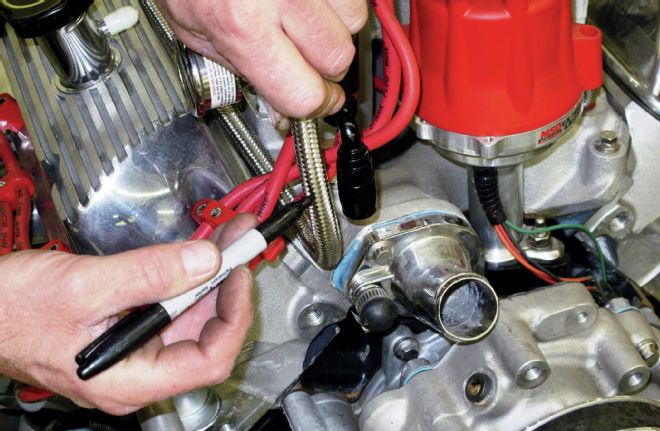
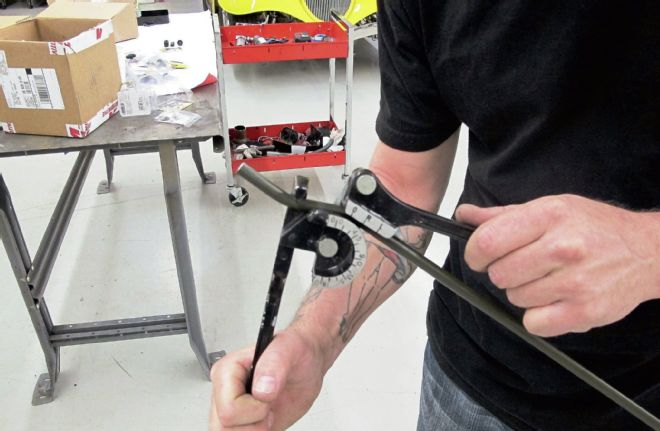
9-10. Working with braided line is actually pretty easy, that is, as long as you take your time. Remember the old adage: measure twice, cut once.
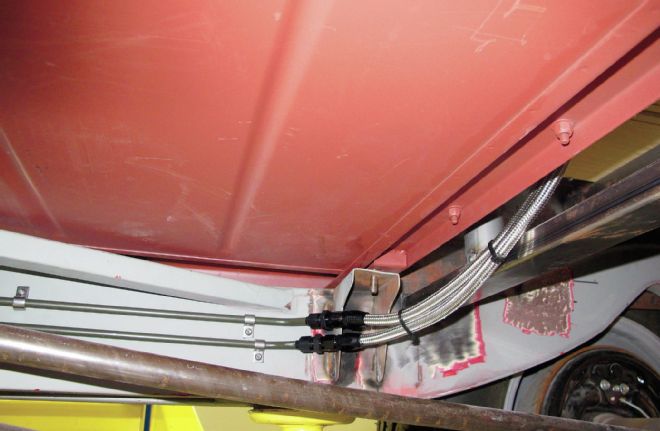
11-12. Making the trip rearward from the engine bay and along the framerails is a couple of sections of 3/8-inch ID hard line. With years of experience and his trusty Eastwood tubing bender Street Rodder Tech Center Manager Jason Scudellari made quick work of forming, flaring, and assembling both the supply and return lines. Lines are attached to the frame via Kugel Komonents clamps.
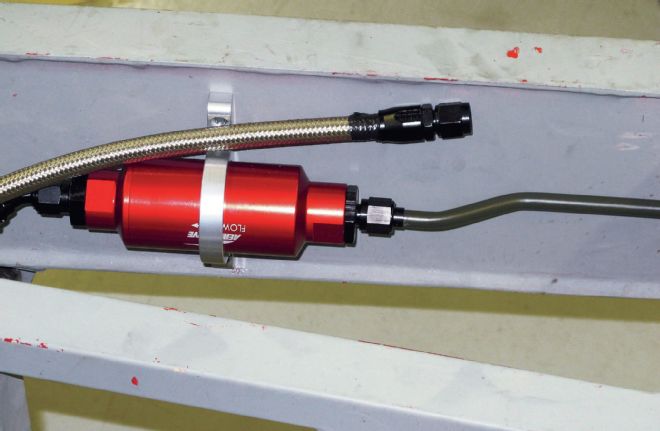
13. Since clean crud-free fuel is a must with fuel injection (or any system for that matter) a 10-micron cartridge-type Aeromotive fuel filter was included in the system. Scudellari attached it to the righthand framerail with a nice little billet aluminum mounting bracket and made the connections with a hard line at inlet end and braided stainless line at the outlet end.
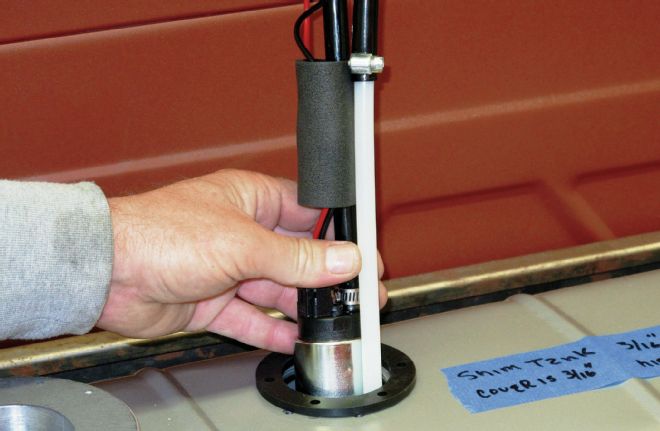
14-15. With most of the trip from the front end of the pickup to the rear handled it was time to mount the 16-gallon Tanks U-30 Series universal steel fuel tank in the forward section of the bed. After the mounting and fuel line routing holes were located and drilled into the bed floor a Tanks GPA-Series in-tank fuel pump assembly was readied and slid into place.
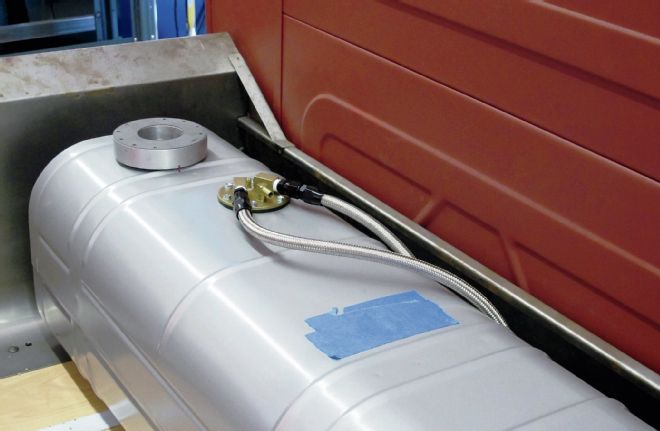
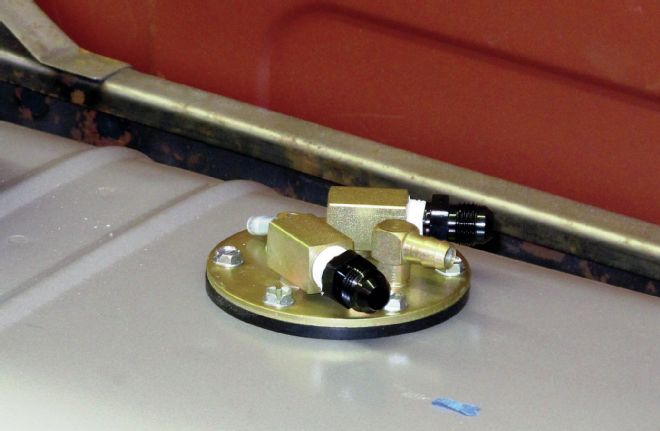
16-17. Braided stainless supply and return line were then routed from the pump down through the bed floor and forward to their junction with two mounted sections of hard line running forward along the pickups framerail.
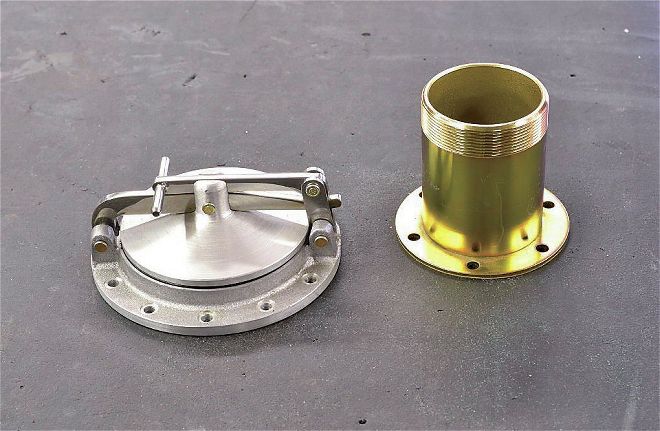
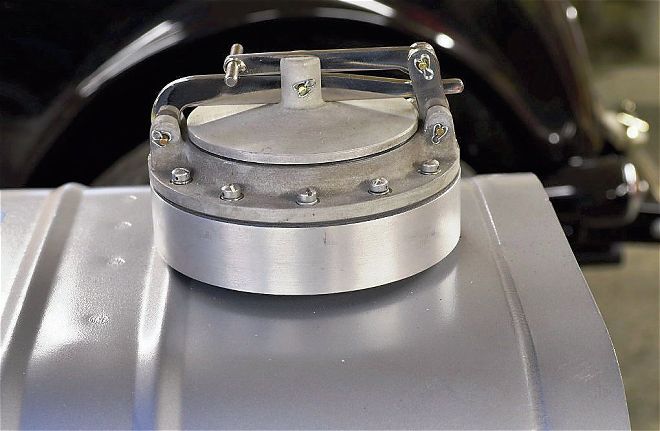
18. We're sure you've been treated to plenty of samples of Frank Wallic's craftsmanship during the course of the Model A's progress but these custom fuel caps are awesome. Here you can see the cap assembly along with the threaded brass sleeve used with a custom adapter he fabbed for our tank.
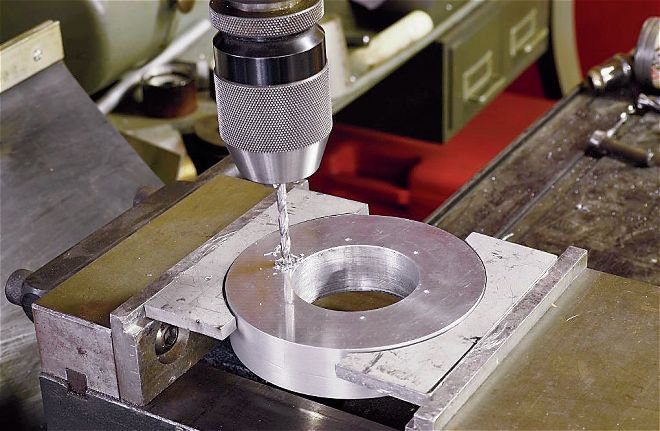
19-20. Wallic fashioned the cap adapter out of a chunk of aluminum using his milling machine and then marked, drilled, and pressed in the brass sleeve, which along with a gasket will attach to the fuel tank.
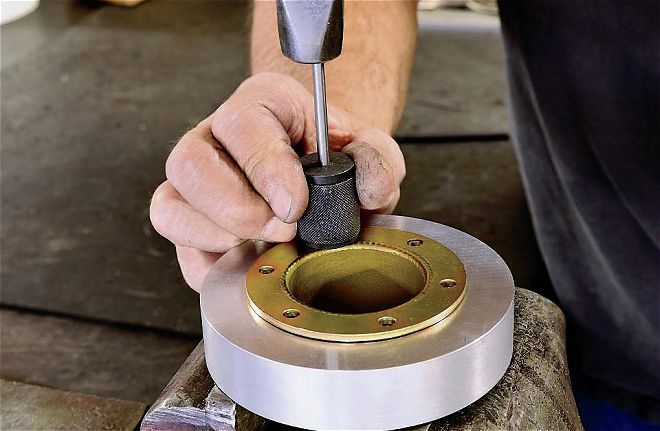
21. Here you can see how Wallic marked both the adapter and the tank so the cap mounting holes and the adapter mounting holes are clocked correctly.
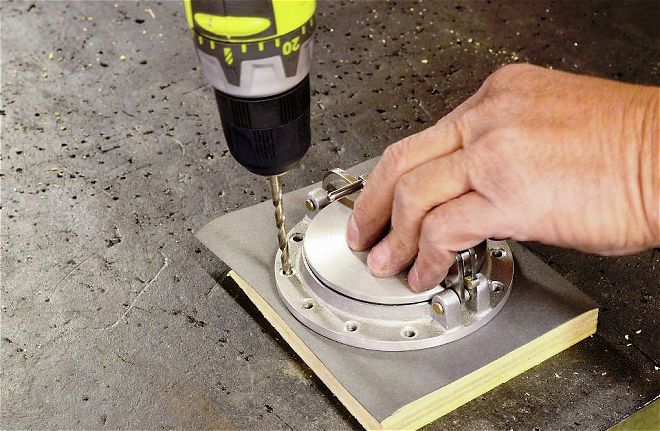
22. Wallic then cut a square of sheet gasket material and sandwiching it between the fuel cap and a block of wood begins to form a gasket to seal the cap to the adapter.
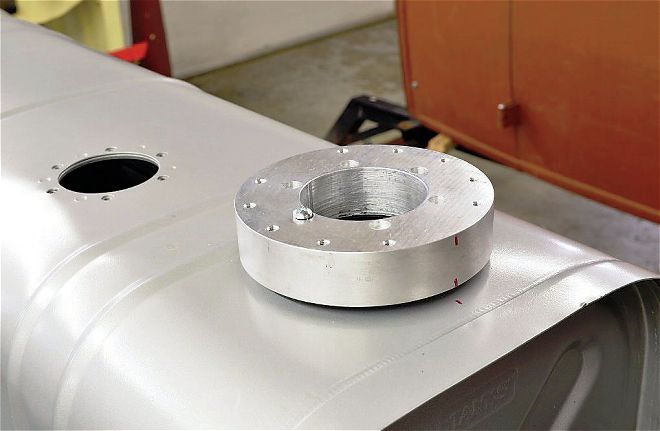
23. As you can see, Wallic accounted for the reinforcement rib formed in the fuel tank when he fabricated the filler cap adapter (the filler hole was pre-cut into the tank from the manufacturer) so that the brass sleeve and rubber gasket lift the adapter just high enough to fit above the rib.
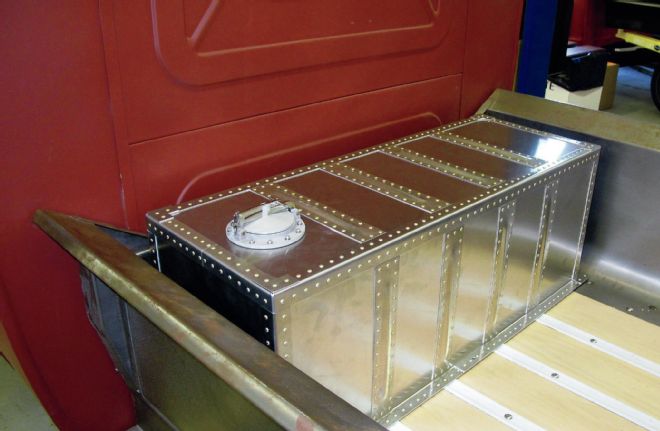
24. And here it is in all its glory. The brass-riveted sheet aluminum cover is beautiful and matches exactly Wallic's handiwork in the pickup's cab (the awesome bomber-style bench seat assembly and matching battery box). With the truck's fuel system completed construction of the pickup can proceed, keep your eyes peeled for more on the closed cab in the future.