
Building a custom exhaust system can be an extremely tedious process if the fabricator is uninitiated, ill prepared, or improperly equipped. But with the right tools, skills, and a decent array of tubing, it can also be a very rewarding experience. Recently, our buddy "Installation Jason" Scudellari and I were discussing exhaust options for his 1949 Chevrolet 3100 pickup. He wasn't sure whether he wanted to run the exhaust over the rearend and out the back or if he wanted to make life easier for himself by dropping the exhaust in front of the rearend. While we were mulling the options over, I asked him his plans for a rear bumper. A nerf bar would be neat, we both agreed, but the simplest solution was to use the stock bumper since it would match the already-in-place front unit, courtesy of Brothers Trucks. That sorted, Jason contacted the guys over at Brothers and ordered up a rear bumper and a set of brackets.
With the bumper appointment solved, Jason could now determine where and how to terminate the exhaust. He already decided against ending it in front of the rearend as he didn't want the fumes coming up through the cab, but he wasn't completely sold on having dual 2¼-inch pipes sticking out from under the bumper. That look wouldn't fit the aesthetic of his truck so back to the drawing board we went. I chimed in with a couple of ideas: 6-inch extensions with fishtail tips, 4-inch vertical Peterbilt stacks, or fenderwell headers, but he wasn't having it. In fact, he threw me out of the CLASSIC TRUCKS Tech Center for the rest of the day. When I returned the following morning, our little buddy had all but solved his dilemma using a time-honored custom trick.
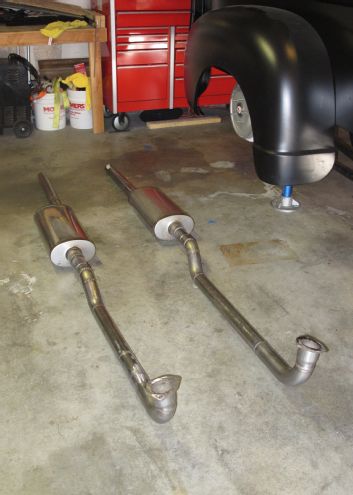
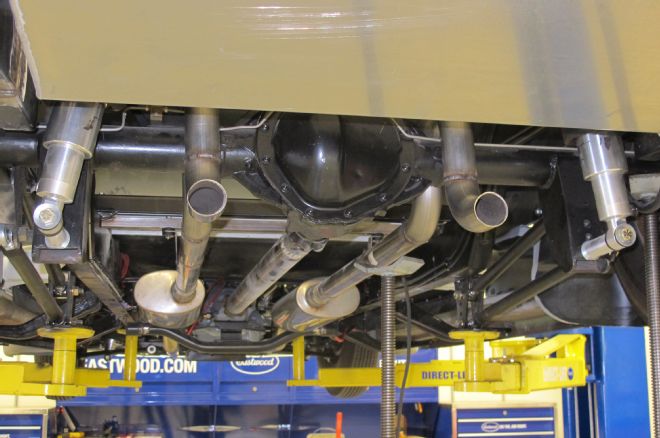
Having a solid plan on how to route the exhaust, Jason ordered up an assortment of stainless tubing from JBA Performance Exhaust, along with a pair of their 18-inch Universal straight-through-style 409SS mufflers, hanger brackets, and hardware. Starting at each collector of the block hugger headers, Jason snaked the exhaust around the transmission crossmember, through the mufflers, up and over the rearend, and out the back of the truck, ending just aft of the modified rear bumper, welding the seams as he went. The resulting custom exhaust system is simple, sufficient, and fits perfectly on Jason's traditional-styled build. CT
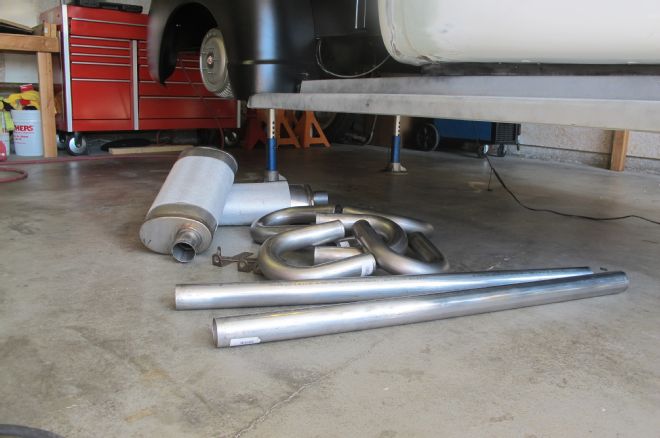
01 An assortment of JBA 2¼-inch 304L stainless steel tubing and hanger brackets, along with a pair of their 18-inch stainless Universal mufflers serve as the foundation from which Jason will build his exhaust system.
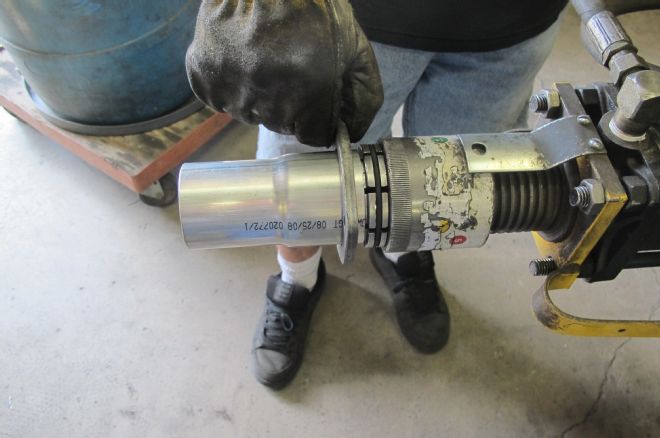
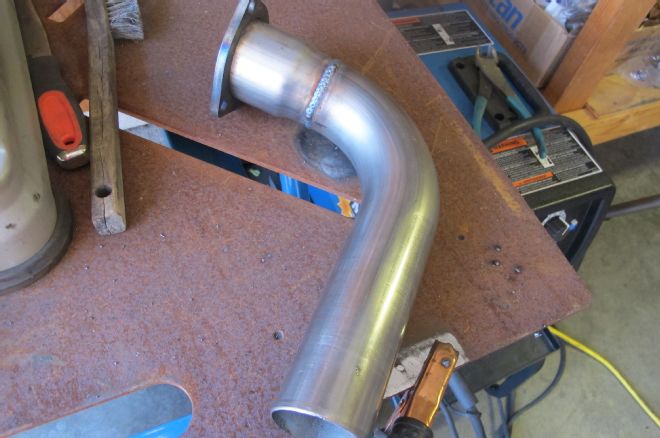
02 Jason's small-block Chevy is equipped with a set of no-name block hugger headers, which will be the jumping-off point for the exhaust system. Using a matching collector flange, Jason found that the 2¼-inch tubing was smaller than the flange's 2½-inch opening. A quick trip to Muffler Man in Placentia, California to have two sections of tubing swaged to fit and we were back in business.
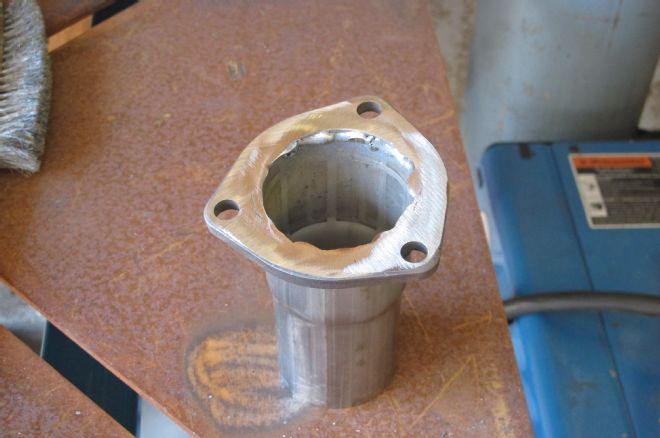
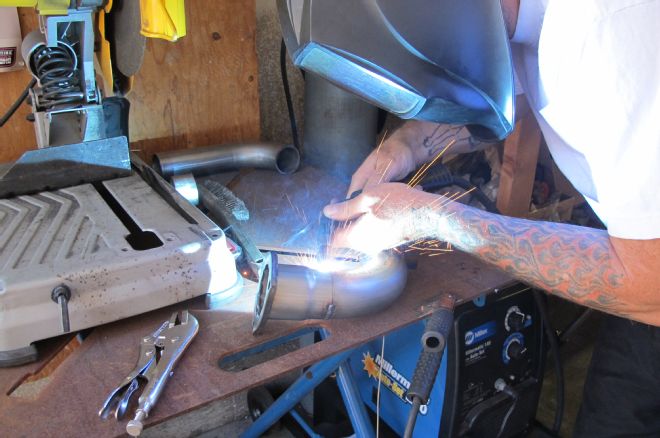
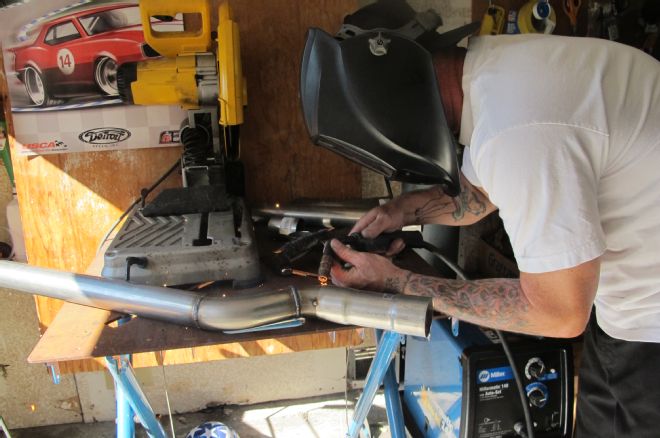
03 Back in the shop, Jason MIG welded each collector flange to the swaged tubing using ER308L welding wire before grinding the surface of the collector nice and flat.
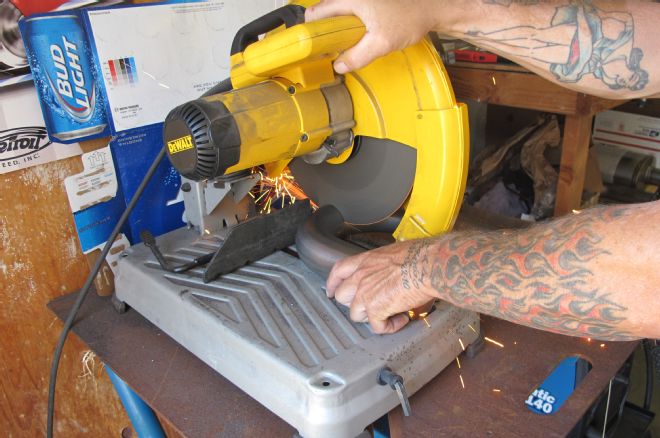
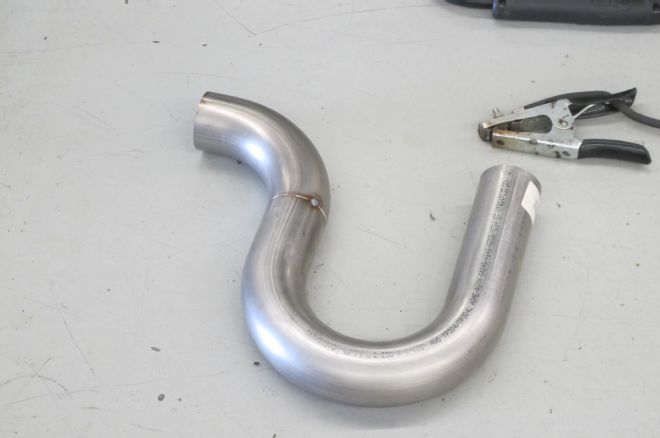
04 Next, Jason knocks out a quick 90-degree bend to send the gasses back toward the tailgate.
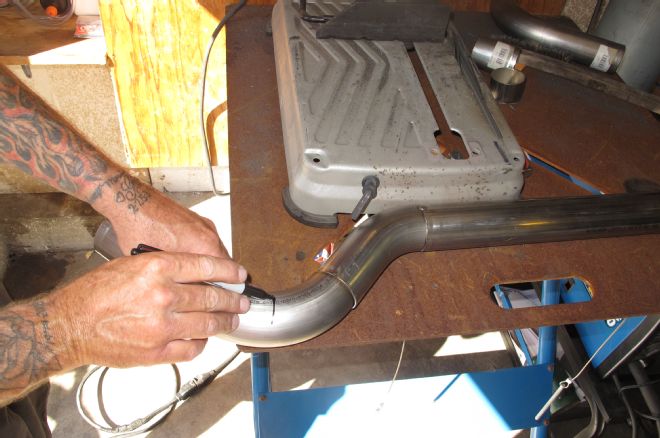
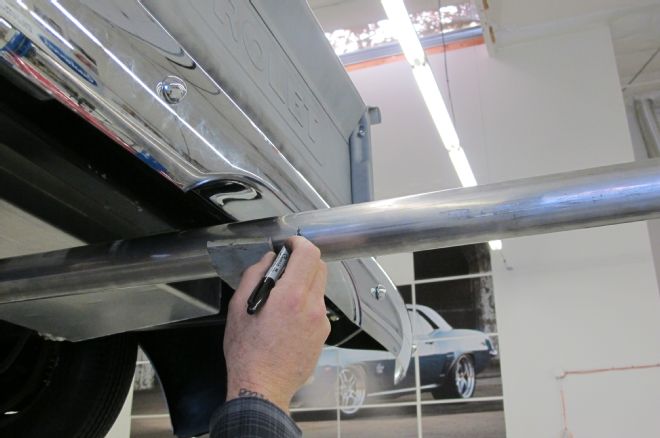
05-07 This bend is then set in place against the collector's down tube and the exiting angle of the exhaust can be determined. A series of vertical lines marked on both pieces of tubing allow the two pieces to be removed and welded comfortably on a workbench. Don't be like Jason and wear your gloves anytime you weld!
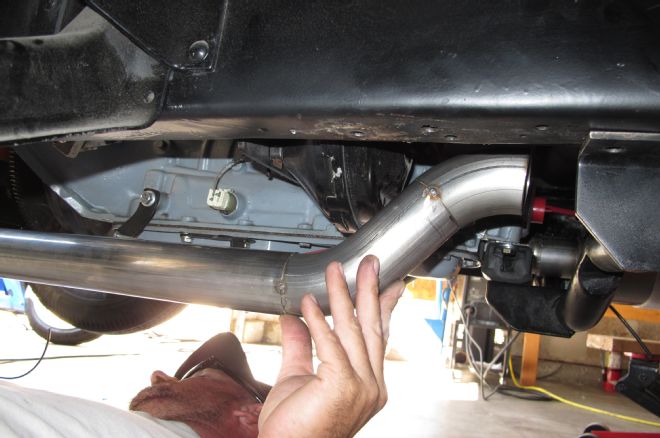
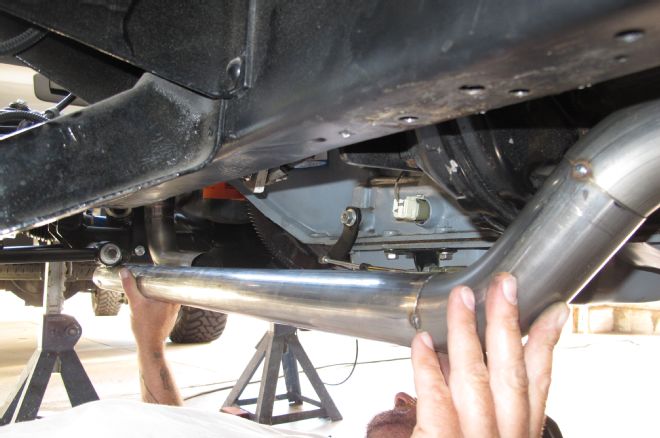
08-10 The next little trek our exhaust needs to make is up and over the transmission crossmember. A bit of guesswork is sometimes in order when it comes to these things and this is what separates the men from the boys. A section of straight tubing and two partial bends are tacked together, effectively forming a nice S-bend.
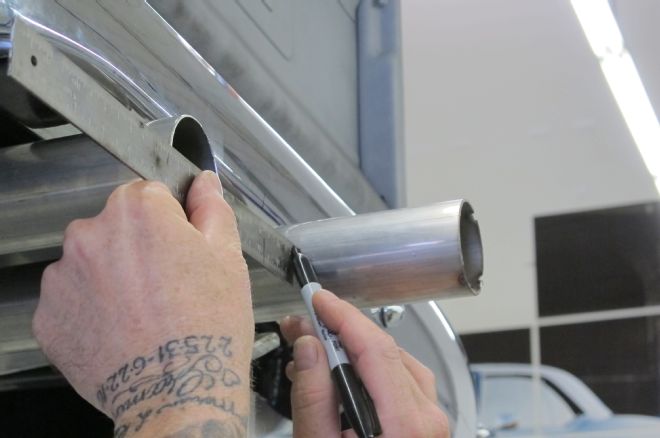
11 While we were at Muffler Man getting the collector tubing swaged, we also had two other sections of tubing swaged so that we could fabricate a slip-fit connection at the mufflers for easier fabrication. The JBA mufflers will be located just aft of the transmission crossmember, so the double-swaged section it being installed just after the previously fabricated S-bend.
12 Next, the mufflers are mocked into position using a pair of jackstands and are tacked to the existing exhaust.
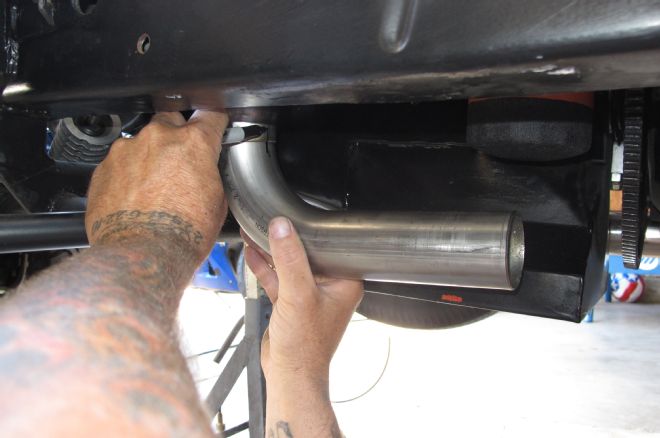
13 A straight section of tubing has been attached to the ends of both mufflers, ending our exhaust just short of the rearend.
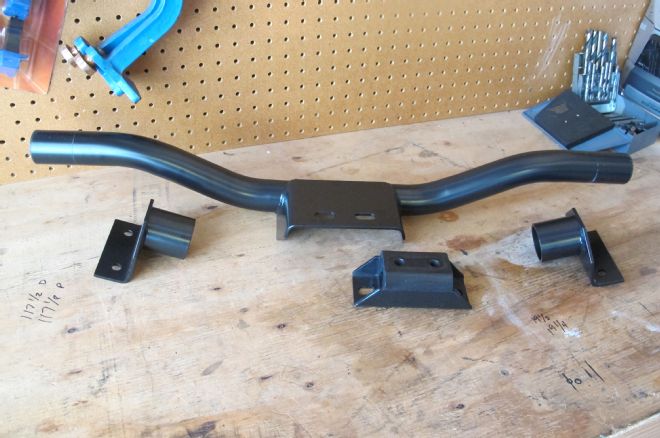
14 The transmission crossmember had previously been hacked to fit a haphazard exhaust system at some point in the past that Jason would probably rather forget. To help with that, we purchased a new crossmember from Brothers Trucks to clean up the underside of the truck.
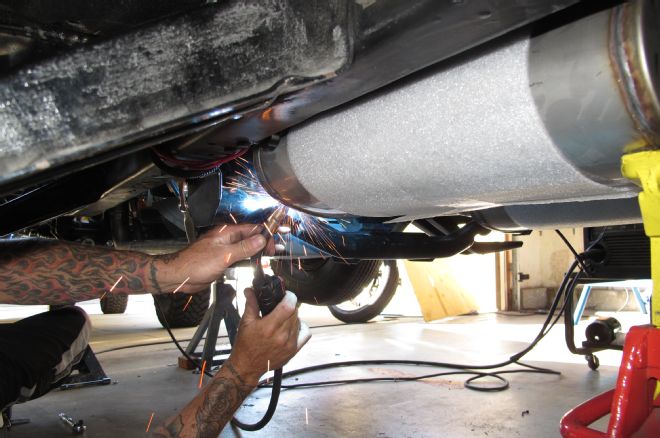
15 With the tubing crossmember bolted to the transmission mount and the crossmember ends attached to the chassis, the three sections can be welded together.

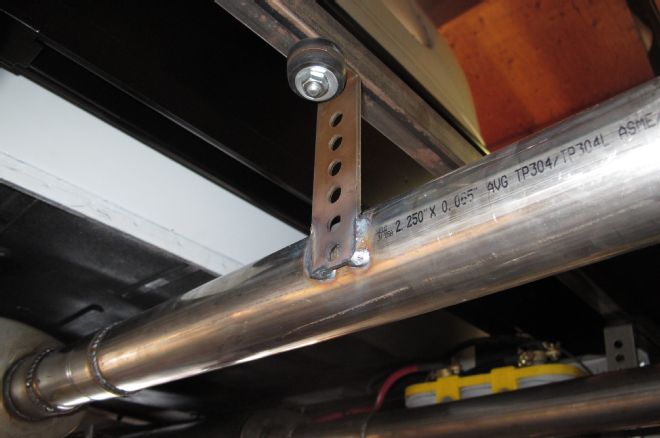
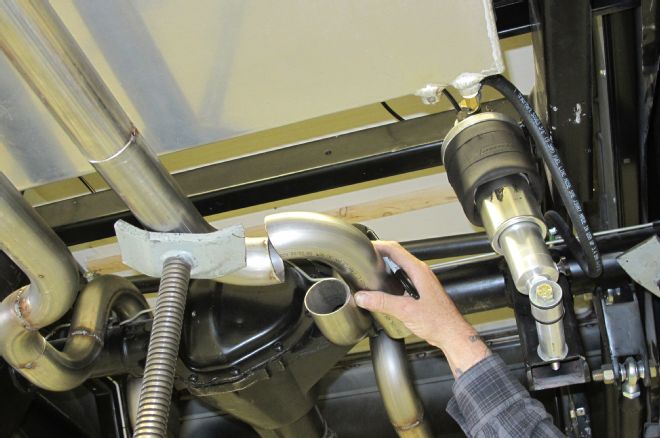
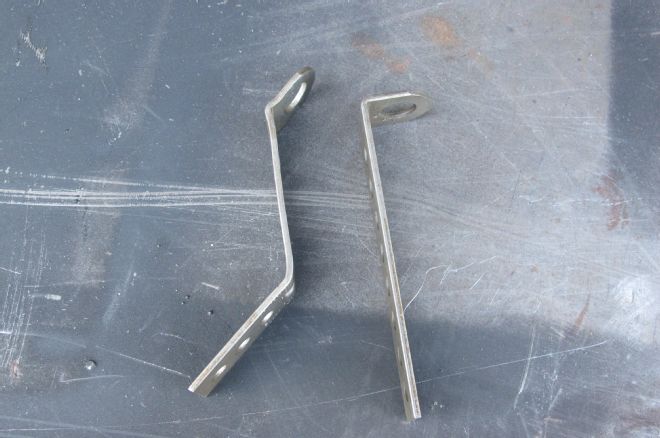
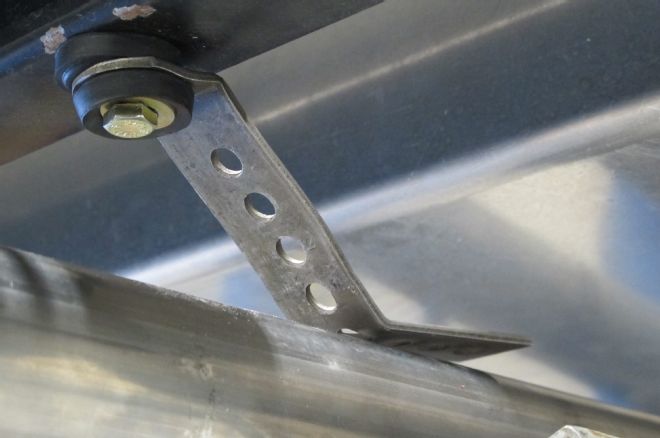
16-17 At this point, Jason's ready to start fabricating the kickup over the rearend, but before he proceeds, he's going to make sure the exhaust system is permanently attached to the chassis. For this end, a pair of JBA exhaust hangers are used to support the system just behind the mufflers.
18 The first transition in the up-and-over section of the exhaust is estimated in place, marked and cut to length. Here, Jason has the bend inverted so he can better guess the length needed before the vertical transition.
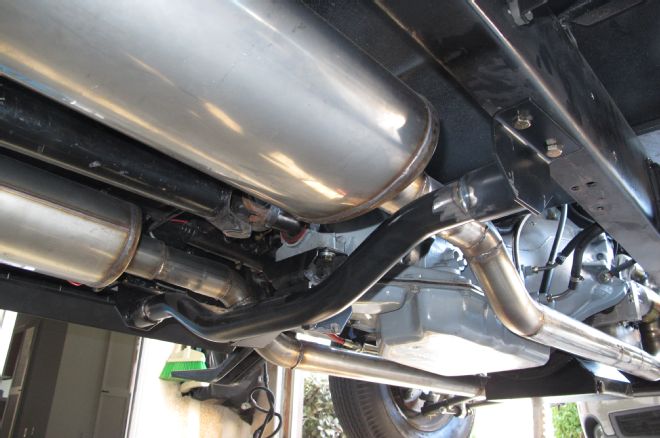
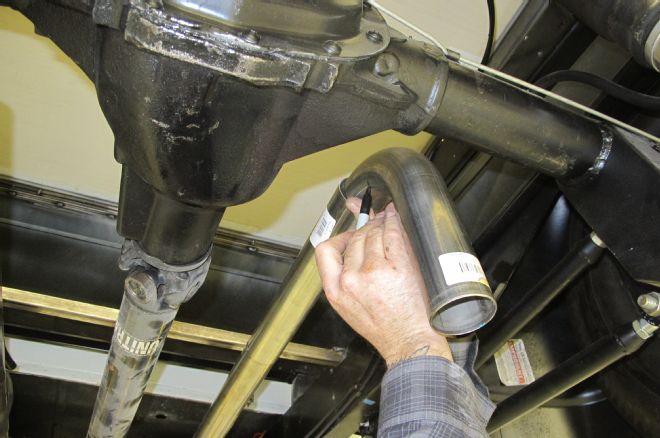
19 The next transition also involved a bit of guesswork to turn the corner over the rearend.
20 Another pair of 90-degree bends has the exhaust up and over the hump. Note that the rearend is in full compression to ensure that the exhaust will clear throughout the suspension's travel.
21 Next, Jason positioned the final length of tubing in place and fabricated a pair of bends to mate with the existing exhaust system.
22-23 Once welded, the final length can be determined.
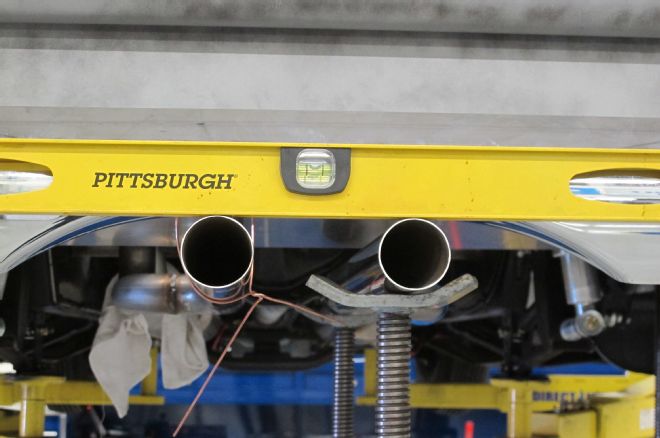
24 A pair of screw jacks and some welding rod are used get the outlets perfectly level...
25-26 ...before another pair of exhaust hangers are installed, supporting the back half of the system.
27 To solve Jason's outlet dilemma mentioned earlier, he decided to flip the stock bumper, using the license plate cutout as a reveal of sorts for the exhaust to exit. The end result is a mild custom treatment that didn't involve any further custom work other than the initial exhaust fab work. A simple and effective solution.