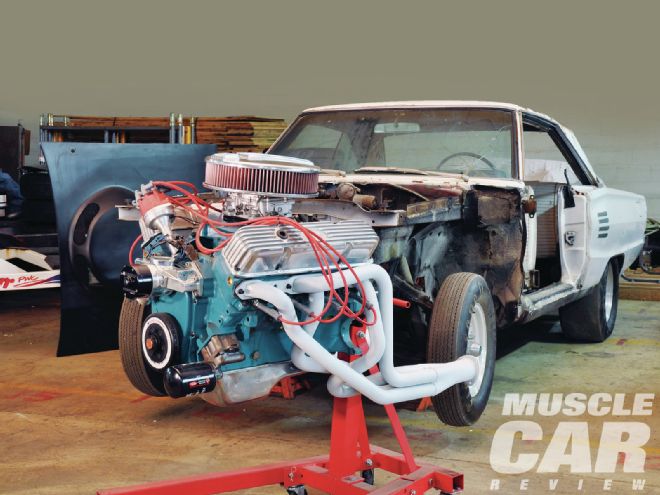
One of the most rewarding experiences in building a car is putting the motor together. A used junkyard engine might get your car running, but in terms of long-term safety and reliability, a fresh, healthy motor is essential. If your muscle car is ready for an engine rebuild, there are a number of options out there. Crate engines will do nicely for some, and many new motors can be made to look old and correct. Many of you are fortunate to have an original car and can rebuild its born-with engine. Then there are those of us who are attempting to piece together a car that carefully mimics the higher-performance cars that were built in the '60s and early '70s. My Coronet fits into that category.
Mind you, this 383 is not the engine that came in my car when it was born. However, it is built around the 325-horse OE block, crank, connecting rods, heads, intake manifold, and carburetor that were available in a 1966 Coronet.
Working with original parts demands you find a reputable machine shop to recondition your parts. I traveled from Chicago to Oklahoma to have my engine built by Jim Lewis—an 11-hour trip each way—but it was worth every dime. Having Jim Lewis build my engine, with tips from my buddy Jim Hale, was an incredible gearhead adventure. However, I strongly suggest you find an engine builder/machine shop that is closer to home so you will be able to keep tabs on the progress. Shop around, ask around, and search Internet forums that deal with your specific brand. Then go make some power.
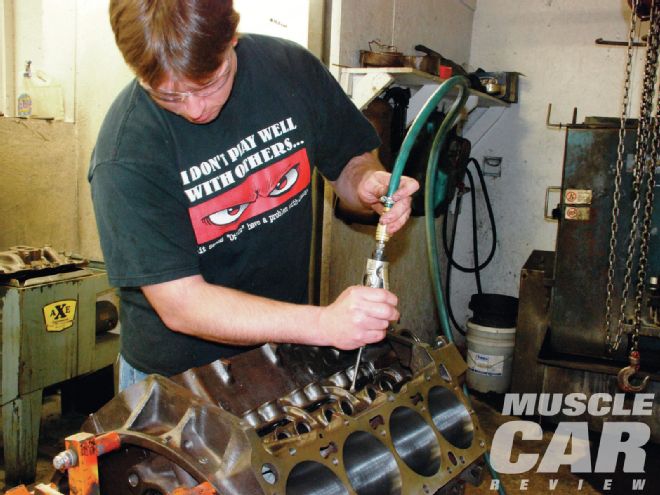
1. All threaded holes in the block are cleaned and chased. The block is then deburred with a small grinder to remove casting slag and sharp edges. Care is taken to avoid hitting the cylinder walls, lifter bores, and main bearing saddles. Deburring the block aids in oil flow, helps prevent stress-induced cracking, and minimizes the possibility of casting flash breaking loose and damaging internal engine components.

2. The block and crank are Magnafluxed to check for cracks. It is a simple but tedious process of spreading powder on the parts to be checked. An electric magnet is placed on the part being checked, and then a current is sent through the part. The dust will collect in any cracks or flaws. Fortunately, both block and crank passed the test.
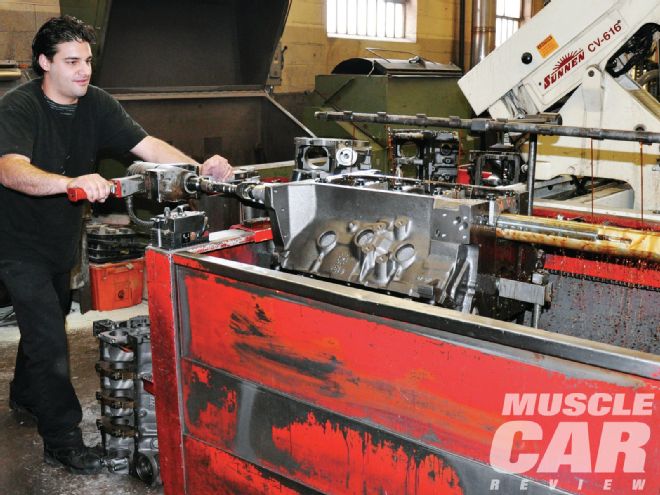
3. Van Senus Auto Parts in Hammond, Indiana, align-honed the block. Align honing uses fine cutting stones to ensure that the crankshaft tunnel and camshaft tunnel are in proper relation to each other. If there appears to be significant core shift or wear in the block, the main bearing and camshaft bores will need a similar but more drastic repair called align boring, which creates a new bore and corrects misalignment in the block.
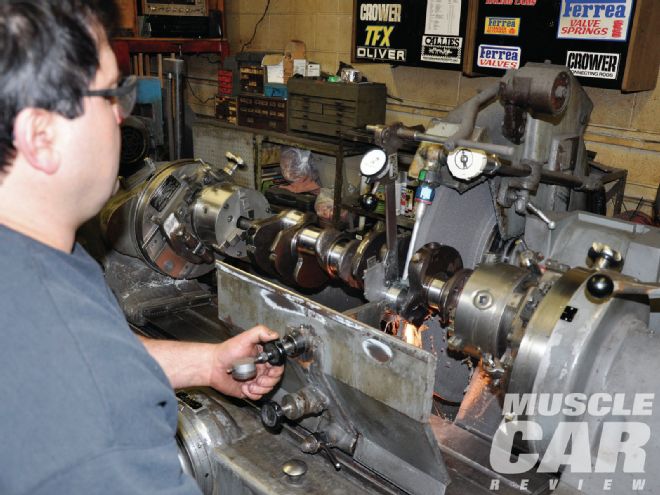
4. Van Sensus Auto Parts also reground the crankshaft. Whether you are talking about a street motor or a 7,200-rpm race motor, the crankshaft must run absolutely straight. The crankshaft was ground 0.010 undersized on the main journals, and 0.020 under on the rod journals. When the rod journals are underground, they are also indexed, and the stroke is equalized. Essentially, the journals are cut to ensure that the connecting rod throws are exactly 90 degrees apart.
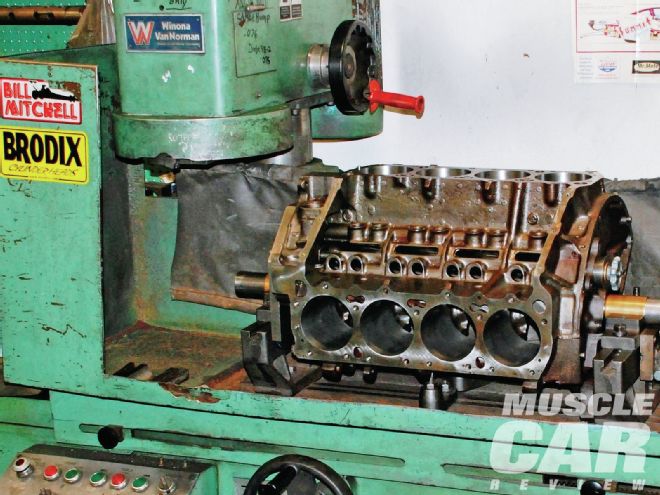
5. The deck of a V-8 engine is the top portion of the cylinder bore that is the mating surface for the cylinder heads. If that surface is not perfectly flat, you run the risk of compression or coolant leaks, gasket failure, and poor performance. The decking machine passes over the block and removes a couple mils (thousandths of an inch) of material off the deck on each pass. The job is done when the entire block has a clean cut surface.
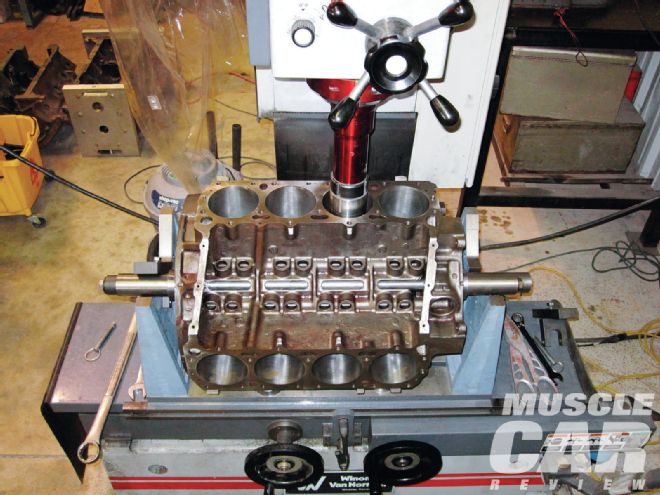
6. On the boring machine, the overbore size is selected to refinish the cylinder walls. Overboring not only adds cubic inches but also makes the cylinder itself perfectly round and consistent for the entire range of piston travel. Overboring an engine means new pistons will be needed to fit the larger cylinders. My block received a 0.055-inch overbore, and the final honing will remove the additional 0.005 inch to produce a total 0.060 overbore.
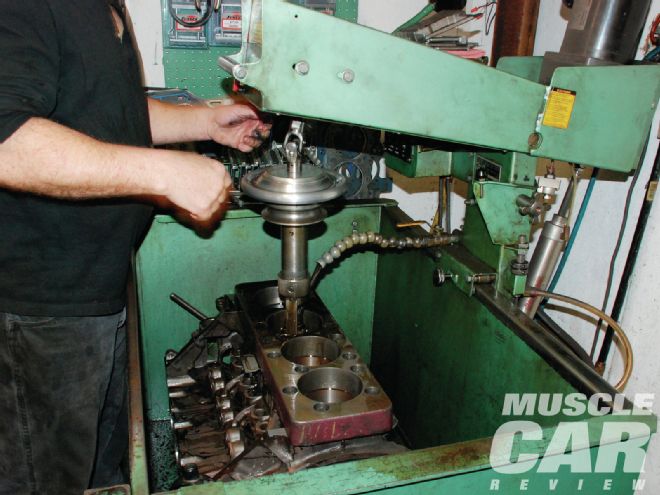
7. Jim Lewis spent hours applying the final hone to the cylinder walls. Each machine shop has different methods for honing; Lewis uses a variety of honing stones, from 280 to 400 grit, to produce a nice crosshatch pattern in the cylinder walls for optimum oil retention and ring seal. He then completes the process with a honing brush. When all machining on the block is completed, it is thoroughly cleaned and washed. At that point new freeze plugs are installed.
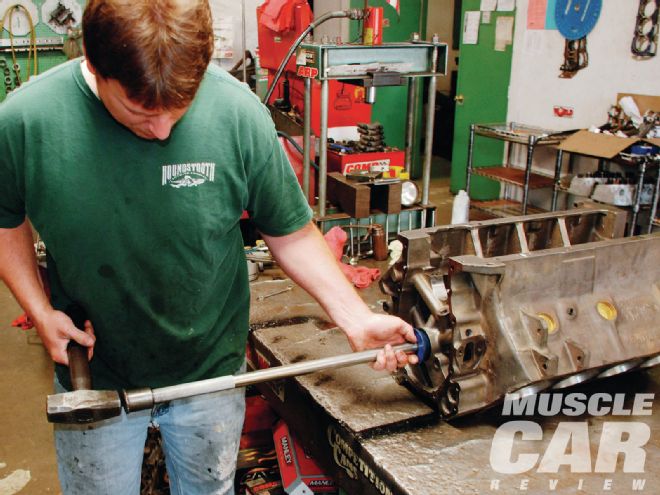
8. Dura-Bond camshaft bearings were chosen for the 383. Even though the camshaft journals are all the same size, the five camshaft bearing bores in the block are not. So each cam bearing is a different size to correspond with its proper cam bearing bore. Make sure you install the bearings in the right position. Each bearing has a hole that must match with the oil galley in the main bearing saddle. Inspect the bearings to make sure they are not damaged or nicked in any way. Unless you have the proper tools to install the cam bearings, it is best to have them installed at the machine shop.
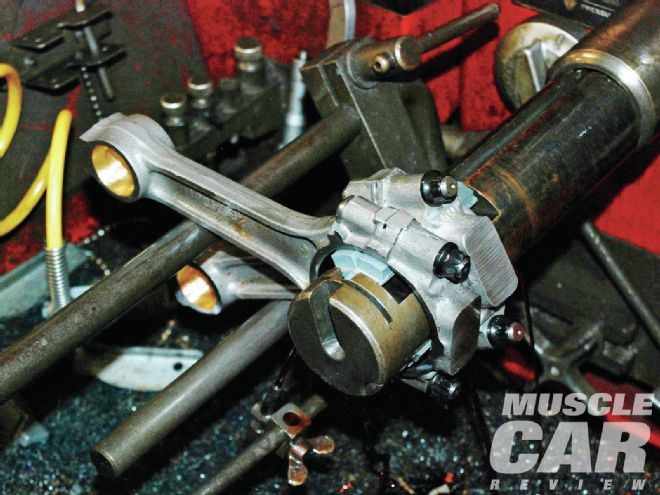
9. The OE connecting rods were examined for any cracks, and then they were balanced to each other. All the rods were weighed and the lightest marked, then the rest of the rods were ground at the big and small ends to match the weight of the lightest rod. The small ends of the rod were fitted with bronze bushings in order to work with the full-floating pins on the new pistons from CP.
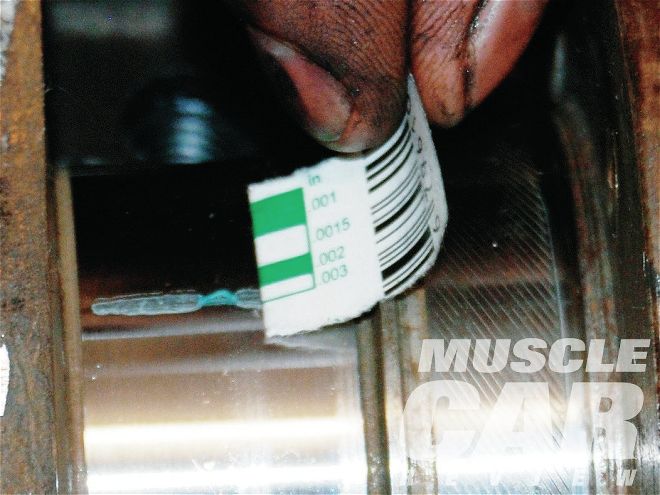
10. To check the main bearing clearances, Plastigage is installed on the main bearings in the saddle. The crankshaft is then installed dry, the main caps are torqued to spec, and the crankshaft is removed. The width of the line created by the crushed Plastigage determines if the clearances are correct.
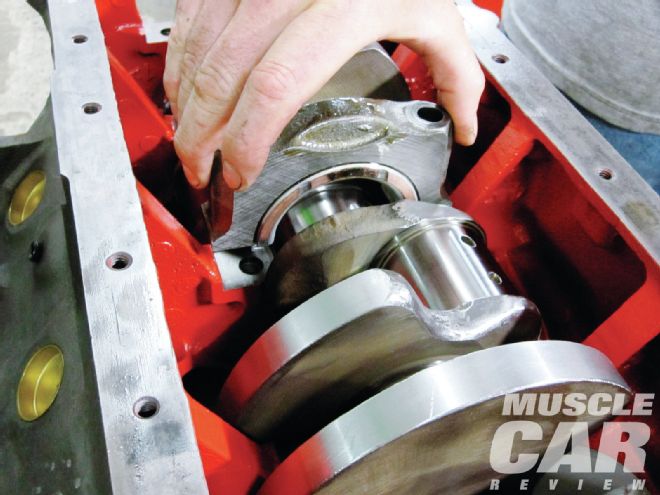
11. With all clearances checked, the inside of the block was painted red, a Jim Lewis Race Engines signature look. The crankshaft is installed using ARP main cap bolts. Stock fasteners on the main caps are torqued to 85 lb-ft; with the ARP bolts, the main caps are torqued to 100.
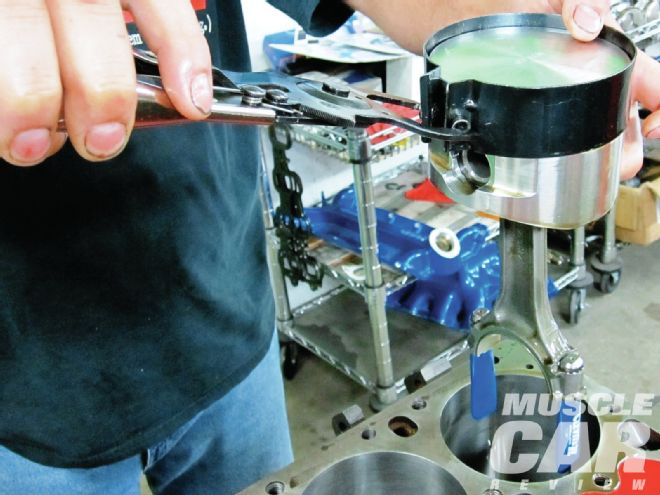
12. Total Seal piston rings, my ring package of choice, required that the piston ring end gaps be filed to size. Check with your machinist or engine builder for recommendations for your application. The forged CP Pistons incorporate floating piston pins, so they are installed with locks to the pistons. Rubber sleeves are installed on the ARP rod bolts, the cylinder walls are lubricated with motor oil, and a ring compressor is called into duty. Care is taken not to nick the cylinder walls or crankshaft.
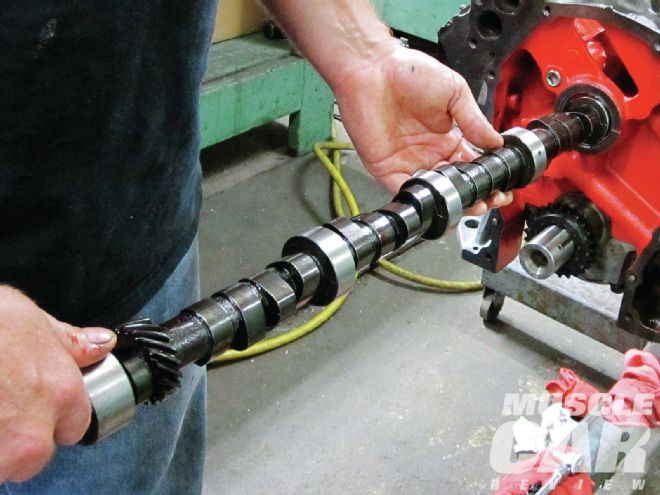
13. The Comp Cams camshaft is covered with assembly lube and then carefully installed in the cam tunnel. Comp Cams offers a tech line that is second to none to help you pick a cam for your motor, whether it is bone stock, a high-performance sleeper, or even a race motor.
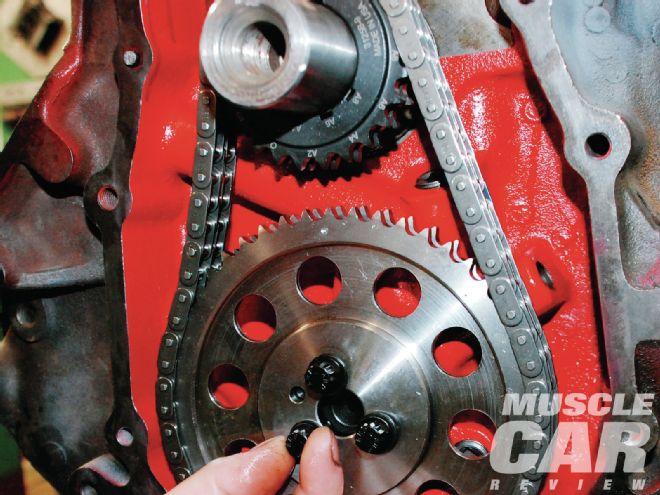
14. The marks on the crank and camshaft are aligned, and the Competition Products Howards Cams double roller billet steel timing gearset is installed. That camshaft timing gear is built with nine keyways for adjustability and is clearly marked in 2-degree increments. The entire setup looks killer on the motor.
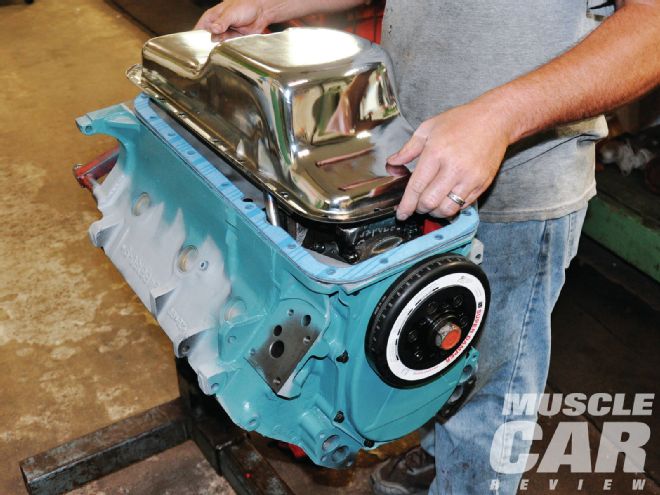
15. The timing chain cover and ATI Super Damper are installed, and then the motor is ready to have the oil pickup, windage tray, and oil pan installed. The pickup screws in and needs to be parallel with the bottom of the pan with about 3/8 inch of clearance. Two oil pan gaskets are necessary with the Mopar Performance oil pan and windage tray. The goal of the windage tray is to keep the oil from splashing up onto the crankshaft, which could rob power at high rpm.
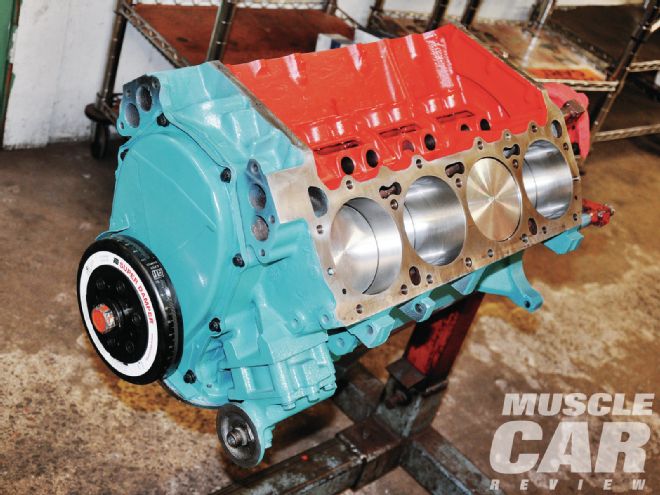
16. Painting the block is a matter of personal preference. Many builders assemble the entire long-block, mask every hole mating surface, and then paint the engine. Painting the engine in stages as it is being assembled, as we've done here, is another option. The Mopar engine block paint color is an exact match to the '66 OEM 383 engine color. Contrary to popular opinion, this color is not Pontiac Engine Blue. That would never happen on this motor. Ever.