
Keeping your hot rod running cool should always be a top priority, but what about the organic mass in the driver seat? As warm-blooded biological machines operating at an already toasty 98.6 degrees F, today's softer, more fragile humans weren't meant to toil away in non-climate-controlled cockpits. Whether its header heat soaking through the firewall, exhaust heat rising up from the floorboard, or solar heat beating down through the roof and glass, a muscle car interior is a repository for thermal energy. As if that's not bad enough, unlike cars, humans rely on a rather crude and messy open-loop cooling system that leads to smelly armpits, dripping foreheads, and unimpressed lady friends. Simply put, in order to enjoy your hot rod year-round, you need to install an aftermarket air conditioning system. Thanks to industry pioneers like Vintage Air, keeping cool, dry, and happy inside your hot rod is easier than ever.
Appropriately located in San Antonio, Texas—where daytime highs routinely top 100 degrees F from May to September—Vintage Air is a company formed out of necessity. Back in the early '70s, founder Jack Chisenhall figured out a way to adapt an air conditioning system, using existing OEM parts, onto his own hot rod so he could enjoy it during the brutal Texas summers. Shortly thereafter, fellow hot rodders hired Chisenhall to install A/C on their muscle cars as well, and soon Vintage Air opened its doors to the public in 1976. Since then, the company's catalog has expanded to envelop a broad range of offerings for hot rods and muscle cars, and not surprisingly, one of Vintage Air's most popular kits is for first-gen Camaros. To get a better idea of what's involved with installing an A/C system into a muscle car, we tagged along as Vintage Air fitted one of its Gen IV SureFit air conditioning systems onto a customer's SS396 '69 Camaro.
While a properly functioning A/C system is easy to take for granted, the modern technology packed into today's systems is light-years ahead of what the Big Three offered during the '60s and '70s. “Factory compressors from the muscle car era take 9-11 hp to turn as opposed to the 3-5 hp that one of our compressors requires. This puts far less load on the engine,” Vintage Air Executive Vice President Rick Love explains. “If your current cooling system is working well, this means that coolant temperature will probably only increase 3-5 degrees, and in some applications, the coolant temperature might not increase at all. The key is making sure you have enough airflow through the radiator in order to dissipate the additional heat load. We also go to great lengths to design air conditioning systems that look as OEM as possible. We find ways to retain the factory climate control panel and integrate it into our systems whenever we can. To simplify installation and improve aesthetics, with our systems we relocate the evaporator core from beneath the hood to inside the car.”
Love says the typical installation should take between 24 and 30 hours for the average DIYer. Granted, that's more time than you'd spend polishing your billet battery hold-down, it's a small price to pay to keep cool, dry, and happy in your hot rod for years to come.
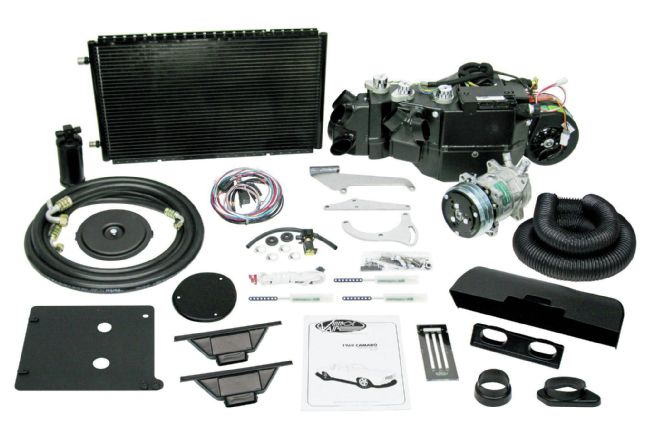
The Vintage Air Gen IV SureFit A/C system for 1969 Chevy Camaros (PN 961169, $1,394.97 from Summit) comes with every last nut and bolt necessary for installation. The kit includes a compressor, an evaporator unit, a condenser, a heater core, ducting, vents, brackets, hard lines, a wiring harness, and even an ECU.
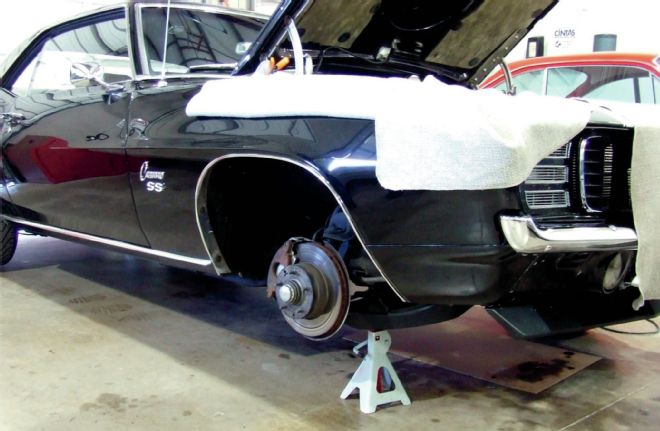
To prep the 1969 Chevy Camaro for installation, raise it up on jackstands and then remove the wheels, drain the coolant, disconnect the battery, detach the cooling fan, and remove the belts. While removing the fenders isn't necessary, they must be loosened in order to free up access to the factory heater assembly.
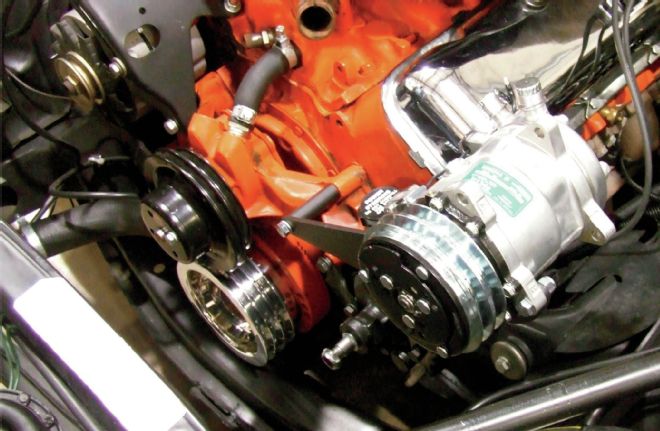
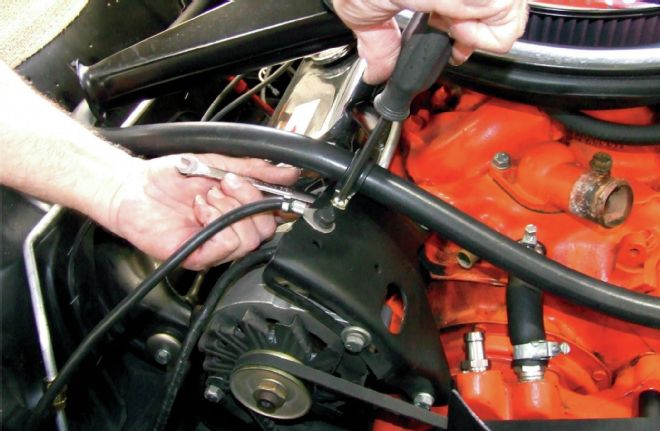
The A/C compressor brackets mount to the water pump and driver-side cylinder head with 3/8-inch bolts. For cylinder heads that have a larger 7/16-inch bolthole, the hole in the bracket must be enlarged using a drill. Brackets are available for big-block Chevys with both long- and short-style water pumps. For proper belt alignment, Vintage Air recommends using GM water pump (PN 14023155) and crank (PN 14025185) pulleys.
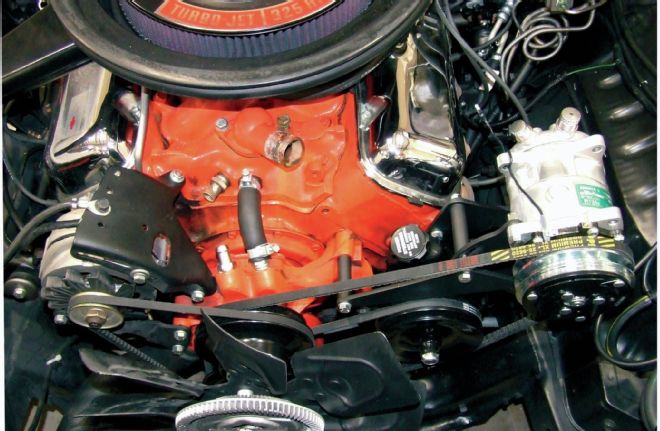
Once the bracket and compressor are in place, reinstall the factory fan and accessory drive belts. For cars equipped with power steering, Vintage Air recommends using a 62-inch A/C compressor belt, which should be routed on the second groove (from the front) of the crank and water pump pulleys.
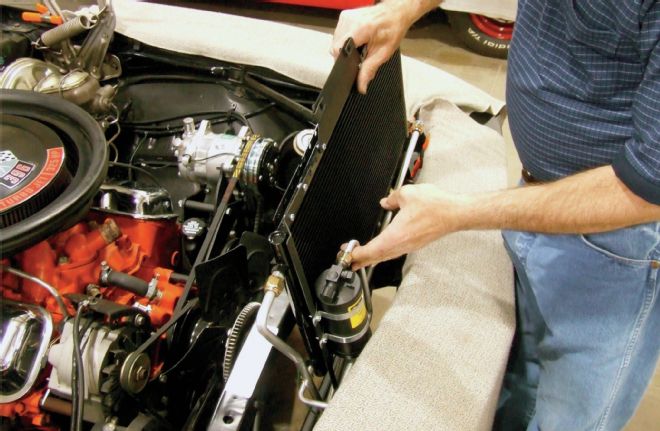
After removing the hood latch and grille, slide in the condenser and drier assembly in front of the radiator. It attaches to existing factory holes in the upper and lower radiator core support with 5/16-inch bolts. Since the condenser is responsible for removing the heat absorbed by the refrigerant inside the passenger compartment, providing it with a clean supply of ambient airflow from behind the grille maximizes A/C system efficiency.
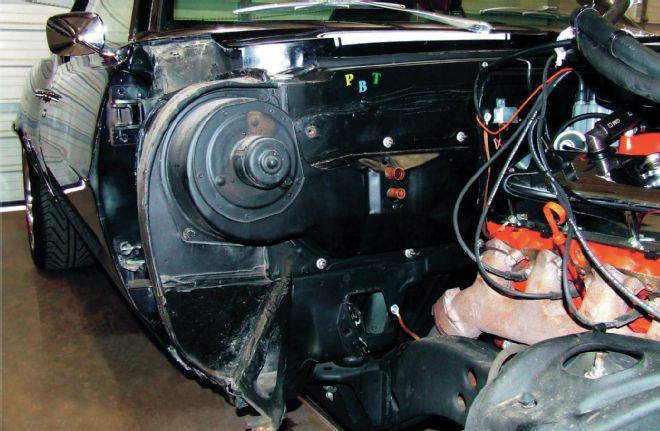
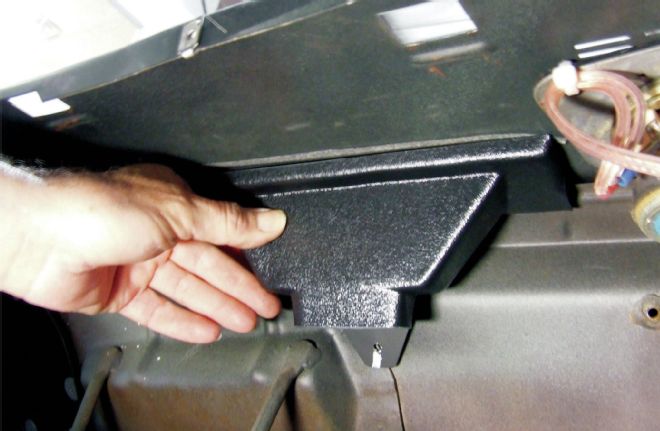
The factory heater box is a bulky monstrosity that eats up underhood space. Since the Vintage Air evaporator assembly features an integrated heater, the factory heater box can be completely eliminated. Although it's not a mandatory step, removing the fenders and the hood vastly simplifies the process of removing the heater box.
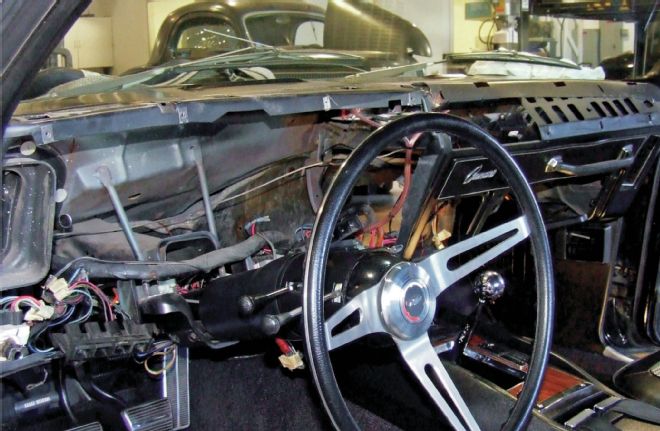
Inside the cabin, there's quite a bit of factory hardware that needs to be removed, including the dashpad, instrument cluster, ventilation control panel, glovebox, ashtray, and defrost ducts. After removing the steering column bolts, the column must be lowered to more easily facilitate the installation of the new Vintage Air ducts and hoses.
Since the factory fresh air vents will not be reused, remove them and cap them off using the vent cover supplied with the Vintage Air kit. There are two vents in total, located near the bottom of the A-pillars (behind dash).
By reaching in through the glovebox opening, remove the driver- and passenger-side OEM defrost ducts and replace them with the new Vintage Air units. Line the new ducts up with the openings in the dash, and drill a 7/64-inch hole into the bottom mounting tabs. Next, secure them into place using No. 10 sheetmetal screws.
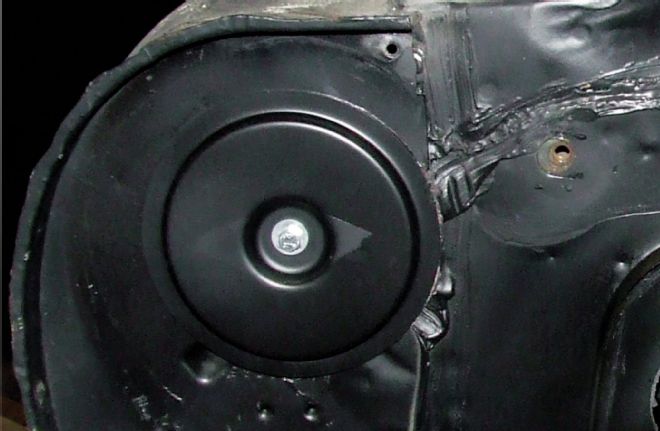
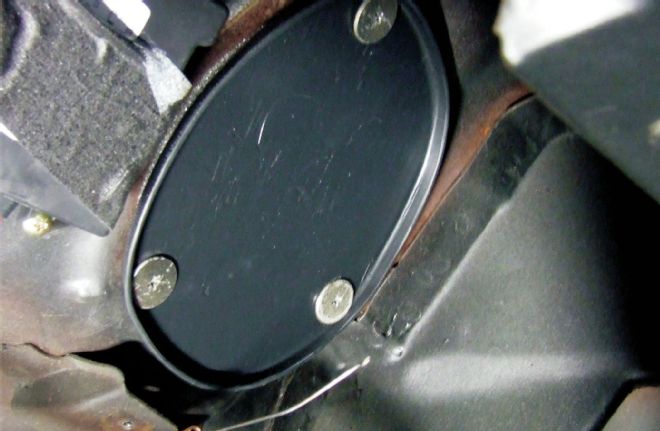
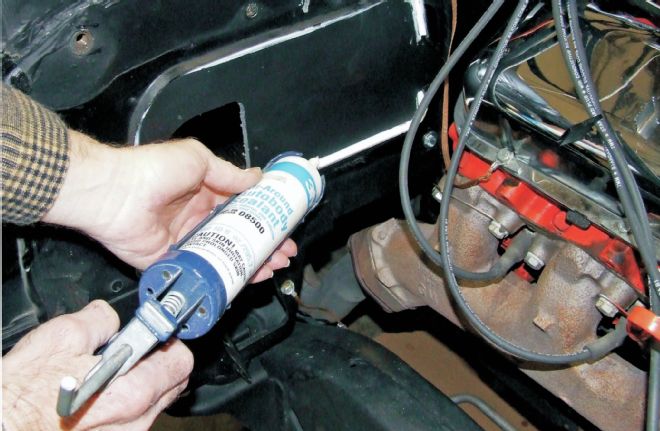
Removing the OEM heater cover requires covering up the hole in the firewall with a new fresh air cap. After applying a bead of silicon around the perimeter of the cap, secure it to the firewall using the supplied 1/4-inch bolt.
The new firewall cover attaches to the existing factory firewall holes with 1/4-inch bolts. Before doing so, the firewall holes must be enlarged to 5/16-inch using a drill. Apply a bead of silicone around the cover to seal out the cabin from the elements.
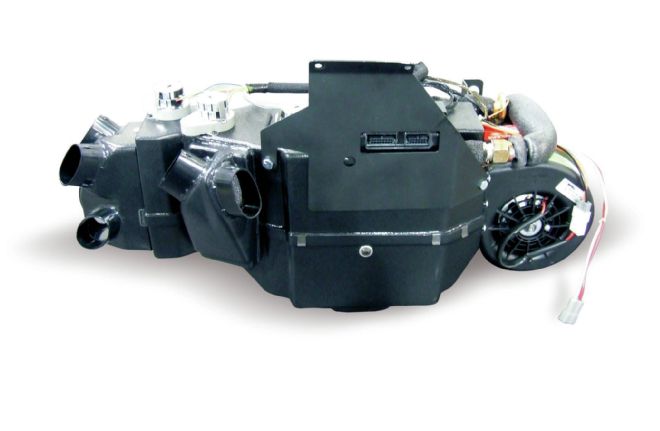
Vintage Air's slick evaporator assembly features an integrated evaporator core, heater core, blower motor, and ECU. Consolidating all the key A/C hardware into a single assembly not only saves space, but it also greatly simplifies installation as well. Servo-actuated doors within the housing precisely blend cold and hot air to achieve the exact temperature that users demand. Before installing the evaporator assembly, install the rear mounting bracket and hard lines.
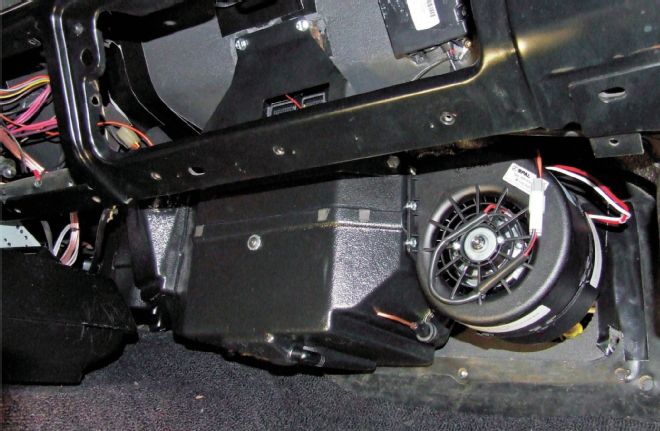
After carefully positioning the evaporator assembly behind the glovebox area of the dash, secure it to the firewall using 1/4-inch bolts. The Vintage Air kit includes a template to help locate the front bracket mounting location. The backside of the evaporator attaches to the inner cowl with ¾-inch-long No. 14 sheetmetal screws.
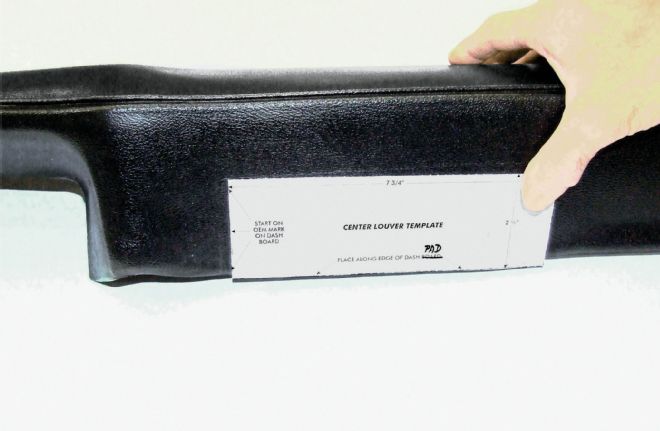
In '69 Camaros that were not equipped with A/C from the factory, there are no air vents in the center of the dash. The Vintage Air kit corrects this oversight, which involves cutting an opening for vents into the dashpad with a utility knife. The kit includes a template that helps establish the cut lines.
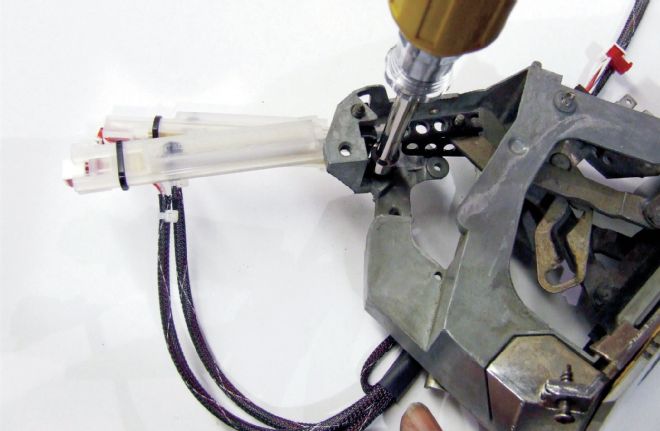
Vintage Air has devised an ingenious way of adapting the cable-actuated OEM ventilation control levers to interface with the ECU mounted on the evaporator assembly. After trimming the factory levers, a Vintage Air wiring harness taps into the factory potentiometer wiring, then plugs into the ECU. The Vintage Air ECU converts the cable signal to an electronic signal. The ECU learns the exact stroke of each lever to compensate for wear in the mechanical control system. This ensures full door travel for maximum cooling.
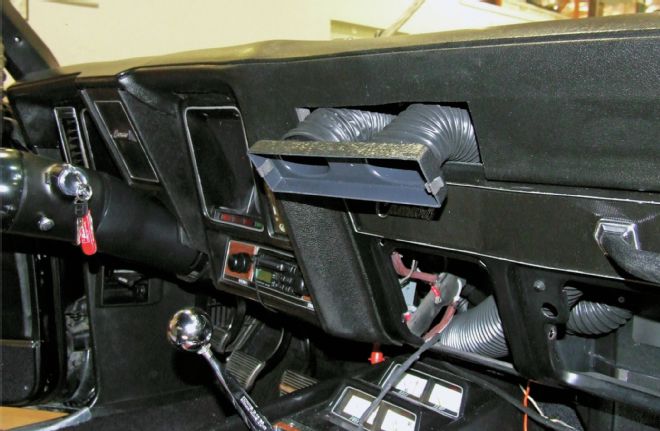
The final step before buttoning up the dash is routing the air hoses from the vents to the evaporator assembly. The system includes hoses for the driver-side defrost vent, the passenger-side defrost vent, two center vents, the driver-side vent, and the passenger-side vent. Although it may look intimidating, the hose routing is clearly depicted in the Vintage Air instruction book.
With the air hoses mocked into position, reinstall the dash, dashpad, instrument panel, and air conditioning control panel. Retighten the steering column bolts as well. The Vintage Air kit includes adapters to fit the new air hose onto the OEM air vents.
Mounted on the evaporator casing, the ECU is the brains of the Vintage Air Air Conditioning system. It controls coil temperature, fan speed, air routing, and cabin temperature. The air conditioning control panel plugs into one port on the ECU, while the main wiring harness—which interfaces with the relays, ignition switch, dash light, heater control valve, compressor switch, and battery—plugs into the other. While it's beyond the scope of the article to cover the wiring of the air conditioning system step by step, anyone with basic wiring skills should be able to wire everything up in a couple of hours.
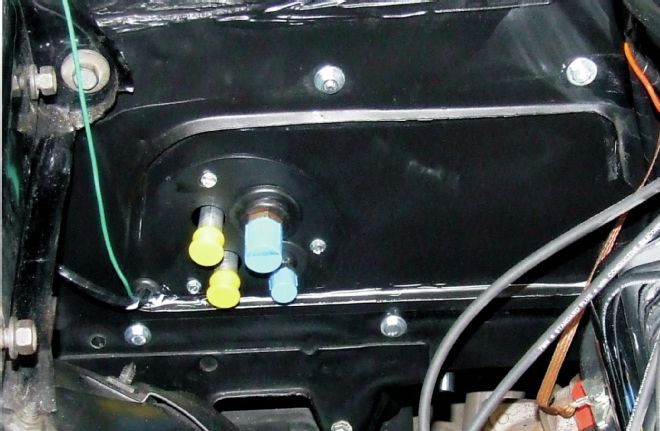
The hard lines for the refrigerant and radiator coolant exit the cabin through the firewall. Vintage Air supplies a firewall cap for a tidy installation, which needs to be sealed off with silicone prior to screwing it down.
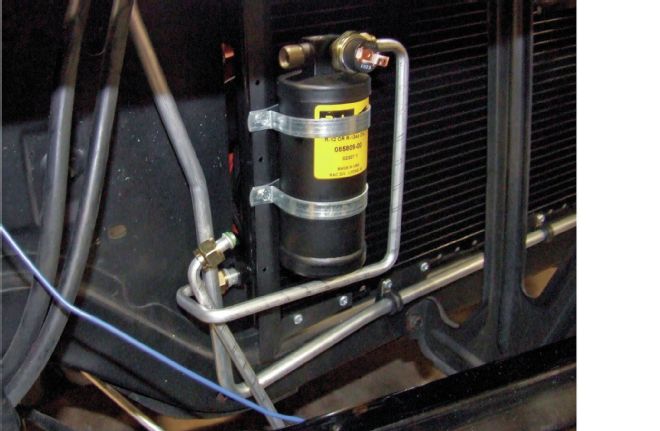
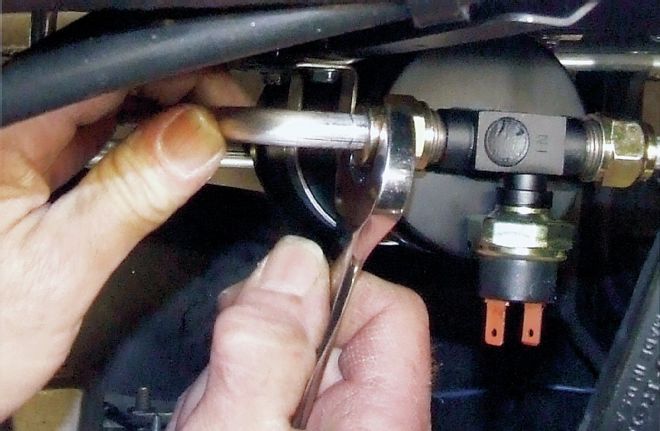
Installing a binary safety switch on the drier assembly protects the A/C system by shutting off the compressor during extremely high- or low-pressure situations. Cars equipped with an electric fan can opt for a trinary switch, which activates the cooling fan once the A/C system reaches 254 psi. After installing the switch, attach the No. 6 drier-core support hard line to the upper-righthand port on the drier assembly.
The upper-lefthand port of the drier assembly connects to another No. 6 hard line, which routes through the core support, beneath the battery tray, and to the firewall. The O-rings at each hard line connection must be lubricated prior to tightening down the fittings.
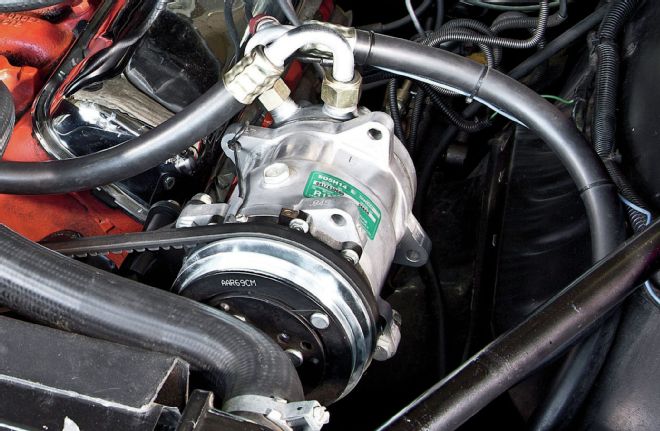
The suction port on the compressor is the port closest to the driver-side fender, and it connects the compressor to the No. 10 evaporator hard line located at the firewall. The discharge port connects the compressor to the No. 8 condenser-to-compressor hard line.
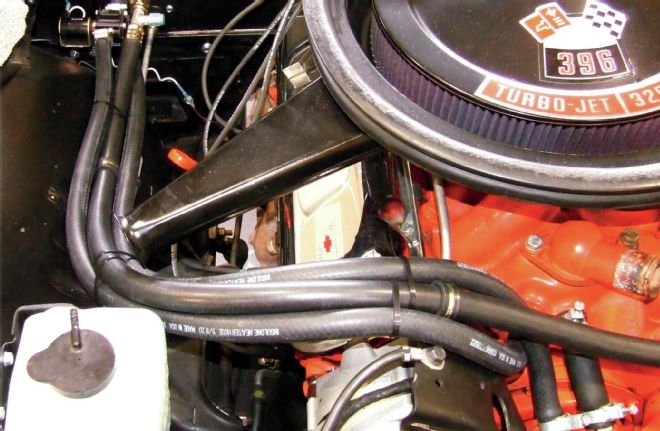
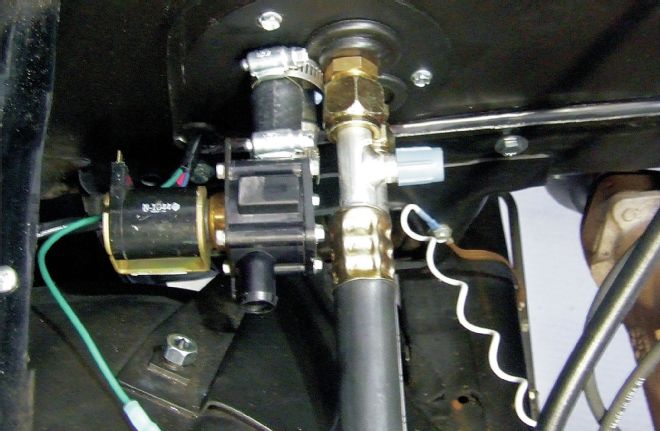
The heater control valve regulates the flow of radiator coolant to the heater core. Using a 3-inch section of hose and pair of hose clamps, attach the heater control valve to the upper heater hard line protruding through the firewall.
To prevent unwanted movement, attach the compressor suction hose to the alternator bracket using an Adel clamp. Vintage Air recommends securing the condenser-to-compressor hard line to the driver-side inner fender with an Adel clamp as well.
The last bit of hose routing involves connecting the lower heater hard line at the firewall to the water pump. Finally, route a length of hose from the heater control valve to the intake manifold.
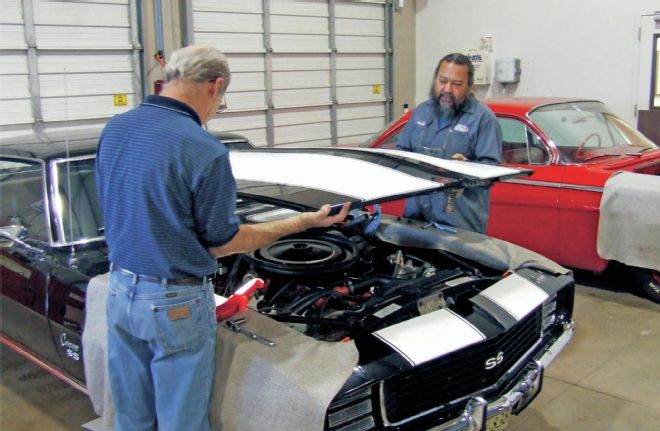
With the air conditioning system installation complete, reattach the grille, fenders, and hood. Likewise, reconnect the battery, and top off the radiator.
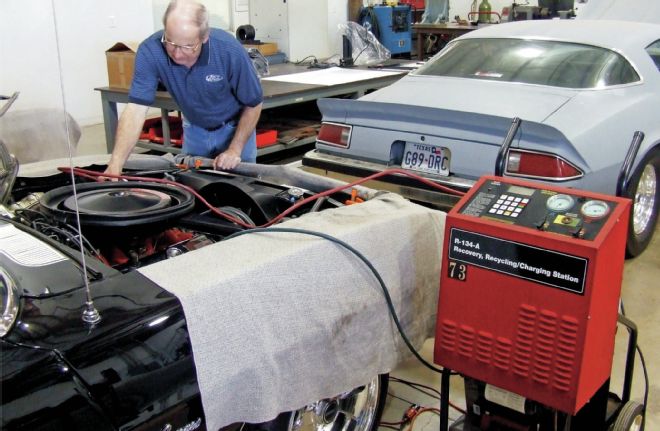
Since most DIYers don't have air conditioning servicing equipment at home, Vintage Air recommends having the system charged at a professional air comditioning service facility. Before filling the air conditioning system up with R-134-A refrigerant, it should be evacuated for at least 45 minutes to remove any debris that may have entered the system during assembly.
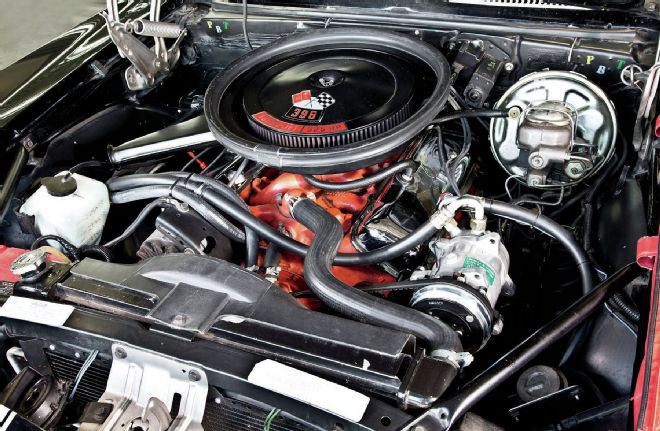
As with the interior, the superclean install of the Vintage Air air conditioning system looks factory except for the fact that the modern compressor is half the size of an OEM unit. With the ugly factory heater box removed, it actually looks better than stock.
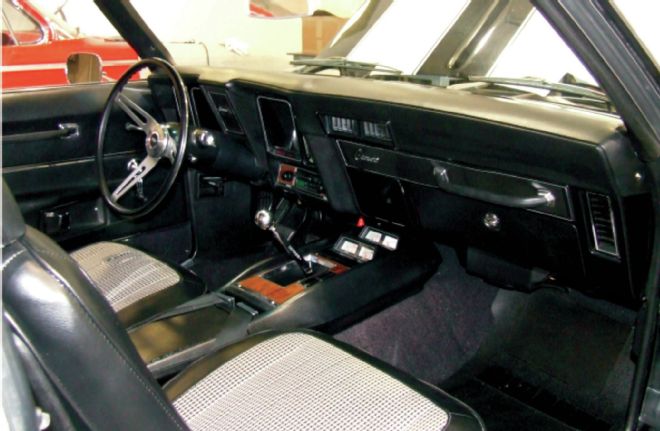
Other than the addition of the new center vents in the dash, the all-original SS396 Camaro still looks all-original. The big difference is that the owner can now cruise in a comfy 65-degree cabin even when it's 105 degrees outside.