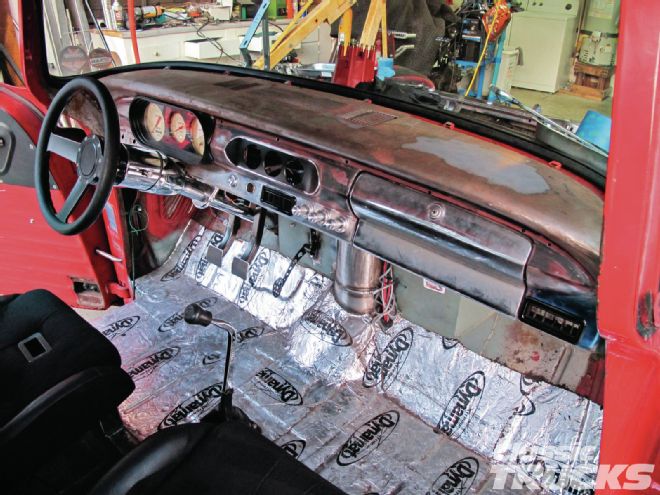
One of the major things you notice about a classic truck is the interior dash area. If you have followed my project vehicle at all you know that I replaced the stock dash with a 1964 Chevy Nova Dash in the June 2011 issue of CLASSIC TRUCKS.
With that install I ran into a few issues like the underdash structure and the holes all over the dash, so I gave up to work on other items on the truck. I’m slowly picking away at filling the holes in the dash and fixing the underside support braces that I temporarily installed to get the article done.
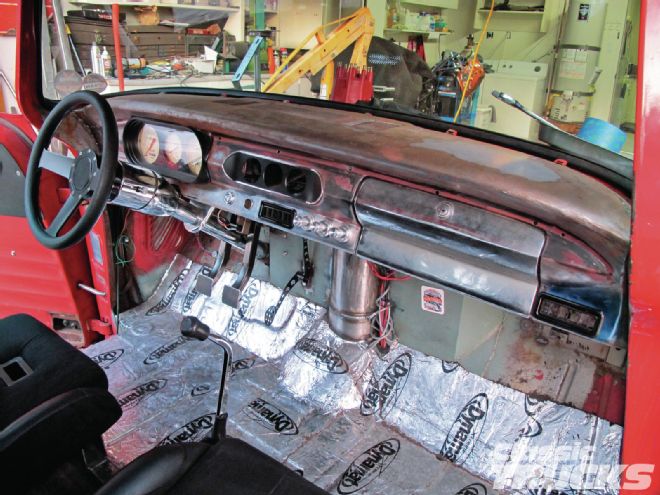
Every time I got in the truck I thought about filling in the heater control holes, radio, and to hide all the key switches, but after doing a quick search for Nova dashes I was left thinking about where I would put it all. Besides I liked the stock dash configuration, but wanted to smooth the flow of the dash by filling in the ashtray and adding a place for the dash vents.
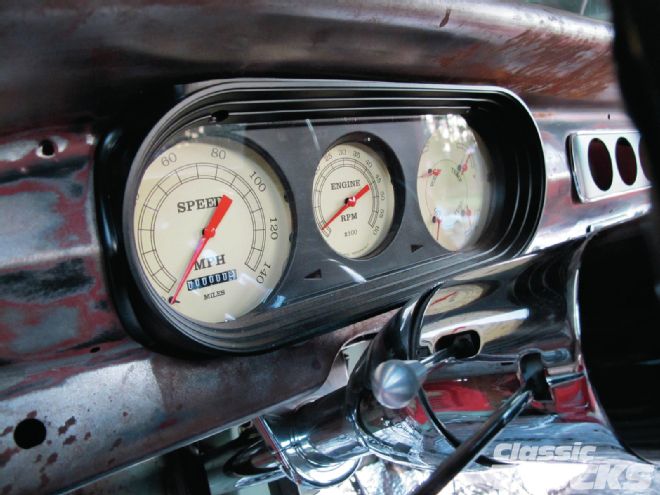 01 The Classic Instruments dash came with a chrome dash bezel that was sold separate from the cluster. I’ve always wanted to paint the bezel flat black, but I was afraid of the paint peeling because the bezel was plastic. I called a friend that recommended the Dupli-Color trim black for painting metal and plastic parts. So I simply painted the bezel trim black and it made a huge difference in the way the cluster looked.
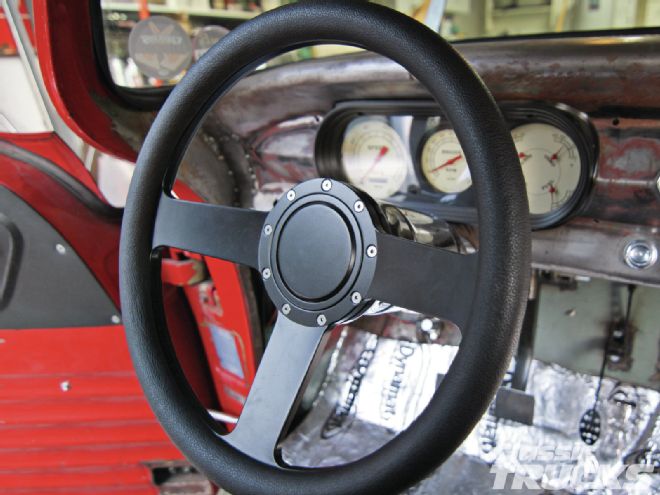 02 To go with the cluster I ordered an Eddie Motorsports steering wheel that fit the CPP column with their custom adapter. Both steering wheel and adapter are machined really nice and have been powdercoated black by Eddie Motorsports.
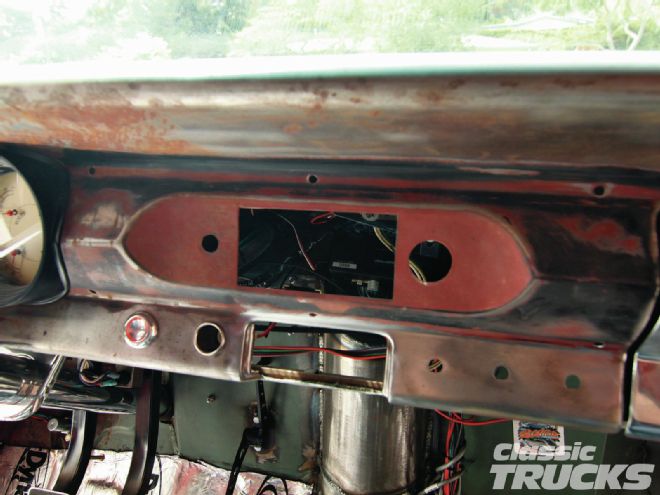 03 The center section of the dash was looking a little bare bones and I didn’t intend to leave it that way. I was in the process of installing a Vintage Air A/C and heating unit and couldn’t help but wonder where to install the vents. One day it dawned on me, because my ashtray kept falling out, to put the center vent where the ashtray is.
 04 A simple poster board template cut out to match the shape of the dash was used to trace on some 16-gauge sheetmetal.
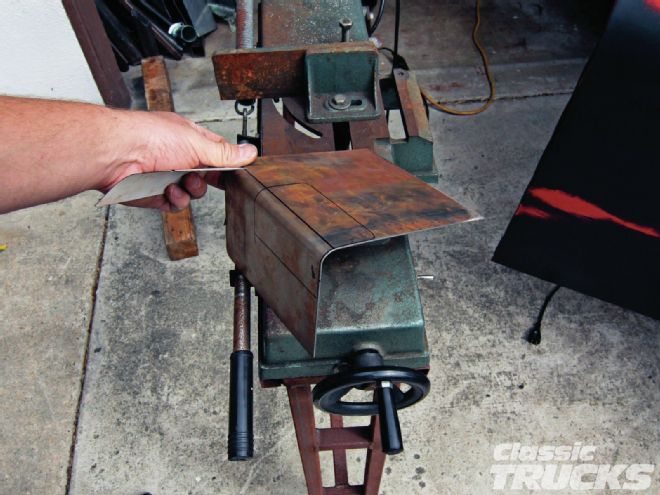 05 The sheetmetal was bent using a break at buddy’s shop, then cut to shape with a small bandsaw.
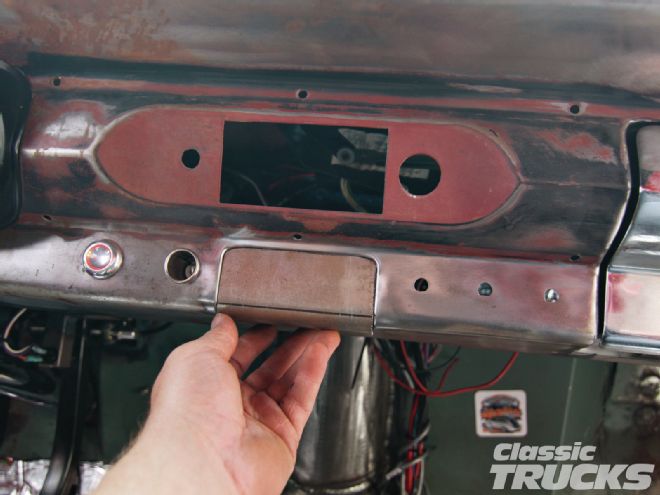 06 Take your time to make the piece fit perfect; if not, the dash will look wavy when its welded in.
 07 A wire wheel on the end of a drill gun was used to clean up the old paint and rust. This ensured a solid and clean weld with no contamination. I also cleaned the surface with some 2,000-grit sandpaper to get rid of anything left behind by the wire wheel.
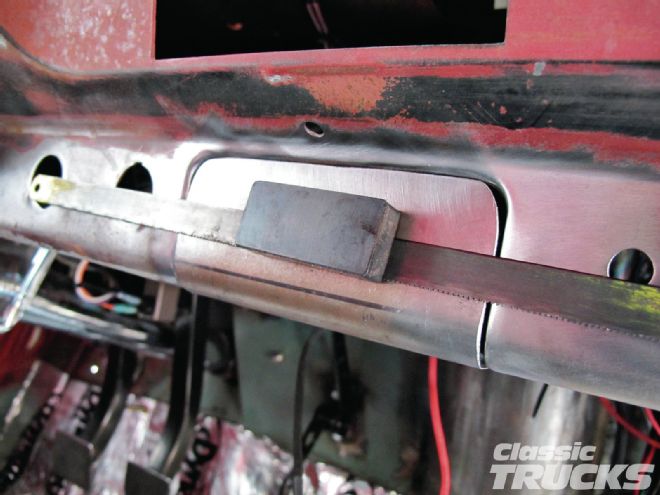 08 A hacksaw blade has several uses to me. I not only use it for a straight end, but it makes a good third hand when combined with a manganite. If you are TIG welding the dash with the manganite attached you will notice the arc jumping around because of the manganite. I only used it to tack the corners of the plate.
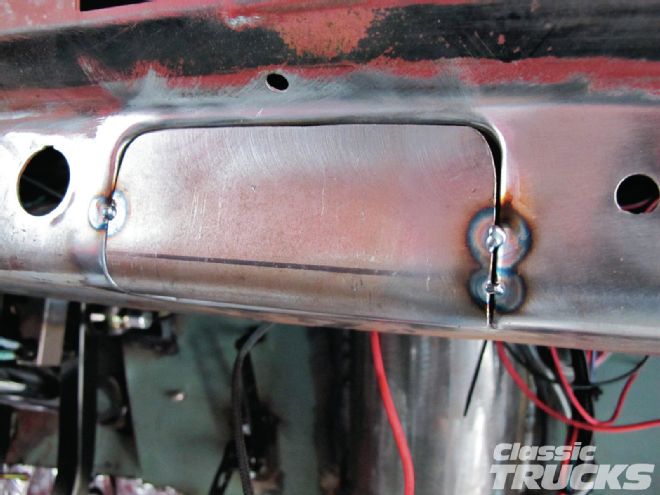 09 The plate was tacked in several spots and let cool for several minutes so that I didn’t warp the dash or new sheetmetal piece.
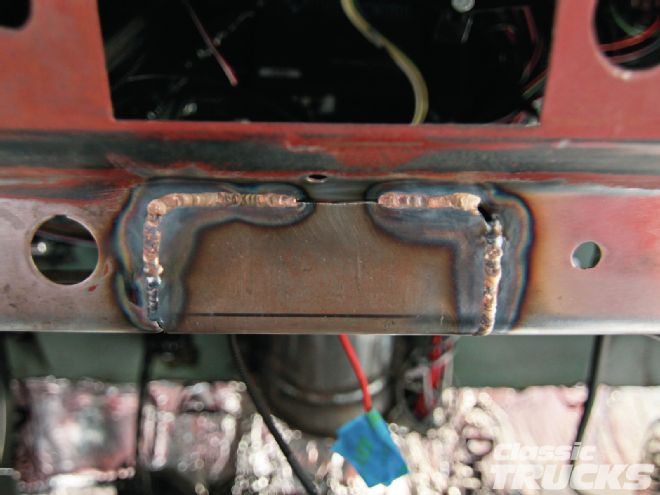 10 I like to use silicon bronze filler rod to work on dash parts and other pieces that don’t require a lot of structural filler.
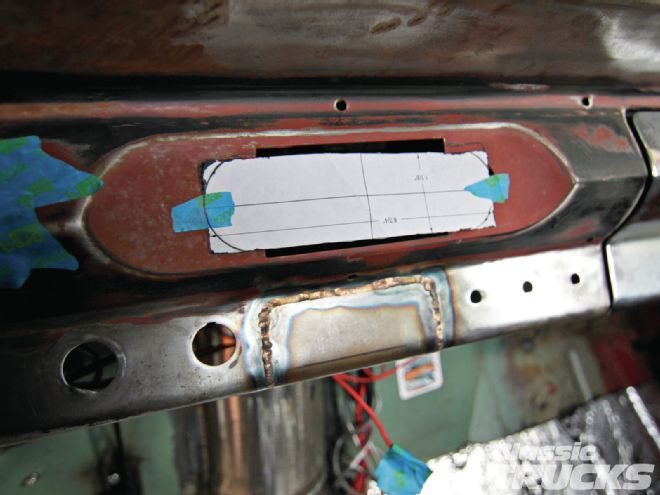 11 The radio plate from Classic Instruments was next. I used the provided template to mark the area that needed to be cut out to make room for mini gauges.
 12 Before I cut out the radio area I made a template for the new Vintage Air vent.
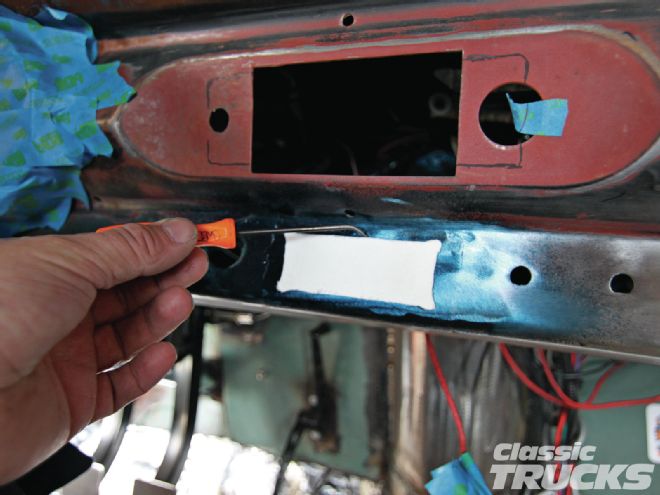
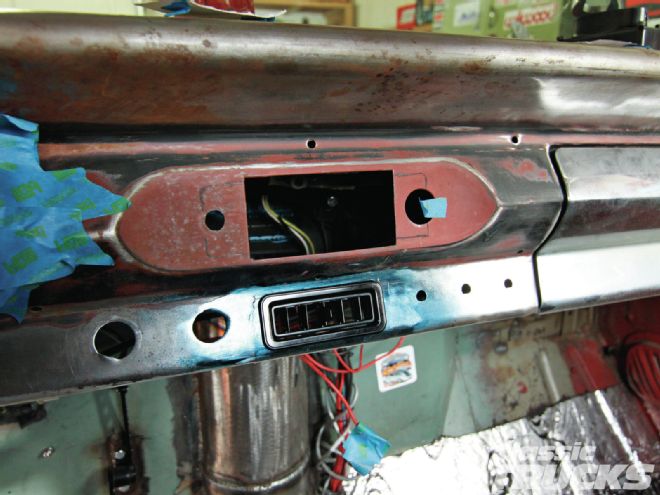
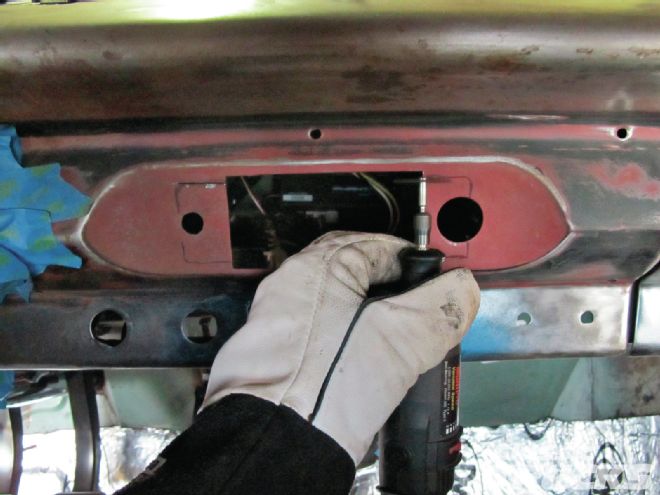
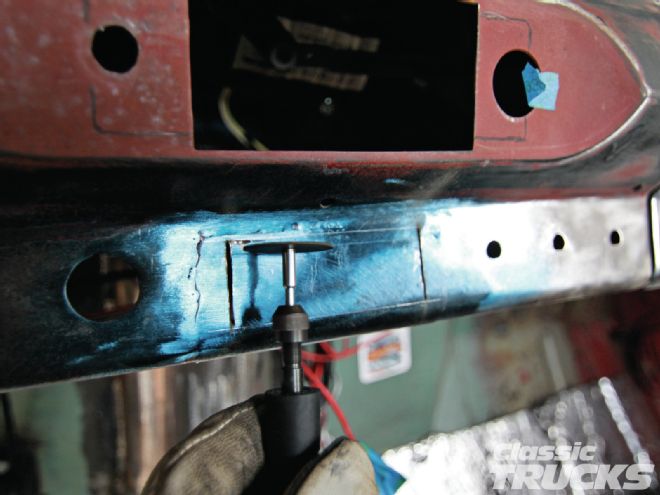 13 Using machinist dye I was able to mark out the area that needed to be removed. I cut out the sheetmetal with a Dremel tool and a small cutting bit.
 14 Using a small file I fit the Vintage Air vent in so that it was nice and tight. I really like how these fit and they look like they belong in the dash.
 15 The same process was used on the radio area to cut out the extra material.
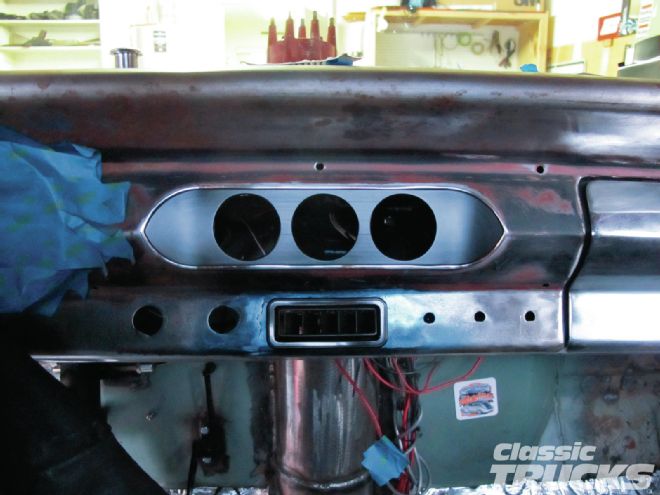 16 The Classic Instruments dash insert fit perfect. Now all I have to do is pick gauges to match the cluster. I’m thinking about using oil temp, power steering temp, and a clock in the middle.
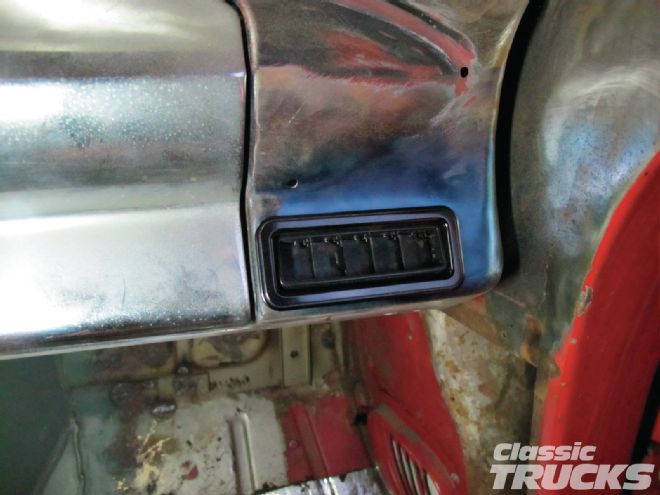 17 I’m using the same Vintage Air vents for both the left and right sides of the dash. Here is what the vent looks like installed in the passenger side. Fits perfect.
 18 Not bad looking for a few hours here and there. Now all I have to do is finish the driver side vent and get ready to install the A/C unit.