Regardless of whether you're walking through a parking lot at your local cruise night, or across the fairgrounds at a major event, it's easy for your eyes to become overwhelmed by vibrant, glossy paintjobs. Pearlescent bodies covered with flames, graphics, and even metalflake highlights seem to call for your attention at every corner.

However, it's the subtle cars that seem to easily gather crowds with their non-metallic bodies covered in simple postwar color combinations. If you factor in a car sporting original, well-worn factory paint, most of the time the crowds around it will get even deeper. There's nothing more pure than a hot rod running some of Detroit's original vibe showing off its wear and tear as the decades have passed. Original patina makes a statement all on its own, regardless of whether it's been on the street since it left the production line or if it was hauled out of a barn the year prior and just brought back to life.
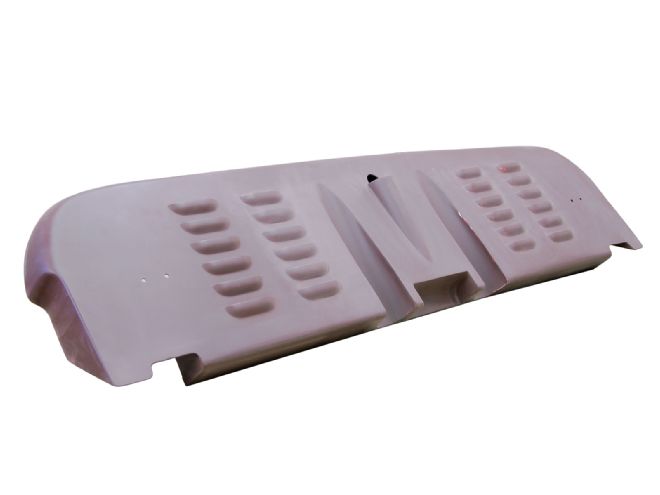 The Rolling Bones Hot Rod Shop is well known for their attention to detail when designing many of their custom parts. With the bodywork and initial priming completed on this '32 Ford rear roll pan it was time to get ready to turn the clocks back regarding its final finish.
What happens, though, if you are building an era-correct hot rod and want that aged look for your new creation? There are a number of ways to inject the soul into your build to establish a look that appears to have weathered the years gone by. A properly executed patina'd paintjob should not only look the part, it should also cause anyone checking it out to ponder whether it's always been there.
The team at the Rolling Bones Hot Rod Shop in Greenfield Center, New York, builds some of the most well-recognized, traditional hot rods in the country today. Each one is an individual statement melding vintage style and performance along with the appearance that the car is decades old. Their signature patina'd bodies have become the benchmark for the look, and we were able to get the lowdown on just how it's achieved.
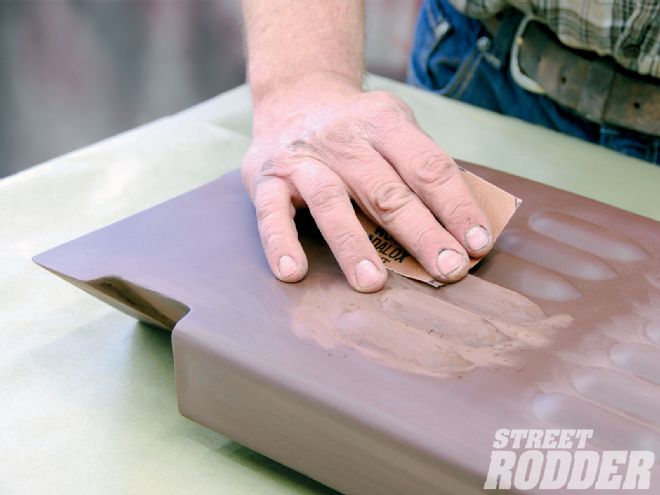 Team member Matt Schmidt began the process by dry sanding the surface, starting with 180-grit and working his way up to 320-grit (pictured here).
Team member Matt Schmidt let us follow along as he prepared to age a newly fabricated rear roll pan for a 1932 Ford coupe. With the bodywork and initial priming portion of the job completed, it was time to focus on turning back time. Once the panel was sanded smooth with up to 320-grit dry, he followed using a maroon scuff pad, being sure to work it into every crevice and contour.
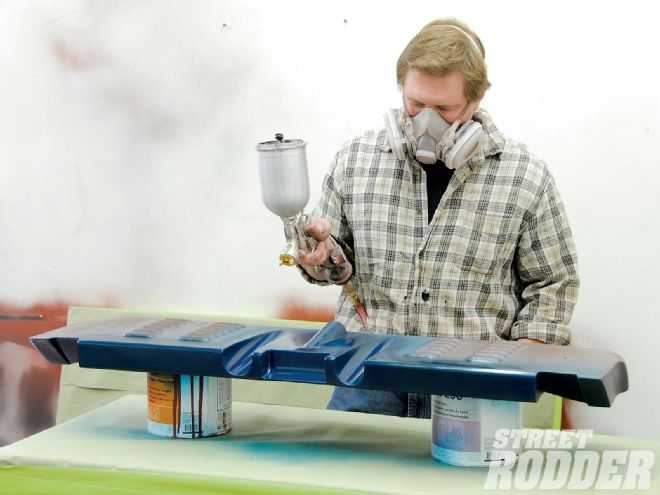
Schmidt then prepared the panel for the next step by first blowing it clean and then washing it thoroughly with PPG Acryli-Clean DX330 wax and grease remover to remove any contaminants from the surface, and then dried it with a soft, white cloth. To begin the creation of the illusion, Schmidt mixed some PPG Kondar DZ7 Acrylic Primer Surfacer Red Oxide with a dash of Duracryl DDL9300 black acrylic lacquer to attain just the right shade. Mixed in a ratio of one part paint to one and a half parts thinner, he began the application to the surface of the roll pan using a 1-inch bristle brush. The primer was then dabbed into key areas that would naturally wear or deteriorate due to age and abuse.
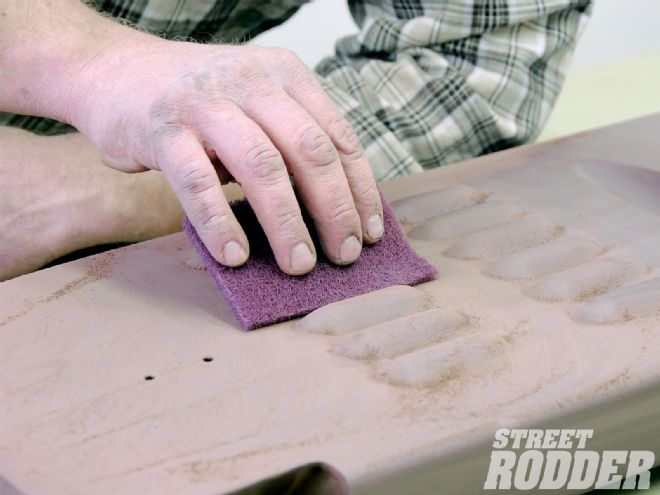 To complete the surface preparation once the sanding was done, Schmidt then followed with a maroon scuff pad, making sure to evenly run the pad over the entire surface and into every minute area.
This is where the artistic skills come heavily into play as you plan out the future to create the past. Many of the areas received additional coats to build up the surface since they will be worn through as the procedures reach completion.
Once the surface had sufficiently dried, Schmidt followed by mixing the mid-coat, which will act as the breakthrough color to accentuate the look once the wet-sanding process begins. PPG Washington Blue Duracryl Acrylic Lacquer and DX685 Urethane Flattening Agent in a ratio of 9-ounce flattener to 1-quart gloss thinned with lacquer thinner in a ratio of one part paint to one and a half parts thinner were sprayed onto the panel in two heavy coats.
Once dried and without re-sanding the panel, Schmidt mixed the final topcoat. Since the completed car would be red oxide in color, he once again blended up a batch of PPG Kondar DZ7 Acrylic Primer Surfacer Red Oxide with a dash of Duracryl DDL9300 black acrylic lacquer in a ratio of one part paint to one and a half parts thinner. After laying down two heavy coats, the panel was left to dry for 24 hours. Once cured, it was now finally time to start the aging process and Schmidt got stated by first methodically wet sanding the panel using 600-grit sandpaper.
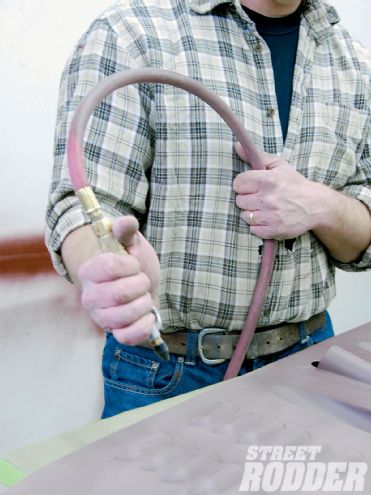 With all of the sanding completed, an air line was used to blow the surface clean.
A notable tip is to add a bit of dishwashing liquid to the water in your bucket to give the paper just a hint of slip, making your job easier. As he moved into the areas that were purposefully built up by the brushed-on red oxide acrylic primer surfacer, extra effort was required to begin exposing the Washington Blue hue hidden beneath. It's a solid idea to take your time at this step of the process so as not to over-sand the area. The beauty of exposing the color beneath is that you are in full control of the final outcome of the breakthrough.
When moving onto the flat surfaces as well as the curved sides of the roll pan, Schmidt used a flexible sanding block to achieve a nice, even paint surface. Particular painstaking effort was paid to the louvers, making the final outcome of their aging well balanced. Once the wet sanding was completed, the panel was thoroughly washed with clean water and blown dry. After a close inspection of the surface, Schmidt continued on using a maroon scuff pad to remove any fine sanding scratches while also ensuring a perfectly balanced surface texture. When finished, the surface was again blown clean, preparing it for the final step.
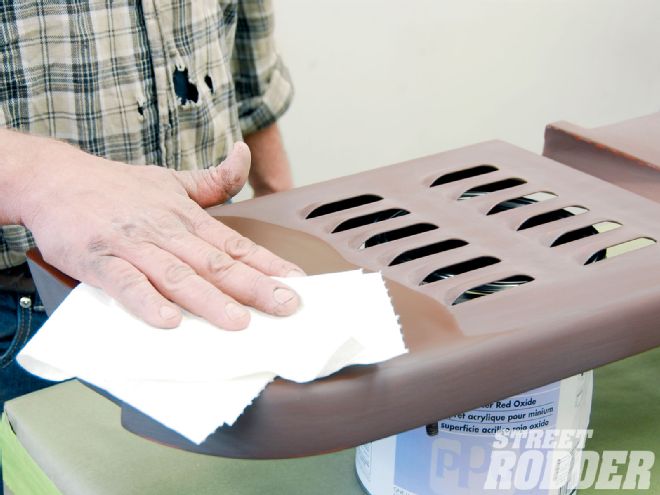 Using white paper towels, Schmidt wiped down the entire surface with PPG Acryli-Clean DX330 wax and grease remover to thoroughly clean the surface of any contaminants, including skin oils. He then dried the clean surface with fresh white cloths.
We have to admit that the final step caught us completely off guard when Schmidt broke out common red shop towels and a can of Comet cleanser available at any supermarket. To complete the surface transformation he wet the shop rag and wrung it out, then applied a dusting of Comet to it and began to work it into the paint. Using both circular and left to right motions with a hint of water, he skillfully worked the compound into the paint to add the final bit of distress to the paint surface. When the panel had been completely tended to, he washed it with clear water and a soft brush to ensure any of the remaining grit had been removed. Once wiped clean with a soft white cloth, it was downright amazing to see firsthand the patina that had been achieved. The final surface is one that is extremely durable and one which will age well over time. Mastering the illusion of a paintjob that had weathered over decades, yet being only days old is truly a skill.