Right from its introduction in late 1954 the ’55 Chevy, the first of the Tri-Five trinity with its new V-8 power, marketed by General Motors as “The Hot One,” has never gone out of style. In 1957, Chevrolet’s official spiel went “This one runs like the tires are two inches under the pavement! We mean it sticks! What makes Chevy hang on like an amorous anaconda? The same kind of engineering that makes the Corvette America’s only sports car. Things like weight distribution close to 50-50. Like outrigger rear springs.”
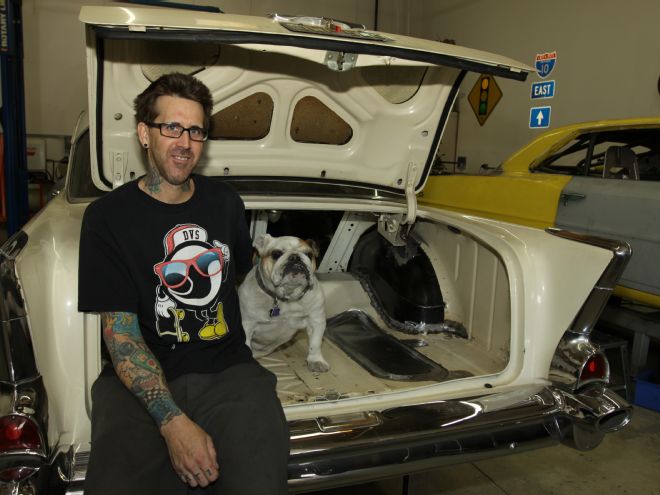
It’s those same outrigger rear springs that are the focus here. Our subject vehicle is Westech Performance Group owner Rick Stoner’s 1957 Chevy 150 two-door sedan he’s building to replicate the street-legal ’55 Chevy drag coupe he had back in the day. Way back in the day there were a few popular ways to make more clearance for bigger meats in the rear. A guy could bow out the quarter-panels, flare the wheelwells, or build it gasser style by jacking the rear up until the slicks fit underneath the wheelswells. For a kid’s low budget street gasser a straight-axle plucked from a junked, old half-ton pickup worked to jack the front end up to match elevation. For status at the high school, a jacked-up street gasser was as cool as any lowered custom car.
The cleanest way to stuff bigger meats under a Tri-Five for better traction is none of the above methods, rather it is a means developed in the mid-’60s for the first of the Funny Cars utilizing wheeltubs and rearend narrowing.
Robbie at Robbie Miller Racecars in Upland, California, installed a setup into Stoner’s ’57 called a rear spring pocket kit that’s been manufactured by Williams Classic Chassis Works since 1971. The kit relocates the rear leaf springs inward from their original outrigger configuration (outside of the frame) to underneath the framerails, providing additional width within the wheelwells. Once the spring pockets were fabricated into place, the next step was to fit and weld in a pair of Classic Performance Products 3-inch wheeltubs. The beauty of installing a rear spring pocket kit with 3-inch wheeltubs is the Tri-Five’s outside appearance remains absolutely stock, yet with newfound room inside for much wider tires.
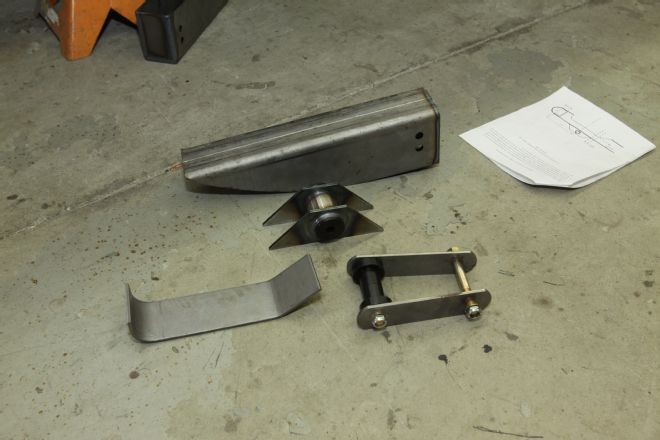
01. In production since 1971, Williams Classic Chassis Works rear spring pocket kit relocates the Tri-Five outrigger-style parallel leaf springs to on-center of the framerails to increase clearance for wider tires.
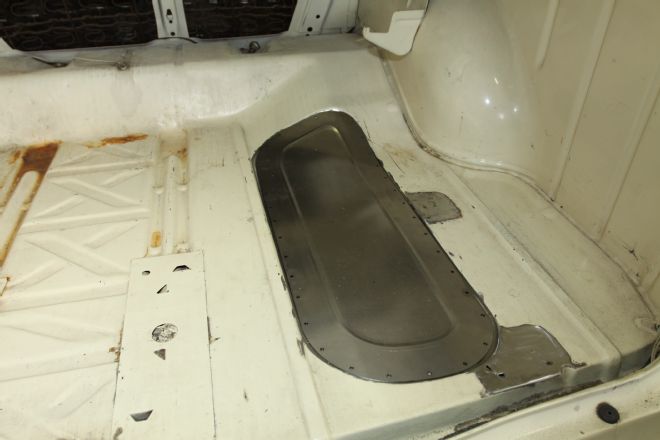
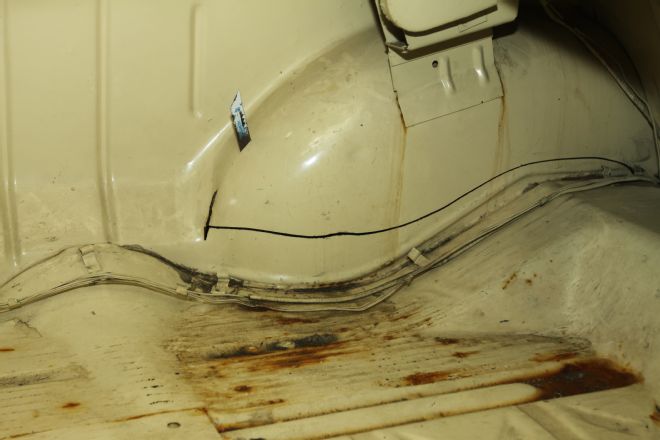
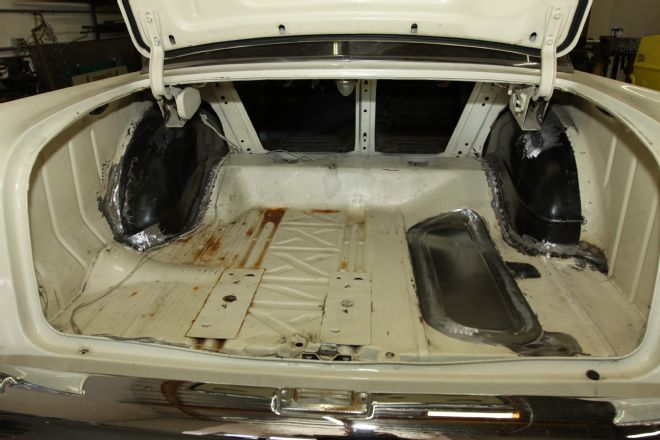
02. It’s necessary to remove the spare tire well from the car to allow clearance for the passenger-side spring pocket kit. First, the spare tire well should be removed, and then lastly the cover installed. Leaving the spare tire cover until last allows good access during installation. Shown here, Williams’ optional 16-gauge spare tire well cover.

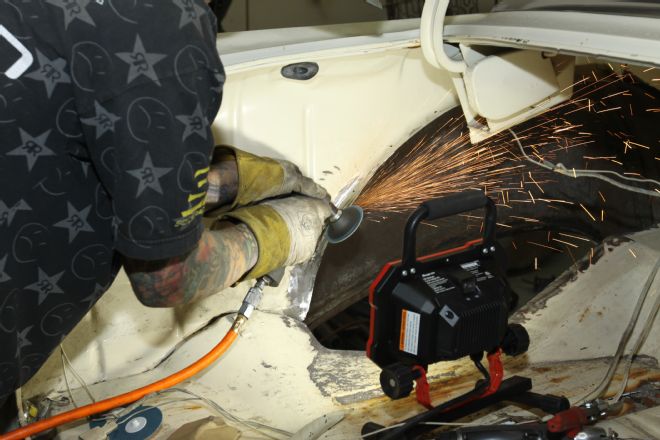
03. To get the job done as quickly as possible with the best results obtainable, pro shops like Robbie Miller Racecars invest in heavy-duty 1hp die grinders and ceramic abrasive wheels to cut steel like butter. DIY grade tools will do the job, they’ll just take longer.
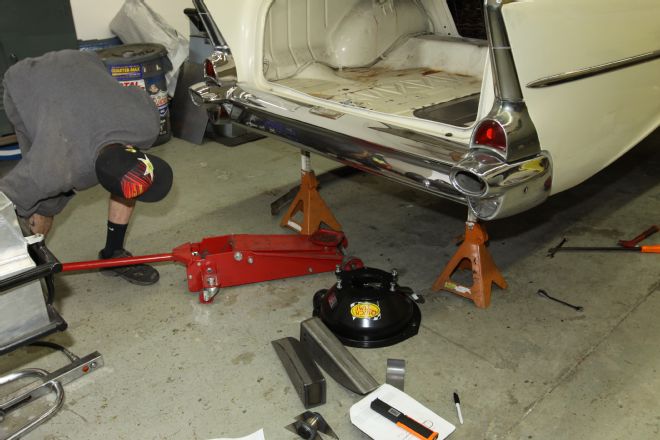
04. For the first step, Robbie raised the ’57 on a level section of cement floor and placed it squarely on jack stands. Safety Tip: Once up on jack stands, shake the car to ensure it’s safe to go under it.

05. The driveshaft, rearend, and gas tank were removed, followed by the leaf springs.
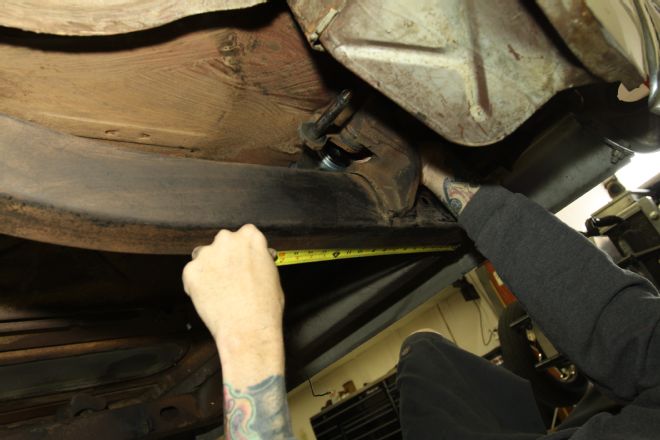
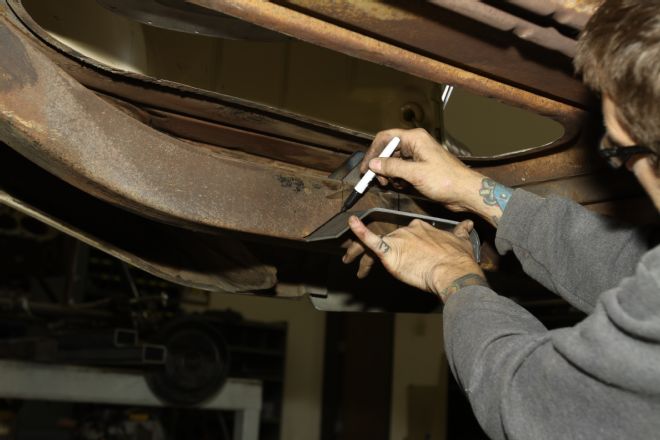
06. Before the front and rear leaf spring perches were removed (cut off), it was essential to measure where the front and rear bolt centers for the leaf spring eyes were located on each framerail.
07. To prevent the frame from springing (dropping) out of shape (square), Robbie welded support braces from the floor up to the frame before the rear notches were cut out.
08. The front spring perches are forgings, so Robbie used a ceramic 4-inch cutoff wheel on a 1-horsepower die grinder along with a sawzall to remove them. Cleanup was done with a flexible disc on a body grinder.
09. The rear spring perches are stamped-steel brackets welded to the framerails. A sawzall was laid flat against the frame to cut the welds. Cleaning up the remaining weld was done with a body grinder.
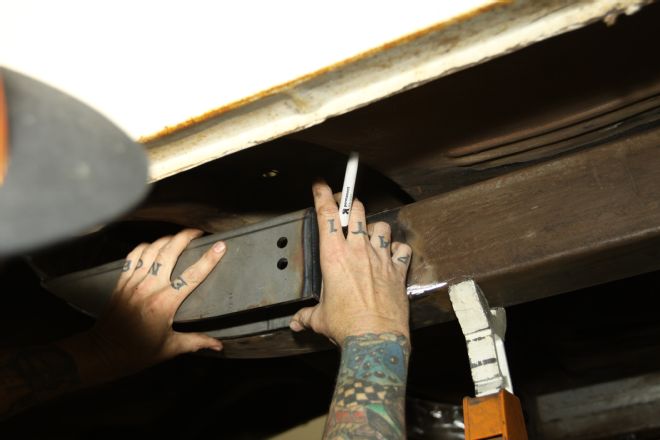
10. Robbie held the spring pocket alongside of the framerail to locate its position and then marked the spot with a vertical line.
11. Next, Robbie scribed the cut-lines with a sharp scribe and straightedge.
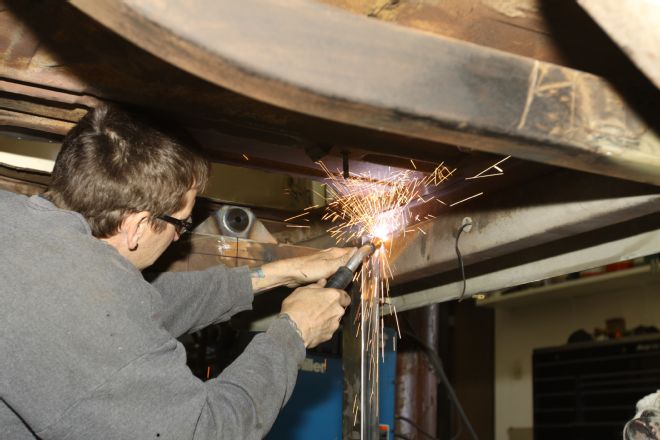
12. The 1-horsepwoer die grinder with a ceramic 4-inch cutoff wheel made short work out of cutting the hole in the framerails for the spring pockets.

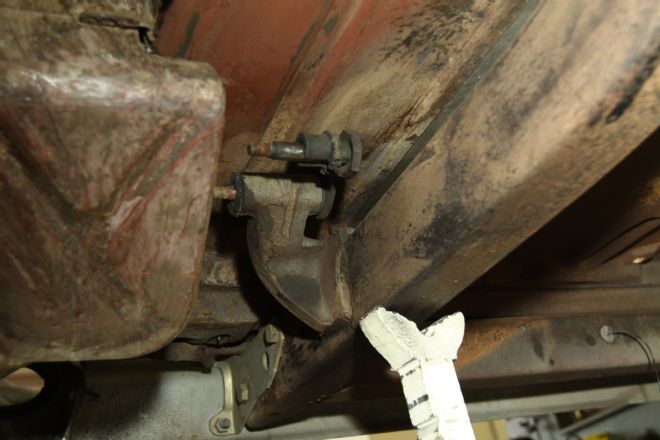
13. A fanatic for super clean detailing, this is how the completed spring pocket installation looked after Robbie finished welding it in and grinding the welds down.
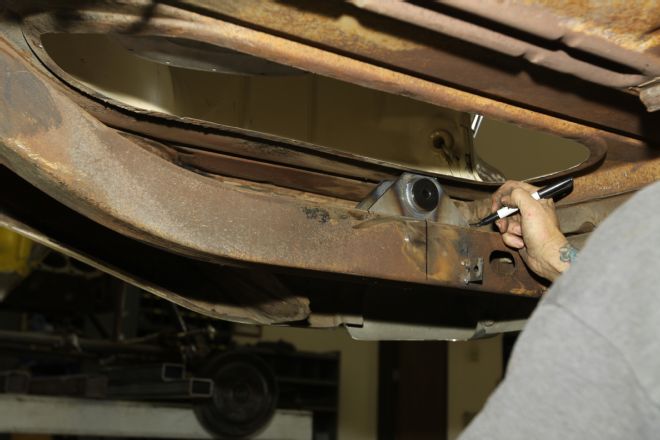
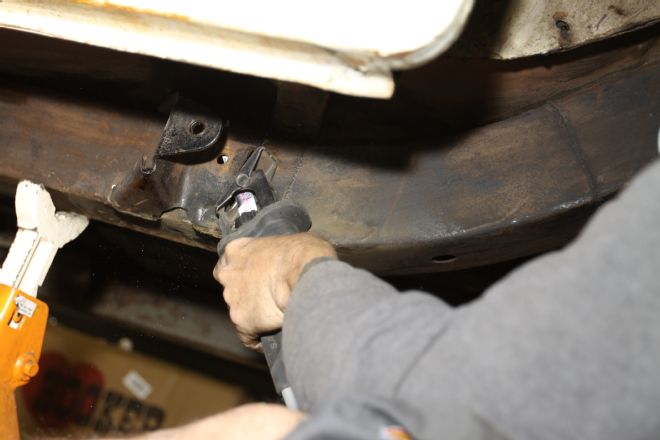
14. The eye of the rear shackle perch was aligned (centered) with the vertical mark indicating the center of the original eye and then the shackle perch was welded into place.
15. The center of the notch was aligned with the eye of the shackle perch and then cut lines for the notch were drawn using the notch plate as a template. A die grinder with a cutoff wheel made the cuts.
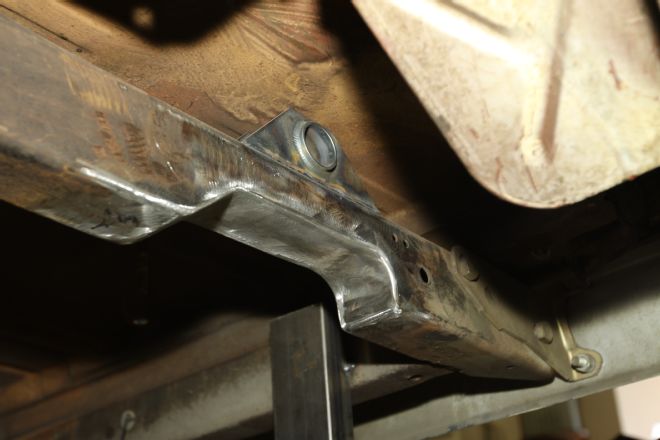
16. This is how the shackle perch and notch appeared after Robbie welded it in and then ground the welds.
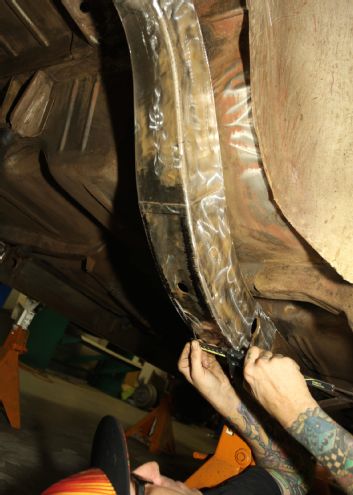
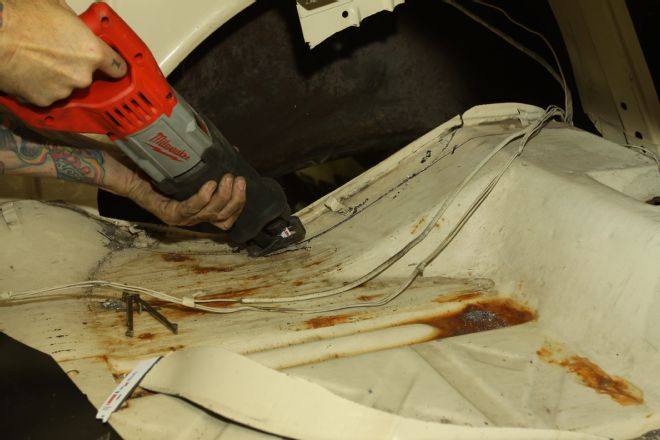
17. Starting the installation for the CPP 3-inch wheeltubs began with marking undersize cut lines and cutting the stock wheelhousings (tubs) off the car with a Sawzall.
18. After a trial fit of the CPP wheeltub bringing it up from inside the wheelwell, Robbie used the Sawzall to trim away excess metal and then retried fitting the CPP wheeltub.
19. Fitting the wheeltubs is a process of trial and error until they fit. Robbie used a ceramic disc on an angle grinder to finesse and trim the edges straight.

20. Here, Robbie is measuring to ensure the trunk lid hinge supports will reinstall (fit) properly to the CPP 3-inch tubs.
21. In this photo, the wheeltub is pushed into place and fitting exactly as it should. Robbie clamped on wide-mouth vice grips to the tub’s outer front and rear edges to hold it into place.

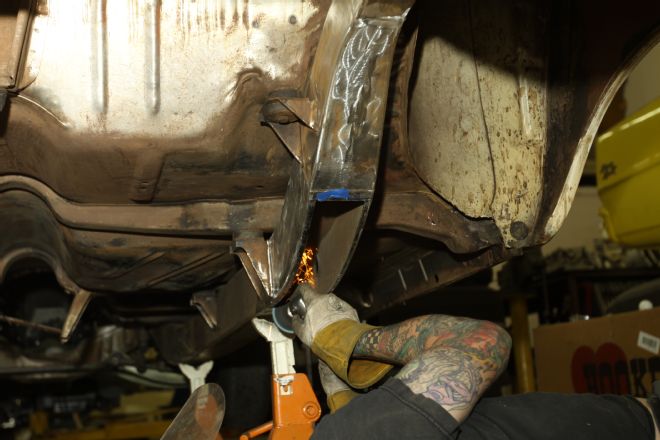
22. With the wheeltubs clamped securely in place, holes were drilled to accept Cleco fasteners allowing the CPP wheeltubs to butt up snugly against the body. Next, Robbie tack-welded spots in a spread-out sequence to weld the tubs in place evenly.
23. After thoroughly tack welding the tubs and spare tire cover in, a bead was welded all around the outer edges of the wheeltubs and spare tire cover. The finishing touch was to grind the welds smooth.