One of the most critical items to help your diesel engine survive to haul another day is fuel filtration. Fuel contaminants are the eventual killer of most injectors but, unfortunately, some diesel owners may not realize this until it is too late. FASS fuel filtration systems have become very popular, as these simple devices remove air or vapor from the fuel, along with any water and debris down to 3 microns. Removing the air in the fuel prevents cavitation inside the injection pump and injectors. Cavitation wears on internal parts of the injector and will, over time, ruin a fuel injector. FASS claims its products can eliminate the air heading to the injectors, so this is great preventive maintenance.
We installed FASS Fuel Systems’ Titanium Series diesel fuel lift pump and filtration system (T C10–095G, MSRP: $597.55) after researching reliable products that would help ensure the survival of
our ’04½ Chevrolet Duramax LLY engine. This 95-gph system would protect the diesel engine’s fuel from contaminants (water, dirt, air) and hopefully boost its performance—alongside the 20-percent-over extruded injector nozzles and larger exhaust manifolds. The installation process was somewhat simple and required only one specialized tool, which can be picked up at the local auto parts supply house. Here are some simple steps to help the DIY mechanic get a fuel filtration system set up.
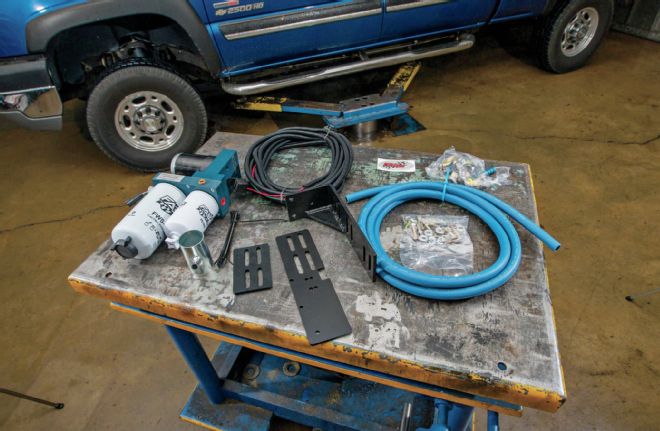
| Fass System Parts
If this is the first time you have attempted this type of install, lay out all the parts and take a quick inventory. Be sure your truck is clean (at least in the area you will be mounting the FASS system) to reduce the possibility of dirt falling into the fuel filler neck or onto fittings during assembly. You will need at least one special tool to release the fuel line fittings, which most auto parts stores carry.
Find a power source in the fuse panel that powers up with the key switch on. This will be the fuse we tap in order to power the pump. We found the 20-amp B/U LP or Back Up Lamp fuse to be a great choice.
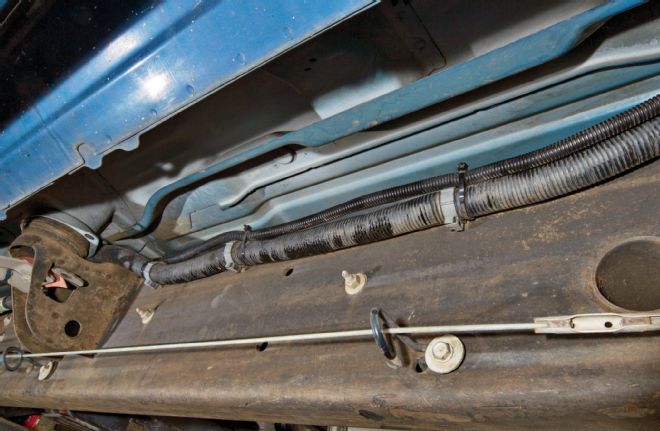
| Wiring Harness Ran Along Frame
Crimp on the ring terminals to the wire harness before fishing it along the framerail. There is a wire bundle running along the framerail up into the engine bay on the driver side, so just simply zip-tie the harness here to secure it. Be sure to avoid any heat sources that could melt the wires or sharp edges that could cut into the wiring harness. Some sheetmetal edges under the cab are very sharp. Keep the wires up and out of the way of road debris that could pull them free.
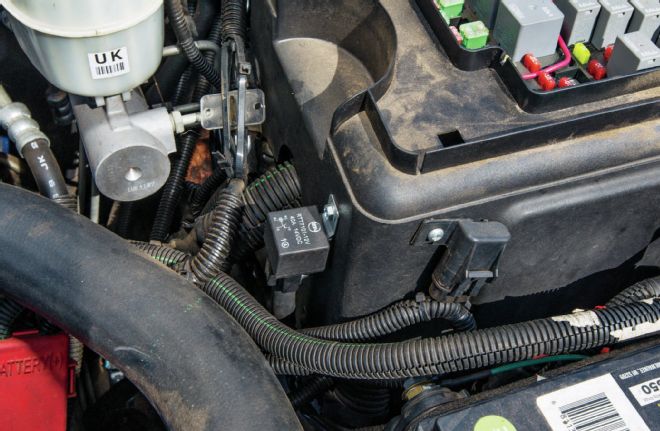
| Relay Mounted
Connect the ring terminals to the battery posts and secure this end of the harness. Mount the relay for the wiring either along the inner fender or on the side of the fuse box. Look inside before you drill or use self-tapping screws to avoid drilling into wires inside the box.
Mounting the FASS filter and pump requires drilling into the leaf spring support bracket. Preassembly of the fuel block, filters, and mounting brackets allowed us to see how much room we needed under the bed. It also gave us the chance to see what section of the leaf spring support would work best for holding the system in place as well as keeping it out of harm’s way.
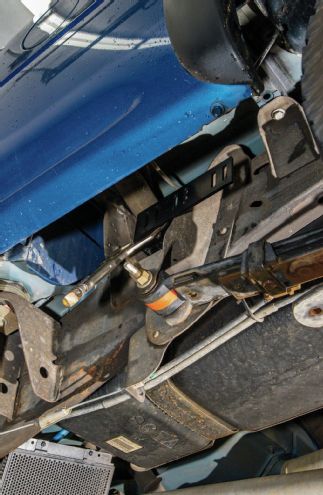
| Mounting Location For Fass System
Once the position has been chosen, remove the mount bracket from the system and clamp it in place with large jaw vise-grip C-clamp pliers. Mark the holes to be drilled and, using a battery-operated drill (for good clearance), make the holes in the support. Note that some FASS systems use existing bed mount bolts to prevent the need for drilling.
With thoughts of possible rough off-roading in mind, we decided to add a small insurance bracket to the backside of the mount. This would give just a little more strength and help reduce vibration. After the holes had been drilled, we installed the brackets and affixed the FASS pump system in place.
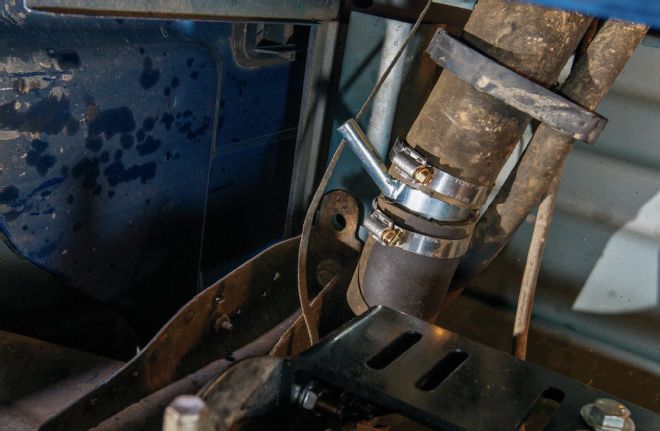
| Overflow Return Connection
Since the
’04½ Duramax does not have an integrated overflow tube inside the filler neck, we were able to install the return manifold in an upper section of the fuel fill neck easily. Remember to point the small tube on the return manifold toward the outside of the bed. Fuel flows back through this pipe and needs to be directed down toward the tank and not up toward the fuel cap.
We then turned our attention to the fuel cooler, removing the three bolts holding it in place. Using the fuel line disconnect tool, separate the suction side connection and attach the new ½-inch fuel line. This will attach to port “E” (to engine) on the pump.
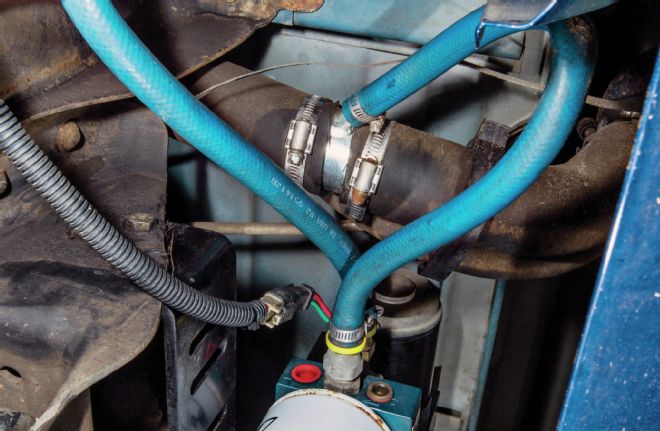
| Fuel Lines Connected To Fass Pump
Included in the kit are three brass press-fit connectors (referred to as PL-1005) that now need to be installed in the blue hose. Make sure to measure the correct length at least twice before cutting the blue fuel line to length. Press-fit the barbed PL-1005 fittings in the two hoses coming from the fuel cooler area. Carefully thread them onto the fittings on the pump in their proper location and tighten to 18 ft-lb. The third will be added to the return line manifold hose attached to the filler neck and threaded onto fitting “R.”
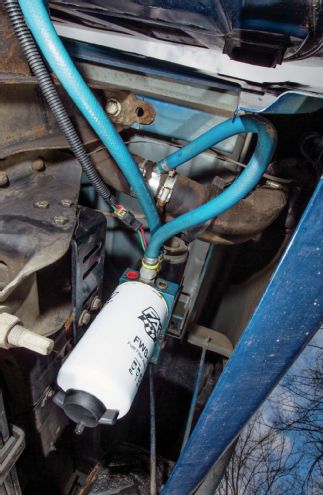
| Fass Fuel Filter Installed
After checking the fittings, hose clamps, and wiring, prime the pump by simply turning on the key switch and starting the truck. You can hear the pump running, but it is not extremely loud, and inside the cab it is barely noticeable. The system is now pushing fuel up to the CP3 fuel pump on the engine, which should, in theory, add time to the life of the factory fuel pump by reducing the work it has to perform. We are looking to make our truck a million-miler, so every ounce of energy saved will come in handy in the later years of its life.


