A clutch and pressure plate work together to transfer turning power between your engine and the transaxle. Over time your clutch and pressure plate will wear out and it will start to drag or slip, which will make shifting gears unreliable and difficult to do. When this starts to happen you know it will be time to replace both the clutch and the pressure plate.
Remove the negative (black) battery cable.
Raise the car using the floor jack and support it with jack stands. Remove the floor jack when you have the car safely supported with the jack stands.
Place the floor jack under the transaxle, but don't raise the transaxle, raise the jack enough so that the transaxle is supported. Remove the bolts that hold the transaxle to the engine. You will need to use both wrenches and a ratchet and sockets.
Move the transaxle just enough so that you can have easy access to the clutch.
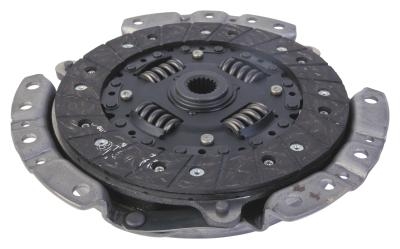
Use your scratching awl on the pressure plate to mark the clutch alignments. Although changing the pressure plate when you're changing the clutch will save you a lot of time and effort in the long run.
Turn the pressure plate bolts two turns counterclockwise going in a crisscross pattern until you can remove the bolts by hand. Removing the bolts this way keeps the pressure plate from warping. When you go to remove the clutch from the car make sure you have a good grip on it because it does have some weight to it, which makes it awkward to move.
Clean off the surface of the flywheel with brake cleaner. Then put on the clutch and pressure plate, make sure that the friction side of the clutch is facing the pressure plate. Line up the pressure plates dowel holes with the dowels on the flywheel. Reinsert the clutch bolts and screw them in finger-tight.
Put the clutch disc alignment tool into the center hole of the clutch. Tighten the clutch bolts two turns at a time, working in a crisscross pattern. Tighten the bolts to 19 foot pounds of torque.
Move the transaxle so that it is aligned with the clutch disc splines. Align the transaxle case to the engine block and push it into place against the cylinder block.
Install and tighten the transaxle bolts to the engine.
Put the vehicle on the ground and reconnect the battery cable.
Take the car for a short test drive to make sure that the clutch is working properly.