There are two rim problems you can fix safely at home: scratches and small dents. While these minor damages make rims less aesthetically pleasing, they do not directly affect the function of the rim. If your rims are significantly dented, broken or weak, have them professionally replaced with new rims that will fully support the wheel.
Park your car and put on the emergency brake.
Jack up the car. Place the jack underneath the car near the wheel you are repairing and crank the handle to lift the car.
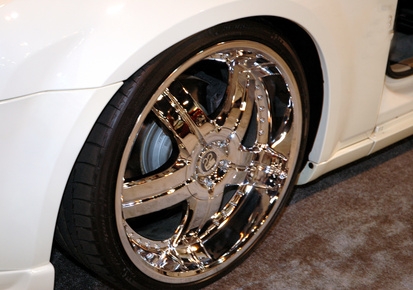
Remove the rim by loosening each lug nut with a wrench. Stick a crowbar between the surface of the wheel and the rim. Pull forcefully as you move the crowbar around the rim to detach it from the tire.
Lay newspaper on a cement floor or other sturdy work surface. Place your rim face up on the newspaper.
Put on your gloves and safety goggles. Ignite your torch and heat the dented area. Move the flame over the dent for five minutes or until it appears glossy and malleable.
Strike the heated area with your flat hammer to smooth out the dent, working from the inner rim to the outer rim. Use moderate force, increasing the strength of your impact until the dent changes shape. The rim will cool as you strike it. Reheat the rim and continue striking until the dent flattens out.
Reinstall the rim by pushing one edge into the groove of the wheel and lightly banging it into place with your crowbar. Tighten the lug nuts.
Drive your car in an open area, such as a parking lot, to check the rim's sturdiness. Bring your car to a mechanic and refrain from driving at high speeds if your car is wobbling or making noises; you may need a new rim.
Wash the wheel and rim with soap and water. Scrub vigorously with a rag and rinse off the entire wheel with a hose. Dry off the wheel and rim with a new rag.
Apply masking tape around the outer edge of the rim to protect the wheel. Do not cover the scratches you want to repair.
Put on your gloves and safety goggles. Soak a rag in paint thinner. Firmly scrub the scratches to remove dirt, grime, debris and wax. Rewash the rim with water and a rag, and dry with a new rag.
Sand the scratches with 400-grit sandpaper. Sand until there is a groove in the rim, erasing the scratch and making the scratched area deeper than the rest of the rim.
Fill the groove with putty to cover the entire scratch. Sand the scratch with 600-grit sandpaper to force the putty deeper into the groove. Let the putty dry. Apply more putty and repeat the process. Allow the putty to dry again before proceeding.
Wrap the wheel in newspaper and tape it down with masking tape. Do not cover the areas you are repairing. Spray rim-colored lacquer on the scratched surfaces until the scratches are invisible. Let the lacquer dry.
Sand the lacquered area with 1,200-grit sandpaper. Apply another layer of lacquer and sand again after the lacquer dries. Use a rag to wash the rim and wheel with soap and water. Dry with a clean rag.
Spray clear high-gloss lacquer over the entire repaired surface. Spray five to ten layers in short, quick bursts. Let the lacquer dry before driving.